As is well-known, VMware has released a new version of virtual VMware vCenter Server Appliance 6.5 in the new version of vSphere 6.5 platform. Now vCSA is Photon OS-based. It works faster; it is provided with built-in high availability tools and has a ready-to-use vCenter Update Manager (VUM).
Due to the numerous changes, many familiar features don’t work anymore, and the information below will help you to get back to the normal use of vCSA.
- How to turn on Bash Shell and use WinSCP for vCSA
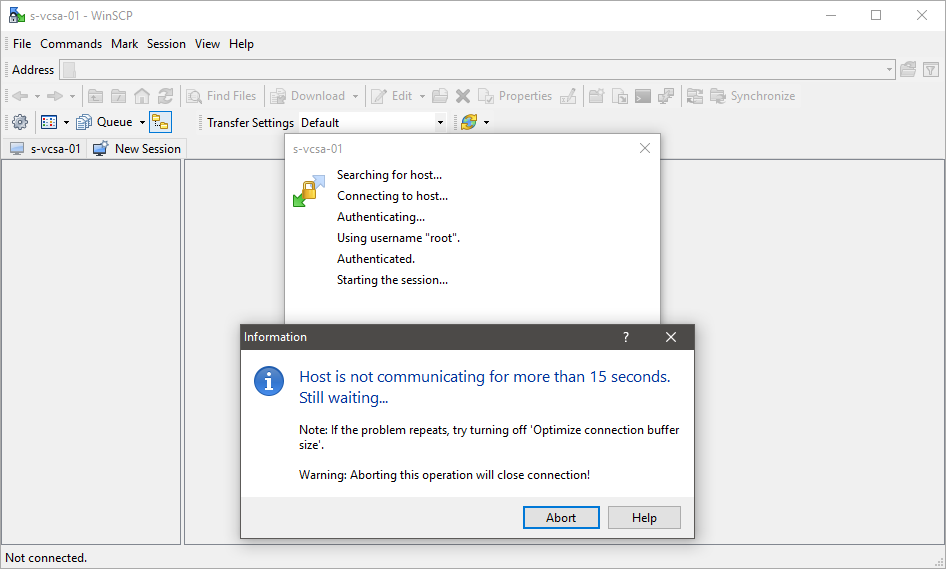
If you try to access vCSA server with WinSCP to download or upload files there, you won’t be able to do that:
The reason is that instead of Bash Shell, Appliance Shell is launched on vCSA. It has its own commands and interfaces, which WinSCP doesn’t understand. To switch to Bash Shell, access vCSA host with SSH and type the following commands:
shell.set –enabled true
shell
With this, you will temporarily switch to Bash Shell. To be switched to it permanently, type the following command:
chsh -s /bin/bash root
After the logout, you can access the host through WinSCP and easily copy the files. To be switched back to Appliance Shell, input the following in the SSH console:
chsh -s /bin/appliancesh root
- Increase of disk partitions in vCSA
Disk partition size can be changed in VM settings. Then, from vCSA guest OS the partition should be extended to the resulting free disk space. The changes in vSphere 6.5 version in these terms are as follows:
- To extend the logical volume, instead of the vpxd_servicecfg command, the following script must be used:
/usr/lib/applmgmt/support/scripts/autogrow.sh - Apart from the extension of partition from SSH, this can be done through Virtual Appliance Management Interface (VAMI) REST API, which can be activated remotely by POST /appliance/system/storage/resize.
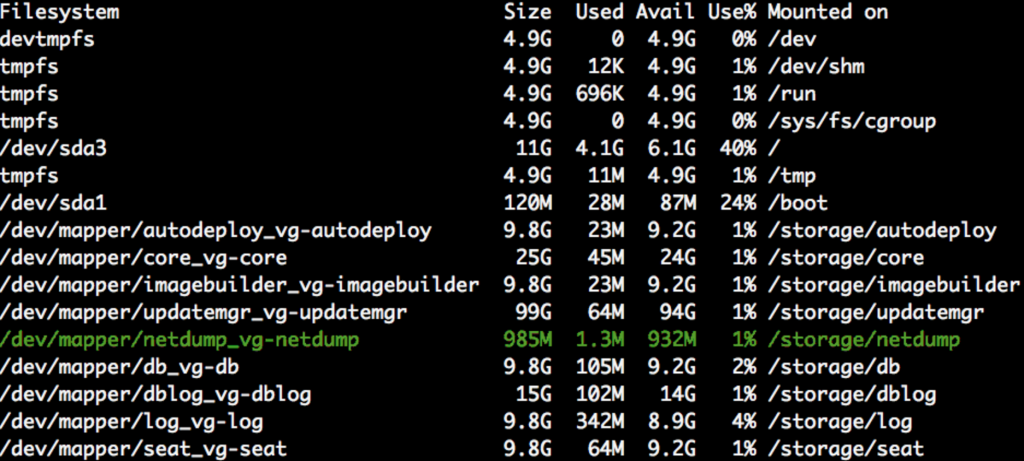
Let’s run df -h command to display partitions table on vCSA:
Now, go to vCSA VM settings in vSphere Client and change to the disk management section to increase 9th virtual disk size (for example, volume highlighted above netdump_vg-netdump) from 1 GB to 10 GB.
Next, click through https://[VCSA-HOSTNAME]/apiexplorer in the browser, select “appliance” in Select API section and press Login button. Enter login/password for vCenter Server.
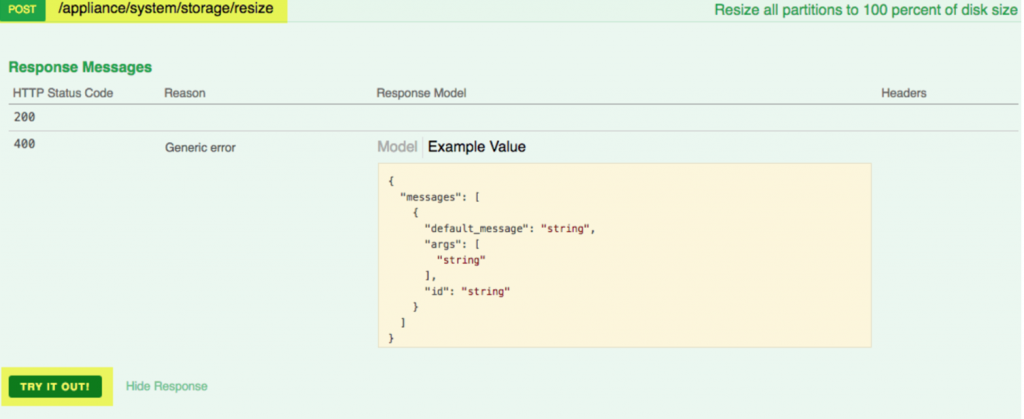
Then, scroll to operation POST /appliance/system/storage/resize and open it to see the details:
Now, press “Try it out!” button. If completion is successful, the Response Code will be 200. In the end, the result will be seen in df command output – the partition together with VMDK disk will increase to 10 GB.
- How to recover root password on VMware vCenter Server Appliance
Now virtual vCSA is based on Photon OS, which is VMware own OS. This means all previous ways of password recovery won’t work. Before password recovery, make sure to back up the virtual appliance or at least make a snapshot of it.
To reset root password on vCenter Server Appliance:
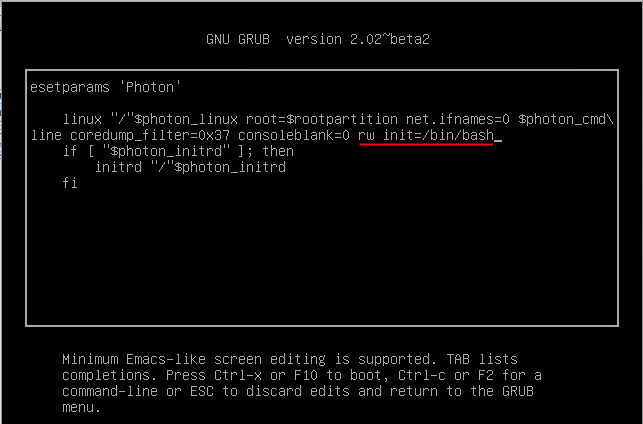
- After the loading, press <e> button to enter GNU GRUB Edit Menu.
- Find the section where Linux start is initialized (it begins with “linux”) and add the following line at the end of it:
rw init=/bin/bash
- Then, press <F10> to continue the download.
- Next, input passwd command to the command line and set root password.
- Then, unmount the file system with the following command:
umount /
- Restart vCenter Server Appliance 6.5 with the following command:
reboot -f
- Afterwards, root password on vCenter Server Appliance will be reset. Don’t forget to delete snapshot (if any) after you make sure the new password is set.
I hope these three small but useful tips will help you in everyday use of virtual vCSA.


