Microsoft Azure provides the ability to create a DNS public zone and manage it from the Azure Portal. If you are already an owner of a public DNS zone, you can change the name server (NS records) to point to those of Azure.
If you have many public DNS zone, it can be a pain to manage. First the interface can be different depending on the providers. Secondly, lot of the time the interface is not user friendly and you can’t automate the DNS record creation.
If you manage your DNS zone from Microsoft Azure, you have a unified interface and you can automate the DNS record creation through ARM, AzureCLI or PowerShell. This service is not expensive compared to the advantage brought by Azure DNS (the below capture comes from https://azure.microsoft.com/en-us/pricing/details/dns/):

In this topic, we will see how to create an Azure DNS zone and how to manage it.
Create the zone and the first records
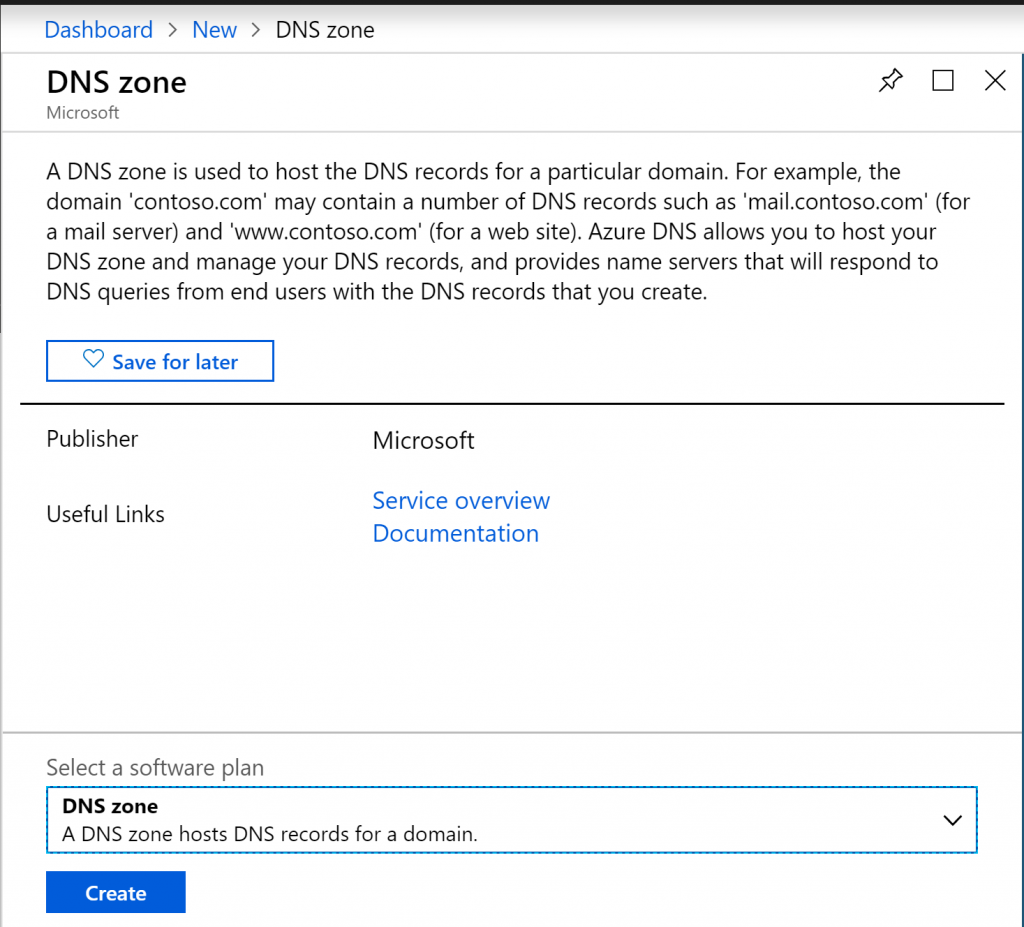
Open the Azure Marketplace from the Azure portal and look for Azure DNS. Then create this resource.

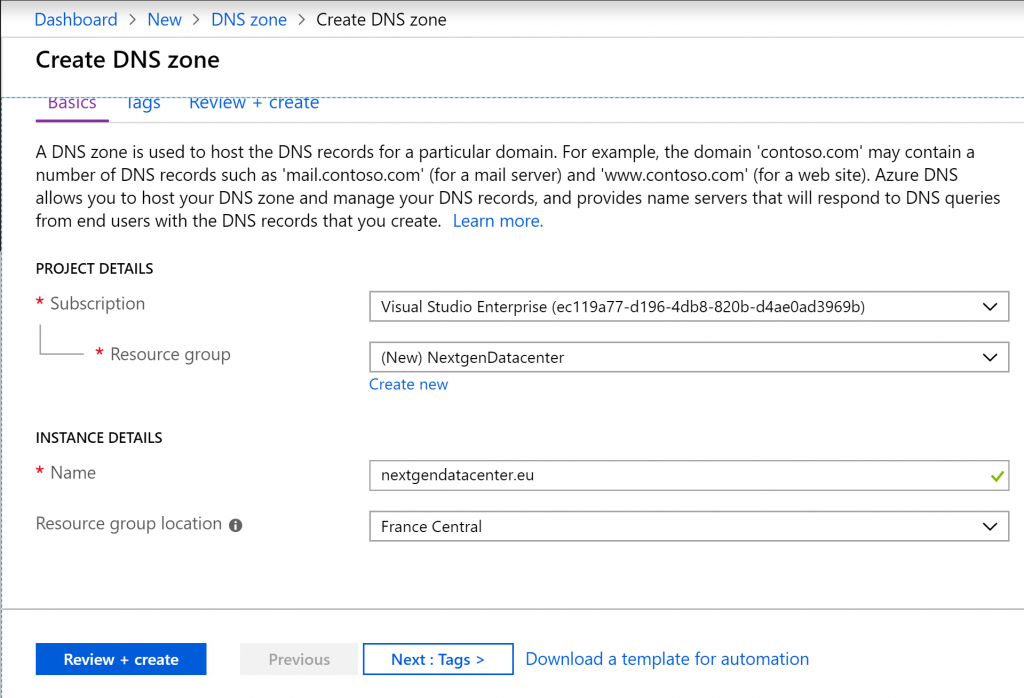
Next choose a subscription, a resource group and specify the name of the DNS zone.

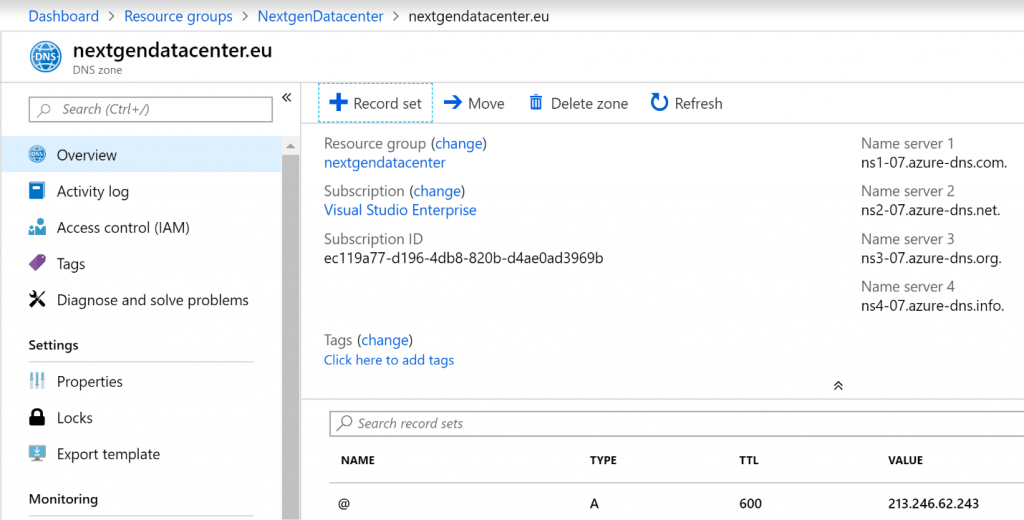
When the Azure DNS is created, in overview you should get the name servers.

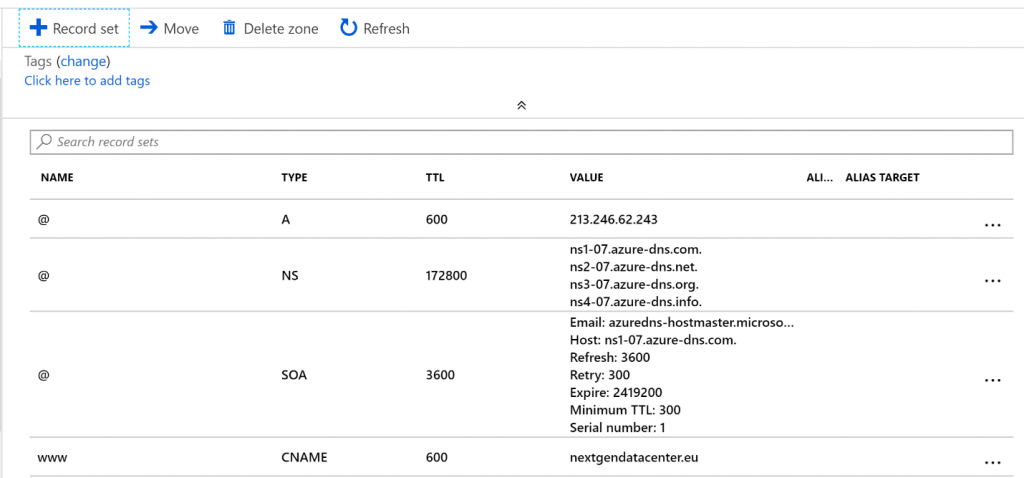
If you click on “+ Record Set”, you can create a DNS record. In the following example, I have created a few records.

Now that records are created, I’m going to try to resolve them. For that I use nslookup tool and I resolve the record from the first name server provided by Azure.

Change the name server from registrar.
Previously we created the zone and we were able to resolve name from this zone by specifying the Azure name servers. Now, in order to the resolve names without specifying the Azure name servers, we have to change the name servers setting from your registrar interface. For this example, my registrar is Ikoula (French provider).
N.B: I’m sorry, this screenshot is in French, I can’t change the interface language to English.

In the above screenshot, I chose to use custom name server and then I specify each Azure name server. Once it’s done, you should be able to resolve the name without specifying the Azure name server:

From this moment, you can manage your DNS record from Azure Portal and everyone will be able to resolve them. For each domain you have, you can reproduce these steps and you’ll have a single pane of glass to manage all your public DNS zones.


