In this blog post we will take a look at installation of “the web framework for perfectionists with deadlines” aka Django. Earlier I covered installation of a minimalist one (i.e. Flask), so if you are in a mood to try more feature complete/different Python web framework this article may come in handy.
If we compare Flask and Django functionality wise, the second just comes in loaded with re-usable modules commonly used by majority of complex websites. Just to give you one example of this, it has object-relational mapper (ORM) implementation, which provides database backend abstraction layer allowing you to create your database objects as Python classes, while Django is taking care about creating actual tables and constraints in the database for you. Django really takes this abstraction to the entirely new level, comparing with Flask, and provides you with automatically generated database access API. It hides all the complexity of the app – database interactions allowing you to focus on your application code. For example, when you define an external link attribute for your Python class, which implies creation of intermediary linking table to reflect many-to-many relationship, Django just silently creates for you both main table (defined by class itself) and linking table. On top of that, you have an ability to use admin web UI to modify database objects created this way, and all of this without need to write any SQL queries or directly interacting with DBMS.
In short, Django has most of the typical modules (known as “contrib” packages in Django’s terminology) which any web site may need so that you don’t need to create them from scratch. At the same time there is no “feature bloat” effect as Django allows you to connect/enable these modules on as needed basis.
Hopefully I gave you some idea about Django benefits and features, and in case you need more, I can only recommend you to read up official documentation and/or try to create some simple project to better familiarize yourself with Django framework capabilities (your another option will be just wait for my next article 
Let’s go through the installation process and see how we can install Django on Ubuntu Server 18.04 LTS. Necessary disclaimer: we will be covering installation for development environment, leaving out more advanced topics and configuration tasks, such as, using Apache as web server or configuring connection to large DBMS. We will be installing the latest version of Django (2.2), using installation into Python virtual environment approach. Although we can also perform global install from packages or install development version from Git, install using pip into a Python virtual environment is preferable option for majority of scenarios. First thing we need to have is recommended version of Python (Python 3.5 or newer). As you can see from the screenshot below (taken from Django documentation) Django 2.2 supports Python 3.4, 3.6 and 3.7:
Python Versions Supported by Django (source)
Ubuntu Server 18.04 includes Python 3.6 by default, and you can confirm this by typing python3 –version command in Terminal window, which should give you result similar to the one depicted below:
As you can see Python 3.6.7 is installed. Depending on your server configuration and whether you use Software Updater your version may vary slightly, but it is worth noting that Software Updater will be installing only updates for Python version installed (i.e. minor updates for Python, like 3.6.7 to 3.6.8 etc.).
Before we move on to the next step, I suggest you install Python 3.7 as the latest version supported by Django 2.2 (and if you just started with Python/Django it makes sense to start with the latest versions).
To do that we first run sudo apt update to update the APT package index with the latest changes made in the repositories (this ensures that information about latest versions is available) and then run sudo apt install -y python3.7 python3.7-venv python3-pip command as shown below (we additionally installing pip and venv Python packages which will be necessary too):
Once Python 3.7 installation completes you can confirm installed Python version using python3.7 –version command:
Having Python 3.7 along with pip and venv packages in place, we can finally create virtual environment to install Django into it. Firstly, we need to create a folder for our virtual environment and open it so that we can later create virtual environment inside of it and install Django into it:
To create virtual environment we just execute python3.7 -m venv env_name command (env_name can be replaced with any value which is meaningful for you, on the screenshot below I used “django_env”). Execution of this command results in creation of subfolder with environment name which will contain the files and folders hierarchy into which required packages can be installed later:
Once we created virtual environment, we can activate it by means of running activate script as shown below (we just specifying path to the activation script which includes folder named after environment name we specified earlier during virtual environment creation stage). Once activation is done your terminal prompt will display virtual environment name prefix:
We now can install Django into our virtual environment (during installation all necessary files will be copied into virtual environment directory):
Once installation is over you can see that Django files were copied into our virtual environment directory as shown below:
That completes installation process and Django is now ready to use for trial/development scenario, and we can check installed Django version as shown below:
You can also verify that Python sees Django from Python shell:
As a next step, we can create new Django project issuing django-admin startproject %project_name% command which will create folder for project data:
As you can see from the screenshot above this command creates Django project folder within our current directory (the same that contains our virtual environment directory). If you look inside of newly created folder, you will see that it contains various Python files along with db.sqlite3 file which holds your project SQLite database. You can check its structure using DB Browser for SQLite (which can be installed using sudo apt install sqlitebrowser command).
SQLite database of newly created Django project opened in DB Browser for SQLite
Next step we need to perform, is migration of pending changes. In Django whenever you add/change something in your project you need to migrate these changes to apply them, and even though we just created our project there are already some “pending” changes to apply. To migrate (read apply) these changes, we execute python3.7 manage.py migrate command from project folder:
Once changes were applied our Django project is ready to be run and even though we haven’t yet created neither custom views nor admin user we can run the server using python3.7 manage.py runserver command as shown below:
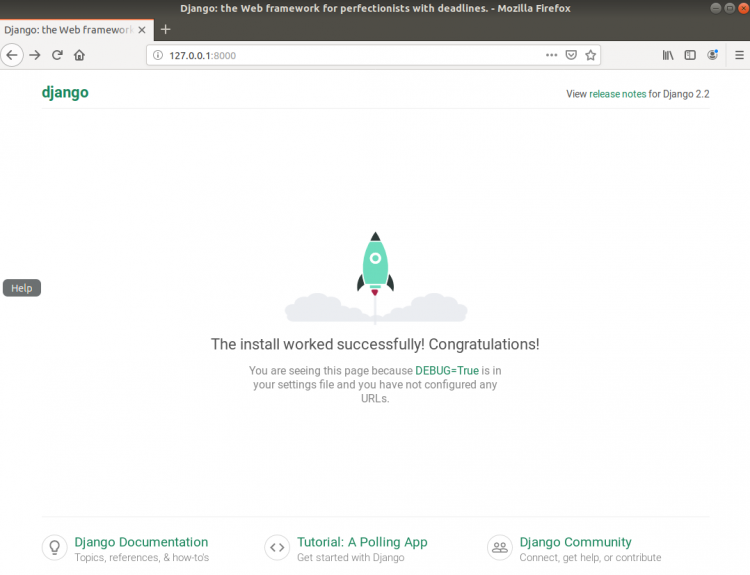
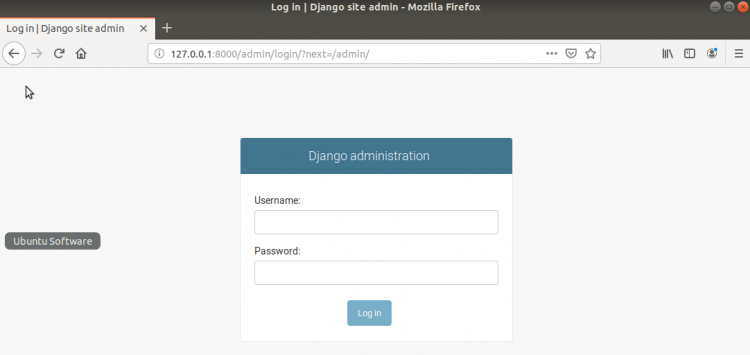
Once server has been started, we can access it and see Django default page as well as admin logon page (/admin) using loopback IP address and default port 8000:
Django Installation Successful Page
Django site admin page
This essentially concludes our basic installation overview and knowing how to create and run your project you have an opportunity to play with Django and further adjust installation configuration according to your needs.
There are some extra tips I would like to mention in this article.
1) To be able to use Django administration UI you just need to create superuser using python manage.py createsuperuser command as shown below:
With this user in place you may create and manage other users as well as manage your database objects which you simply defined within Python code without even knowing you have database and so on (remember those database abstraction capabilities I mentioned in the beginning of this post?).
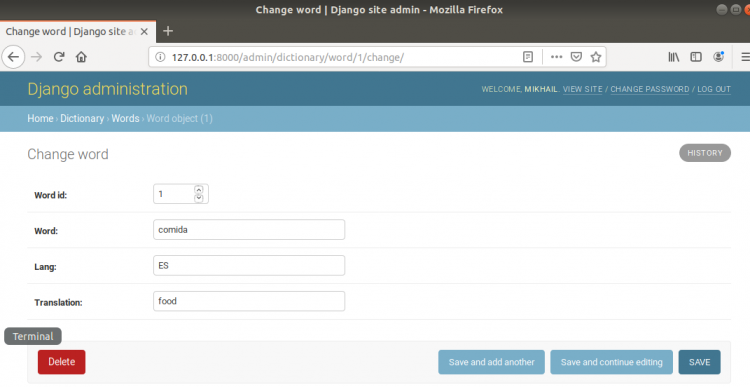
2) Going through the canonical Hello World example or explaining the way you work with models in Django is a bit out of scope for this article, but as I mentioned Django allows you define Python classes which Django translates into database objects and subsequently exposes them in the dynamic admin interface. To get an idea on how this works, you can look at the screenshots below.
Defining model using Python class results in creation of the database table in the background
Created models/database objects can be managed through admin UI
I’m sure that once you familiarize yourself a bit with Django’s features and capabilities you will see how much time you can save using them. I think that, Django project structure as well as its model-template-view (MTV) architectural pattern can be a good topic for separate article which I’ll probably try to write later. For now, if you have followed steps above, you already have working Django environment which leverages SQLite database as well as its own light weight web server, entirely sufficient for development purposes. In my next posts I also plan to cover more advanced configuration options for Django installation such as configuring it to work with larger DBMS (MySQL) and Apache web server, if that sounds interesting to you, stay tuned for new articles.


