Hi, fellas. At some point, we were all assigned to create an easily accessible storage space where all the company workers could store, share, and manage the company’s files. That task is usually achieved by configuring a file server and sharing its storage with the entire company.
In this article, I’ll show you how to use StarWind VSAN as file server and how easily it can be done. I will guide you through each step of the configuration process.
How to set up?
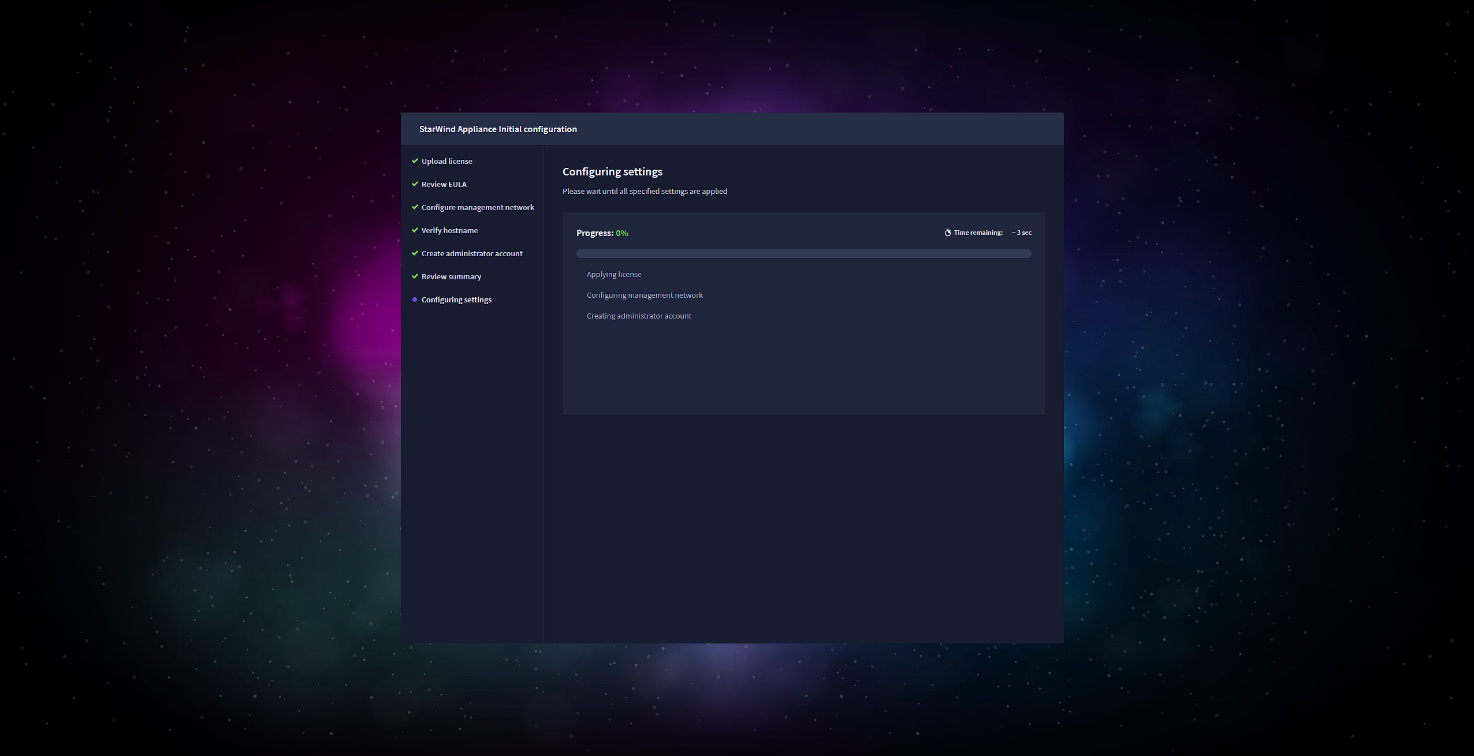
For starters, you must download and deploy the latest version of StarWind VSAN. It is distributed as a Controller Virtual Machine (CVM) template you can use with your Microsoft Hyper-V, VMware vSphere, or KVM-based hypervisors. When the VM template is deployed, you will need a few extra minutes to complete the initial configuration:
First, you need to identify the assigned IP address for the management network of the CVM in the hypervisor UI or by opening the VM console.
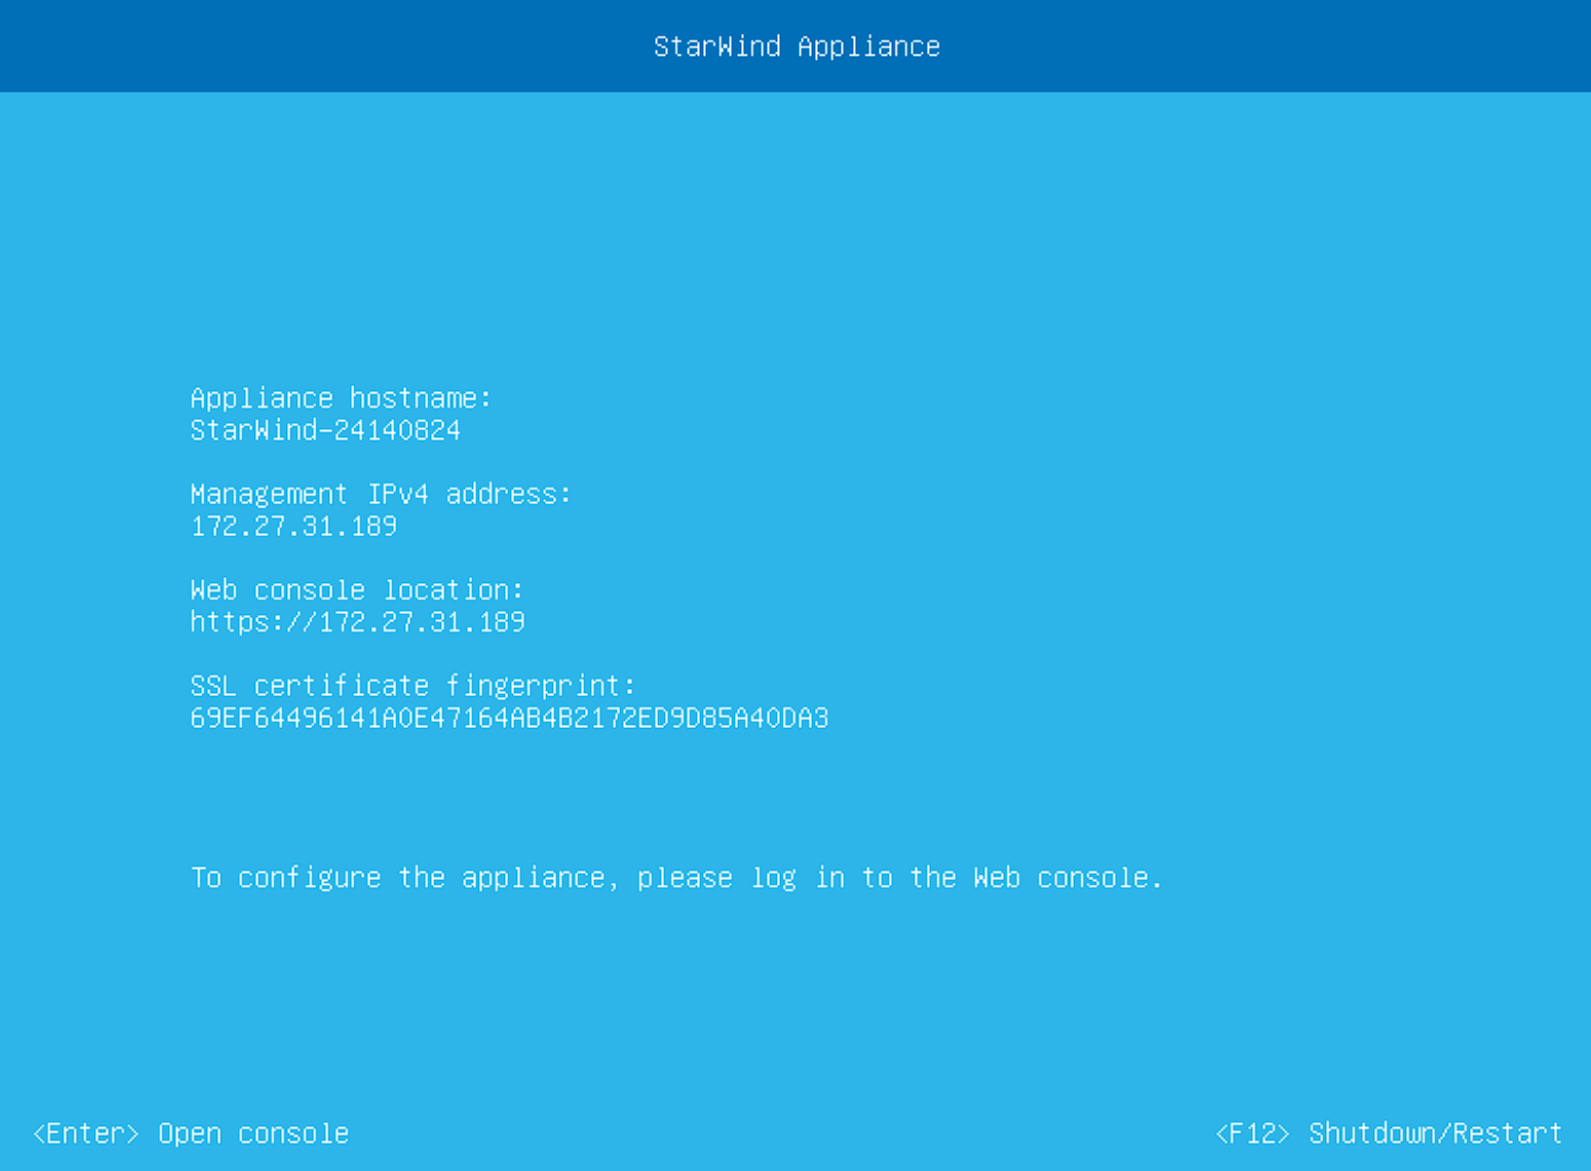
Then, use that IP address to access the web UI in your preferred browser and start the Initial Configuration Wizard.
After you finish the configuration, use the created credentials to log in to the VSAN web UI.
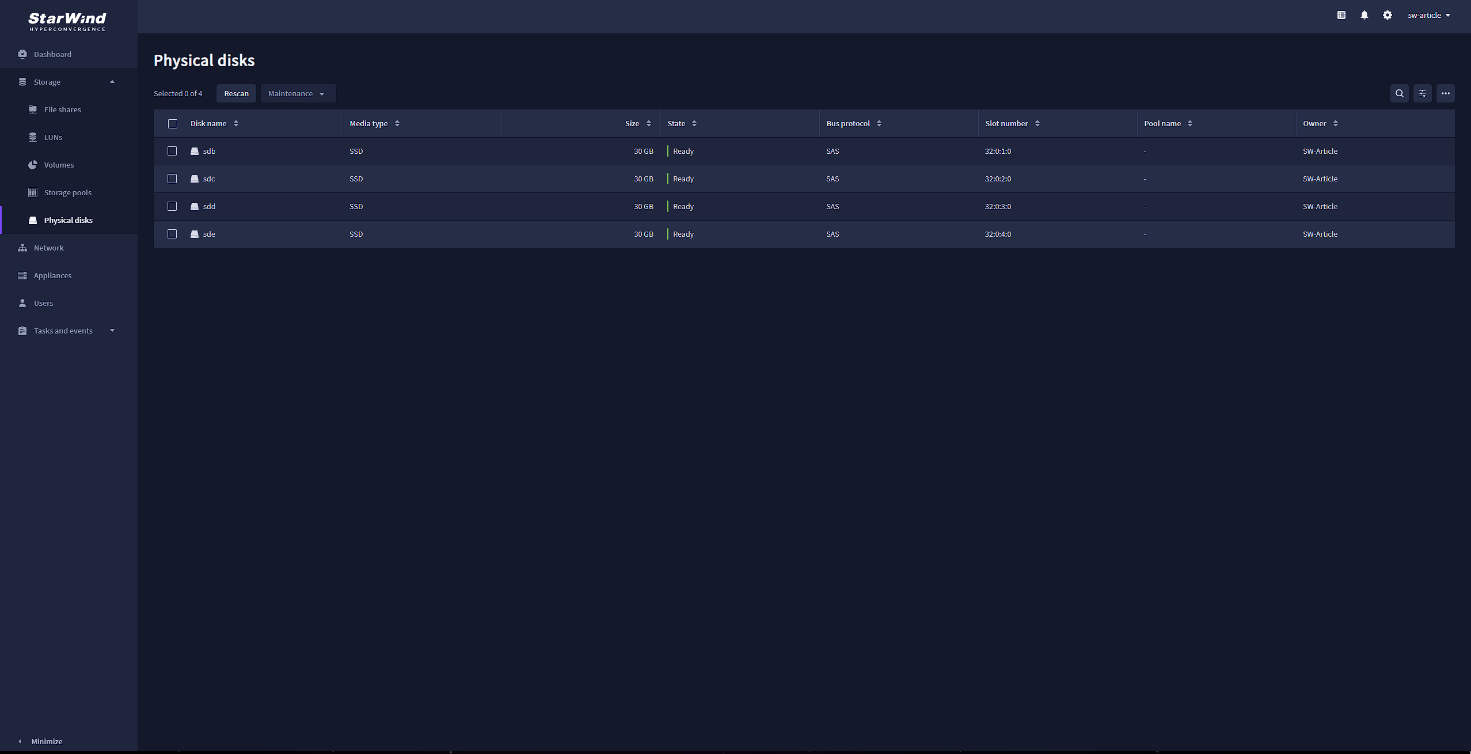
Once you log in, check if the storage has been discovered and add it to the CVM. To do that, you must go to the “Physical disks” tab and check if all the desired drives were added.
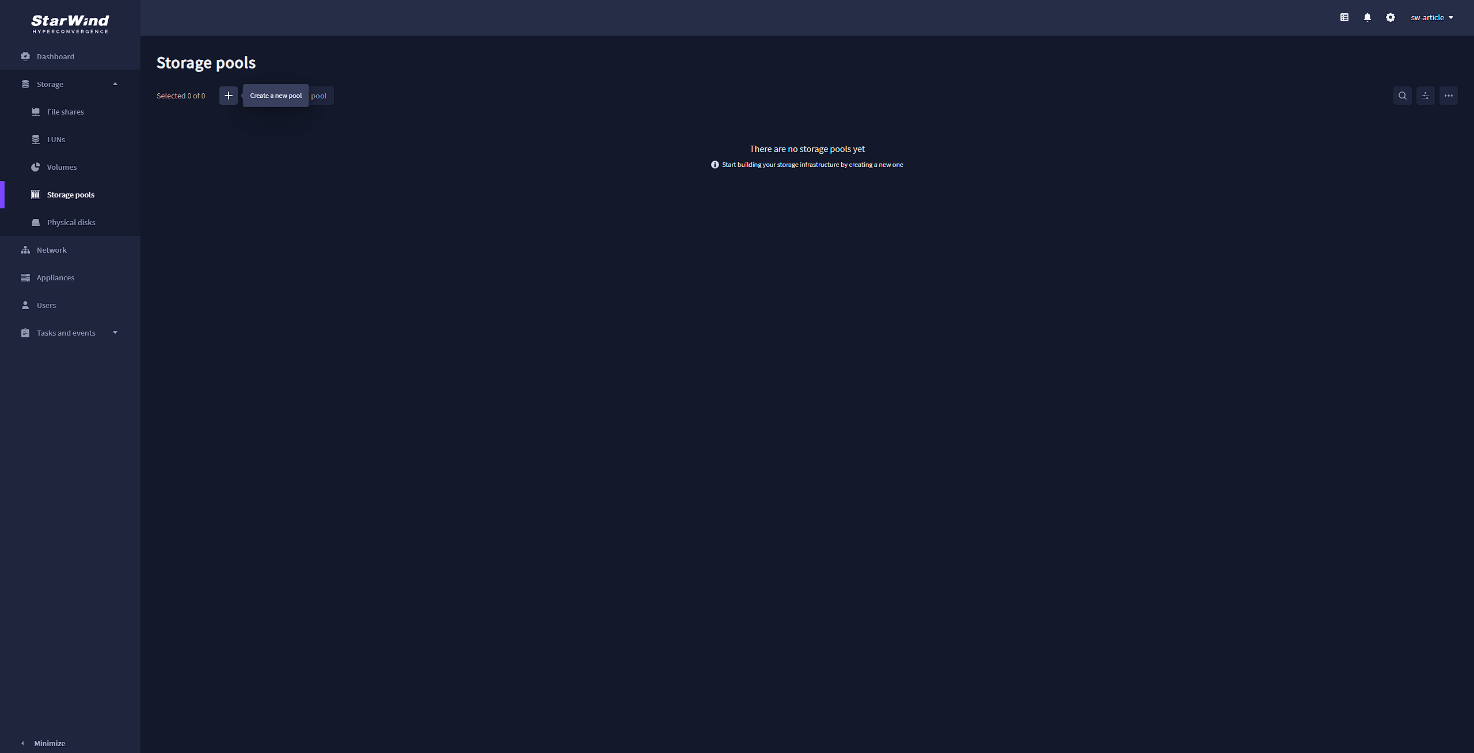
When the disks are ready, create a storage pool. Go to the “Storage pool” tab and press the “plus” button to create the new pool.
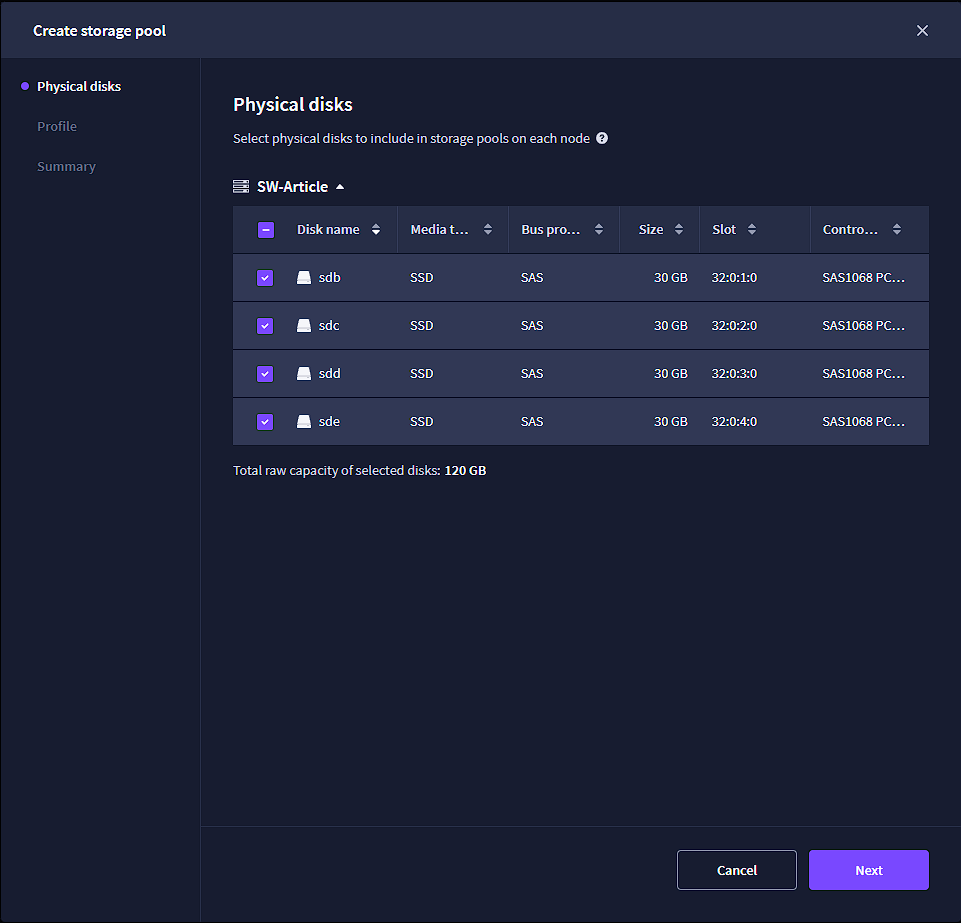
Now, select the physical disks you’d like to create a pool with and press “Next”:
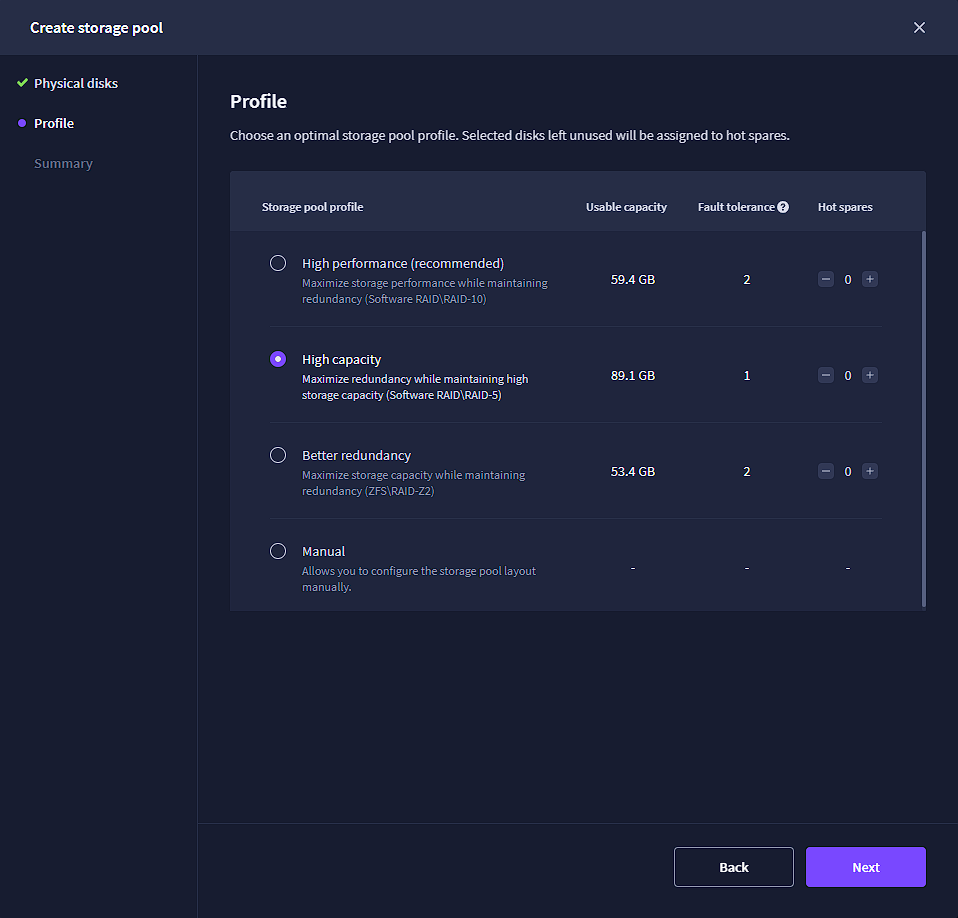
The next step is to choose the pool profile. StarWind Virtual SAN provides you with the three default presets – “High performance,” “High capacity,” and “Better redundancy.” For each preset option, you will see the description of it, so you can quickly choose one of the options if it suits your requirements. Also, you have the fourth option – “Manual.” This option will allow you to have full control of all the settings of storage pool creation. I am going with the “High Capacity” preset since it fits my needs and saves time. When your desired profile is selected – press “Next”:
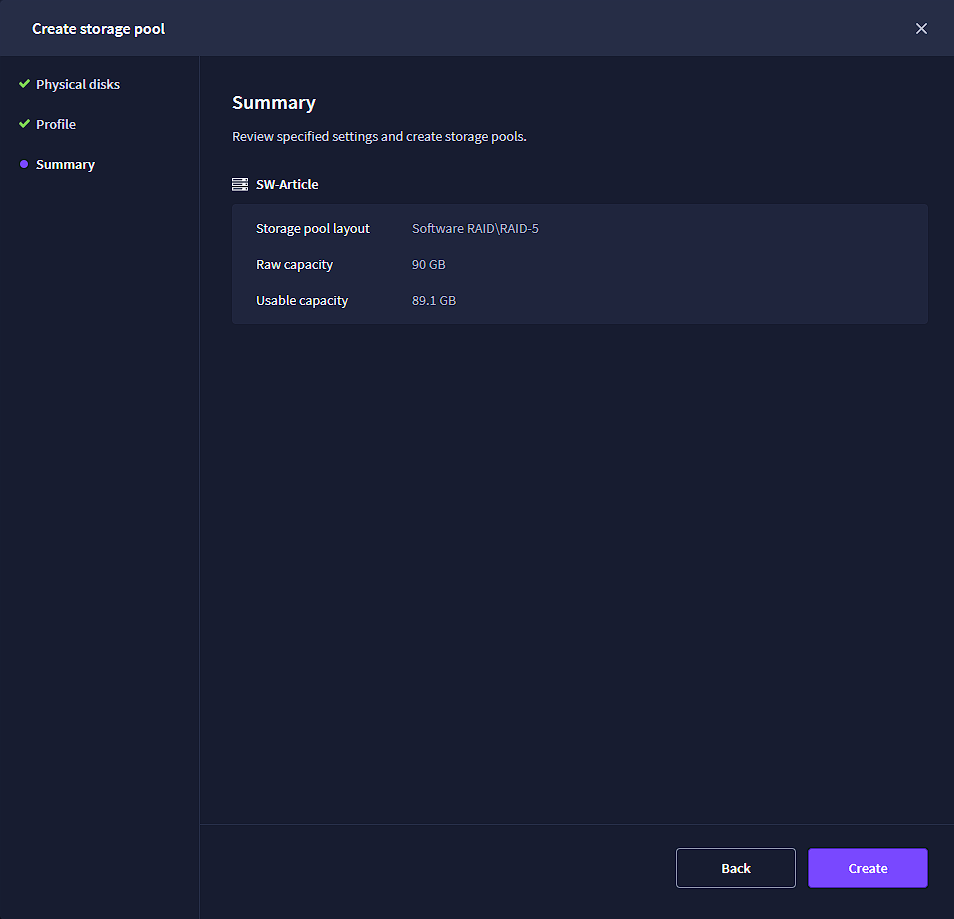
Now, review your settings and press the “Create” button to create the new storage pool:
Depending on your pooled disks capacity, the pool initialization may take some extra time.
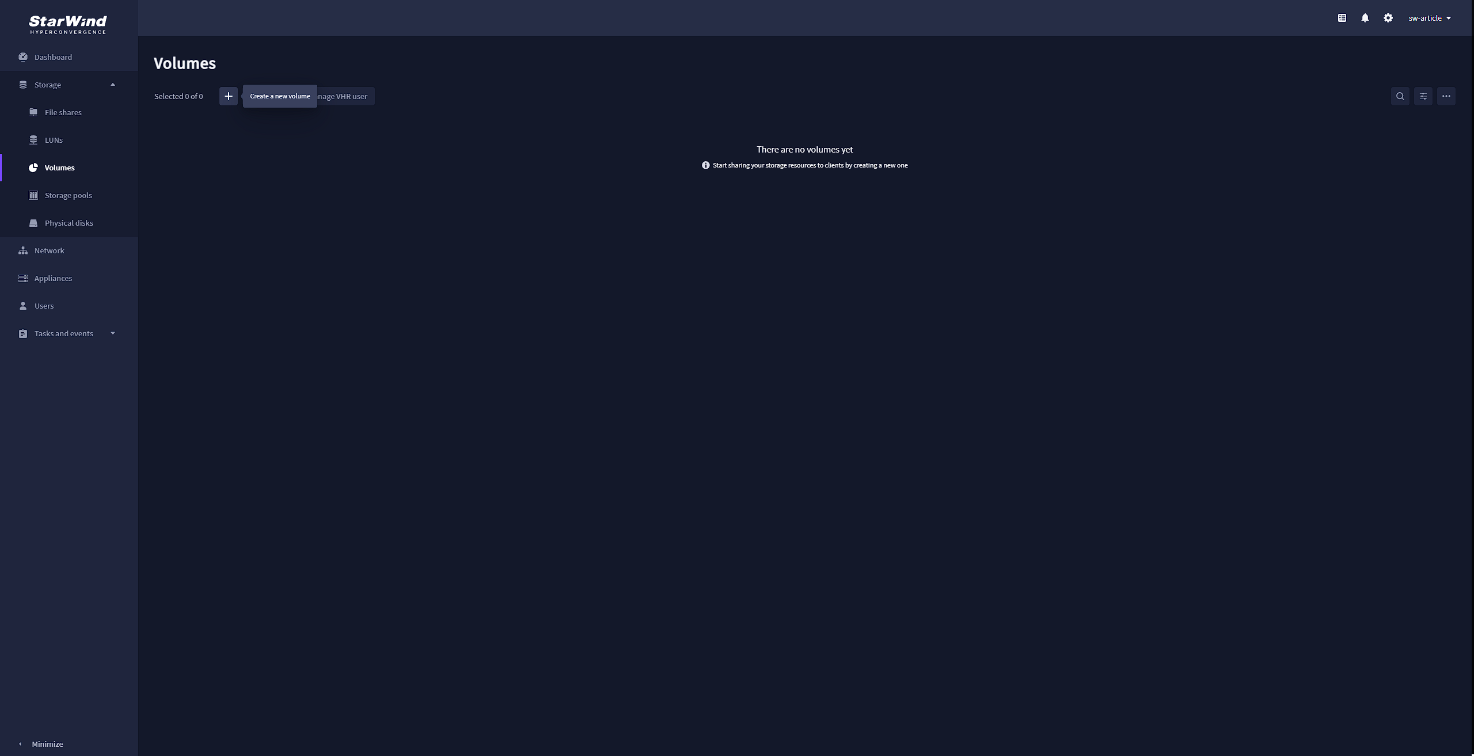
Once the storage pool is created, navigate to the “Volumes” tab and press the “plus” button to open the “Create volume” wizard:
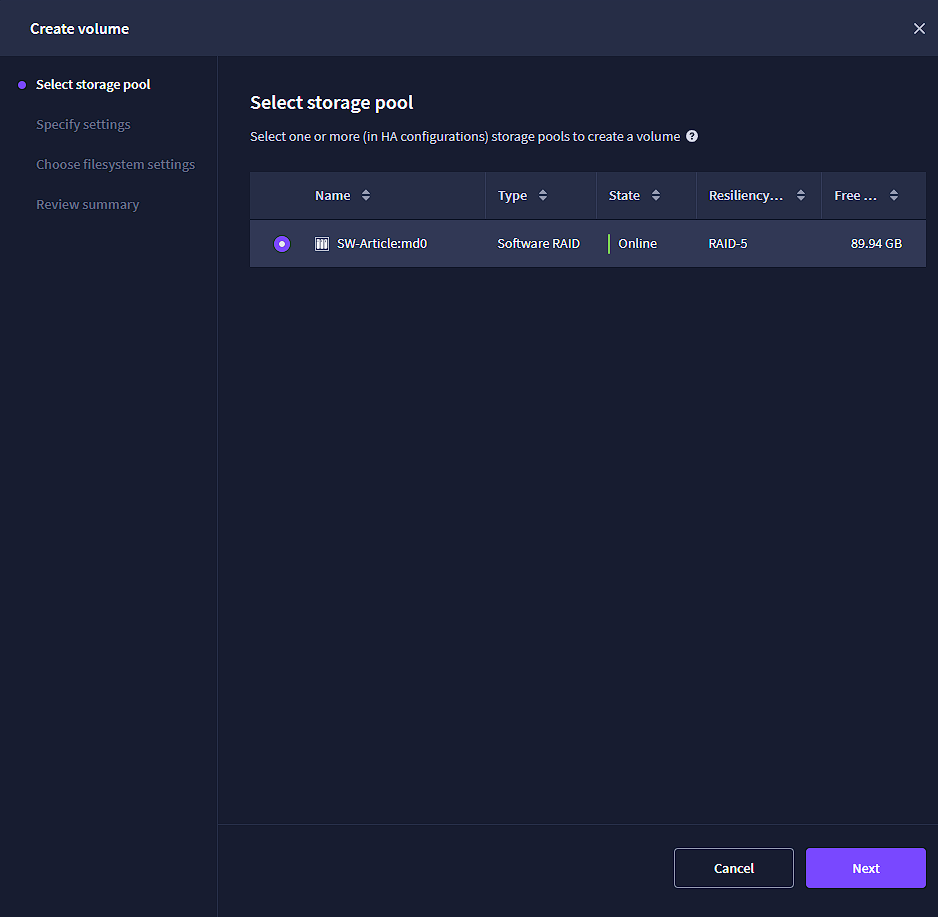
Now select the storage pool that you are going to use for the new volume and press “Next”:
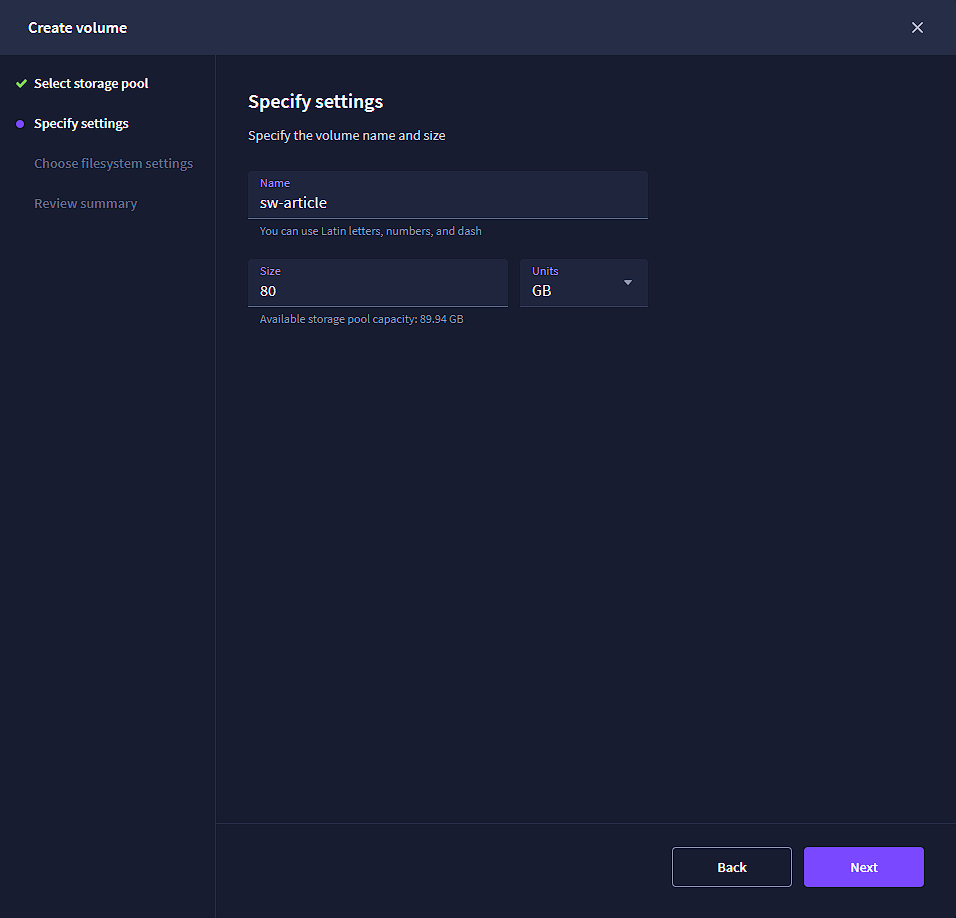
Specify the name of the new volume and select the required size:
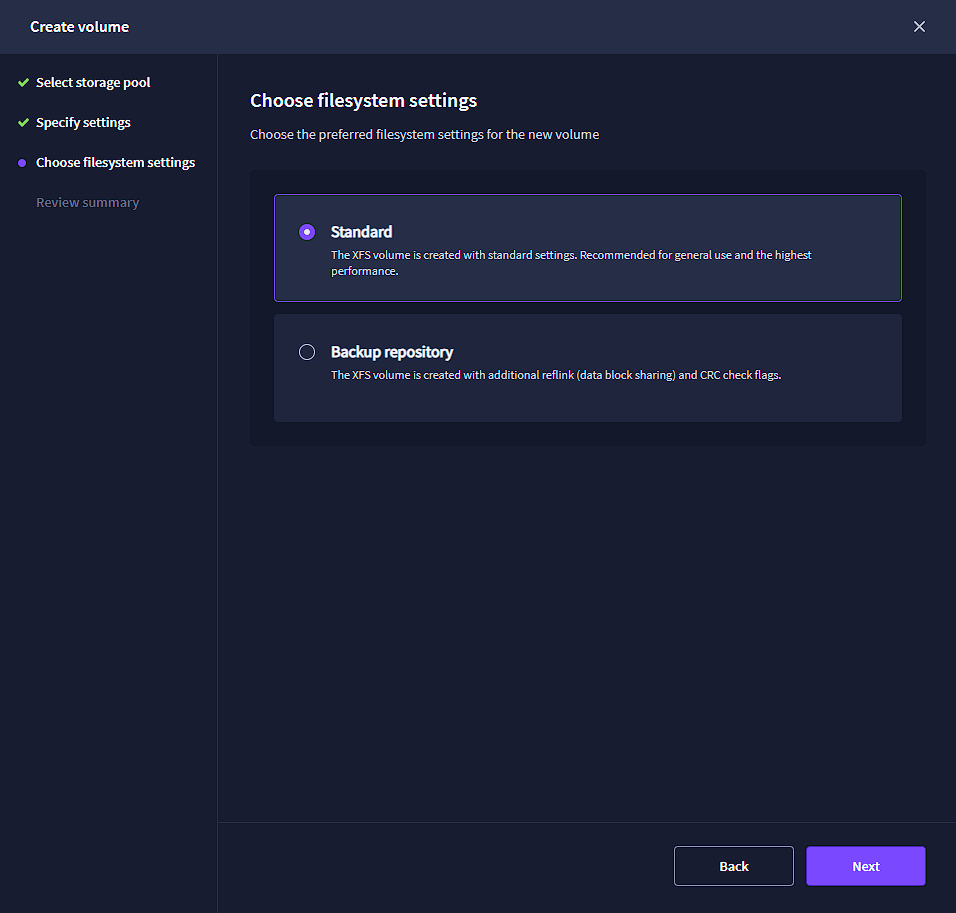
Now select the filesystem for your volume. To use the volume for file sharing, select “Standard” :
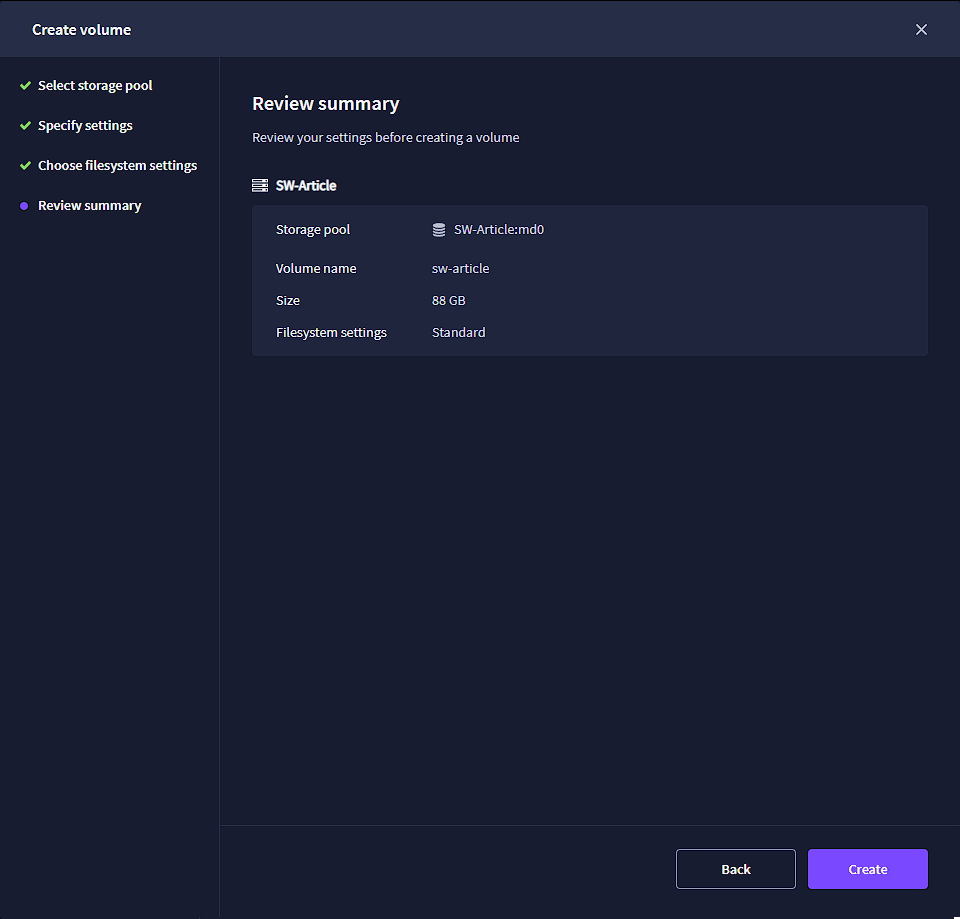
Review your settings and press “Create” to create the new volume:
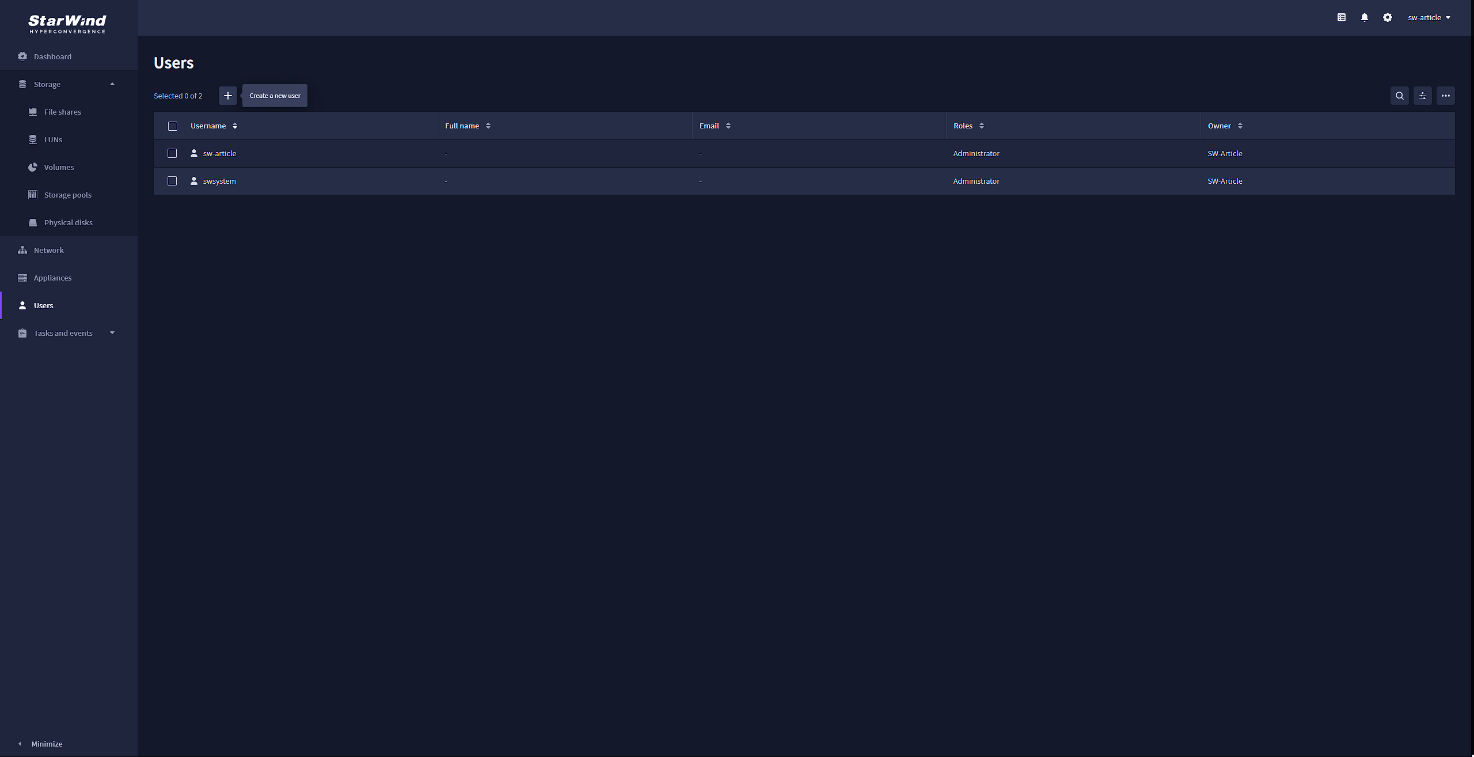
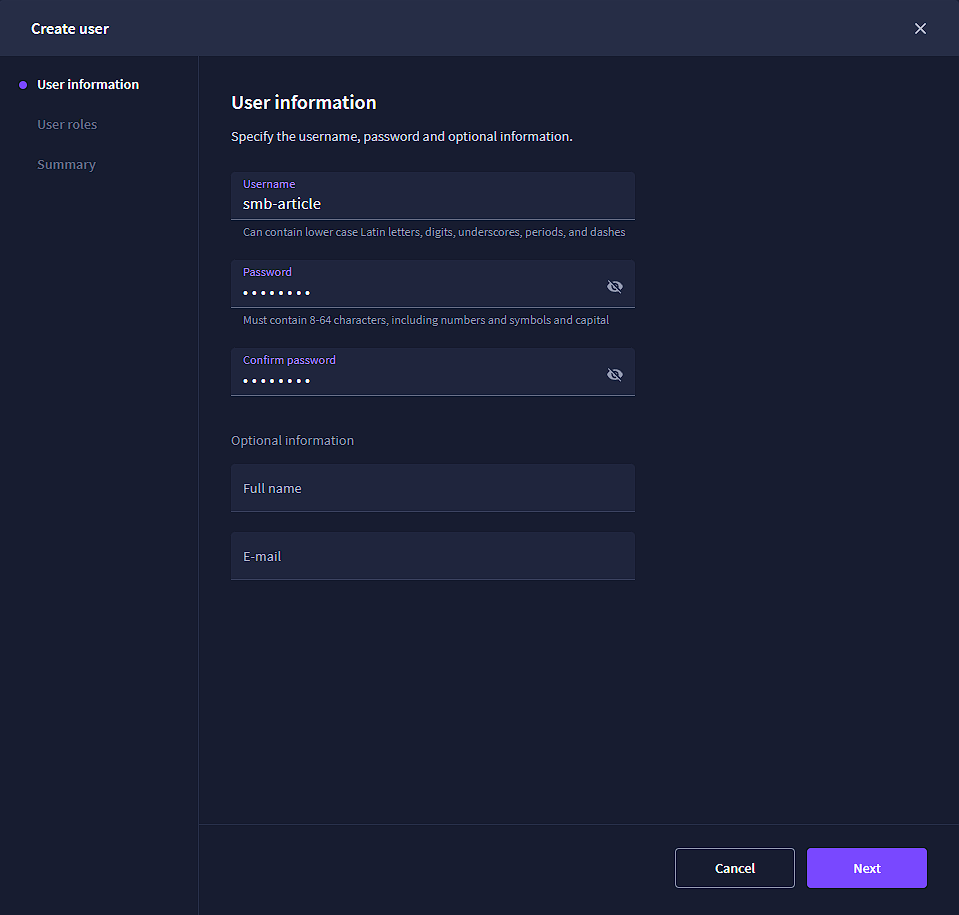
After creating the volume, we need to create users with access to the SMB share. For that, go to the “Users” tab and press the “Plus” button:
Create the name and password for the new user. You can also add optional info, such as full name and email address:
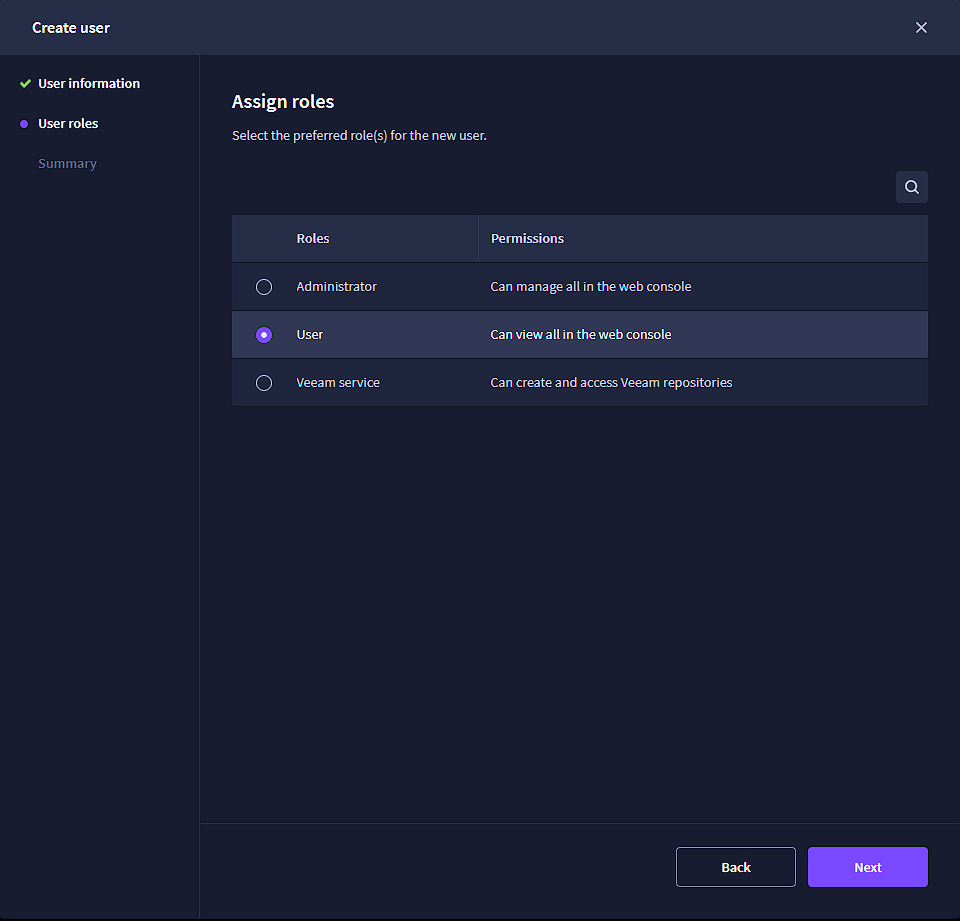
In the next step, you need to assign the user’s role. For file access purposes, select the “User” option:
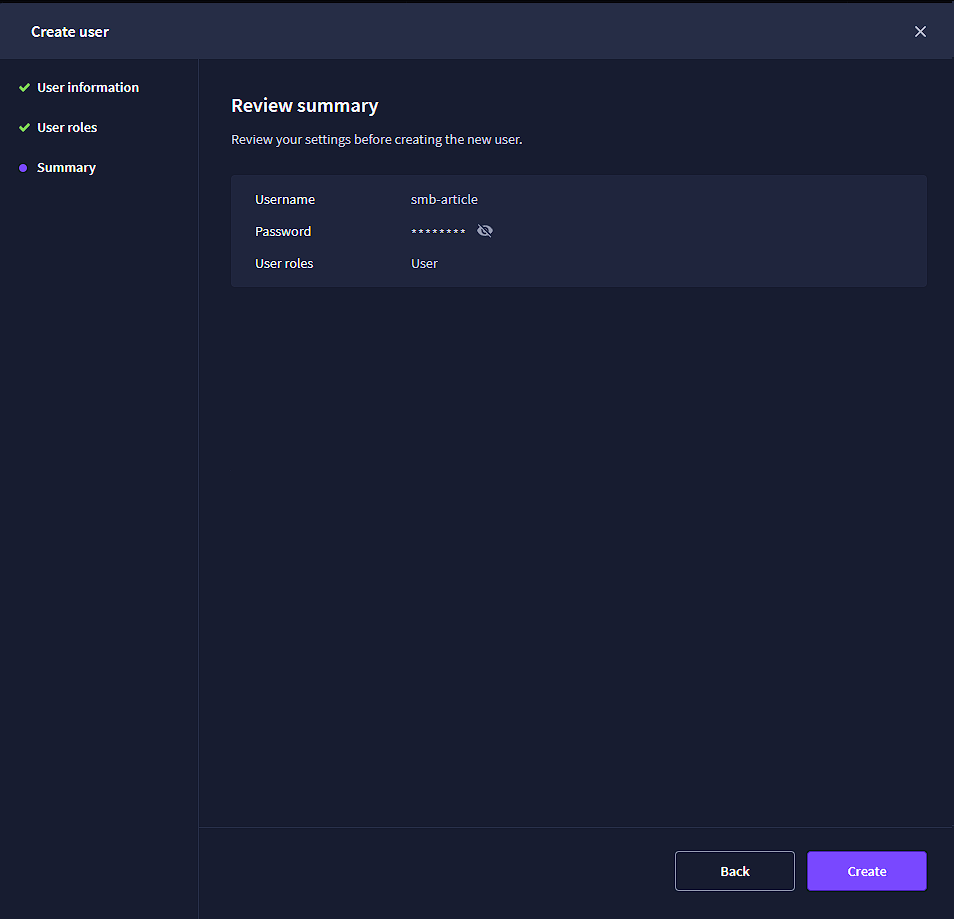
Once again, review your settings and press the “Create” button to complete the wizard:
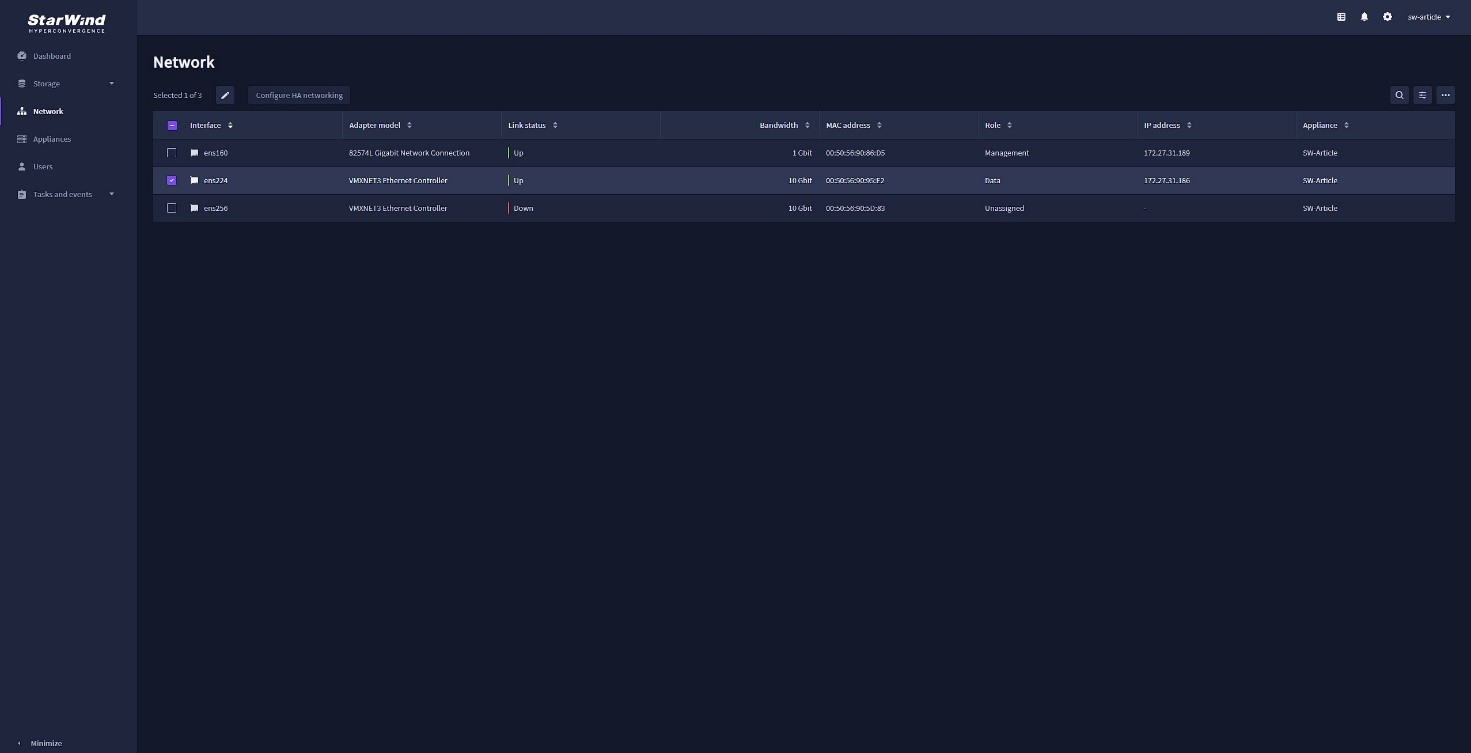
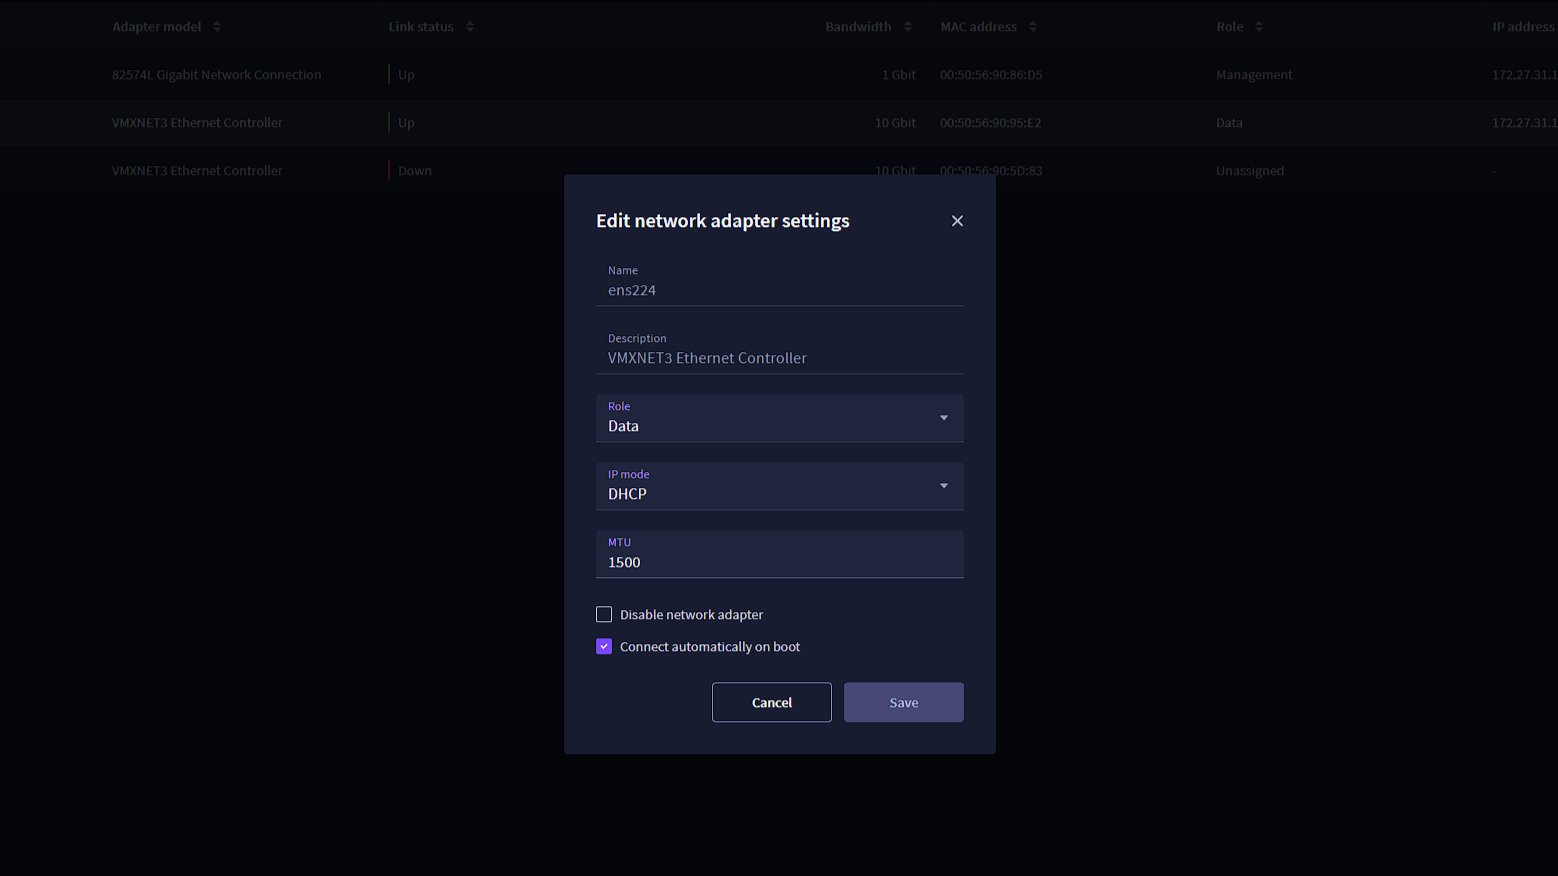
The next step is configuring and assigning the network adapter responsible for providing access to the file share. To do that, go to the “Network” tab, select the desired network adapter, and press the “Edit” button to open its settings:
Here, you have the option to use automatic IP settings assignment via DHCP or configure the IP settings manually. For simplicity, we are using DHCP. Ensure to specify all the required network settings and select the ‘Data’ role for this adapter:
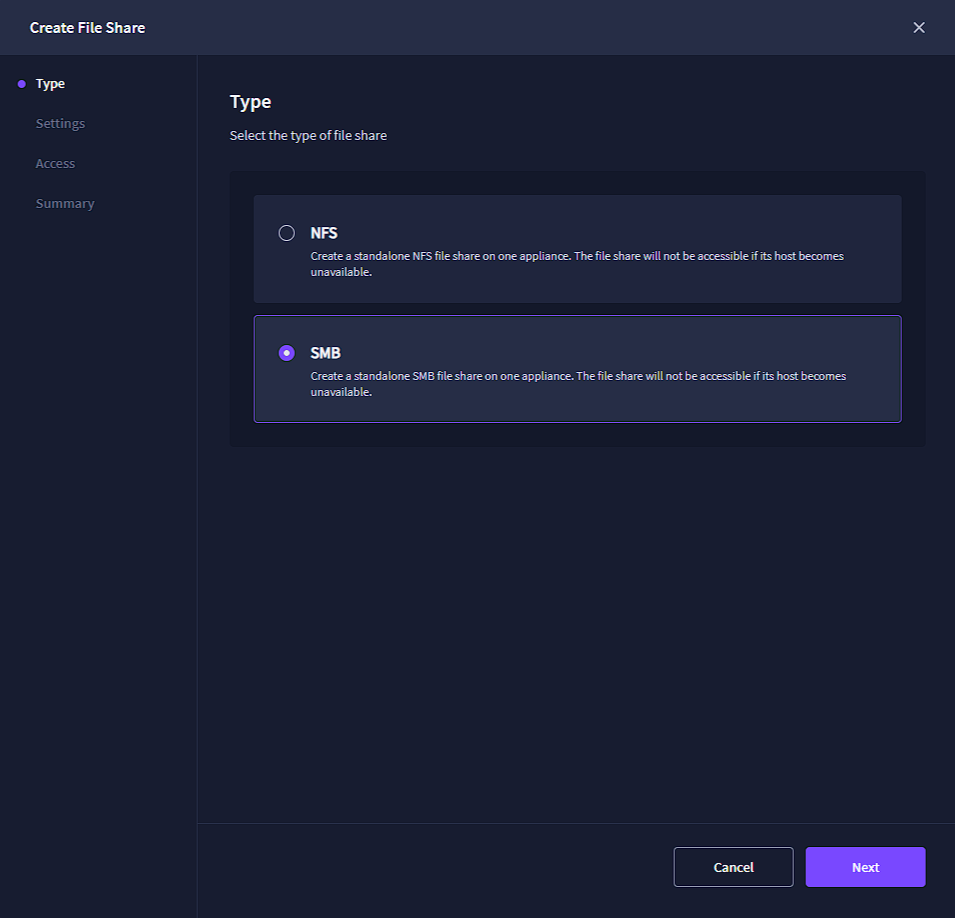
Once you finish the network configuration, go to the “File shares” tab and press the “Plus” button to create a new share:
StarWind VSAN provides you with two options for file shares – SMB and NFS. I’ll start with the SMB:
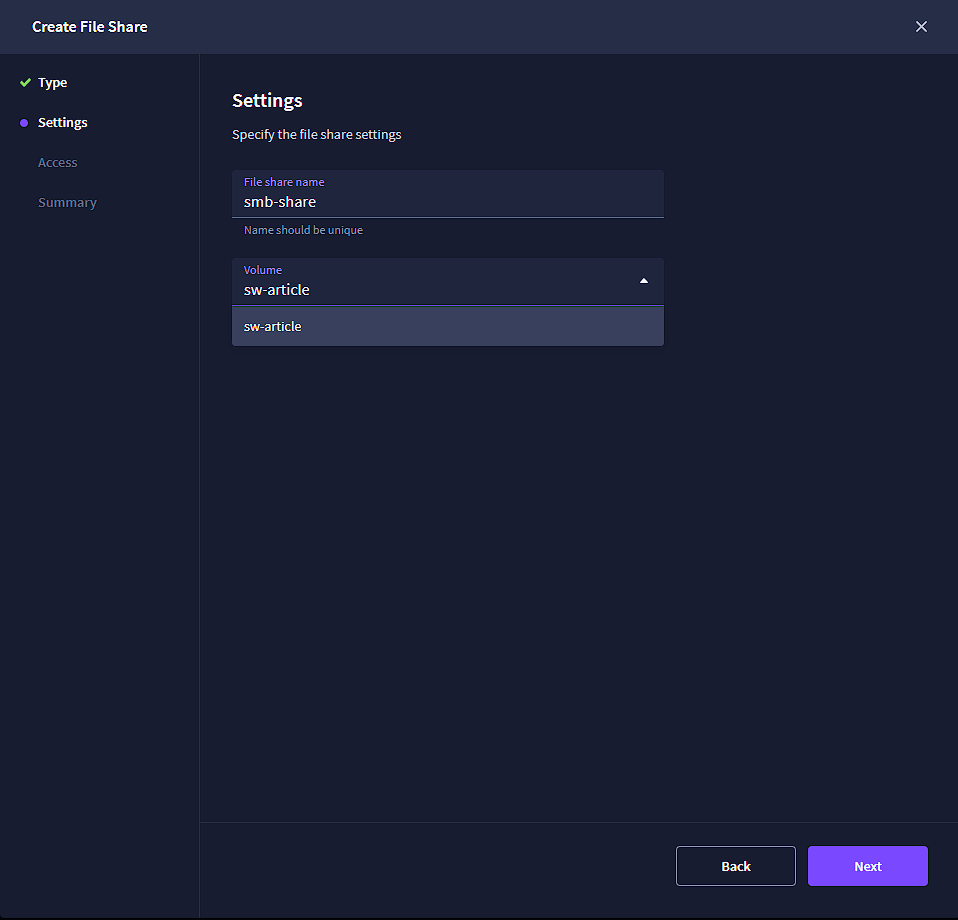
Now we need to put the name of the share and select the volume that we are going to use for this share.
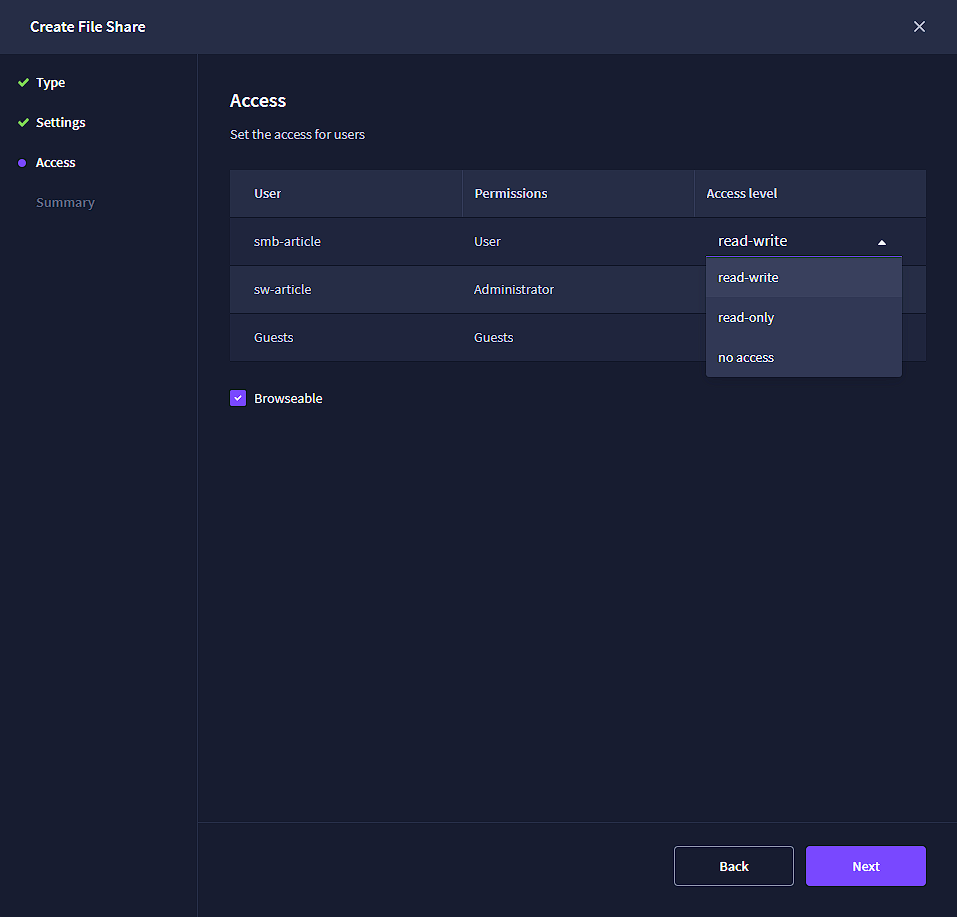
After that, select the access level for each user you have created for this file share, as well as for any guest users. By default, the VSAN Administrator user will have the highest privileges. For the “sw article” user that I have created for my file share, I will choose the ‘read-write’ option, which grants the user full access to the data stored on the share. In addition to ‘read-write’, you have two other options to choose from: ‘read-only’ and ‘no access’. For the guest user accounts on my share, I will select the ‘no access’ option to ensure that no unauthorized accounts can access the data:
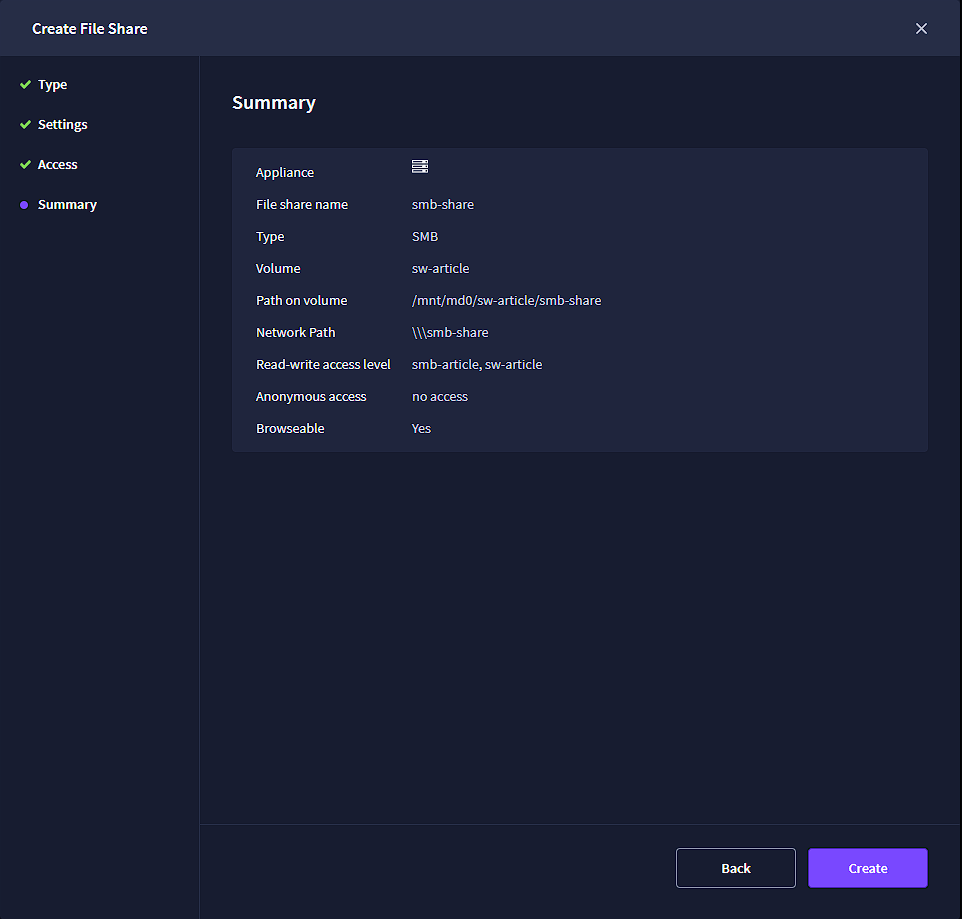
In the next step, review the new file share summary and press the “Create” button:
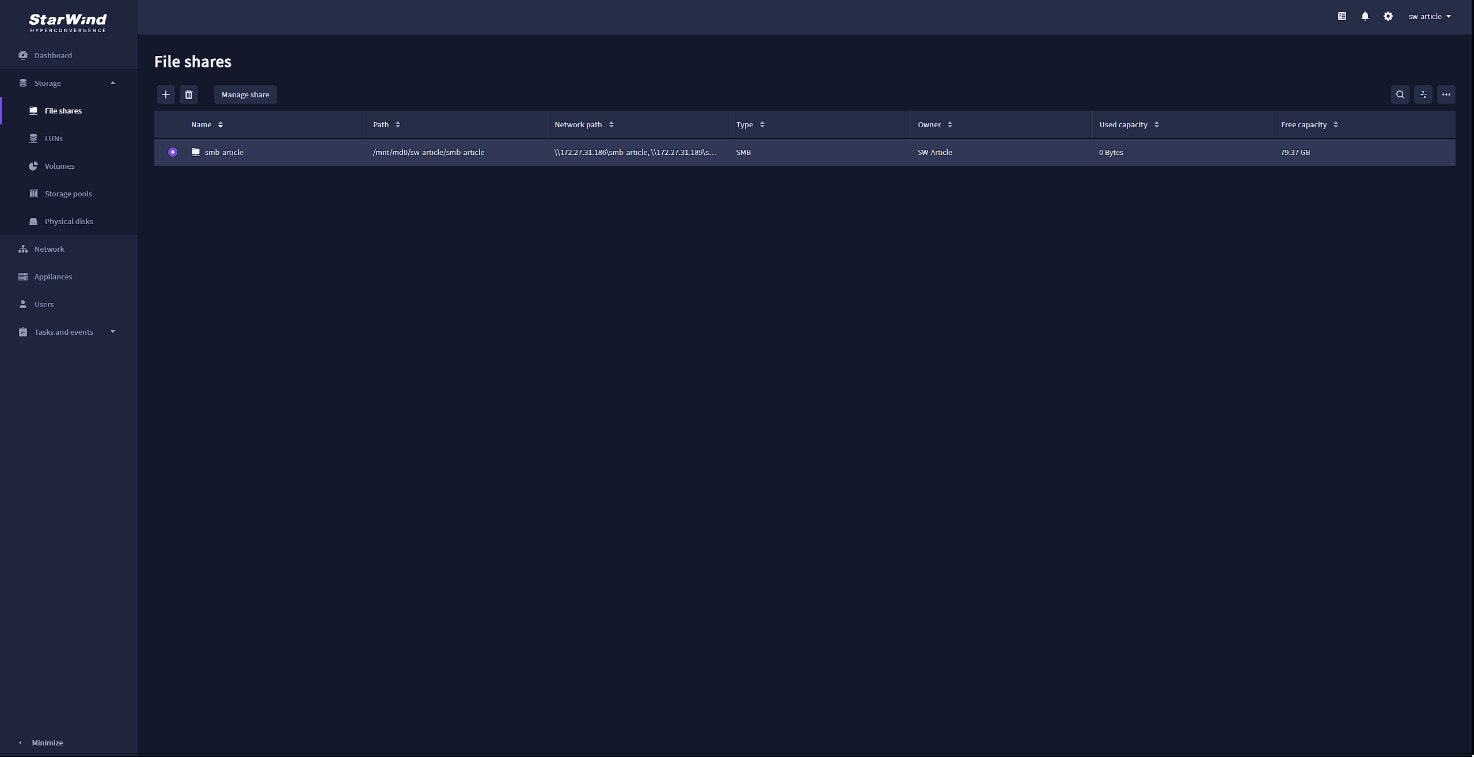
And voila, we have a fully functional SMB share that is ready for the action:
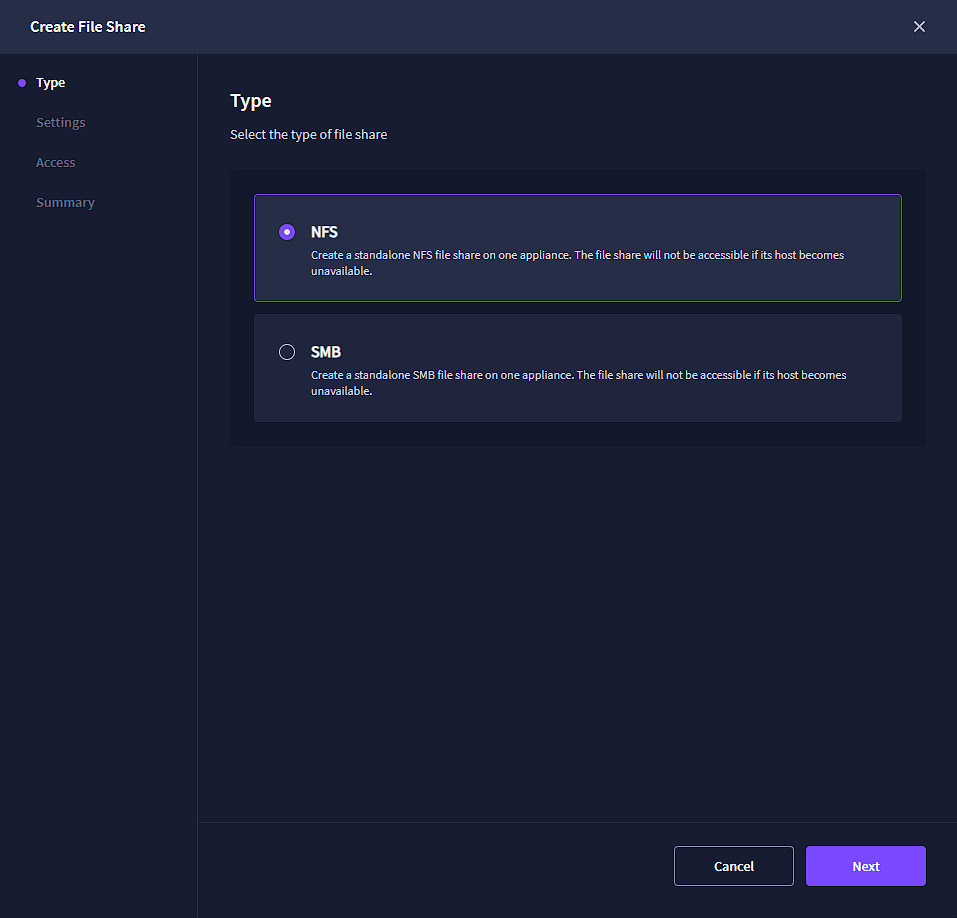
With the NFS share, the process is very similar. You go to the “File shares” tab, open the “Create file share” wizard, and select the “NFS” option:
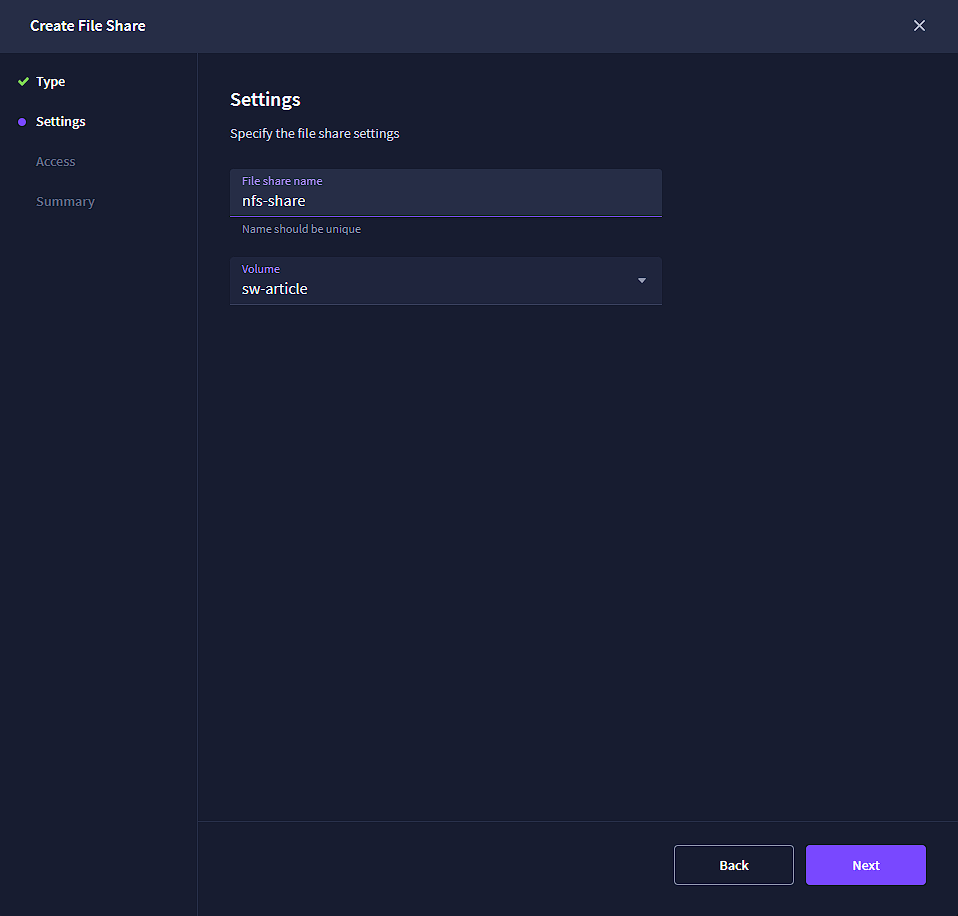
In the next step, specify the file share name and select the desired volume:
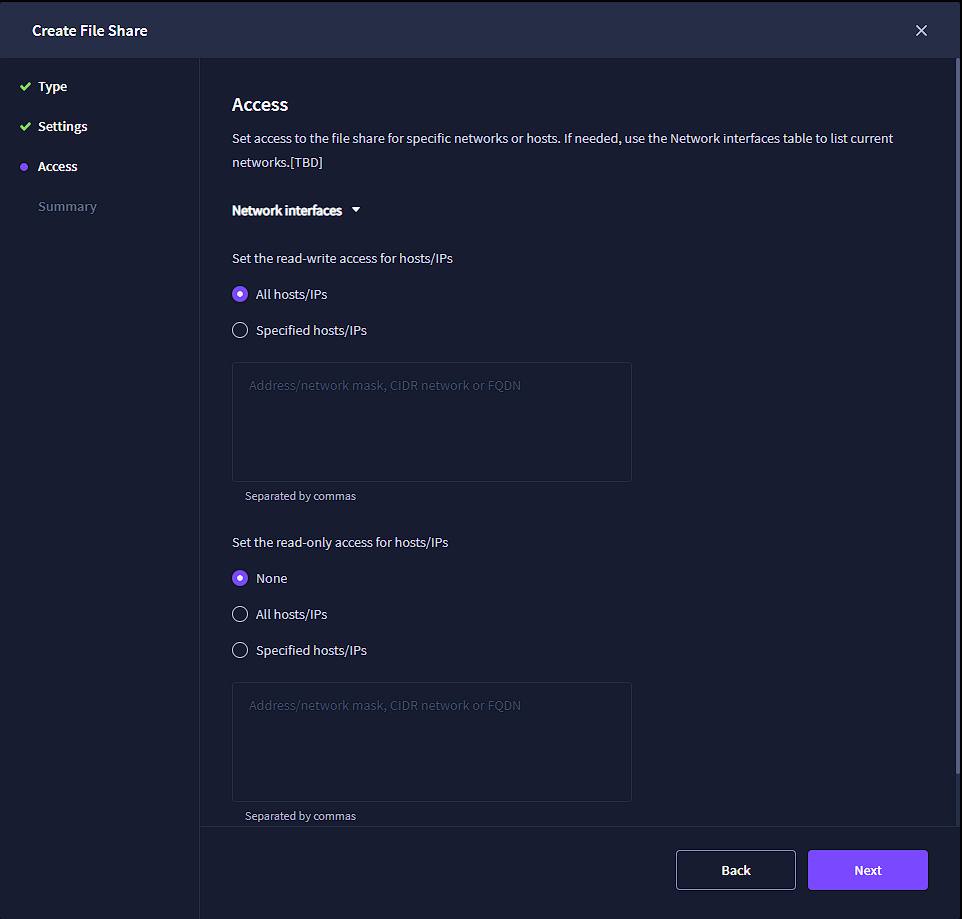
After that, you need to configure access to the file share. You can either grant all hosts “read-write” or “read-only” access to the share, or you can specify a particular IP address, IP subnet, or a list of host names (FQDNs). I selected the “All hosts/IPs” option for simplicity. When you are done, press “Next”:
Finally, review your settings and press “Create” to create the file share:
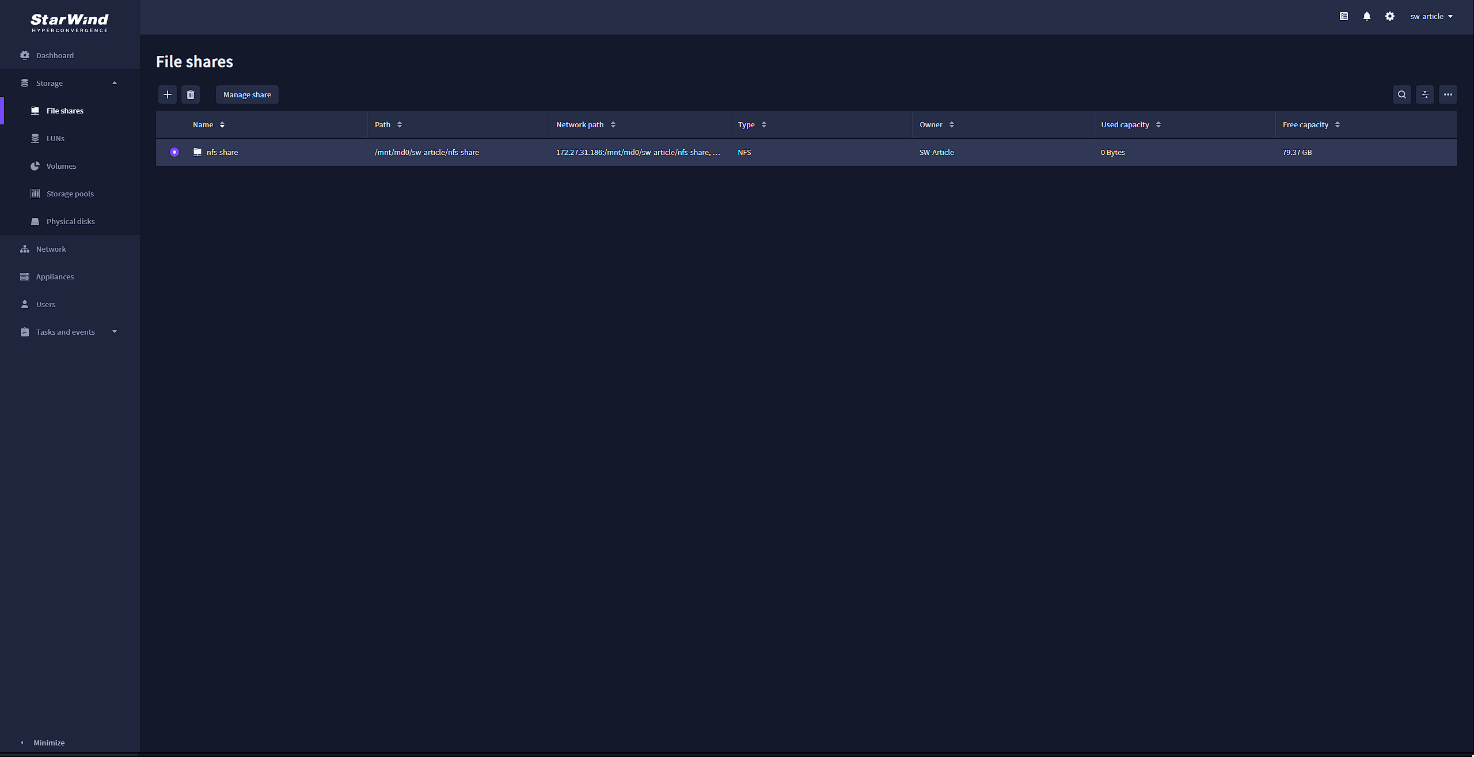
And after all of those steps, we have our newly created NFS share.
Conclusion
Now, my friends, you know how easy it is to create a file share with StarWind VSAN. In our next articles, we will cover other popular StarWind VSAN use cases, so stay tuned!


