Introduction
Plenty of articles have been released about Storage Spaces and everything around this topic. However, I would like to absorb all actual information and lead you through the journey of configuring Storage Spaces on a Standalone host.
The main goal of the article is to show a Multi-Resilient Volume configuration process.
How it works
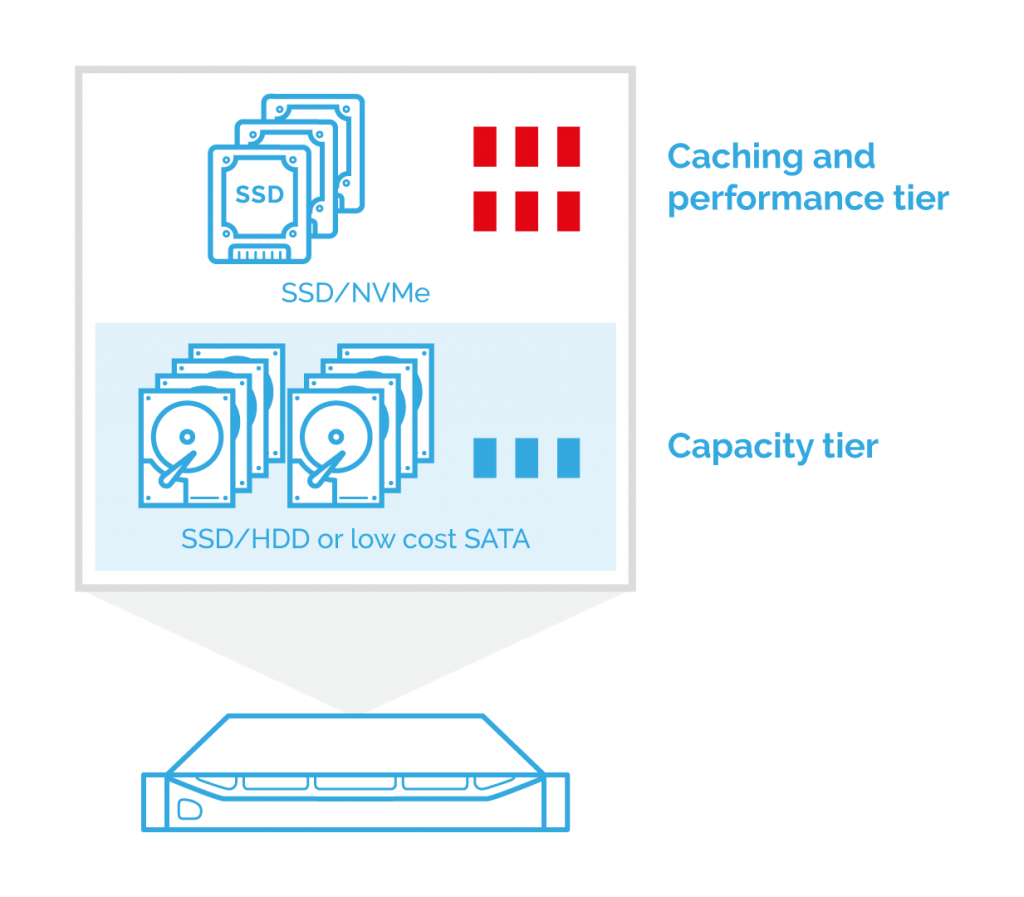
In order to use Storage Spaces, we need to have faster (NVMe, SSD) and slower (HDD) devices.
So, we have a set of NVMe devices along with SAS HDD or SATA HDD, and we should create performance and capacity tier respectively.
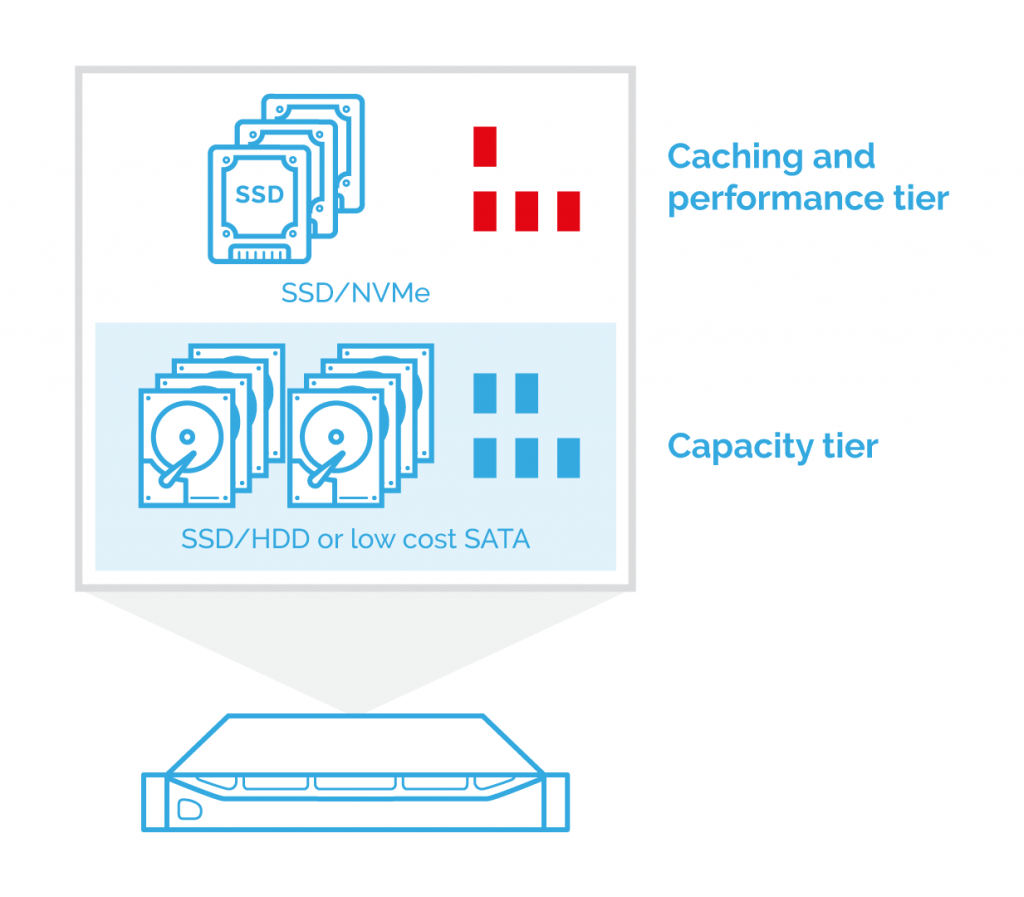
NVMe tier is used for caching. When hot blocks are written to the storage array, they are written to the caching tier first (SSD’s or NVMe):
When some blocks become cold, they are automatically moved to the slower storage, HDD in our case:
Thus, you can manage storage which is as fast as SSD and costs less.
Cost-to-performance ratio is the main point to use Multi-Resilient Tier.
ReFS (The Resilient File System) is a new recommended file system for using S2D. It is able to move data between faster and slower tiers automatically. However, NTFS also supports building Multi-Resilient Tier.
When you use Multi-Resilient Tier, you don’t need to create a hardware RAID array, since pools are created by Storage Spaces itself.
Instead of RAIDs, there are three resiliency options available for storage configuration: Mirror, Parity, and Simple.
Mirroring
Under this configuration, you have multiple copies of data. It looks and operates like RAID1.
Copies are written to different physical drives in order to provide independence.
Parity
It is implemented as RAID5. It saves one bitwise parity symbol. Also, Parity provides better storage efficiency than Mirroring, but fault tolerance is lower.
Simple
Simple was created as RAID0. It provides better performance and best storage efficiency.
However, I do not recommend using it since when one drive fails, all data gets corrupted. It is good only for temporary environments.
So, you may use Multi-Resilient Tier for a Standalone host or for several hosts (Storage Space Direct).
Today, we are going to browse through the Standalone host configuration since we can combine this technology with StarWind solution and get a great result.
Create a multi-resilient volume
There are two ways to configure Storage Spaces. It could be done via Server Manager or via PowerShell console.
Storage Pools
A collection of physical disks that enables you to aggregate disks, expand capacity in a flexible manner, and delegate administration.
Storage Spaces
Virtual disks created from free space in a storage pool. Storage spaces have such attributes as resiliency level, storage tiers, fixed provisioning, and precise administrative control.
PowerShell guide:
Let’s check all available disks for Storage pool
Get-PhysicalDisk – list physical disks
Get-StorageSubsystem – check the storage subsystem name
In case if Media Type of the physical disk is unknown, it can be changed with the PowerShell commands:
Get-PhysicalDisk | ft FriendlyName,CanPool,Size,MediaType

Set-PhysicalDisk -FriendlyName [disk name] -MediaType [SSD or HDD]
or
Get-PhysicalDisk | ft FriendlyName,CanPool,Size,MediaType

Get-PhysicalDisk | Where Size -EQ [disk size] | Set-PhysicalDisk -MediaType [SSD or HDD]
In the next step, we will create a storage pool which will use all available disks.
PowerShell commands for Storage Pool and Virtual Disk creation:
Get-PhysicalDisk

$disks = Get-PhysicalDisk |? {$_.CanPool -eq $true}

New-StoragePool -StorageSubSystemFriendlyName "[storage system name]" -FriendlyName [pool name] -PhysicalDisks $disks

Get-StoragePool -FriendlyName [pool name]$ssd_tier = New-StorageTier -StoragePoolFriendlyName [storage pool friendly name] -FriendlyName SSD_Tier -MediaType SSD
$hdd_tier = New-StorageTier -StoragePoolFriendlyName [storage pool friendly name] -FriendlyName HDD_Tier -MediaType HDD
New-VirtualDisk -StoragePoolFriendlyName “[storage pool friendly name]” -FriendlyName "[friendly name]" -StorageTiers @($ssd_tier,$hdd_tier) -StorageTierSizes @([disk size],[disk size]) -ResiliencySettingName [resiliency setting name] -WriteCacheSize [ ]GBor
$vd1 = New-VirtualDisk -StoragePoolFriendlyName “[storage pool friendly name]” -FriendlyName "[friendly name]" -Size [ ] -ResiliencySettingName [resiliency setting name] -ProvisioningType [provisioning type] -WriteCacheSize [ ]GBThe following example shows how to create a Multi-Resilient volume where SSD tier is mirrored and HDD tier is configured in Parity.
New-StorageTier -StoragePoolFriendlyName Pool1 -FriendlyName SSD_Tier -MediaType SSD -ResiliencySettingName Mirror


New-StorageTier -StoragePoolFriendlyName Pool1 -FriendlyName HDD_Tier -MediaType HDD -ResiliencySettingName Parity


$ssd_tier = Get-StorageTier -FriendlyName SSD_Tier


$hdd_tier = Get-StorageTier -FriendlyName HDD_Tier


New-VirtualDisk -StoragePoolFriendlyName Pool1 -FriendlyName "VirtualDisk" -StorageTiers @($ssd_tier,$hdd_tier) -StorageTierSizes 100GB, 300GB
This configuration will give you better storage efficiency, leaving the performance on the great level.
I’m not going to cover the GUI configuration in this article. It will be available on StarWind web site soon.
Conclusion
When Microsoft released Storage Spaces, it gave us more flexible opportunities to build the virtual storage. In this blog post, I have covered PowerShell step-by-step configuration. In addition, I showed an example of configuring Mirror+Parity Storage Spaces pool.This technology is compatible with StarWind solution as well. I will describe it in the next blog post.


