
Protection Groups is a new feature introduced with the Update 3 of Veeam Backup & Replication 9.5 and allows the administrators to backup physical servers and workstations through the use of Agents. In this article will be explained the procedure to create Protection Groups and their use in the backup jobs.
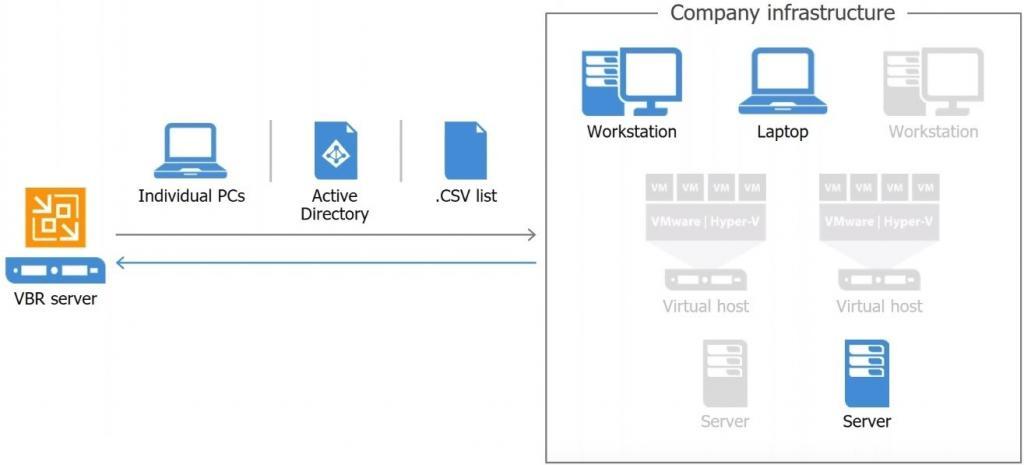
Backup of physical servers as well as virtual machines can be centralized and processed from the Veeam Backup & Replication dashboard having all backup jobs available from a single pane of glass. This feature allows to simplify the backup jobs management, managing the Agents directly from Veeam Backup & Replication.
Protection Groups
Veeam Backup & Replication 9.5 U3 provides the option to manage Veeam Agents directly from the console but requires the creation of Protection Groups in the inventory specifying the machines to protect with Agents.
Protection Groups allows the administrators to automate the deployment and the management of Veeam Agents on computers installed in your infrastructure, avoiding to perform administrative tasks individually for every computer you need to protect with Veeam Agent. You can create more Protection Groups depending on your infrastructure
A Protection Group can contain physical servers, workstations or cloud instances protected by Agent-based backup jobs and it can be populated in three different ways:
- Manually – the Protection Group is populated by manually inserting computers to protect.
- Active Directory integration – you can browse the AD tree and specify the OUs containing computer accounts to insert in the Protection Group. Veeam will then perform an automatic discovery and installation of the Agent in the selected machines associating them to a backup job.
- CSV files – these files exported from an asset management system are used to populate the Protection Group automatically.
You can also perform a mixed backup of physical and virtual machines but VMs must have the Agent installed.
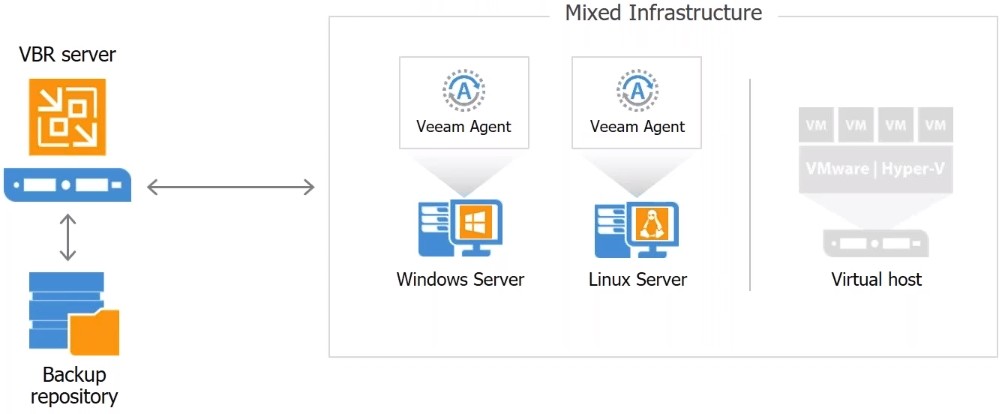
Once the Protection Group has been created, you can create a backup job associated to the Protection Group.
How to create a Protection Group
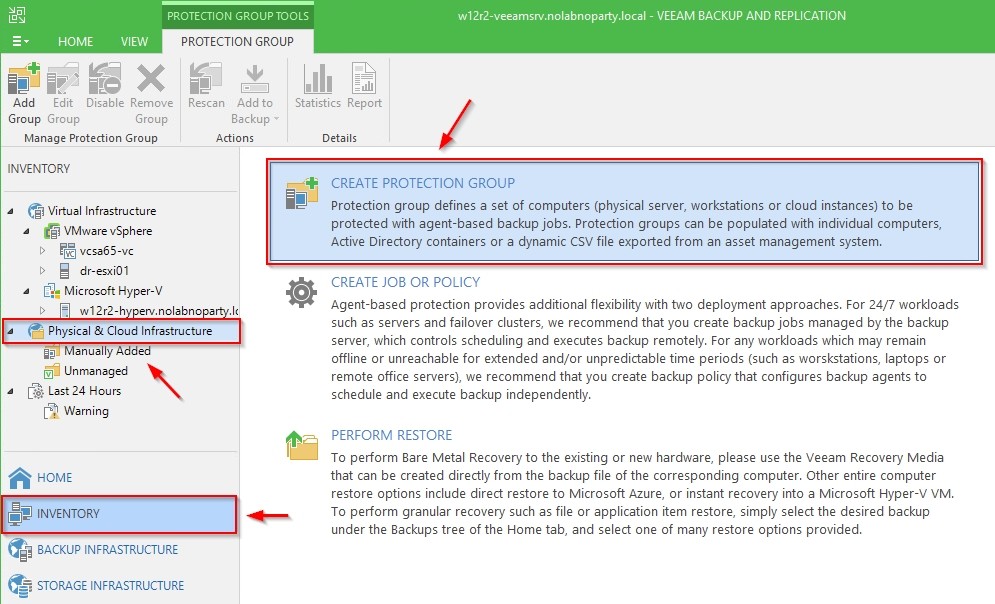
To create Protection Group, enter the Inventory section and select the Physical & Cloud Infrastructure item. Click Create Protection Group to proceed.
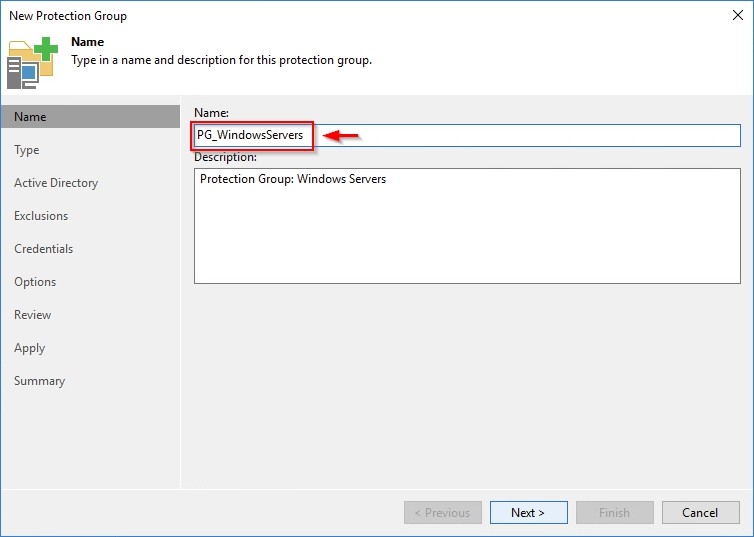
Enter a Name and optionally a Description then click Next.
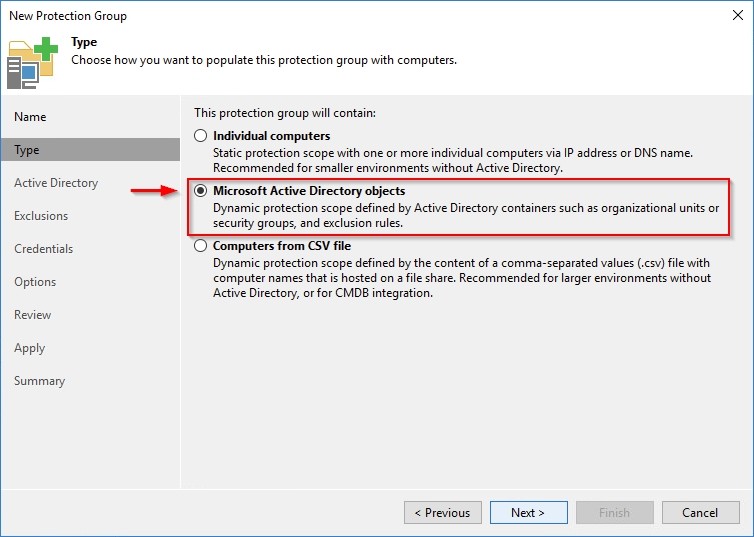
The Protection Group can be populated automatically taking benefit of the Active Directory integration by selecting the containers with the machines to protect. Select Microsoft Active Directory objects options and click Next.
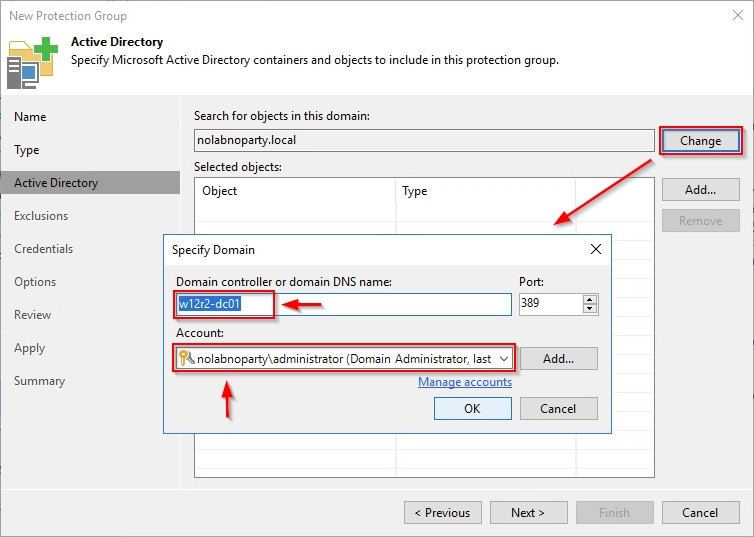
Click Change to select the Active Directory domain to browse then specify the domain controller and a domain account with at least permissions to browse. Click OK to confirm.
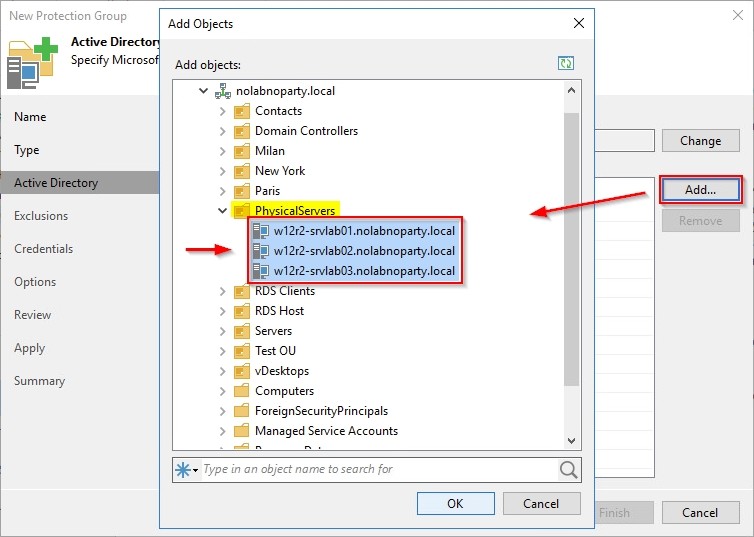
Click Add to browse Active Directory and select the OU or specify Servers to process. If the OU is selected, each computer joined to the domain and located in the selected OU will be inserted into the Protection Group. Also Linux machines can be inserted in the Protection Group if joined to the domain. Click OK when done.
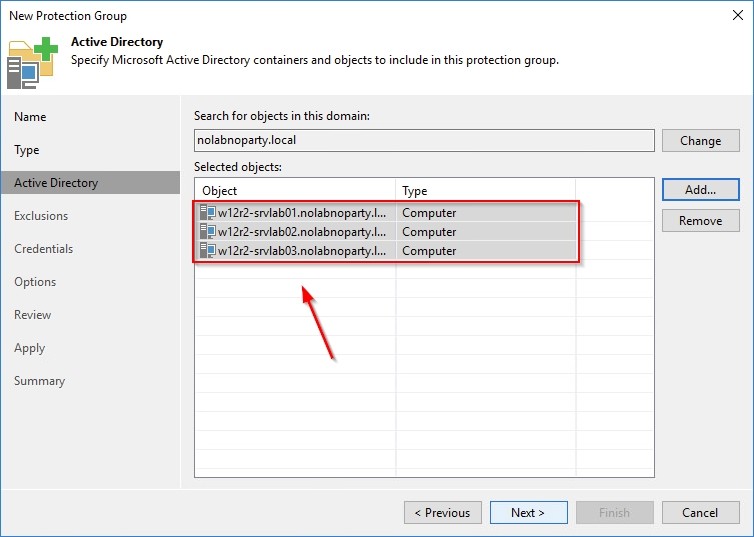
The selected computer objects are listed in the window. Click Next.
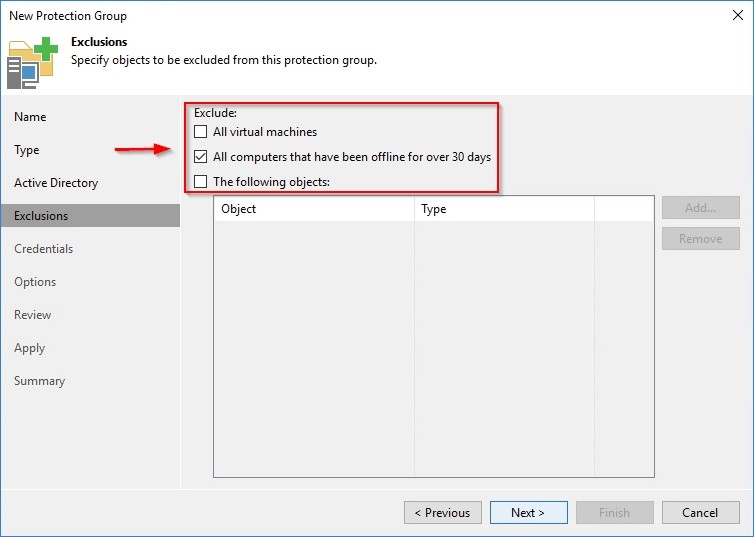
Protection Groups have some Exclusions enabled by default and depending on your needs you may decide to enable or disable some. In the example, option to esclude All virtual machines has been disabled since the processed Servers are VMs. Click Next.
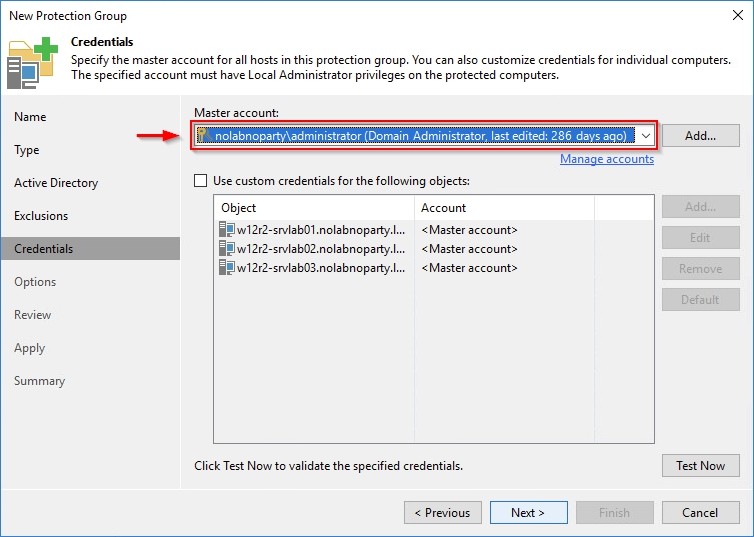
Specify the account used to install the Agent in the selected servers. You can use a Master Account (a Domain Admin for instance) or specify the credentials for each server. Click Next to continue.
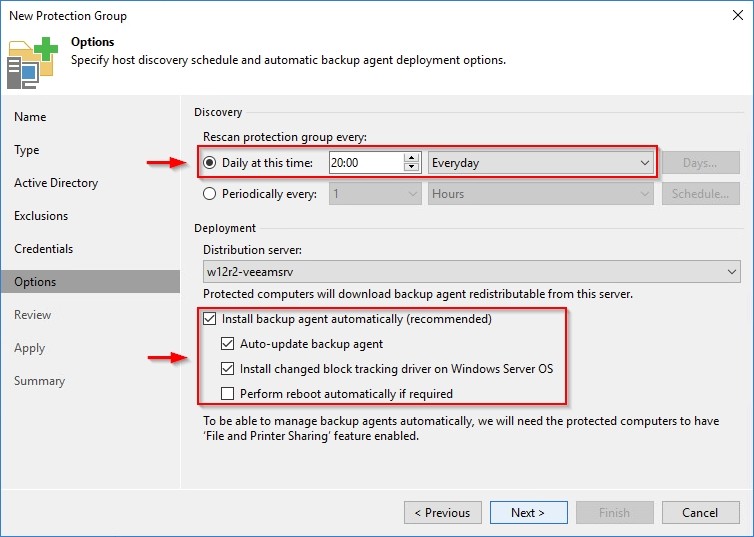
Specify the Discovery schedule to check periodically the Protection Group’s contents. You can also specify actions to performs with Agents during the rescan keeping in mind the Veeam’s proprietary CBT driver requires a reboot. Click Next to create the Protection Group.
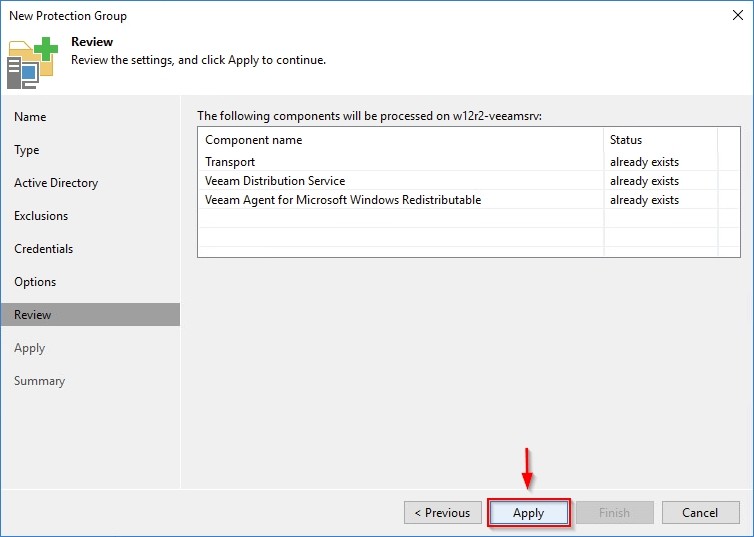
Click Apply to proceed with Protection Group creation.
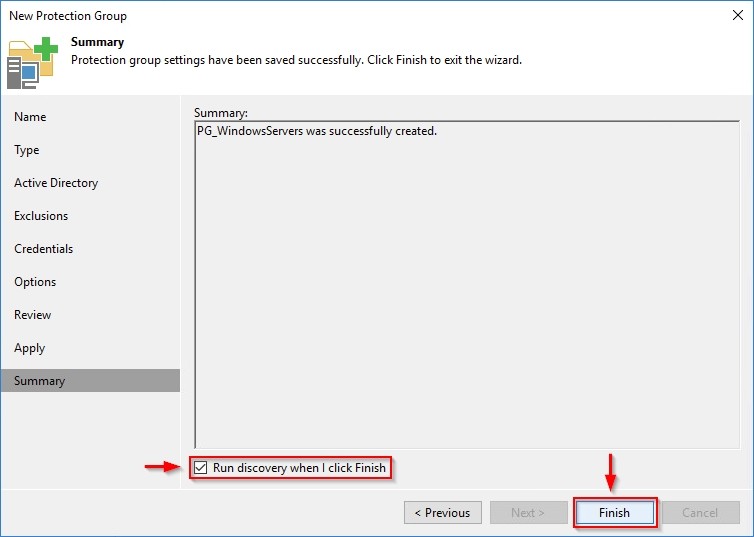
When the Protection Group has been created, click Finish to exit the wizard. Leave option Run discovery when I click Finish to begin Agent installation immediately.
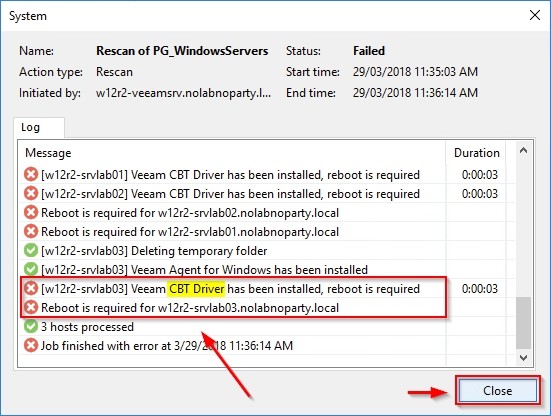
Veeam performs the Protection Group discovery and installs the Agent. Note that the CBT Driver requires the reboot of the server to finalize the installation.
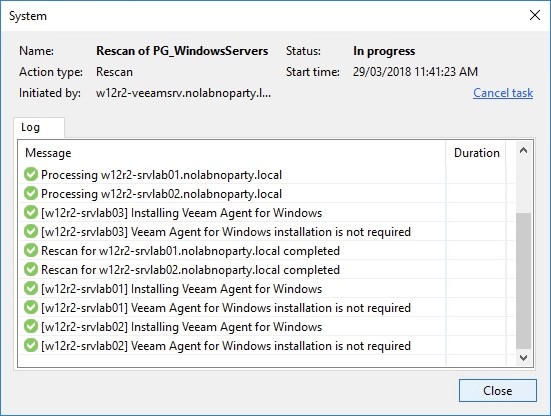
After rebooting the server, a new discovery action doesn’t report any issue.
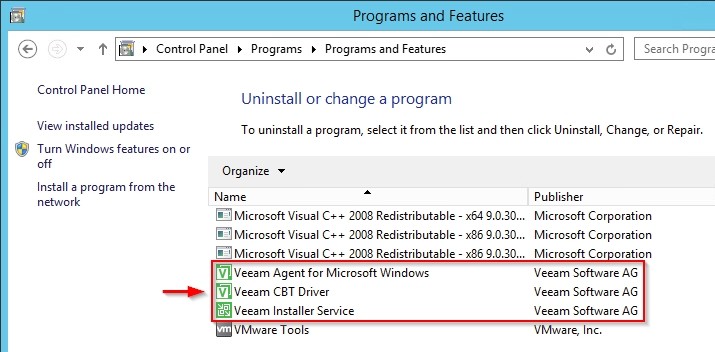
Looking at the Windows Server, you can recognize the components installed by Veeam.
Create the Backup Job
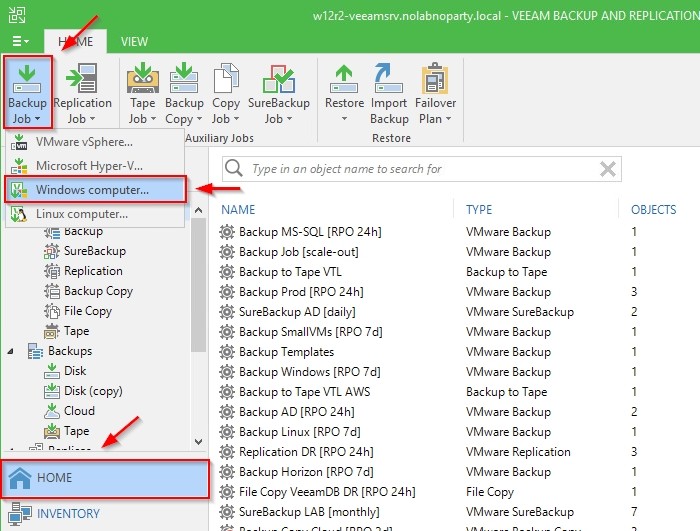
Once the Protection Group has been created successfully, it can be associated to a backup job. From the Home area click Backup Job in the main menu and select Windows computer.
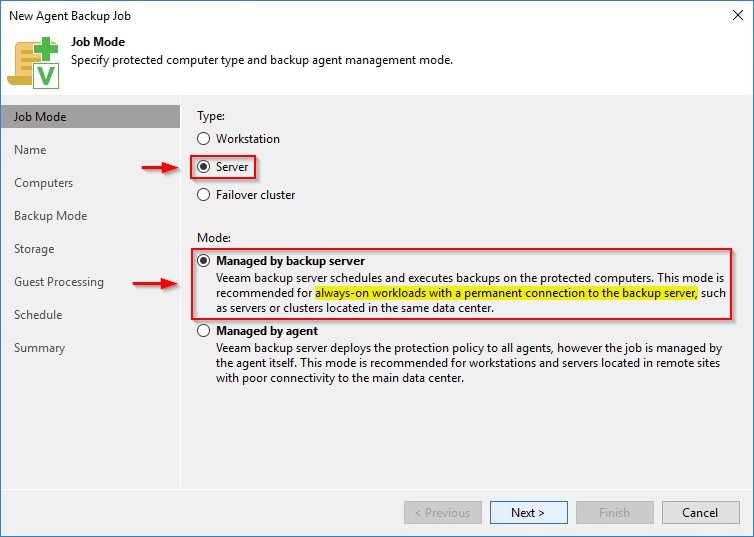
Here you specify how the Agent will be managed. Select the Agent edition as Type and the backup Mode, that is how the Agent interacts with the backup server. While Managed by backup server option, used to process servers always connected to the backup server, creates a backup job, option Managed by agent will create a Backup Policy instead. Click Next.
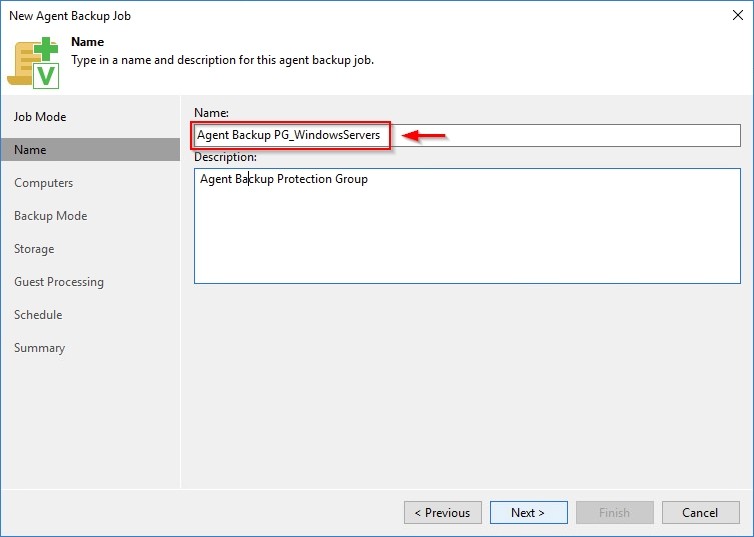
Specify a job Name and optionally a Description then click Next.
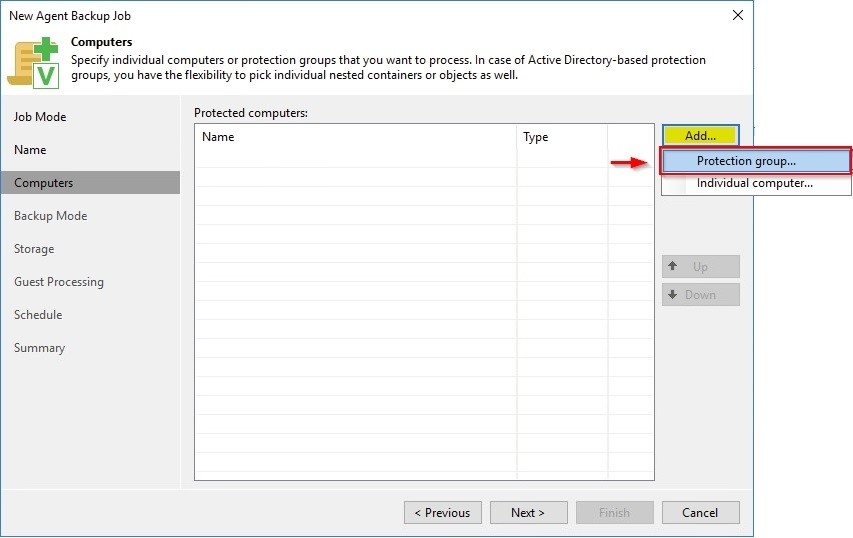
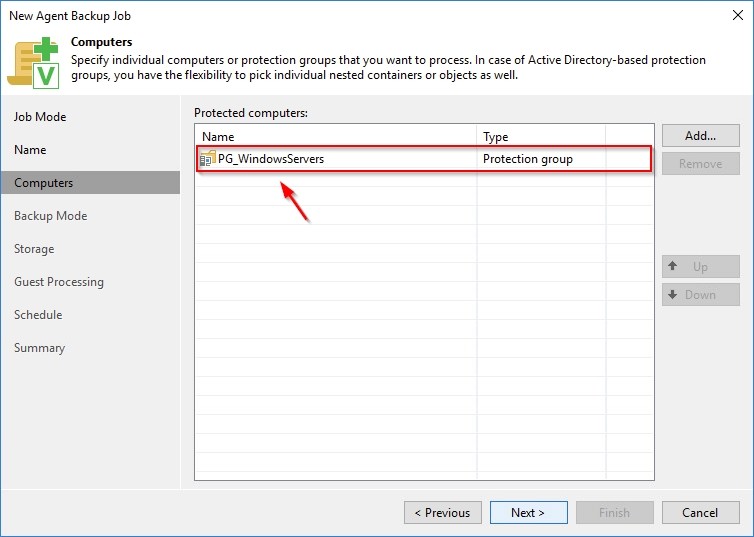
Click Add and select Protection Group to backup the machines in that object.
Select the Protection Group to backup and click OK.

Click Next to continue.
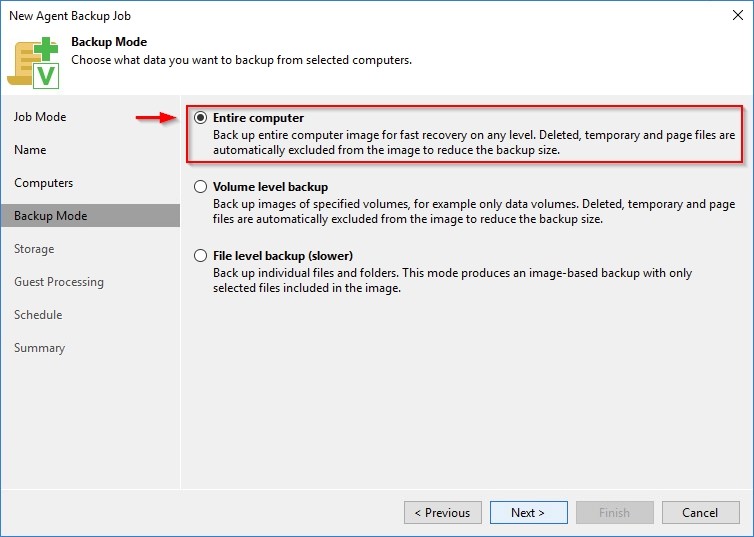
Specify the backup type for your machines (Entire computer in the example) then click Next.
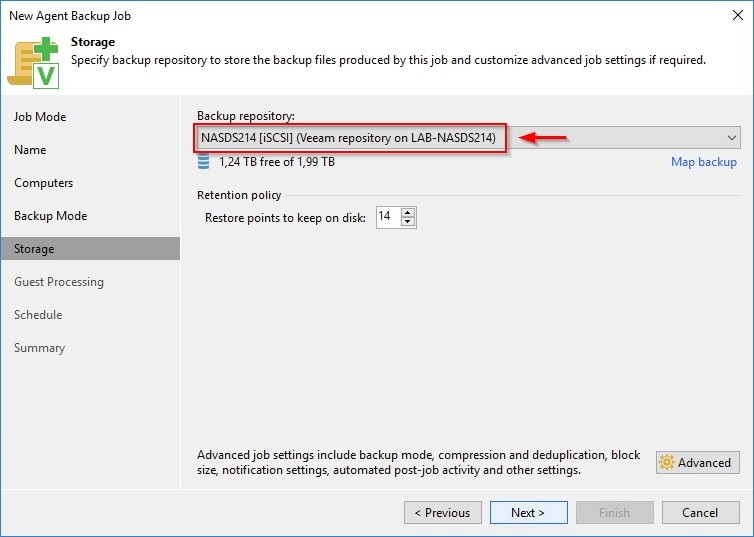
Select the Backup repository to use and configure Advanced settings if requested then click Next.
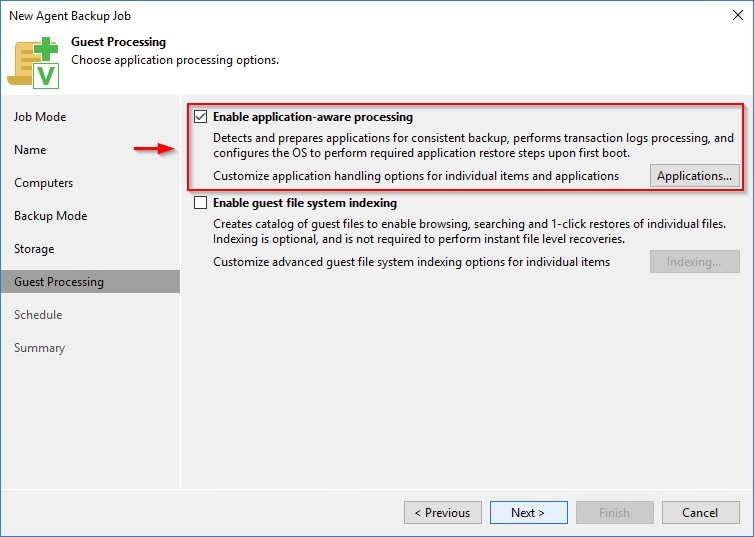
Thick Enable application-aware processing option to have consistent backups if processed servers are MS-SQL or SharePoint then click Next.
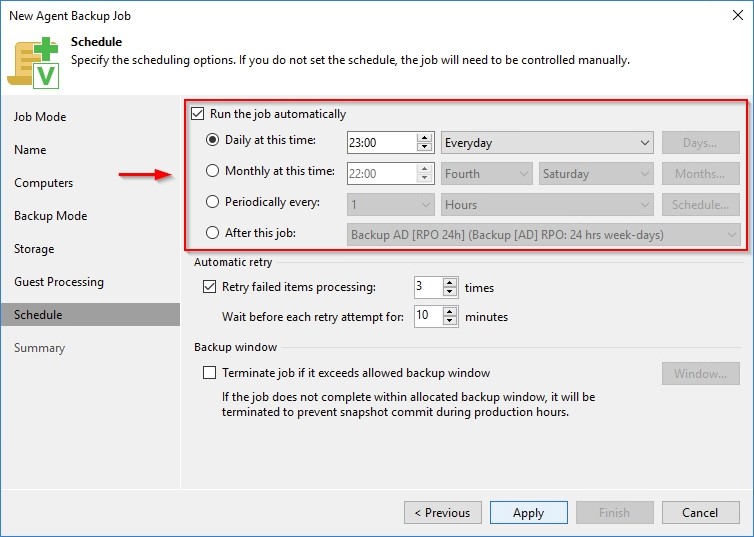
Specify the Schedule for the backup job and click Apply.
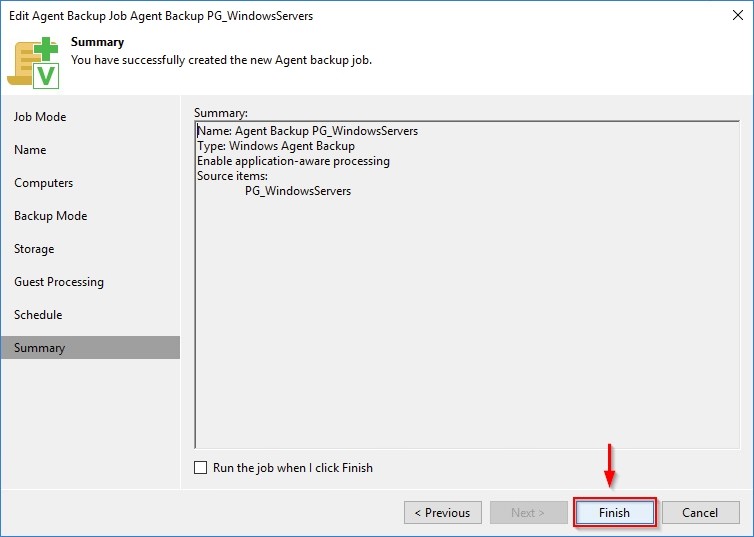
Click Finish to save the configuration.
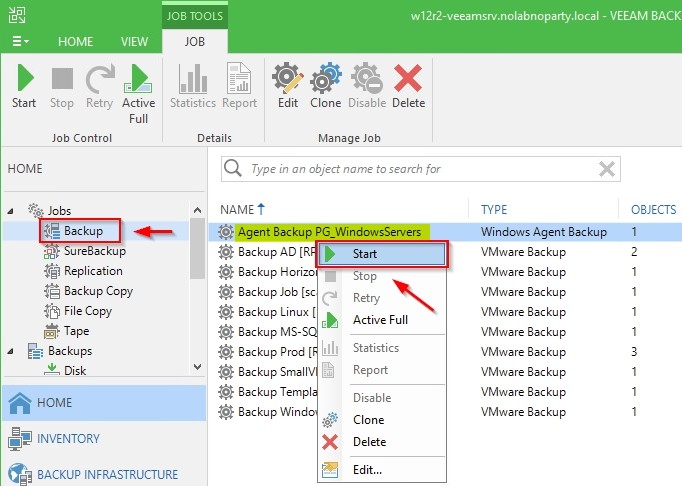
Select Backup item, right click the just created backup job and select Start.
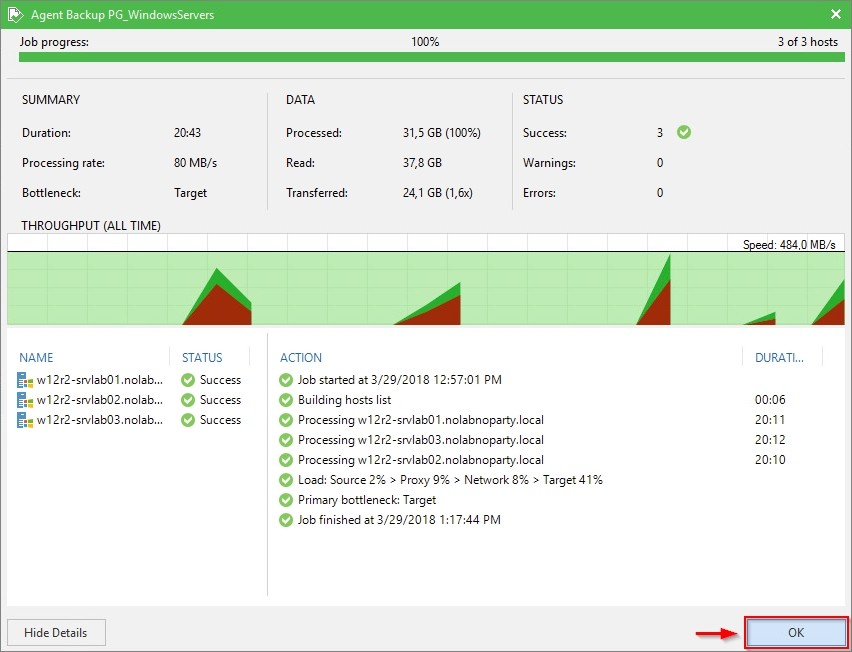
The backup is being executed.
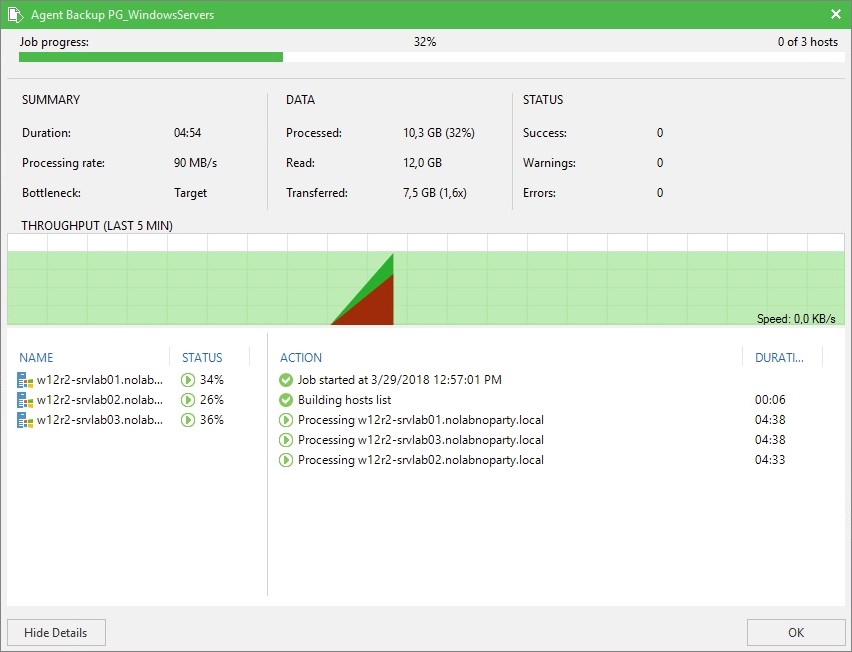
When the backup has completed, click Close to exit the window.
Before starting, make sure to understand Protection Groups constraints:
- Ensure all computers added to the protection group are powered on and accessible over the network
- Computers to protect should have a static IP address.
- Only AD objects belonging to one domain only can be included in a protection group
- Only Active Directory global groups are supported.
- It is recommended to include each computer in one protection group only
Checkout Veeam website for additional info about Protection Groups.
Protection Group is another great feature introduced by Veeam to manage backups of physical machines that cannot be virtualized with the benefit to centralize the overall management of the backup infrastructure.
A 30-day free trial is available for Veeam Agent for Microsoft Windows 2.1 and Veeam Backup & Replication 9.5 for testing purposes.


