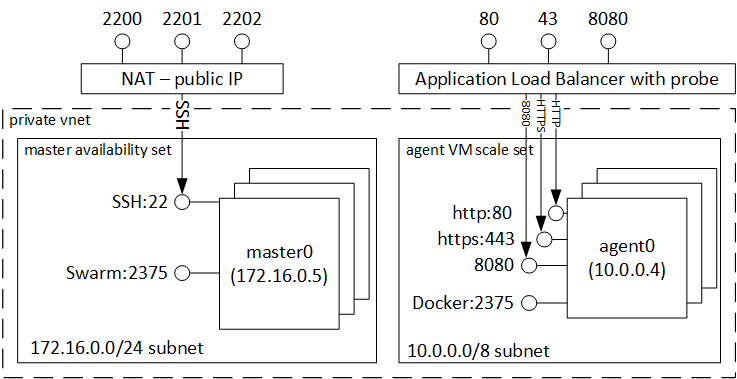
Azure Container Service is a new technology, on Microsoft Azure, and that help you to deploy quickly and in production, with the ARM technology, a Docker cluster, orchestrated by Marathon and DC/OS, Docker Swarm, or Kubernetes to give your applications highly available, but also to deploy many nodes quickly and without any problems. The Microsoft’s documentation is available here: https://docs.microsoft.com/en-us/azure/container-service/container-service-intro
In this article, I will use the Docker Swarm solution:
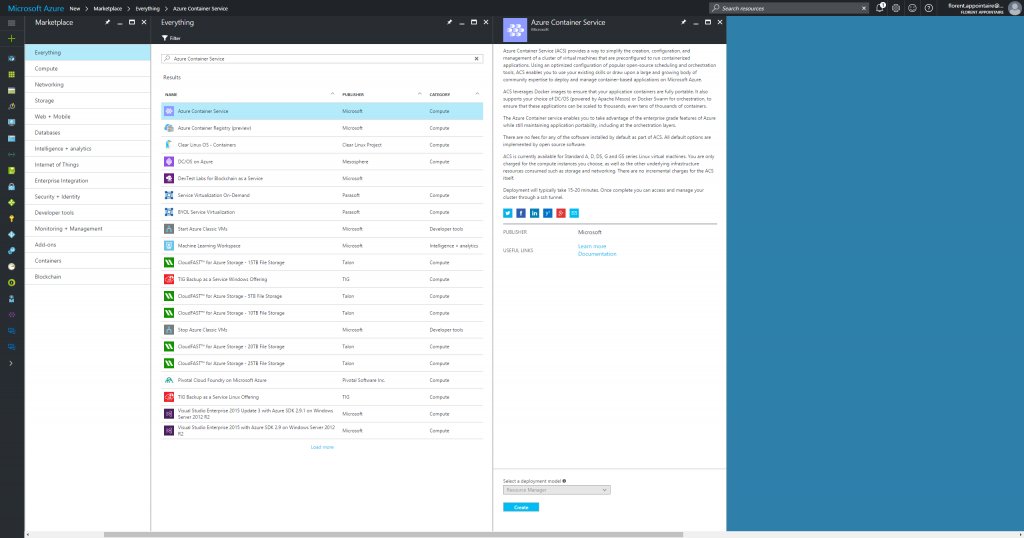
To start, in Azure, search Azure Container Service:
To start the deployment, you need a public key on the computer: the server from where you want to connect the first time to your swarm cluster. To get this key on Windows, download PuttyGen : http://www.chiark.greenend.org.uk/~sgtatham/putty/download.html
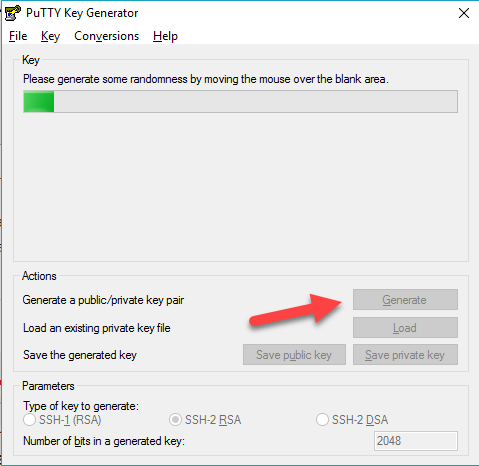
Click on Generate and move the mouse until the green bar is full:
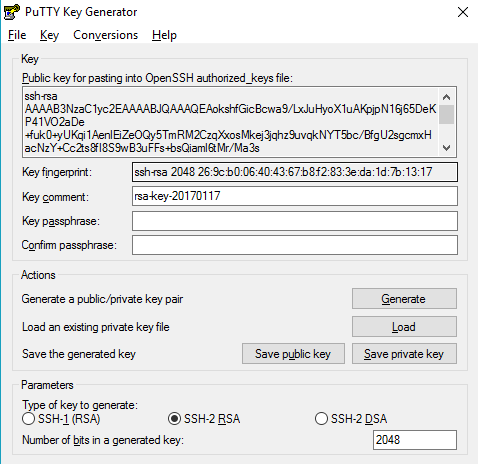
You should have this:
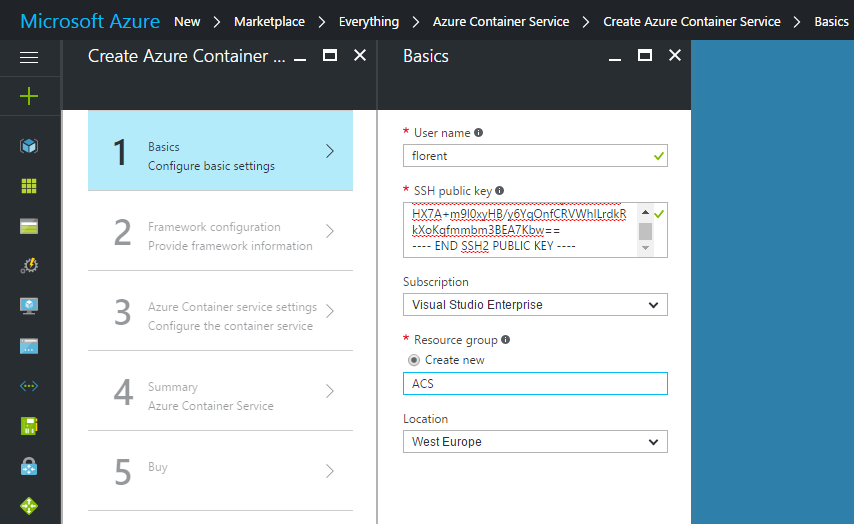
Click on Save public key and save the key. Do the same with the private key. Open the public key and paste it on Azure:
Choose which orchestrator you would like to use, in my case, Docker Swarm:
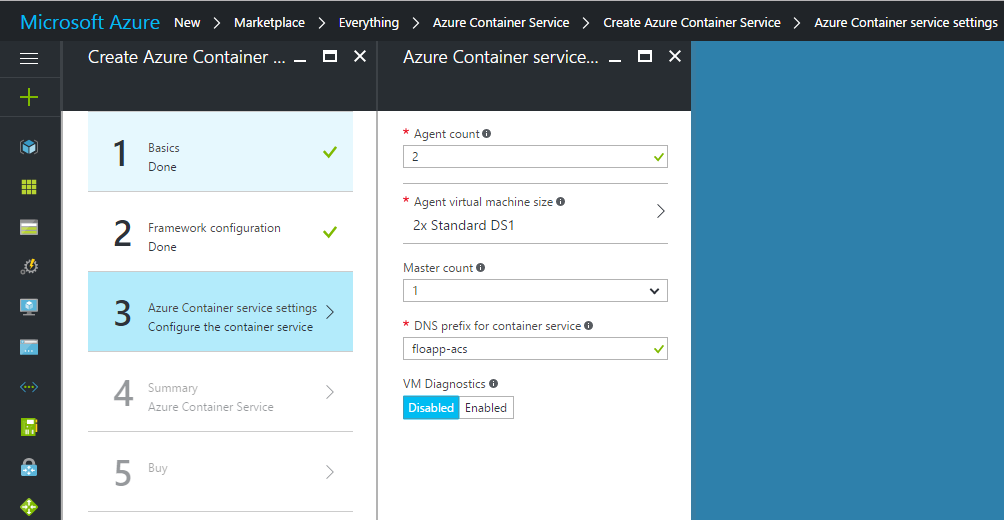
Choose the number of nodes/masters for your cluster, a public DNS name and the size of virtual machines:
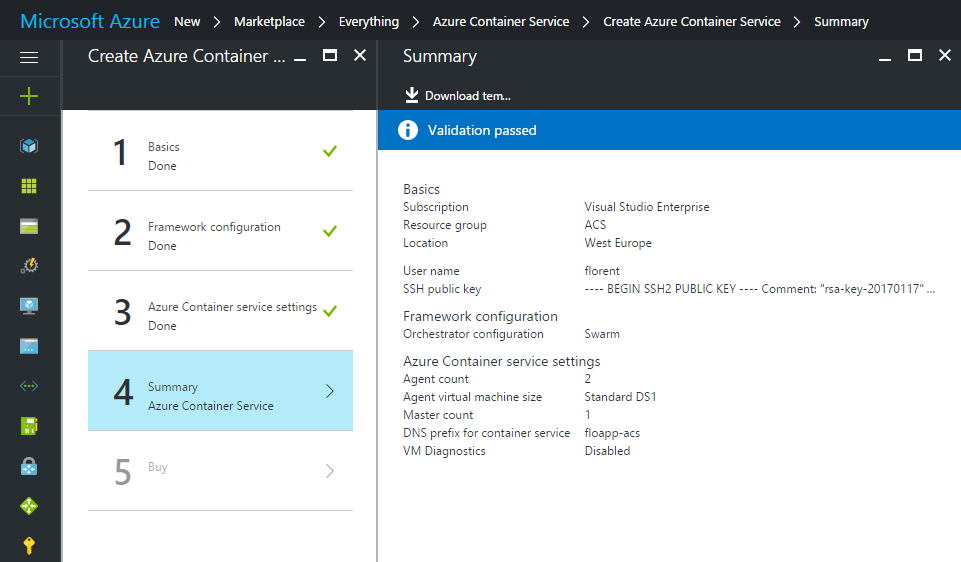
If the validation is ok, you can continue. You can download the template if you want to deploy more quickly the same configuration next time:
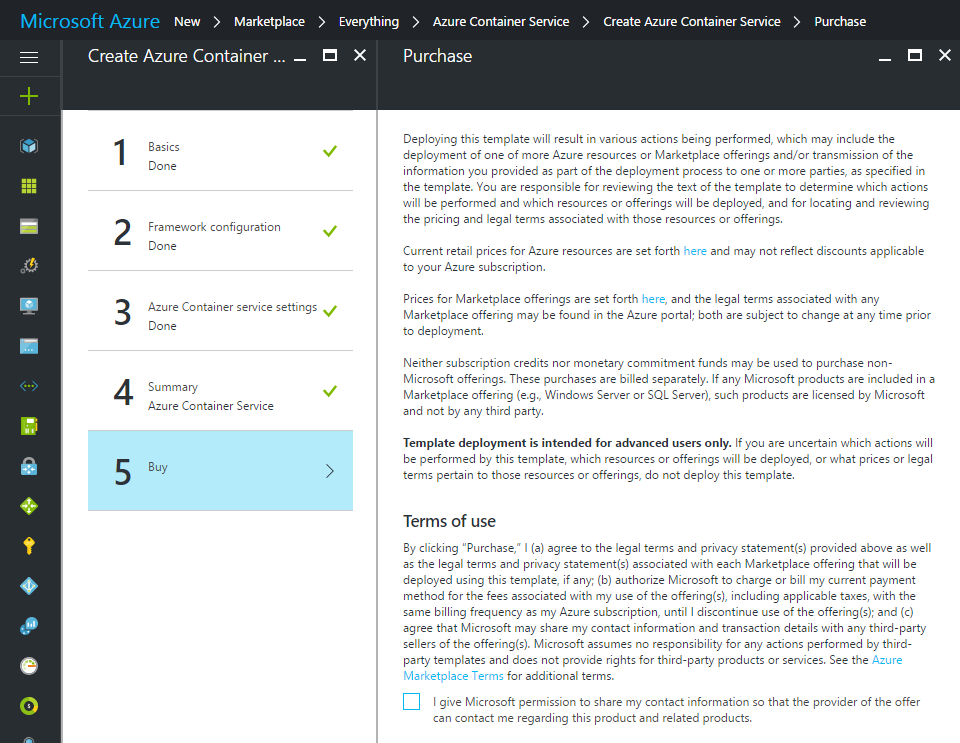
Accept the license to start the deployment:
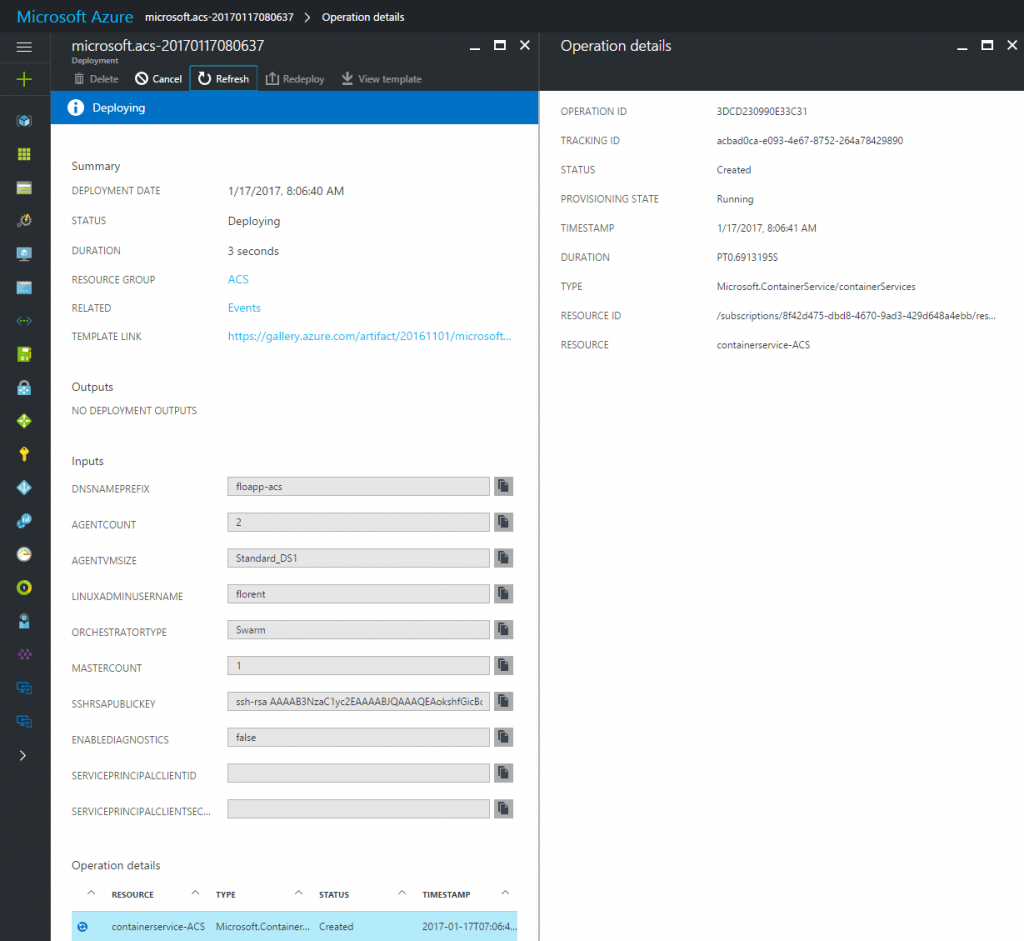
The deployment is now finished:
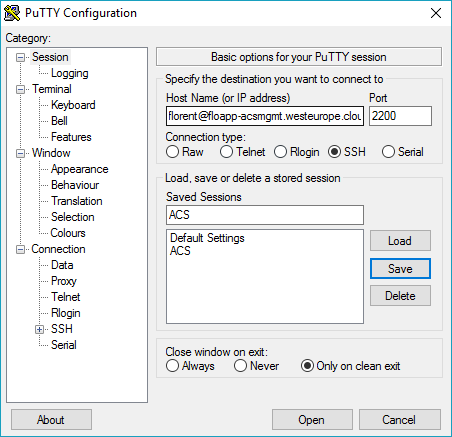
By default, you can’t connect from outside to your cluster. You need to use an SSH tunnel. On Windows, with putty connect with the following parameters:
- Host Name : user@dnspublicname
- Port : 2200
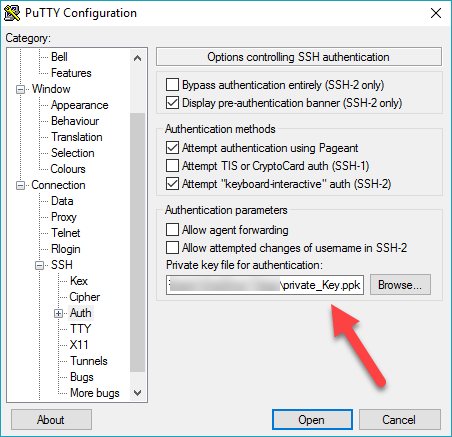
- Connection > Auth > SSH : Select your private key
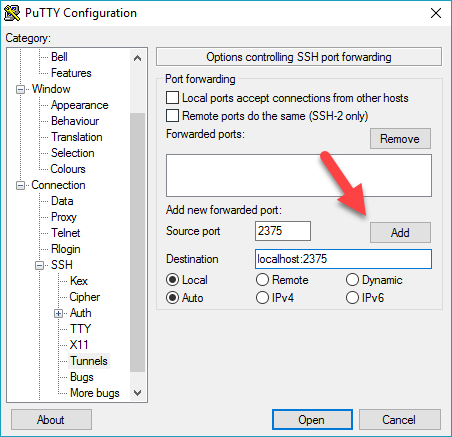
Because I’m using Swarm, I’ll associate the port 2375 for the source and for the destination, localhost on port 2375 in Connection > Auth > Tunnels, and click on Add:
Save the configuration and click on Open to open the SSH tunnel.
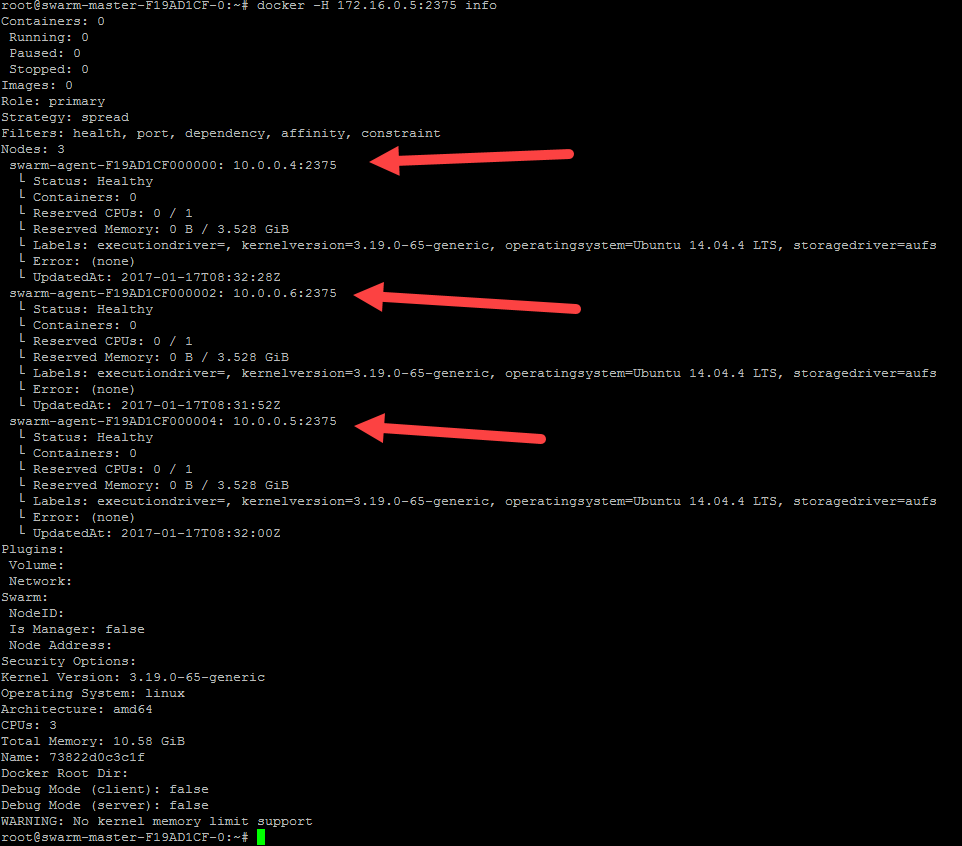
Get the private IP address of your master (172.16.0.5 by default) and watch nodes that are composing your Swarm cluster:
|
1 |
docker -H 172.16.0.5:2375 info |
Here, I’ve 3 nodes:
I’ll deploy a simple website, customized by myself, on port 80. This port is exposed on the load-balancer, like port 8080 and 443. I created a Dockerfile and an index.html:
Dockerfile :
|
1 2 3 4 5 |
FROM nginx MAINTAINER Florent APPOINTAIRE <florent.appointaire@gmail.com> COPY index.html /usr/share/nginx/html/ |
index.html :
|
1 2 3 4 5 6 7 8 9 10 11 12 13 14 15 16 17 18 19 20 21 22 23 |
<html> <head> <link href="https://maxcdn.bootstrapcdn.com/bootstrap/3.3.5/css/bootstrap.min.css" rel="stylesheet" integrity="sha256-MfvZlkHCEqatNoGiOXveE8FIwMzZg4W85qfrfIFBfYc= sha512-dTfge/zgoMYpP7QbHy4gWMEGsbsdZeCXz7irItjcC3sPUFtf0kuFbDz/ixG7ArTxmDjLXDmezHubeNikyKGVyQ==" crossorigin="anonymous"> <title>FlorentAppointaire.cloud</title> </head> <body> <div class="container"> <h1>Hello from ACS</h1> <p>You are running this container on Azure Container Service :)</p> </div> </body> </html> |
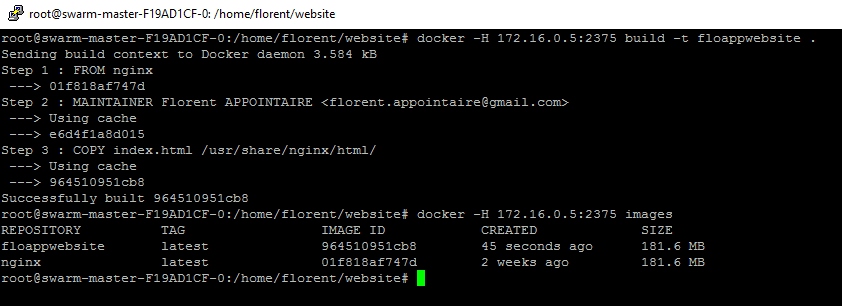
Execute the following command to build the image:
|
1 2 3 |
docker -H 172.16.0.5:2375 build -t floappwebsite . docker -H 172.16.0.5:2375 images |
And to deploy it:
|
1 2 3 |
docker -H 172.16.0.5:2375 run --name floappwebsite -d -p 80:80 floappwebsite docker -H 172.16.0.5:2375 ps |
You can see on which node the container is running.
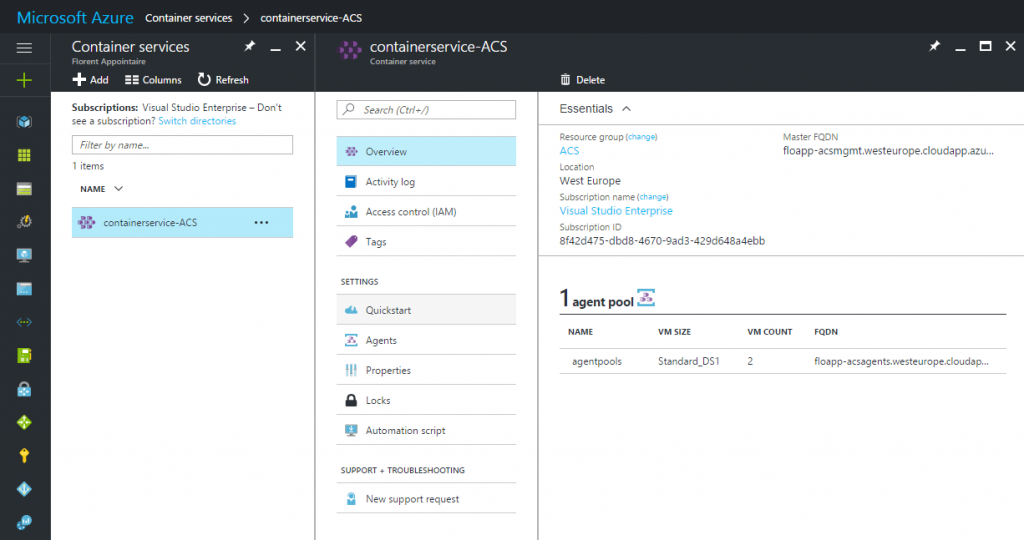
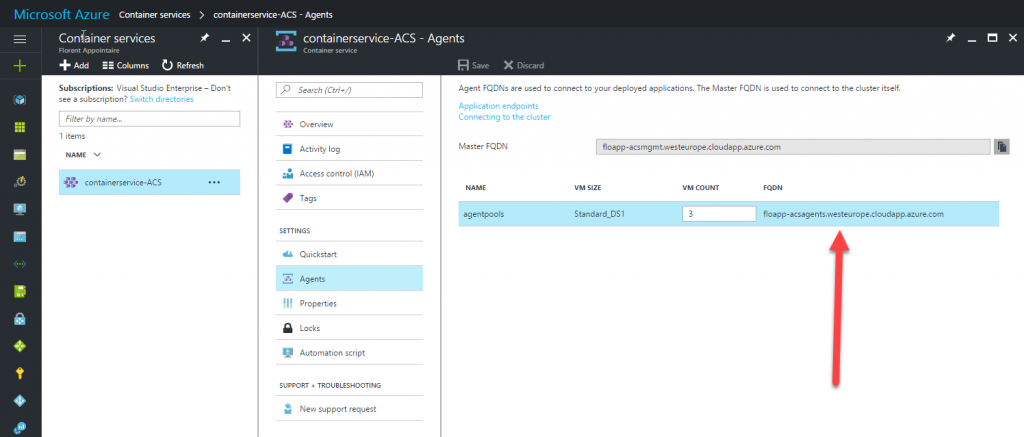
To access the website publicly, go on your Azure interface, in the ACS part, in your ACS and on Agents. Here, select the URL bottom the FQDN:
Open it in a browser. You should have this:
If you want to add the node, nothing’s easier J On your ACS, go to Agents and change the value of VM Count, and click on Save (I passed from 2 to 3). A new VM with the new agent will be deployed:
In the next article, we will see the Azure Container Registry (Preview) 🙂


