Microsoft released in February 2019 a new service called Azure Lab service. With Azure Lab Services, you can easily set up and provide on-demand access to preconfigured virtual machines. Thanks to a dashboard, you can also keep your budget in check by controlling exactly how many hours your lab users can use the virtual machines.
Azure lab Service is interesting to deploy the following scenarios:
- Professional training or school classes
- Hackathons
- Hands-on labs
- Environments for demo
- Machines for development and test environments
In the Lab Account configuration you can also specify whether the resources created in the lab are connected to a specific virtual network. It is nice if you need to connect two labs between them.
This article shows how to enable and configure the service and explores the main features of the solution.
Creating the lab account
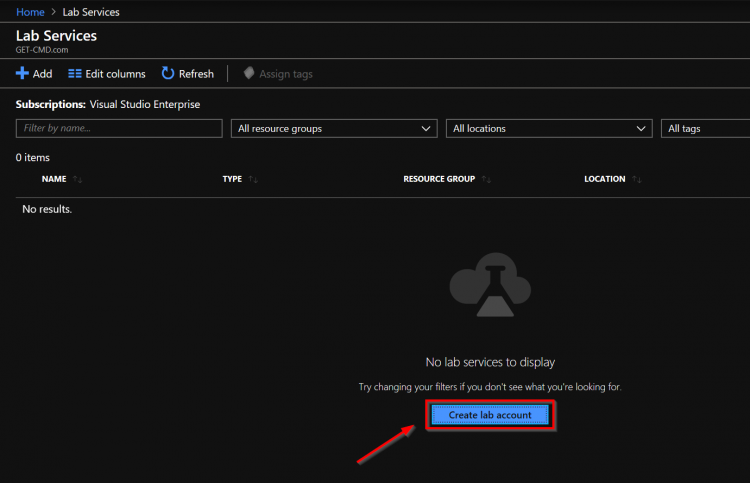
Open the Azure Portal and navigate to Azure Lab Services. Click “Add” to create a new lab account.
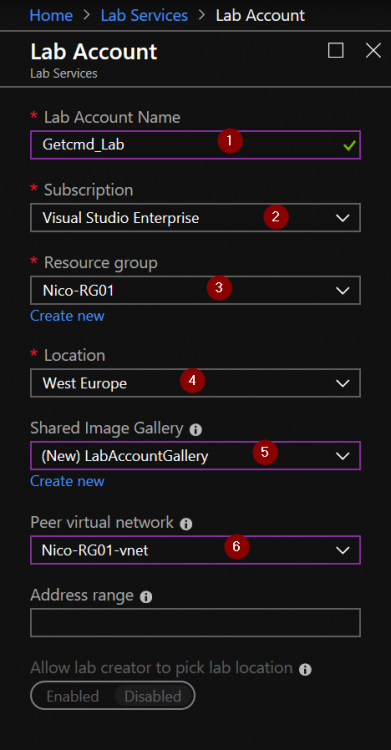
Enter the following information:
- The Lab Account name
- Select the subscription
- Select a Resource Group or create a new one
- The location where the lab account will be located
- A peer Virtual Network
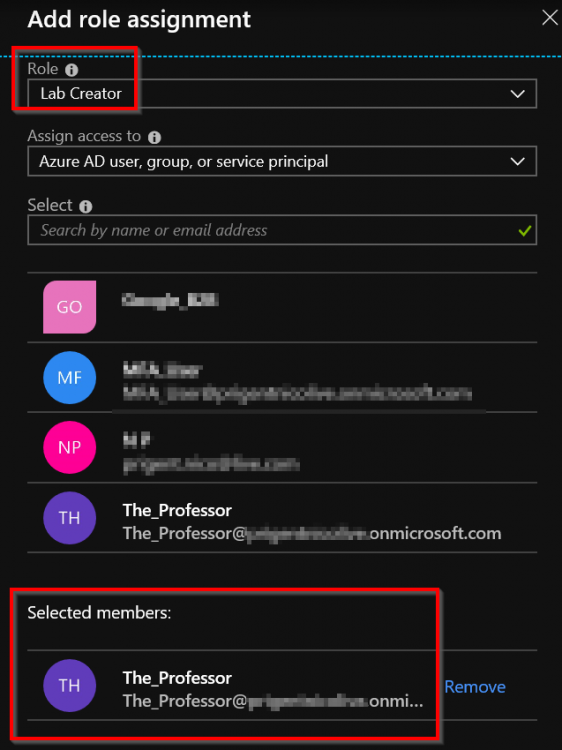
When the Lab Account is created, you must add the Lab Creator role to an existing Azure AD user. If you don’t have an existing account, you must create a new one.
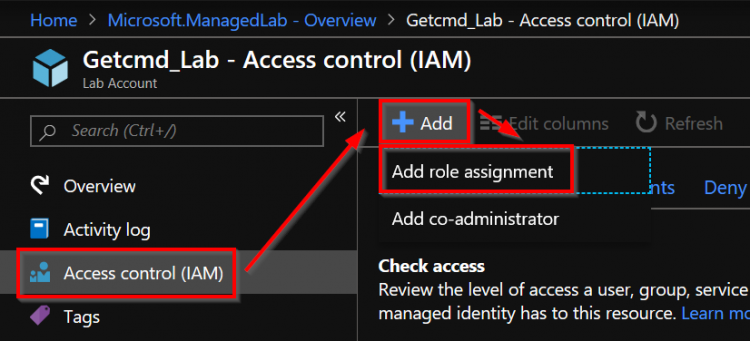 In this article, I created a sample user named ”The Professor”
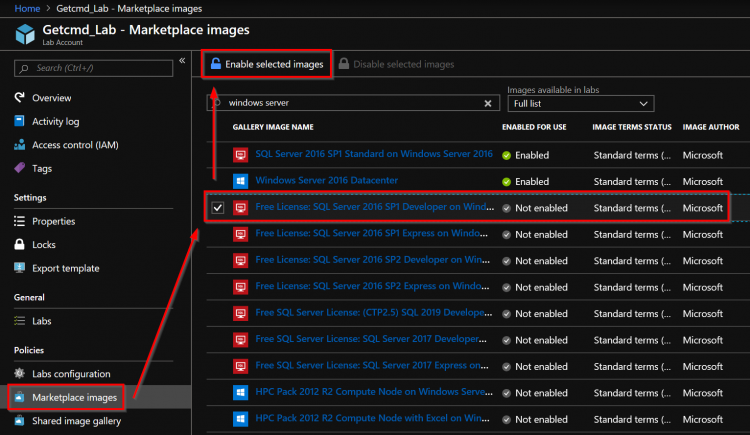
In the lab configuration, you can specify which of the Azure Marketplace images you can make available. The Lab Creator user will be able to create a template based on these images. To enable an image, you just need to select the image and click “Enable selected images”
Creating the lab
When the lab account is created and configured in the Azure portal, you have to create the lab from the following website: https://labs.azure.com/
Log in with the account created previously (e.g “The_Professor”) and click “Add” to create a new lab, setting its name and the maximum number of VMs. The limit can be increased later to suit your needs.
Click “Save” and select the Virtual Machine specifications:
- Core
- RAM
- VM Image
At this step you must specify the credentials to access the virtual machines. It is very interesting in order to create the same administrator account in all Virtual Machines.
 Wait until the template is created
At the end of this creation process you can make changes to the virtual machine template, by directly connecting via Remote Desktop, such as the installation and configuration of additional software.
 When you are happy with your template, you can proceed with the template publication. By clicking ”Publish”
Wait a few moment …
When the template is published, you can see the following dashboard:
- Manage your Virtual Machines
- Set lab schedules
- Add users to lab
 You can allow user to use the lab during specific schedules.
To finish, click “Users” in order to register a user in the Lab :
The user can access to the Azure Lab Services site and use the lab environment virtual machine assigned to him.
Note that users don’t need Azure subscriptions to use the service.
You can confirm that your lab is ready to be used in the Azure Portal by clicking “Labs”
Conclusion
Azure Lab Services is in General Availability, so I advise you to try Azure Lab Services. Note that you can make suggestions or vote on priorities on the UserVoice feedback forum.


