In 2019, Microsoft released a great new service in Azure called Azure NetApp Files (ANF). This service is a very powerful service that may help you to manage your data in Azure or to migrate your on-prem workload to the Cloud. The announcement is available here: https://azure.microsoft.com/en-us/blog/azure-netapp-files-is-now-generally-available/ and the full documentation is available here: https://azure.microsoft.com/en-us/services/netapp/
In this article, I will explain how to create and manage volumes using Azure NetApp Files.
Difference between Azure Files and Azure NetApp Files
Azure NetApp Files and Azure Files are similar, you can use both to store your data like you would on a file server.
Azure NetApp Files is easy to integrate with modern applications and provides both NFS and SMB protocols. It means that it can be natively mounted to Linux machines. Minimum deployment for Azure NetApp Files is 4TB and maximum is 100TB. To finish, the max file size is 16TB.
You can also replicate ANF using cross region replication and you can easily restore data with the NetApp snapshot. The pricing model can be checked on this page: https://azure.microsoft.com/en-us/pricing/details/netapp/
Getting Started
Start by registering the resource provider that will help you to use Azure NetApp Files (e.g ANF). Go to the Azure Portal and open the Cloud Shell. Then, copy/paste the following commands:
az account set --subscription <subscriptionId>az provider register --namespace Microsoft.NetApp --waitThen, you can confirm if the provider is registered in your subscription. Run the following command:
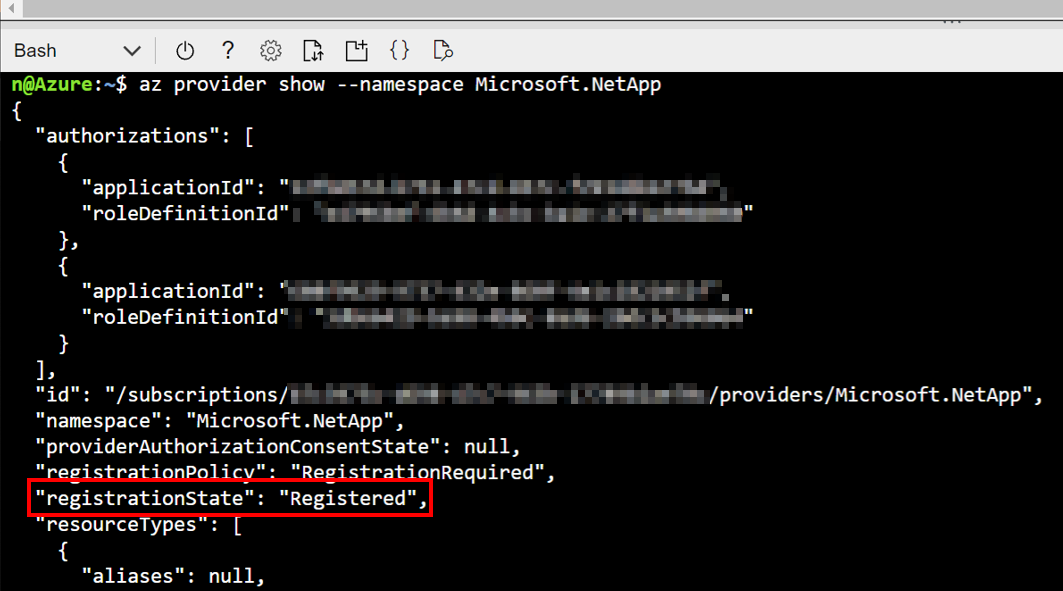
az provider show --namespace Microsoft.NetAppYou can also use the following command to list the ANF feature:
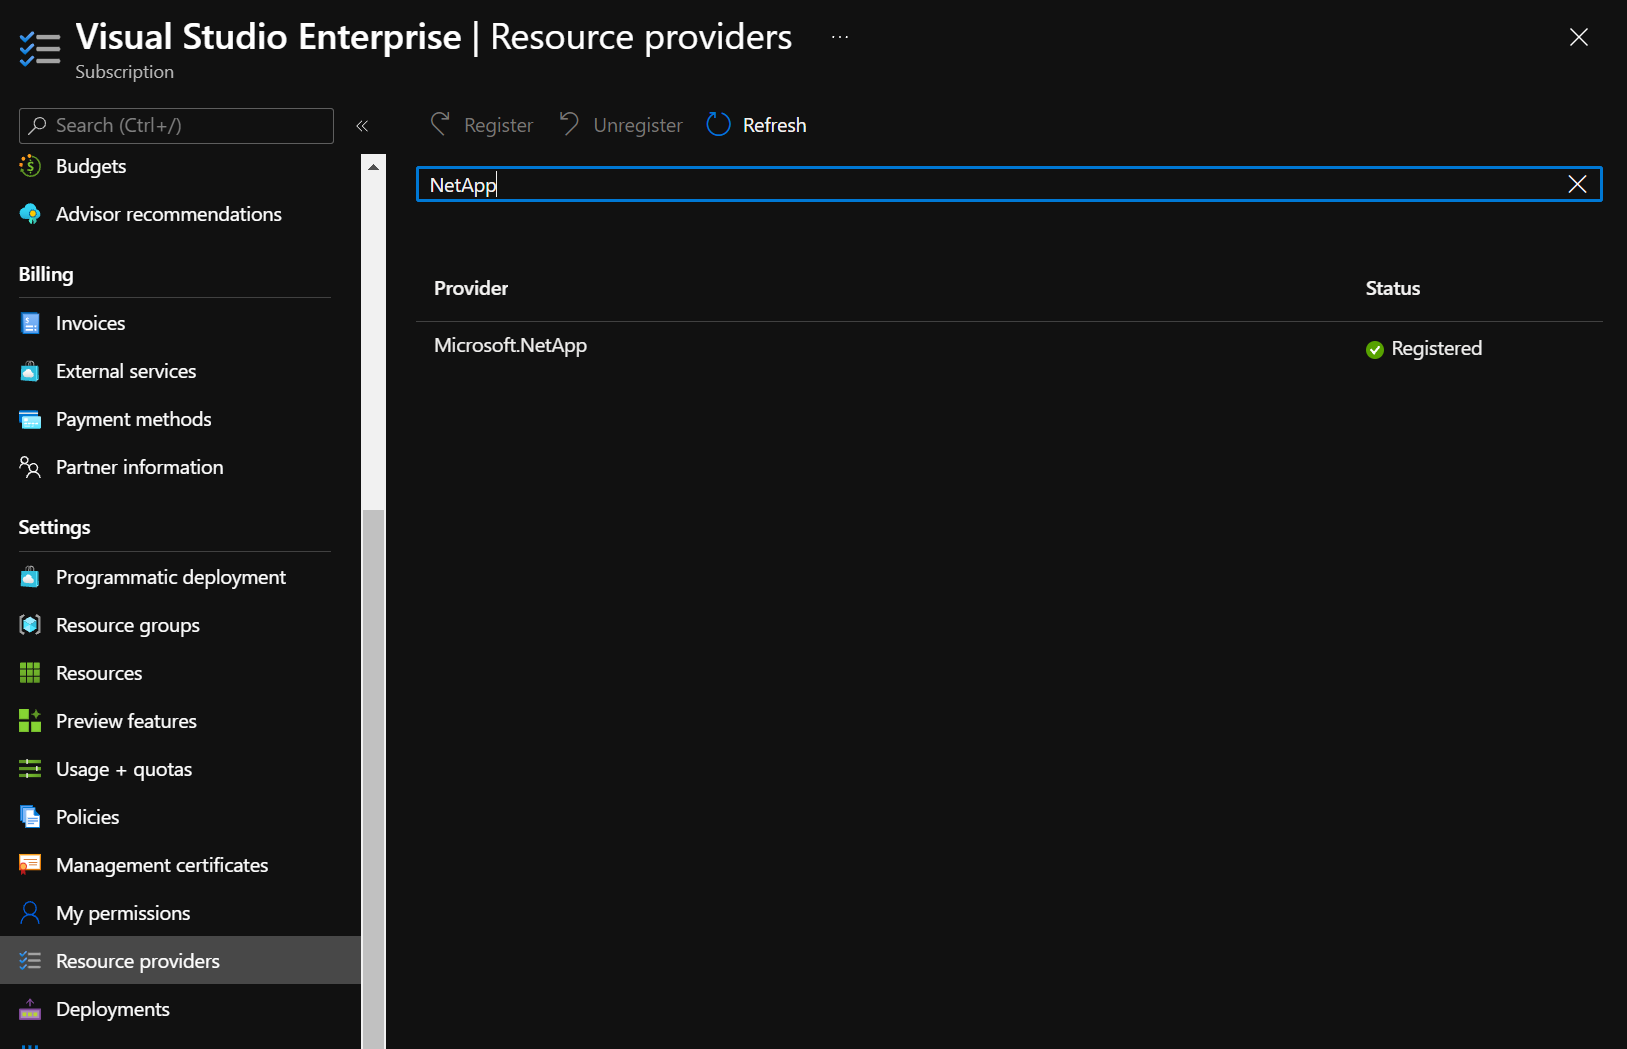
az feature list | grep NetAppBasically, you can check the provider in the Azure portal as well:
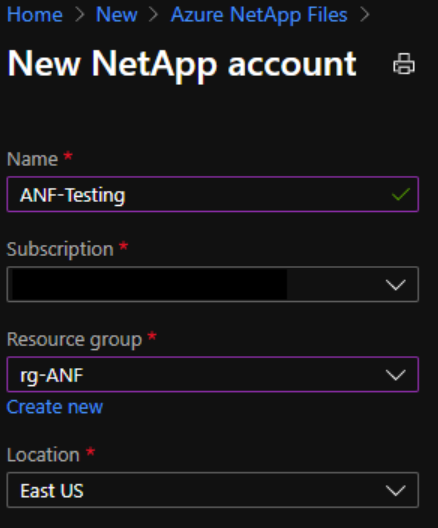
Now, we can start working with Azure NetApp Files. Go to Azure NetApp Files section, and click “Create” to create your first ANF account:
You need to enter:
- the name,
- the subscription,
- the resource group,
- and the location
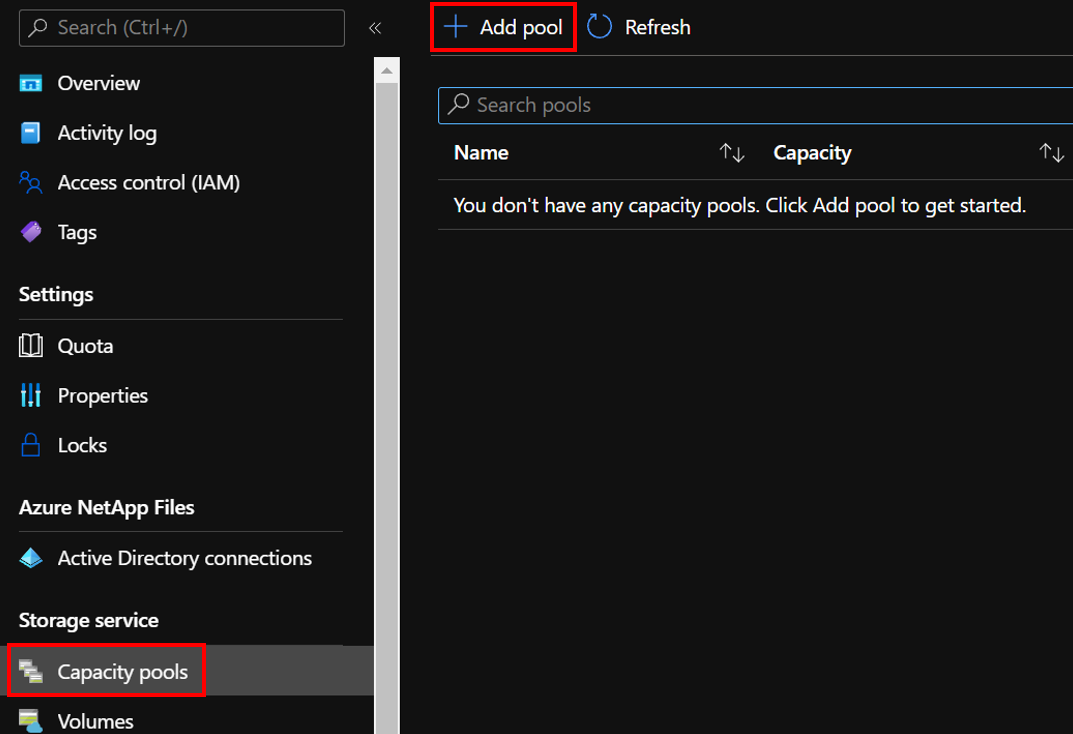
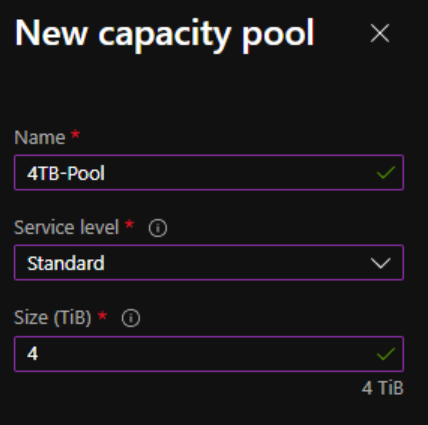
Now, we can create the capacity pool. Go to “Capacity Pools” and click “Add pool”.
You need to enter the name of the capacity pool, the service level and the size. Note that 4TiB is the minimum.
Once the pool is created, you will see the following.
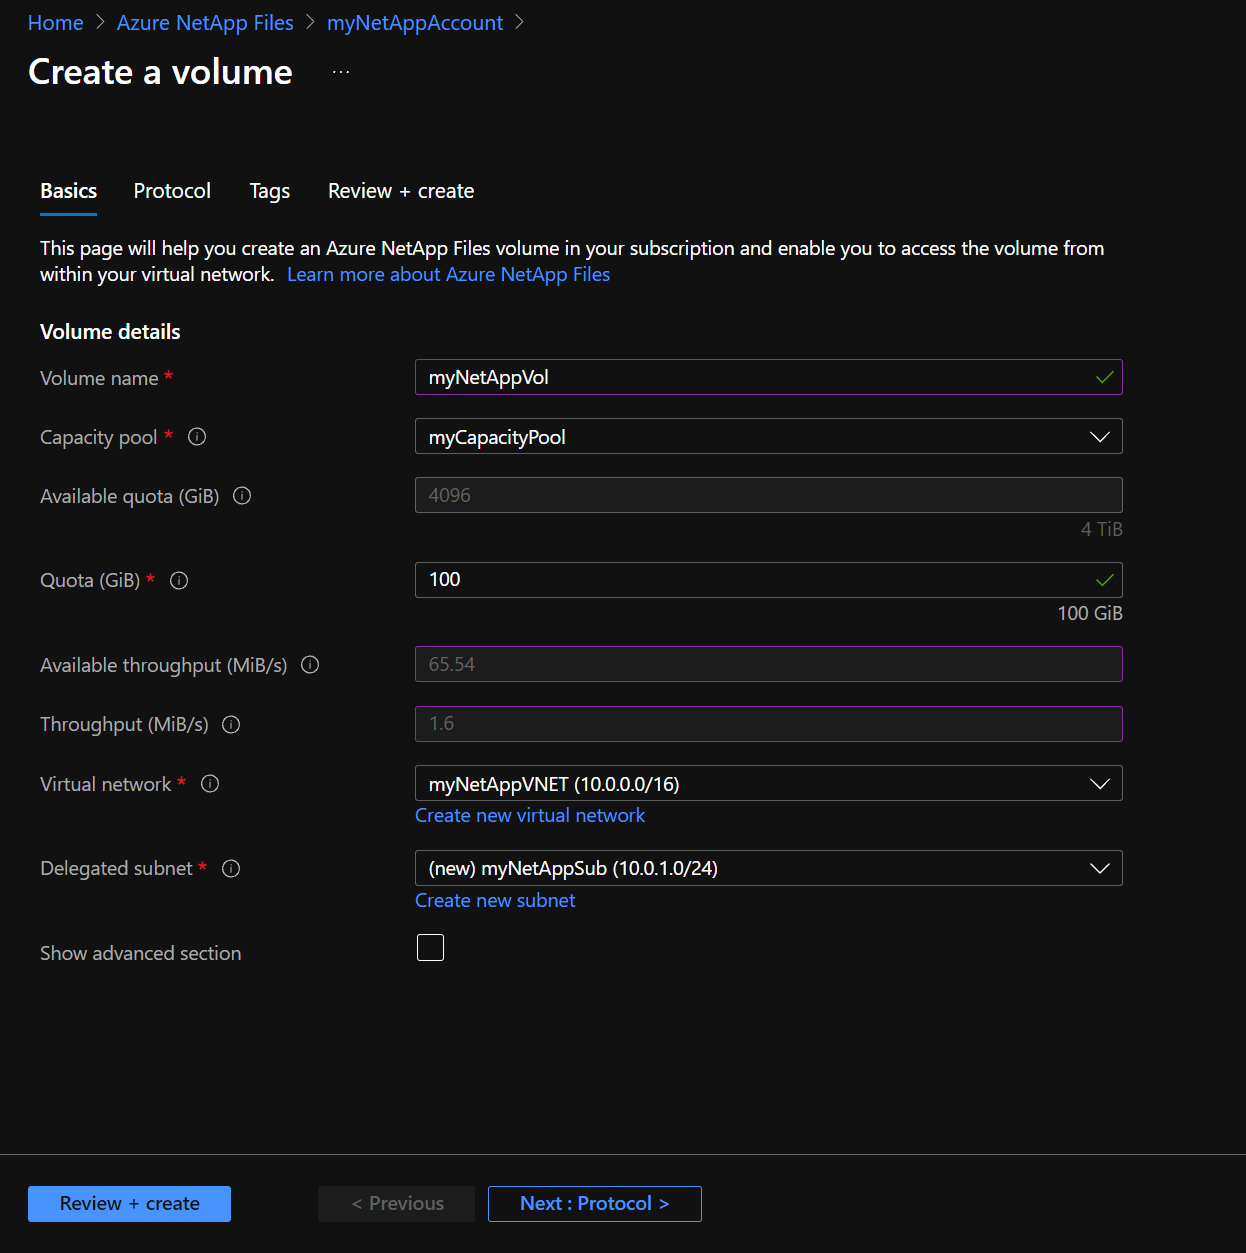
You can now create the volume which will be located on the volume previously created.
We need to give some information to create the volume. First, we need to enter the name, select the capacity pool and the virtual network with the delegated subnet. This subnet is dedicated to these resources and can not be shared with other Azure resources.
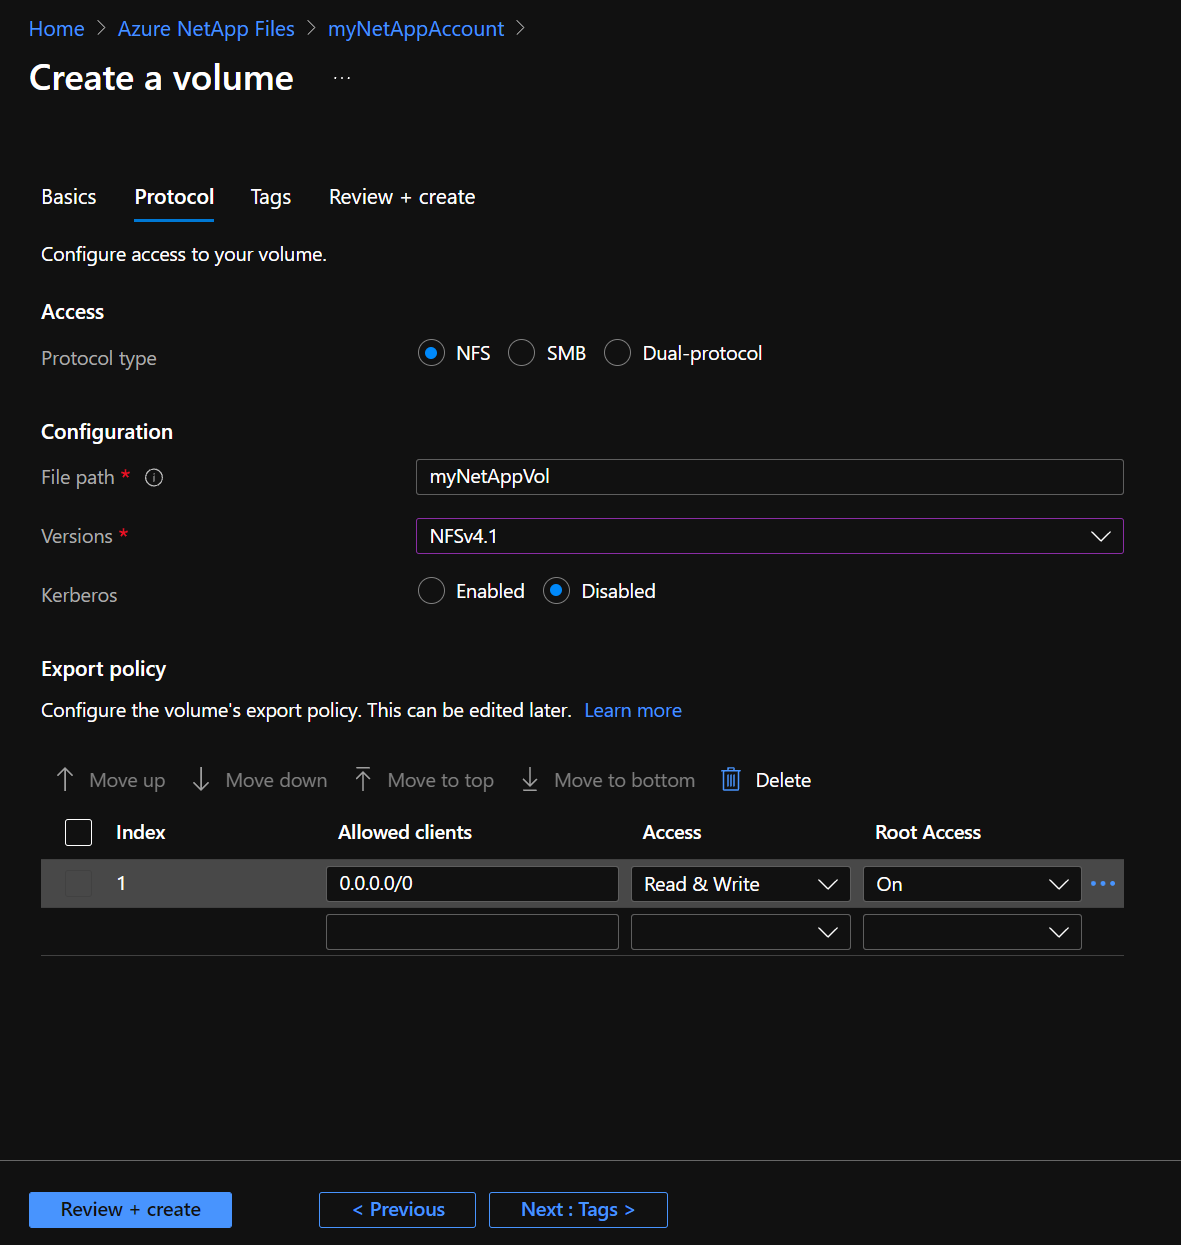
Move to the second tab to configure the protocol that you want to use. You can also select the version and you could also connect with your Active Directory. Azure NetApp Files supports only one Active Directory connection within the same region and the same subscription.
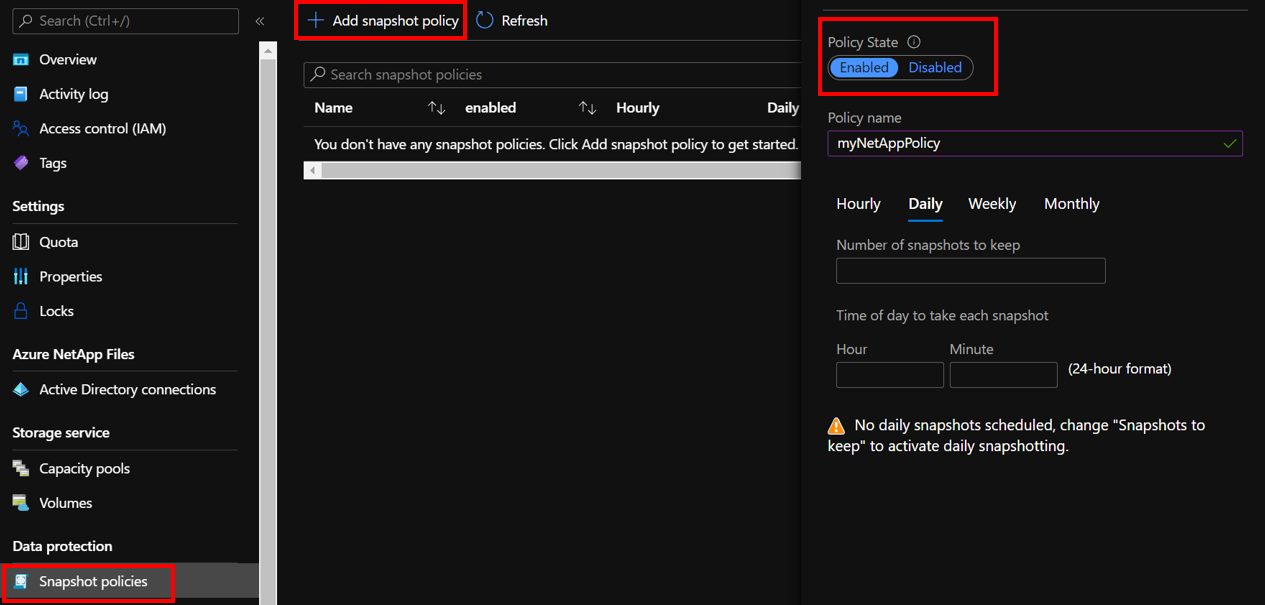
Then, go to “Snapshot policies”, and click “Add snapshot policy”.
Then, I deployed a Linux Virtual Machine in the same VNet and I installed the NFS support tool.
Sudo apt-get install nfs-commonThen you can mount your NetApp share with the following command:
Sudo mount -t nfs -o rw,hard,rsize=1048576,wsize=1048576,sec=sys,vers=4.1,tcp 10.0.1.4:/MyNetAppVol mynetappvolDon’t be afraid, when you move to the volume section in the Azure portal, you will see the “mount instruction” tab, and you will be able to copy/paste this command. 
Now, switch on a Windows 11 Virtual Machine, and install the advanced feature ”Client For NFS”.
No need to restart your computer, you can now map a new network drive to your Azure NetApp Files share.
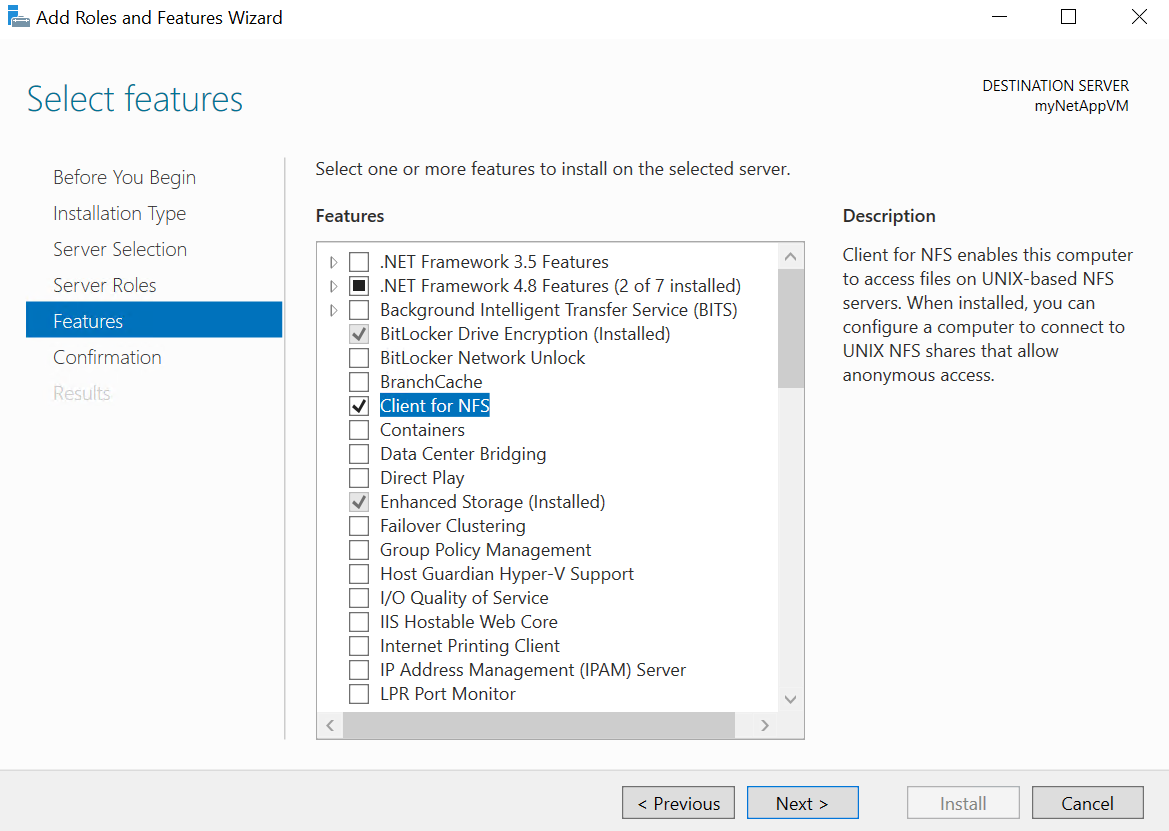
Of course, you can do the same thing on your Windows Server. Install the feature “Client for NFS” and map your network drive.
You can now repeat these steps to create your Azure NetApp File volumes very easily.


