First, just a few words about Storage Spaces Direct (S2D) fault tolerance levels. S2D allows building a mirrored spaces array. There are two flavors of mirroring: “two-way” and “three-way” mirroring. The former, tolerates one hardware failure (drive or server) at a time, while the latter can withstand two hardware problems (drive or server).Two-way mirroring creates two copies of data. Its storage efficiency reaches 50% – to write 1TB you need 2TB of storage. Three-way mirror, in its turn, keeps three copies of everything. It is 33 % efficient (you need 3 TB storage to write 1TB of data). There are also other options (parity, mirror-accelerated parity, etc.), but I’m not here to talk about S2D fault tolerance levels, and moreover, Microsoft recommends using just mirroring for most performance-sensitive workloads. So, if you want to learn more, just look through materials Microsoft has on this topic.
But what exactly should you do to resolve the failed disk problem?
First, let’s find that guy
If your disk goes into “Unhealthy” state and has the transient error status, that may be the high time to replace it. Type the following command to check cluster health:
|
1 |
<em>Get-StorageSubSystem *Cluster* | Get-StorageJob</em> |
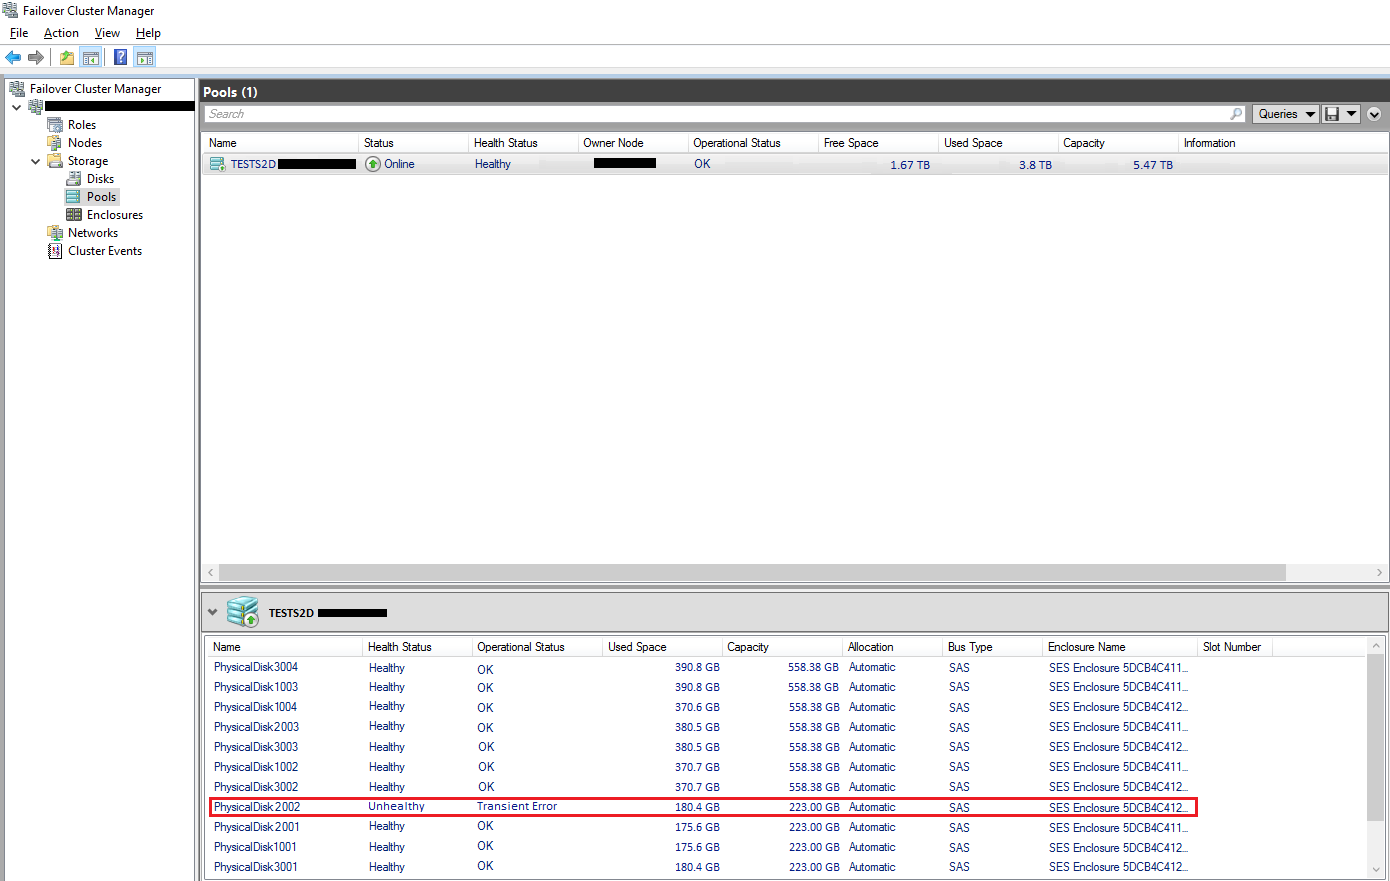
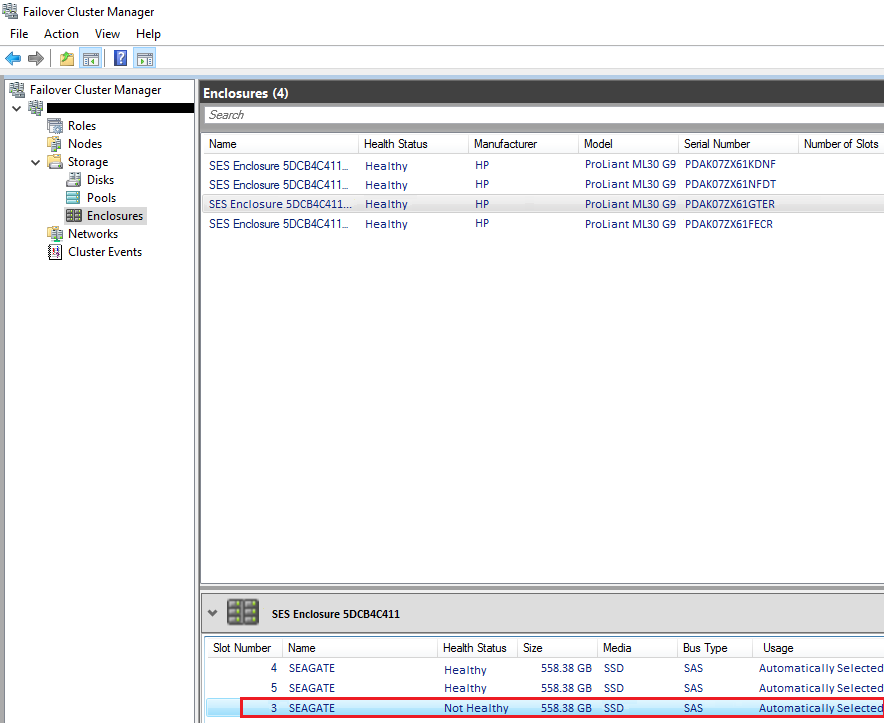
Malfunction of a single disk is displayed in Failover Cluster Manager (access by Storage -> Pools) just as in the screenshot below.

Also, you can gain all the necessary information about the storage pool health using PowerShell:
|
1 |
<em>Get-StoragePool *TESTS2D* | Get-PhysicalDisk</em> |

Next, to manipulate the disk, add the physical disk object as a PowerShell variable. For that purpose, use:
|
1 |
<em>$Disk = Get-PhysicalDisk |? OperationalStatus -Notlike ok</em> |

Retire and pinpoint the disk physically
Now, let’s stop any write operations on the disk to prevent possible data loss. Run:
|
1 |
<em>Set-PhysicalDisk -InputObject $Disk -Usage Retired</em> |

Remove the failed disk from the storage pool with the following cmdlet:
|
1 |
<em> Get-StoragePool *TESTS2D* | Remove-PhysicalDisk –PhysicalDisk $Disk</em> |
There may be the warning, telling that the device is not responding. Well, but did you expect something else?
In order to identify that disk quickly, turn on its LED:
|
1 |
<em>Get-PhysicalDisk |? OperationalStatus -Notlike OK | Enable-PhysicalDiskIdentification</em> |
Note: You can switch on LEDs only in Windows Server 2016. The physical server, in its turn, should support SES Enclosure Storage protocol.
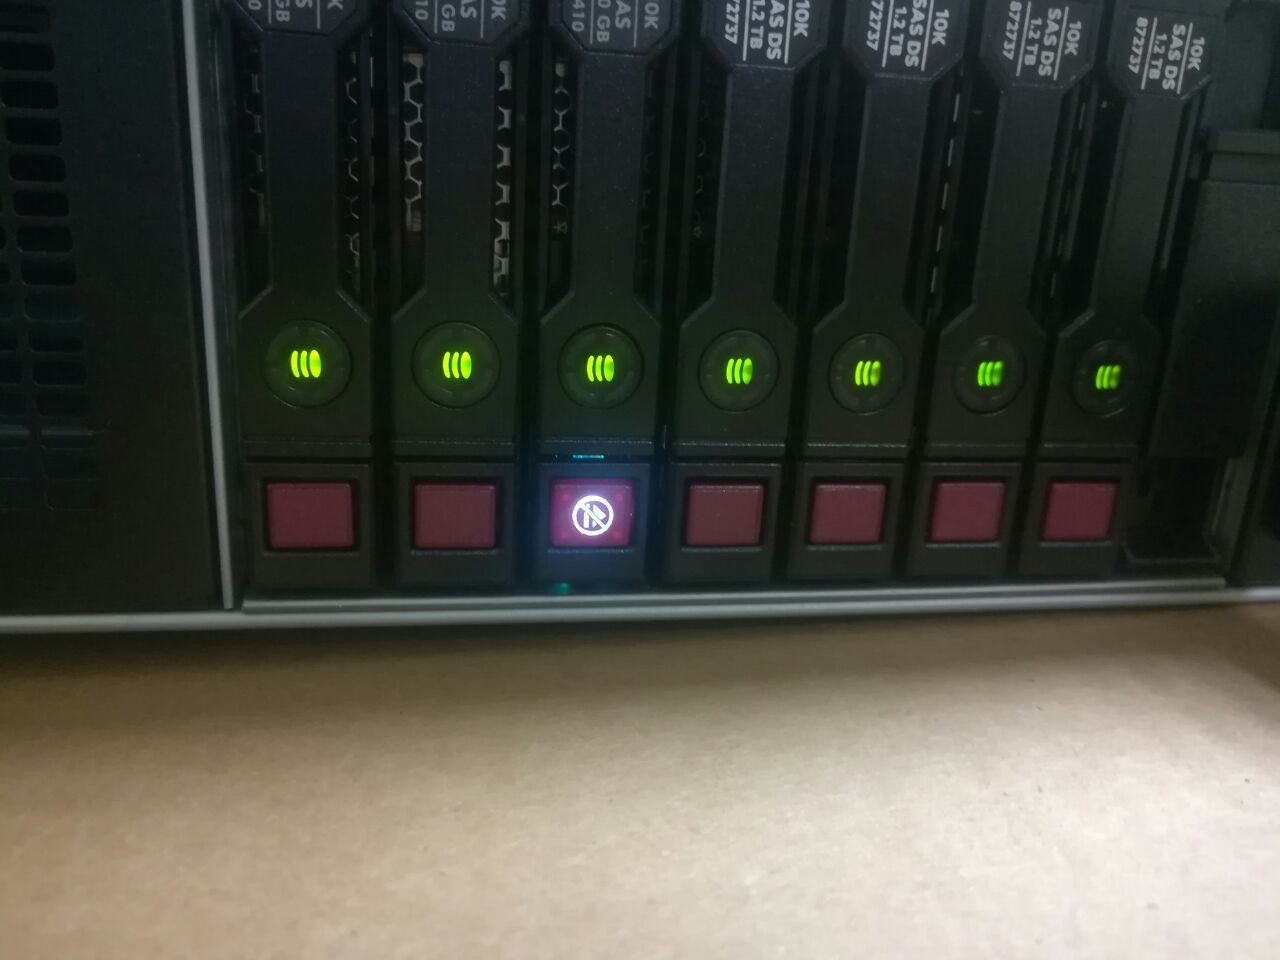
Now, have a walk to the server room, and find the failed disk. Obviously, it will be the only one that has its LED on.

Once you replace it, don’t forget to switch off the LED:
|
1 |
<em>Get-PhysicalDisk |? OperationalStatus -like OK | Disable-PhysicalDiskIdentification</em> |
Add the disk to the storage pool
If you connect a new disk, don’t forget to initialize it. Make sure the disk is online and formatted as GPT. Now, check whether OS has detected the disk as suitable for joining the S2D pool. Type the following cmdlet for that purpose:
|
1 |
<em>$Disk = Get-PhysicalDisk | ? CanPool –eq True</em> |

Note: Sometimes you may need to reboot the server to ensure the proper disk identification.
Add the new disk to the pool with the following command:
|
1 |
<em>Get-StoragePool *TESTS2D* | Add-PhysicalDisk –PhysicalDisks $Disk –Verbose</em> |

Afterwards, S2D spreads data automatically across all disks. In order to check the progress of rebalancing run the following command:
|
1 |
<em>Get-StoragePool *TESTS2D* | Get-StorageJob</em> |
Well, that’s it!
Conclusion
As you can see, changing a failed physical disk on Storage Spaces Direct in Windows Server 2016 is usually not a big deal but needs some decent PowerShell skills. Fortunately, Microsoft makes it fairly simple in S2D with only three steps: set it physically as retired, remove it from your server, and join the new one. Enjoy!


