In a Microsoft Azure subscription, a lot of activity can occur. Administrators can delete, update or create resources. Moreover, several users in a single subscription can do these tasks if they have the right permissions. To trace activities, Microsoft provides activity log attached to each resource and resource group in Azure. The below capture has been taken in a resource group activity log.
Activity logs are useful to trace changes that occurred in a subscription. If a service went down because of a change, you can review all modifications applied to this service. These activity logs enable also to get input in case of deployment errors.
Natively, activity logs are not centralized and if you have a complex infrastructure spread in several resource groups, it can be difficult to use them to troubleshoot an issue. Thanks to Log Analytics, you can add a solution to centralize activity logs. In this topic, we will see how to install this solution and the benefits. To follow this topic, you need a running log analytics workspace.
Deploy the solution
To deploy the solution in the log analytics workspace, navigate to the marketplace. Inside the marketplace, specify activity logs in the search bar. Then select Activity Log Analytics.
Then click on Create to start the deployment wizard.
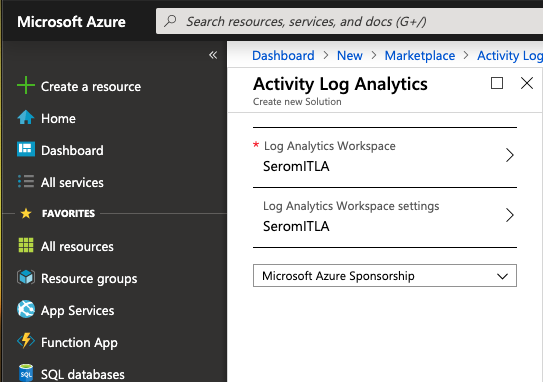
In the wizard, specify your log analytics workspace and your subscription. The solution will be deployed in this workspace.
Once the deployment is finished, you can check in your log analytics workspace if the solution is available. Its name is AzureActivity.
Work with the solution Azure Activity Log
First, check if the solution is connected to your Azure subscription. To verify that, open your log analytics workspace and navigate in Workspace Data Sources > Azure Activity Log. The log analytics connection status should be connected.
Then open the workspace summary. You should get a tile called Azure Activity Logs. After you enabled the solution, it can take a while until you get information in the workspace. The tile can be pinned into the dashboard to get information about activity logs at a glance. If you click on the tile, you can get more information about activity logs.
The following screenshot introduces the information you can get in this solution. All information is centralized and you can review quickly who has made the most change and the status of change (failed, succeeded, etc.)
If you click on a “caller”, you can review all operations made. It’s based on log analytics query so you can create your own queries to get the information you need.
The Activity Logs by Status tile enables to get an overview of the change states. If you click on a status (failed for example) you can list all failed logs.
As above, you can create your own queries to find the information you need.
The last tiles enable you to get which resources have the most change and which kind of resource are mostly changed. In the below example, it seems I work a lot on computing and network resources in a resource group called Mig-RG… How do I know it’s a resource group? Because I named my resource group with RG letters. So the naming of your resources is really important to quickly retrieve the information you need.
Conclusion
Microsoft Azure provides a great way to trace changes. For small solutions deployed you can leverage activity logs in each resource. However, for complex solutions, you should get advantages by centralizing activity logs in log analytics. It can help you to troubleshoot issues after a change occurs in your solution.


