Introduction
This article describes the deployment of a Ceph cluster in one instance or as it’s called “Ceph-all-in-one”. As you may know, Ceph is a unified Software-Defined Storage system designed for great performance, reliability, and scalability. With the help of Ceph, you can build an environment with the desired size. You can start with a one-node system and there are no limits in its sizing. I will show you how to build the Ceph cluster on top of one virtual machine (or instance). You should never use such scenario in production, only for testing purposes.
The series of articles will guide you through the deployment and configuration of different Ceph cluster builds.
Virtual Machine Deployment
Before you begin, you can download our pre-deployed OVF template. In case you want to look at Ceph from the inside, proceed reading the article
We are going to use Debian 8 as a base OS. You can download it here:
https://cdimage.debian.org/cdimage/archive/8.8.0/amd64/iso-cd/debian-8.8.0-amd64-netinst.iso
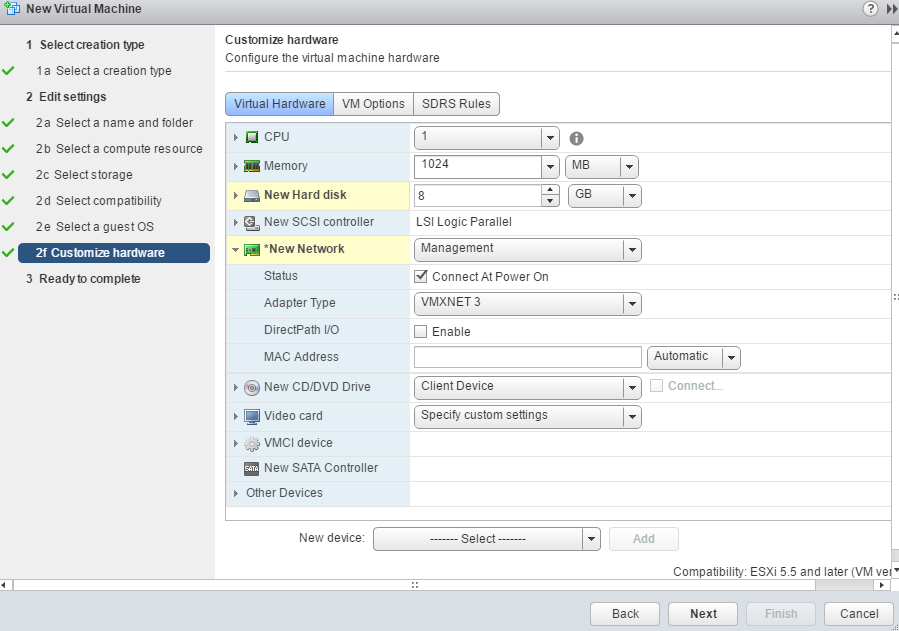
First, we are going to create ESXi VM with the following settings:
Of course, the next step is to install the OS. You can find a detailed guide about the OS installation here:
StarWind® Ceph all-in-one Cluster: How to deploy Ceph all-in-one Cluster
Configuring the Virtual Machine and the operating system
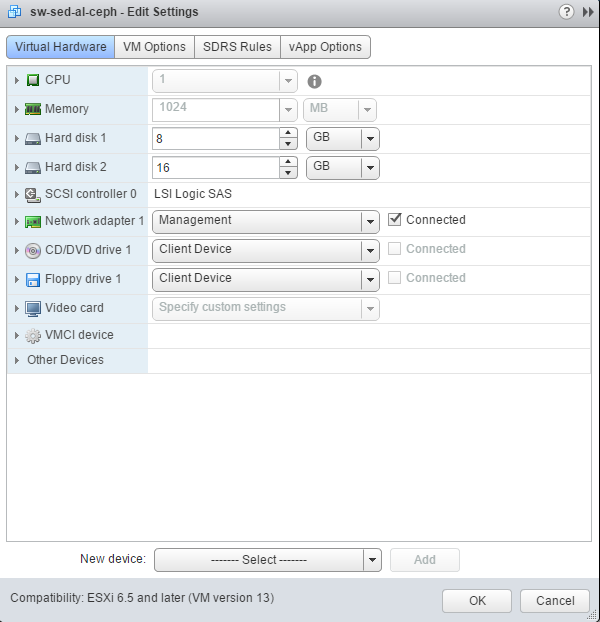
We need to add the Virtual Disk with a desirable size to the VM. The VD is going to be used by Object Storage Daemon. I started with a small one – 16 GB.
Let’s boot the VM into the recently installed OS and log in to it using the root account. Update Debian using the following command:
apt-get -y updateInstall the packages and configure NTP.
apt-get install -y sudo python python-pip ntp;

systemctl enable ntp;

systemctl start ntp;
We need to add the user (the one we have created during the installation) to sudoers (where %USERNAME% is the user account you have created during the OS installation):
usermod -aG sudo %USERNAME%;

echo "%USERNAME% ALL = (root) NOPASSWD:ALL" | sudo tee /etc/sudoers.d/%USERNAME%;

chmod 0440 /etc/sudoers.d/%USERNAME%;
Now, I am going to connect to the VM via SSH, using a new account.
Configure SSH:
Generate the ssh keys for %USERNAME% user:
ssh-keygenLeave the passphrase as blank/empty.
Edit file id_rsa.pub and remove “%USERNAME%@host” (name of the user) at the end of the string
nano /home/%USERNAME%/.ssh/id_rsa.pub

cp /home/%USERNAME%/.ssh/id_rsa.pub /home/%USERNAME%/.ssh/authorized_key
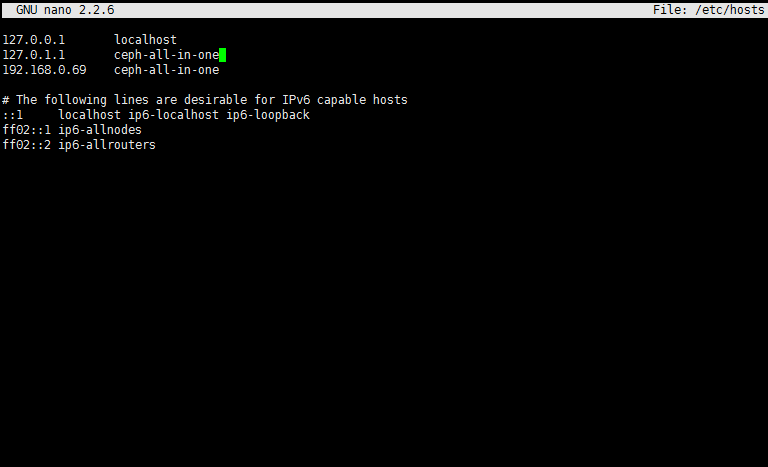
Let’s add host ip (eth0) and a hostname to /etc/hosts
We have prepared our Virtual Machine for Ceph deployment.
Ceph Deployment
Finally, we are going to deploy the “Ceph-all-in-one” cluster. We need to create the directory “Ceph-all-in-one”:
mkdir ~/Ceph-all-in-one;and move to it
cd ~/Ceph-all-in-one;Installing Ceph-deploy is another important procedure:
sudo pip install Ceph-deployCreate new config:
Ceph-deploy new Ceph-all-in-one;

echo "[osd]" >> /home/%USERNAME%/Ceph-all-in-one/Ceph.conf;

echo "osd pool default size = 1" >> /home/sw/Ceph-all-in-one/Ceph.conf;

echo "osd crush chooseleaf type = 0" >> /home/%USERNAME%/Ceph-all-in-one/Ceph.conf;
Next, I am going to install Ceph and add a monitor role to the node:
Ceph-deploy install Ceph-all-in-one;(“Ceph-all-in-one” is our hostname)
Ceph-deploy mon create-initial;

Ceph-deploy osd create Ceph-all-in-one:sdb;
(“Ceph-all-in-one” our hostname, sdb name of the disk we have added in the Virtual Machine configuration section)
Let’s change Ceph rbd pool size:
sudo ceph osd pool set rbd size 1
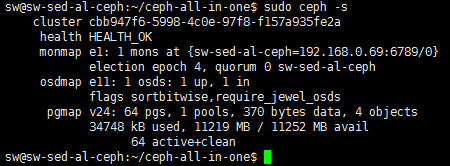
After the deployment, we can check the cluster status:
sudo ceph -sConclusion
We have successfully deployed the “Ceph-all-in-one” cluster allowing you to look at Ceph abilities. You can create the RBD device to store your data. Also, you can add additional OSDs and configure Replicated or Erasure Coded pools, which I am going to cover in the following articles.


