A lot of admins surely remember that when VMware announced the vSphere 8 platform last year, they also introduced a technological preview of the Configuration Profiles technology. The latter is essentially a replacement for the outdated Host Profiles mechanism. In vSphere 8 Update 1, for example, the Configuration Profiles engine is now fully supported in a production environment. As an admin, you can now start using this functionality and migrate previously used host profiles to this environment.
Now, let’s take a brief look at what Configuration Profiles are and what they do. They fulfill three goals:
- Applying the required configuration at the cluster level in the form of a JSON document;
- Verifying whether the hosts in the cluster align with the required configuration;
- Bringing it to the configuration level defined for the cluster (in case they don’t match).
JSON documents are the key to the procedure. If you want to define the cluster and fine-tune parameters, you will have to edit structured JSON files. Naturally, I can only recommend planning in advance which tool you will use for this purpose.
1. Configuration Profiles and settings for a new cluster
Let’s start with the scenario for creating a new cluster using ESXi hosts and utilizing Configuration Profiles. Here, when creating the cluster, select the option “Manage all hosts in the cluster with a single image” for management by Lifecycle Manager. Then choose the option “Manage configuration at a cluster level”:
When the cluster is here, add the ESXi hosts to it:
Now, we do need to configure one of the ESXi hosts to act as the reference host. This step is necessary for setting up all other hosts in the cluster. For example, let’s use the host esx-01. Keep an eye on this process, as these settings will be applied to all hosts in the cluster.
Select our cluster from the Inventory. Then it’s time to go to the Configure tab and navigate to Desired State -> Configuration. Click on the ellipsis (…) and select “Extract from reference host”:
Well, now, you can download the configuration for this selected host in JSON format:
Open the JSON file:
There will be two main sections of parameters. First is configuration settings that can be applied to all hosts. Another one is dedicated to individual settings specific to this host (such as IP identification) that are listed in the “host-specific” section.
Now, this particular section containing the host identifier (UUID) and its parameters needs to be copied into a separate document. Also, you are free to use multiple documents based on the number of hosts in your cluster:
Modify the parameters that will be applied to the cluster hosts (IP addresses, names, etc.):
Once all the parameters are in place, modify the host identifiers (UUIDs) in the top line of all files. These identifiers can be found in the very same Configuration section:
Once you’ve done replacing all the UUIDs for the hosts, it’s time to copy all the configuration blocks from the files into the host-specific section after the first host, esx- 01.
Now, use any online JSON validator to verify the correctness of the resulting file.
As a next step, return to the Configuration section. Then click on Import to upload our generated file as the required cluster configuration:
In the Compliance section you can see that the cluster has passed the verification. The host esx-01 is displayed as Compliant, while the other hosts show an error. Keep in mind that this is how it should be since the other hosts require configuration.
If you were to click on the other hosts, it is clear that they have unconfigured parameters. There are set in the cluster specification that we just uploaded:
Finally, simply click the Remediate button. It will configure all the hosts in the cluster according to this specified configuration:
Hosts may be put into maintenance mode during the configuration application process (in case the applied settings do need that).
After the settings are successfully applied, all cluster hosts will be displayed as compliant:
2. Adding a new host
Now that we have a fully compliant cluster with ESXi hosts, what do we do with it?
At this point, we add the ESXi host as usual, and automatic compliance checking will begin. It will result in an error indicating that the new host is not present in the cluster’s configuration:
Let’s export the current cluster configuration by clicking the Export button in the
Settings section:
After it’s done, open this configuration. Then, go to the host-specific section, copy the last host settings block, paste it at the end, and modify the settings for the fourth host in that fragment. Don’t forget to specify its UUID, which we get from the vSphere Client:
Next, save this file and validate its JSON format. Then return to the cluster and import the obtained configuration:
After conducting compliance checks, the host’s status will change from Error to Non-compliant, which means that there are some non-matching parameters:
Click the Remediate button, and the configuration of host esx-04 will match the cluster’s configuration:
3. The cluster configuration
Let’s entertain a scenario where you need to change something in an already operational cluster (for example, adding a VMkernel port for vSAN infrastructure). To do so, we have to make the corresponding settings in the configuration of host esx-01 by adding the vmk3 interface:
After the compliance check, you can see that host esx-01 does not match the cluster’s configuration:
Export the cluster configuration one more time:
Also, export the configuration of host esx-01:
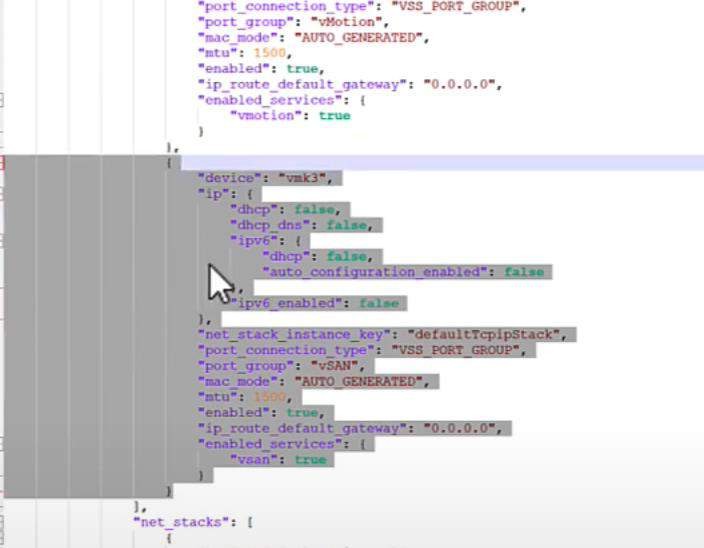
We can now find the section related to the vmk3 interface in the host’s configuration file:
Time to copy this section and paste it into the cluster’s configuration file in the same place where it was taken from the host’s configuration.
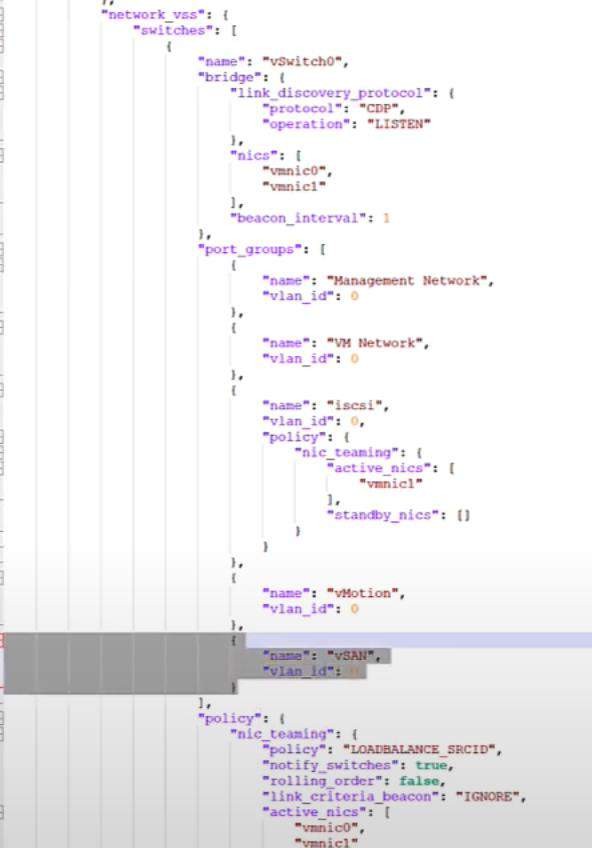
As a next step, we now have to copy a portion from the host’s configuration file that concerns the port group configuration on the virtual switch. Then, we need to paste it into the cluster’s configuration file under the port_groups section:
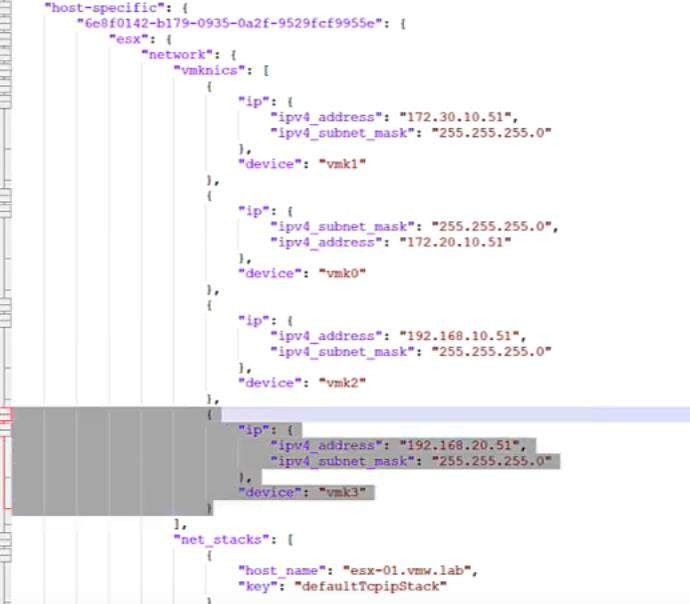
An interesting point is that the vmk3 interface has its own IP configuration, and it needs to be applied to all hosts with their respective parameters. So we need to copy this little bit from the host-specific section:
Finally, we have to paste this portion into the corresponding section of each host in the cluster’s configuration in order to modify the IP identification parameters for each host. You need to be careful with brackets and the choice of insertion point, though. Try using a specialized editor like Notepad++.
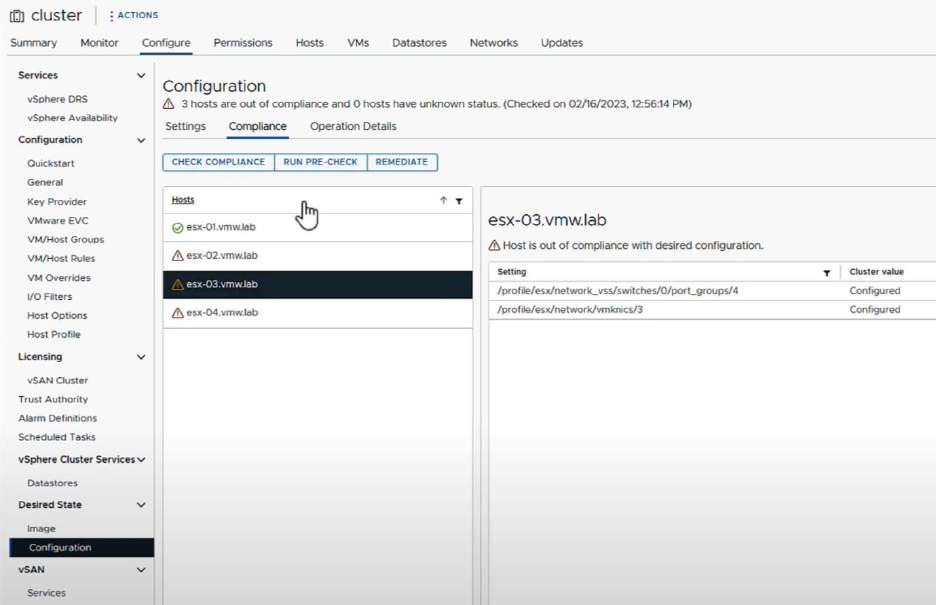
When the cluster’s configuration file is saved, time to validate its JSON format and import it as the main cluster configuration by clicking the Import button. As a result of a compliance check, host esx-01 becomes the only correct host! The other three are marked as Non-compliant because they lack the new interface:
Now, click on Remediate, and all cluster hosts will be brought into alignment. Each host receives the new vmk3 interface:
4. Migration from Host Profiles with Distributed Switch
Starting from vSphere 8 Update 1, the Configuration Profiles functionality comes to support vSphere Distributed Switch. That means if you already have it configured in your infrastructure and managed through Host Profiles, you can migrate it to be managed by Configuration Profiles.
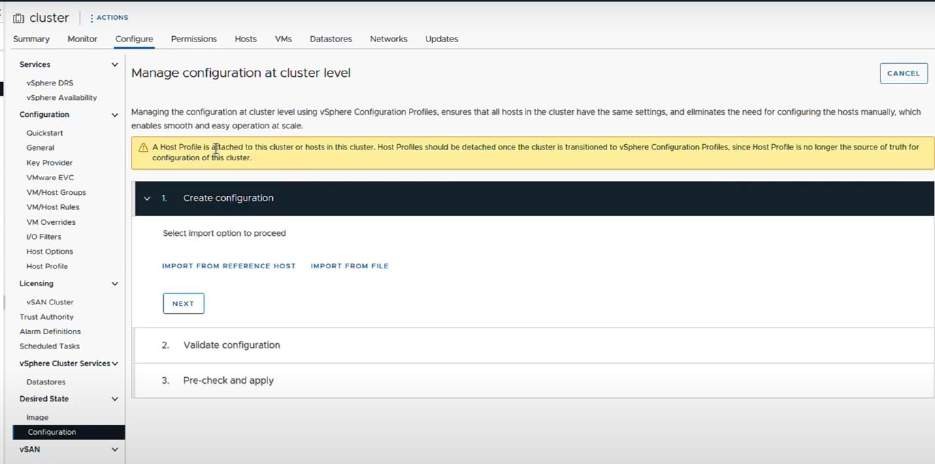
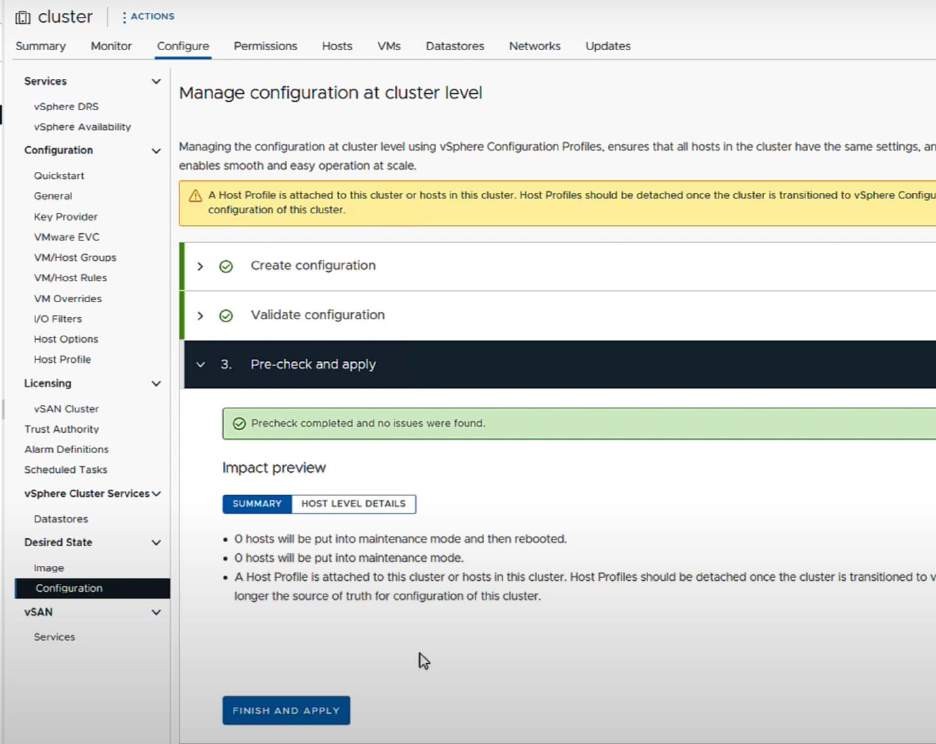
Let’s try this one as an example. First, we go to the Configuration Profiles management section and click on Create Configuration. Next, we see a warning that the cluster hosts are associated with a Host Profile and that we need to detach the cluster from their management and associate it with Configuration Profiles:
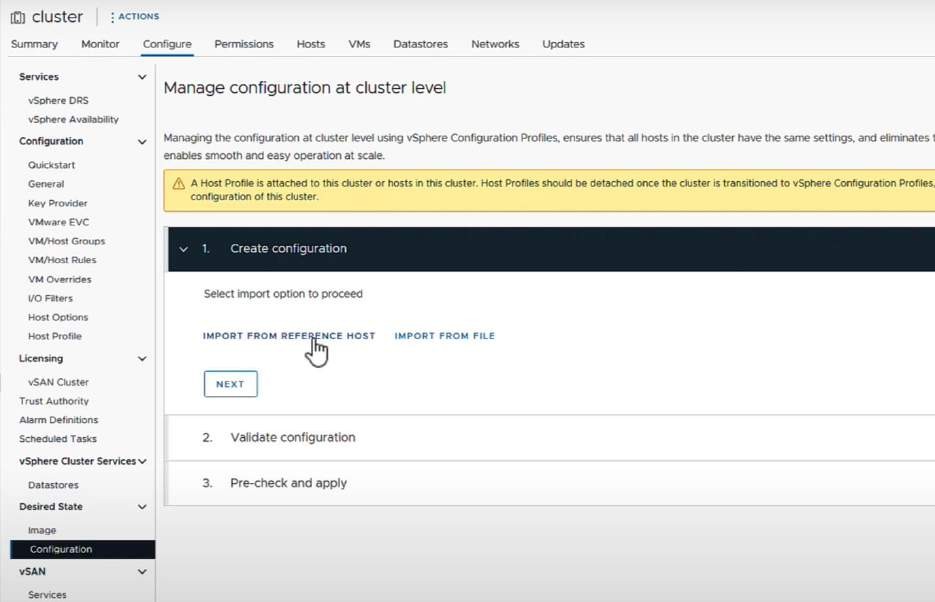
Let’s begin with creating a cluster configuration. We import it from one of the hosts, for example, esx-01. Click on the Import from reference host button:
Click on Next and validate the configuration. All hosts in the configuration should be compliant:
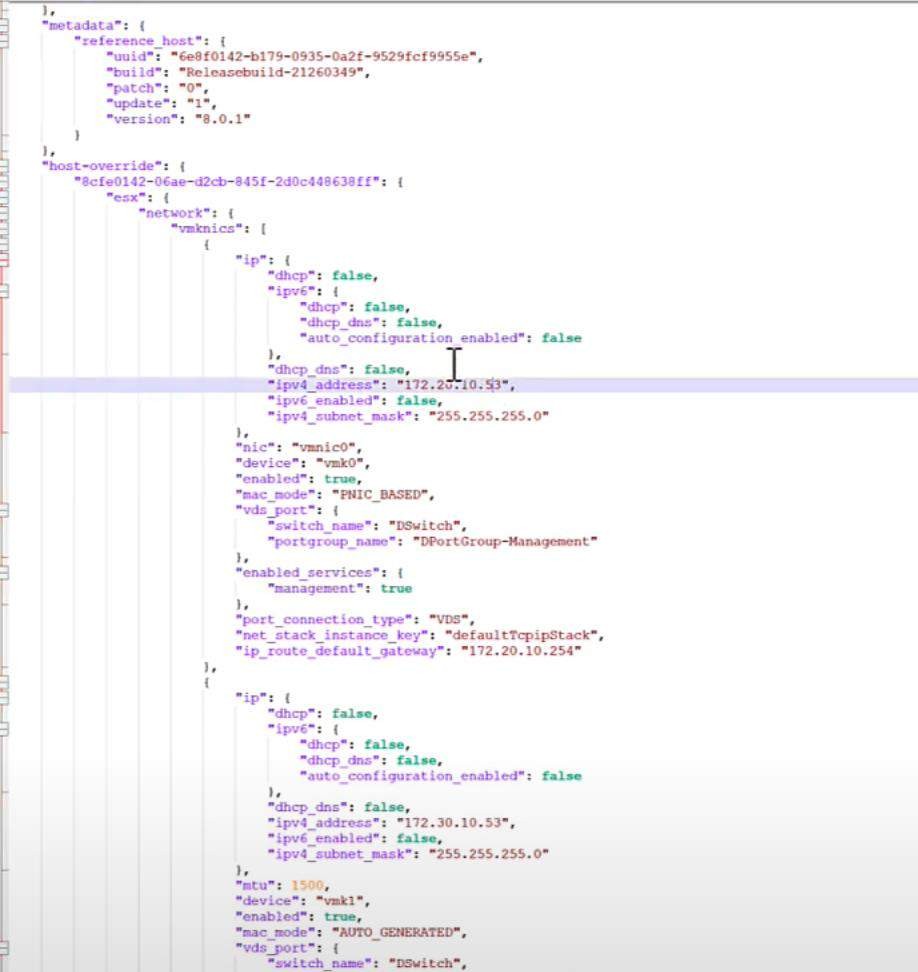
Click on Export Configuration. Next, download the JSON file, and open it in an editor. The general parameters for the hosts will be the same. However, we are interested in the host-override section particularly. It contains specific parameters for the hosts (except for esx-01, which is the reference host):
Complete the Configuration Profile setup for the cluster:
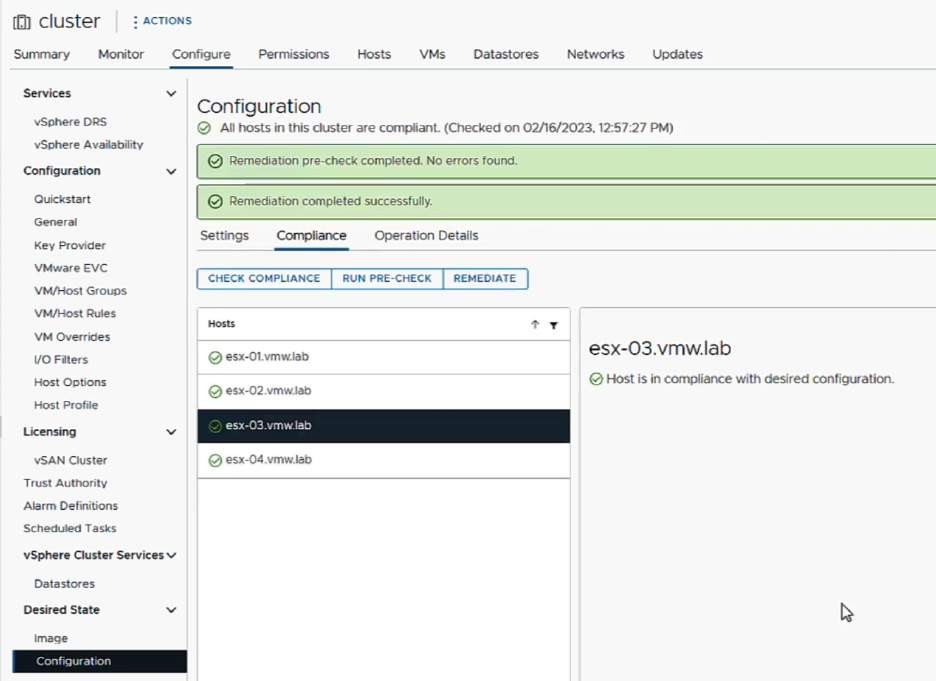
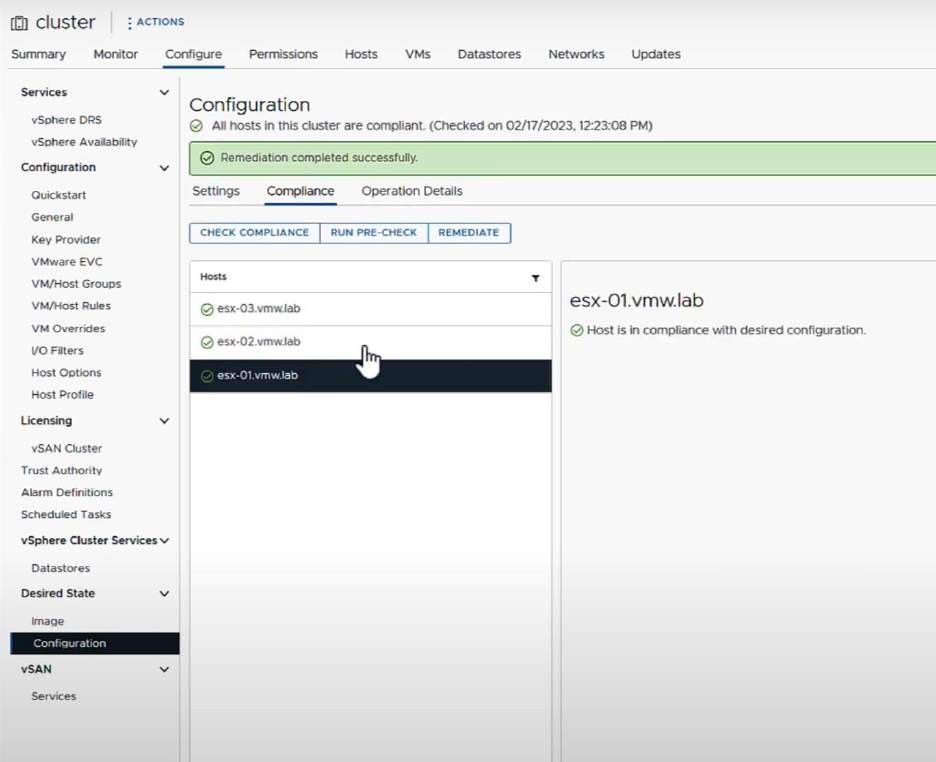
The transition will be completed, and all cluster hosts will be displayed as Compliant:
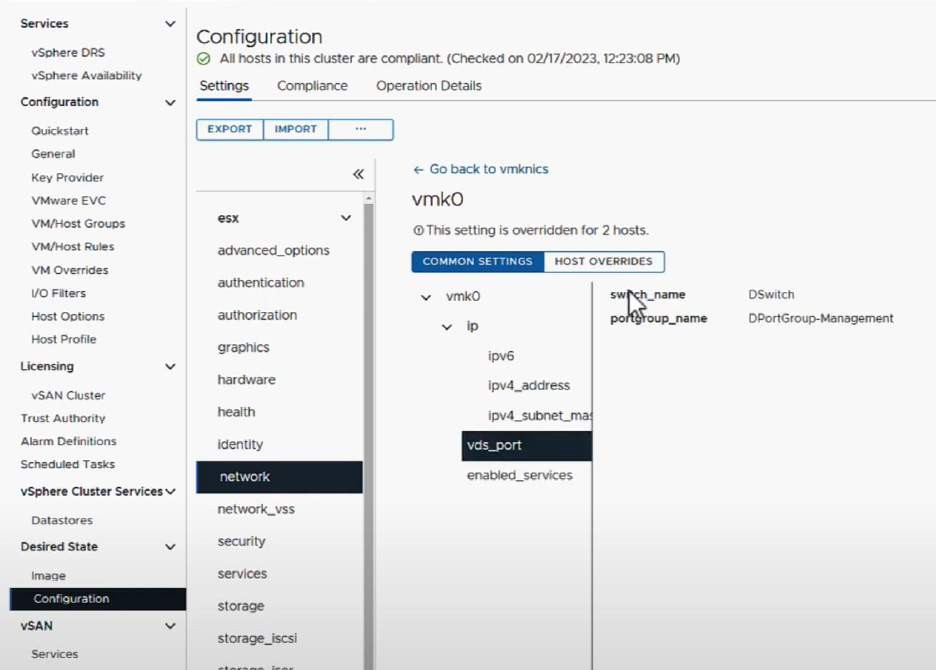
You can also see in the networking management section that the VDS (vSphere Distributed Switch) is associated with the hosts. That means that the infrastructure has successfully migrated to Configuration Profiles:
If we check the network adapters section and select the desired interface, it will be evident that the port is associated with the corresponding port group of the distributed switch:
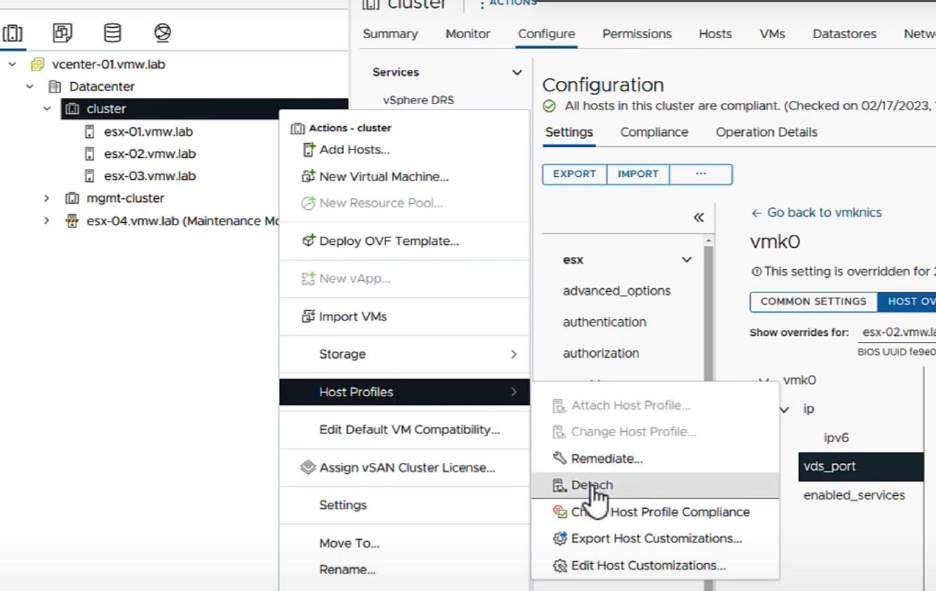
Finally, we need to detach the Host Profile from the cluster to no longer use its functionality. Right-click on the cluster, go to the Host Profiles section, and select Detach:
After that, you will be able to manage the cluster’s configuration and its hosts smoothly through Configuration Profiles.


