Latest Veeam v12.1 supports the Data Domain Retention Lock feature to manage immutable backups directly from Veeam Backup & Replication.
Although the Data Domain is not always a good choice to store primary backups (random read is not so good), it is a widely used device and fully compatible with Veeam 12.1.
To leverage the Data Domain Retention Lock feature using Veeam Backup & Replication 12.1, you need to meet the following prerequisites:
DDBoost protocol enabled.
Data Domain Retention Lock in Compliance mode.
Configure the Data Domain Retention Lock
Before configuring the Veeam Backup Job using the Dell Data Domain as target repository, it is required to configure the Data Domain Retention Lock in Compliance mode.
Enable the Compliance mode
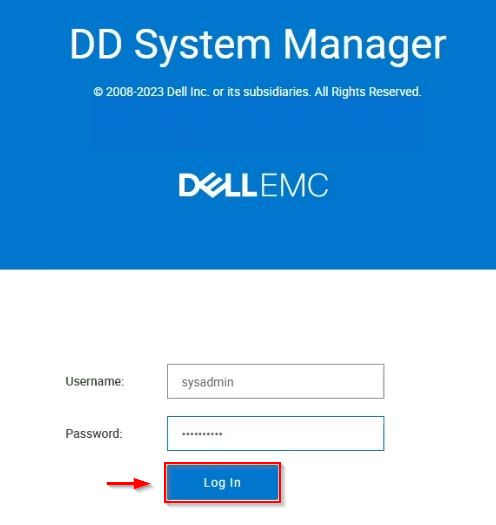
Using your favorite browser, enter the address https://<IP_data_domain> to access the DD System Manager. Enter the sysadmin credentials and click Log in.
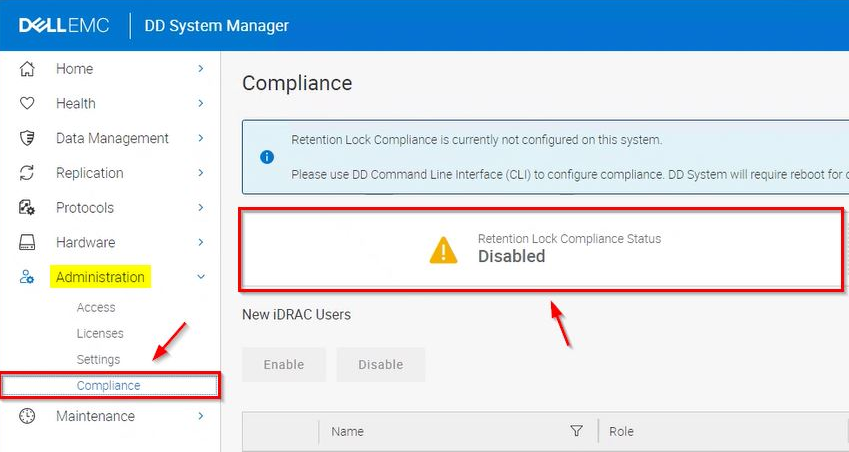
Go to Administration > Compliance and check the compliance status. By default the Retention Lock Compliance status is Disabled.
To enable the Retention Lock Compliance you need to run some commands from the Data Domain CLI. Using a tool like PuTTY, SSH the Data Domain using the security user credentials. Run the following command:
# authorization policy set security-officer enabled
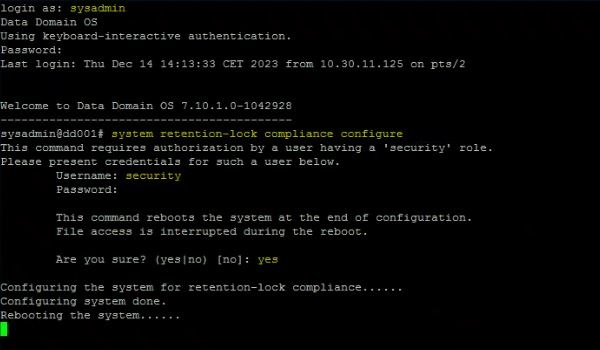
Logoff from the console and login once again using the sysadmin account. Run the following command and specify the security user credentials when requested:
# system retention-lock compliance configure
System is rebooted automatically.
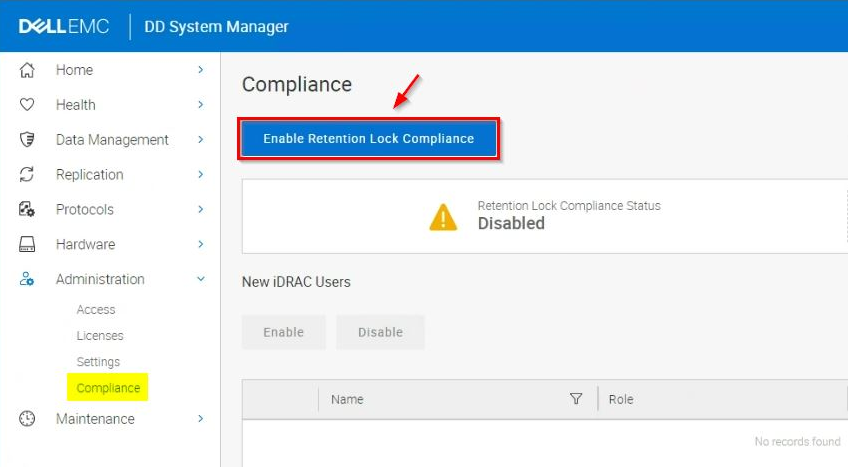
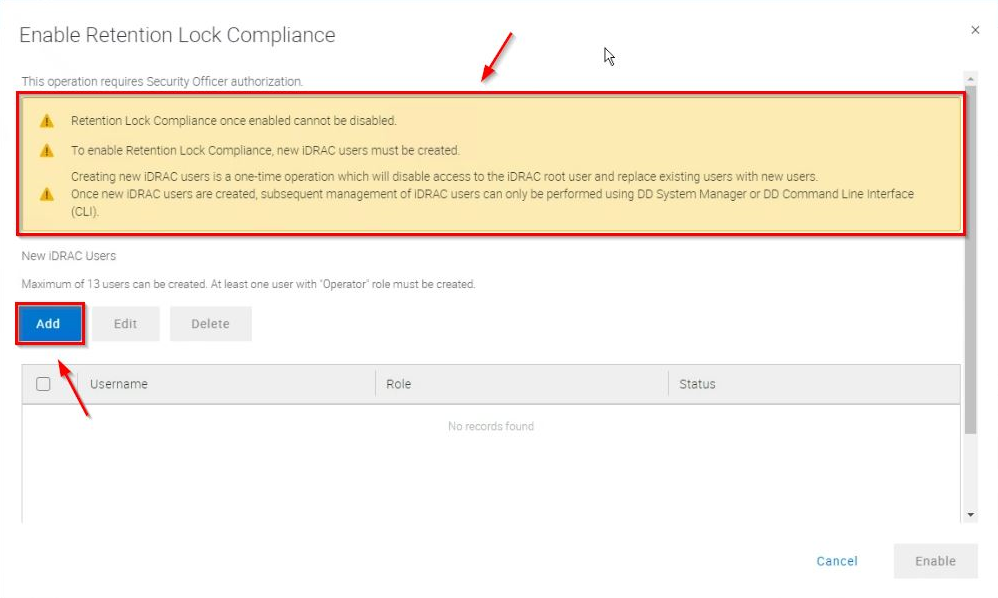
When the boot process completes, login to the Data Domain using the sysadmin credentials to access the DD System Manager. Go to Administration > Compliance and click Enable Retention Lock Compliance.
Click Add to create a new iDRAC user. You can create up to 13 users. At least one user must have the Operator role.
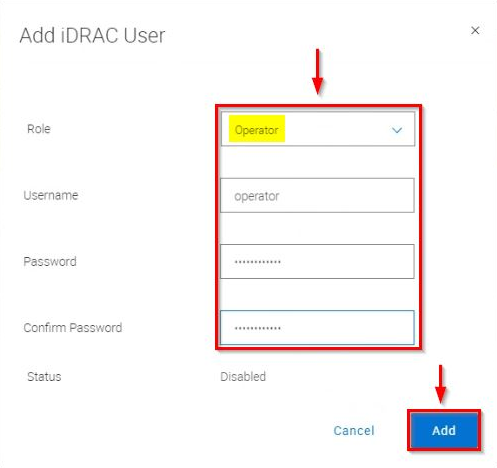
Select Operator as Role and enter the Username and Password. Click Add.
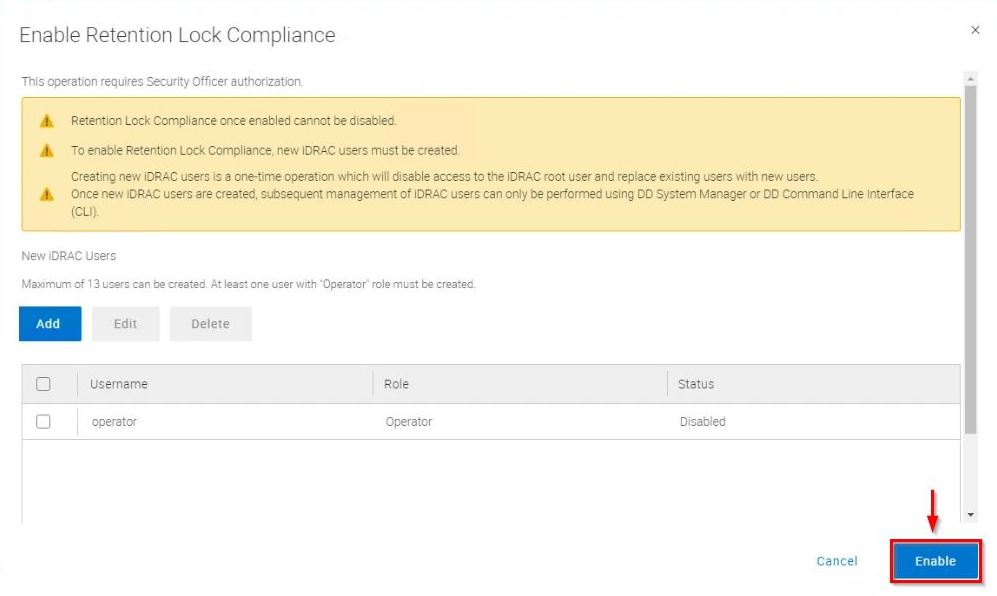
The new user (operator in the example) has been created. When all required users have been created, click Enable.
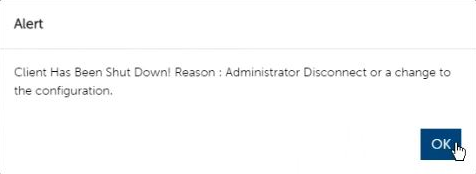
Enter the security user credentials to enable the new users and click OK.
The system is rebooted.
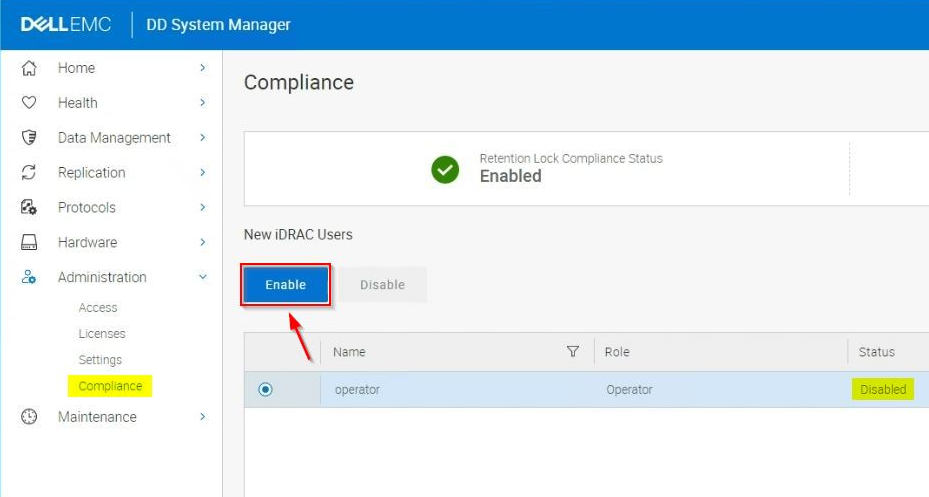
Access the DD System manager and go to Administration > Compliance. By default the new created iDRAC users are Disabled and must be enabled to allows the login to the iDRAC. Click Enable.
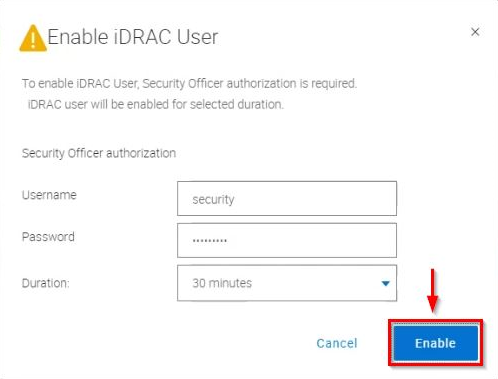
Enter the security user credentials, specify the Duration for the iDRAC session and click Enable.
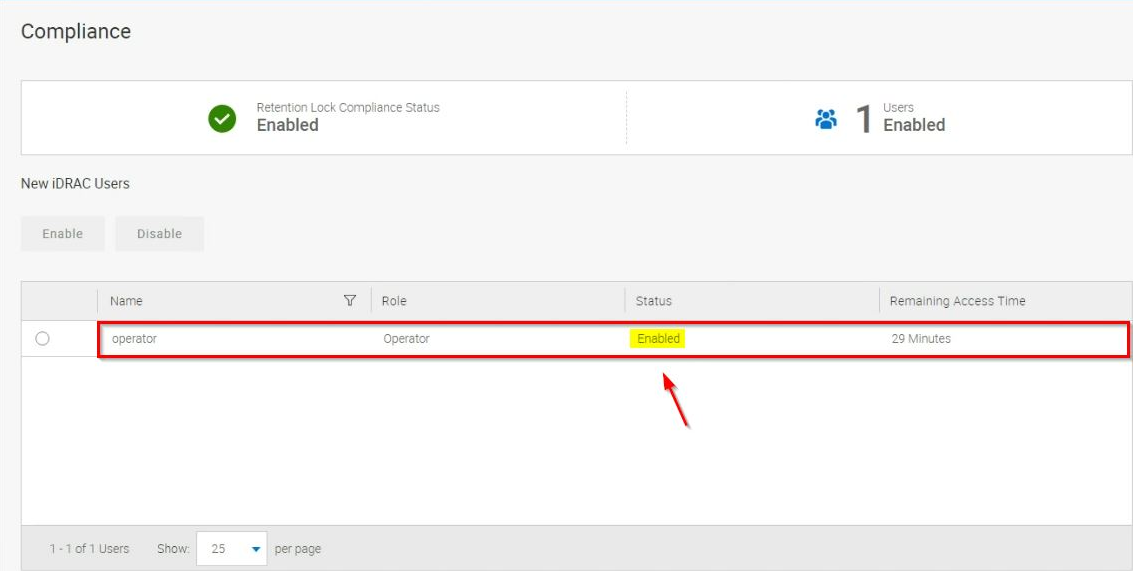
The created user (operator in the example) Status is now reported as Enabled.
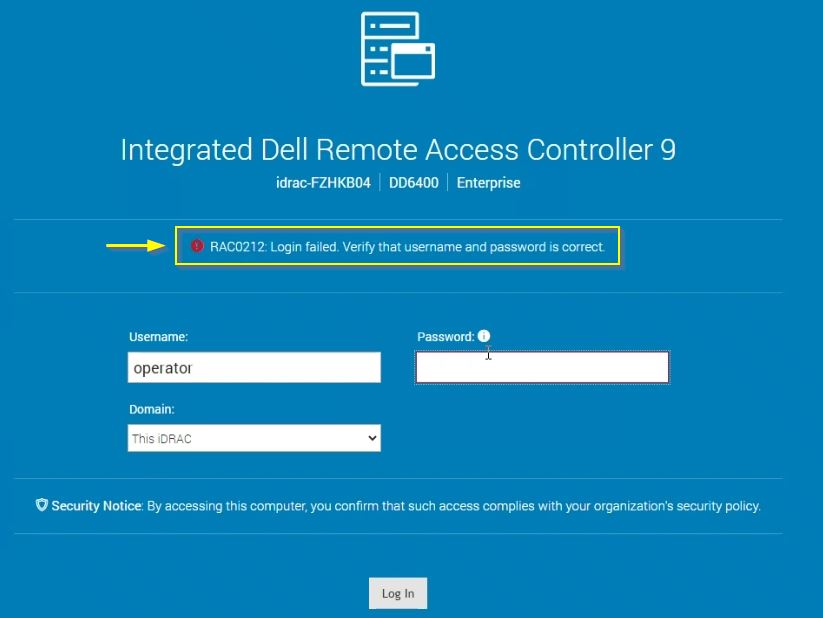
If you don’t enable the user, when you try to login the IDRAC the operation will fail.
Create MTree
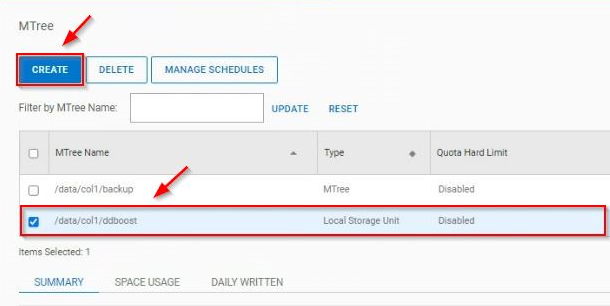
Now go to Data Management > MTree and click Create to create a new MTree. Write down the just created MTree Name (/data/col1/ddboost in the example).
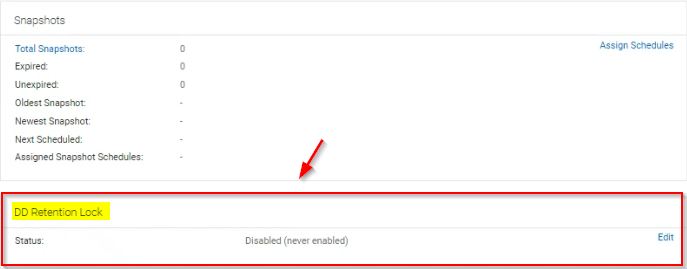
Scroll down and check the DD Retention Lock status. By default is Disabled.
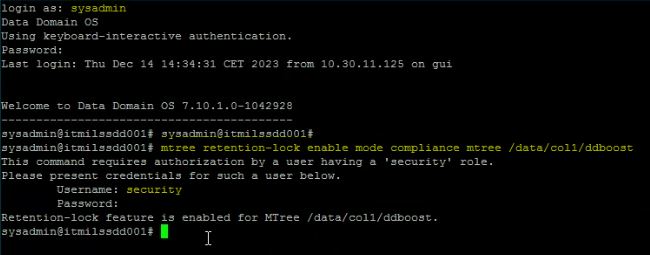
Access the Data Domain CLI using the sysadmin user and enter the following command to enable the Retention Lock for the MTree created:
# mtree retention-lock enable mode compliance mtree /data/col1/ddboost
Go back to the DD System Manager. Checking now the DD Retention Lock status in the MTree page, the Mode is now reported as Compliance. Make sure the Retention period max value is higher than the immutable retention you will configure in the Veeam Repository.
Configure the Veeam Repository
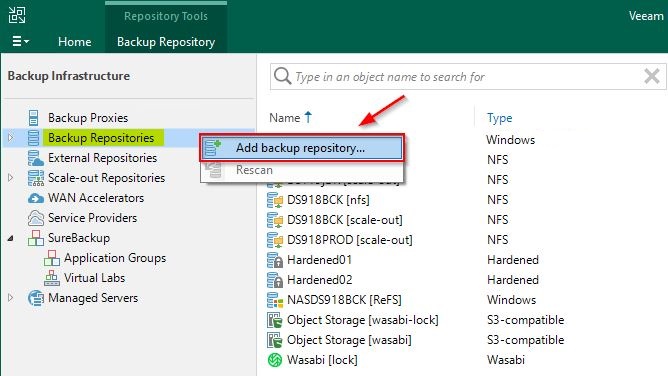
From the Backup Infrastructure area right click Backup Repositories and select Add backup repository.
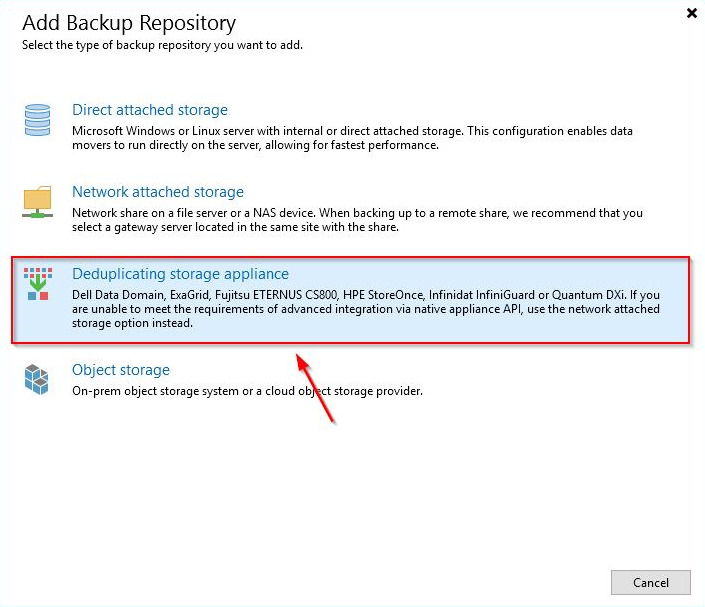
Select Deduplicating storage appliance.
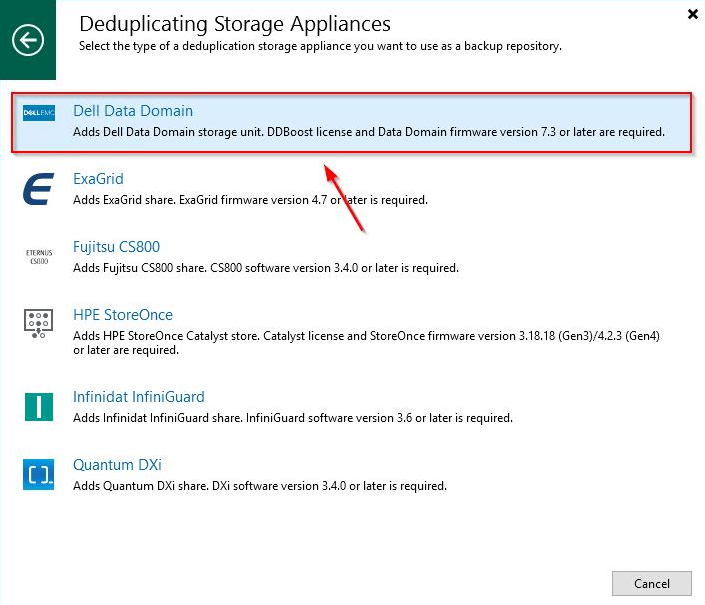
Select the Dell Data Domain storage.
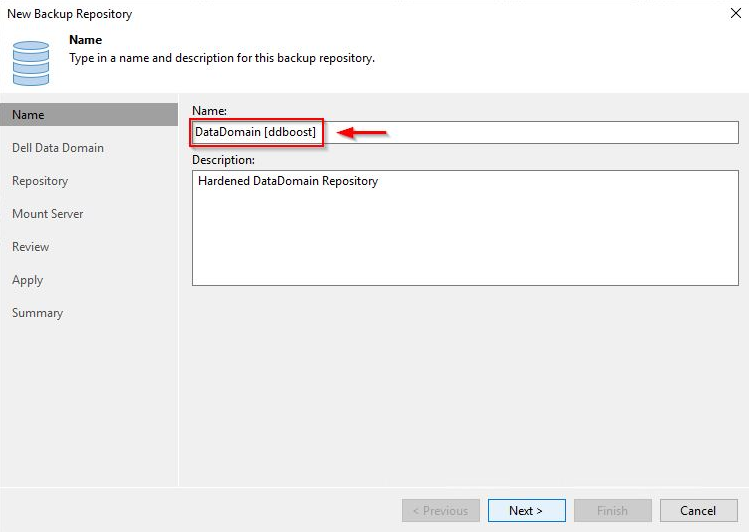
Enter the Repository Name and optionally a Description. Click Next.
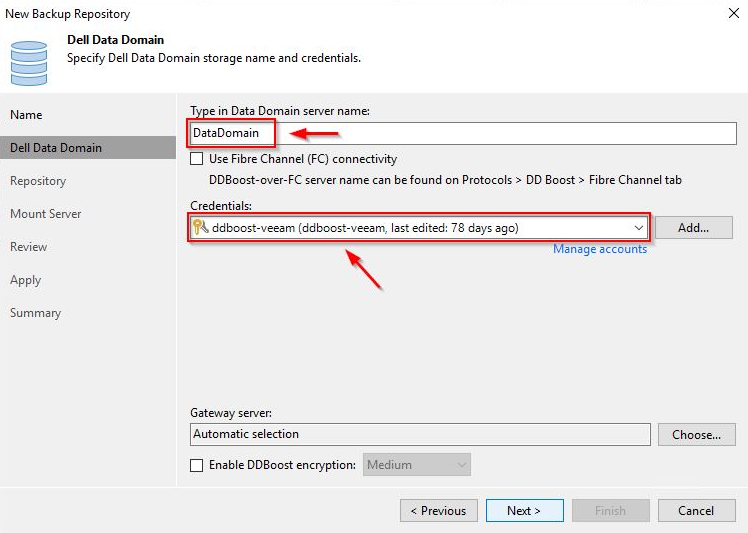
Specify the Data Domain server name and the Credentials for the DDBoost user configured in the Data Domain. Click Next.
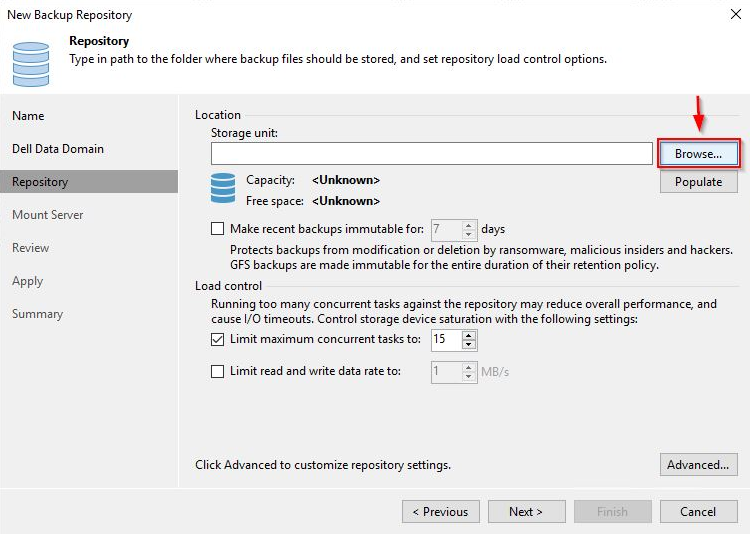
Click Browse to specify the Storage Unit.
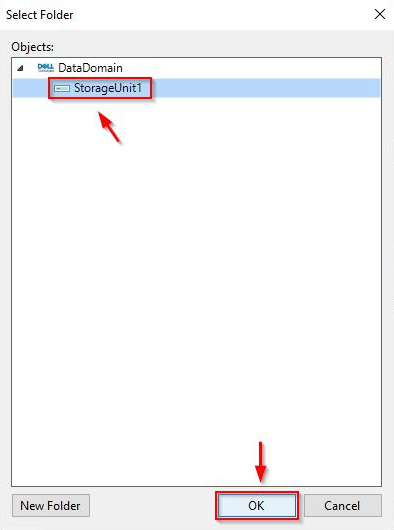
Select the Storage Unit to use and click OK.
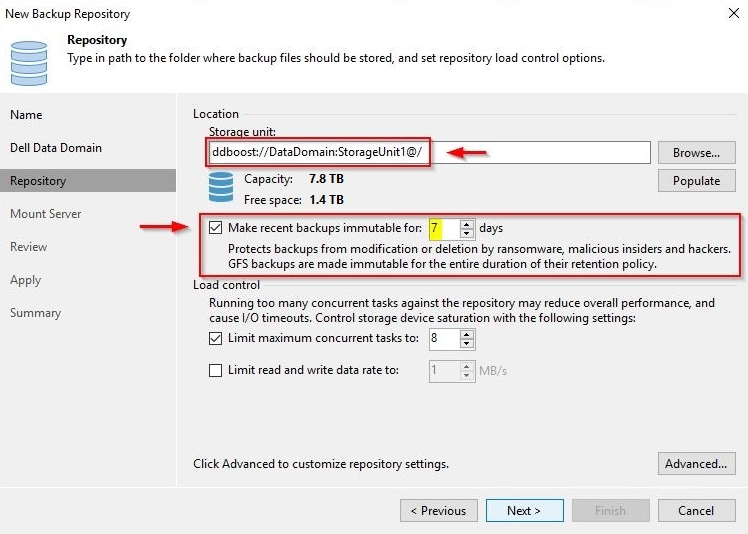
Enable the Make recent backups immutable for x days option specifying the immutability retention. Click Next.
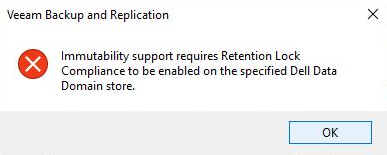
If the Retention Lock Compliance mode feature hasn’t been configured in the Data Domain, you receive an error. Immutability cannot be set at this stage.
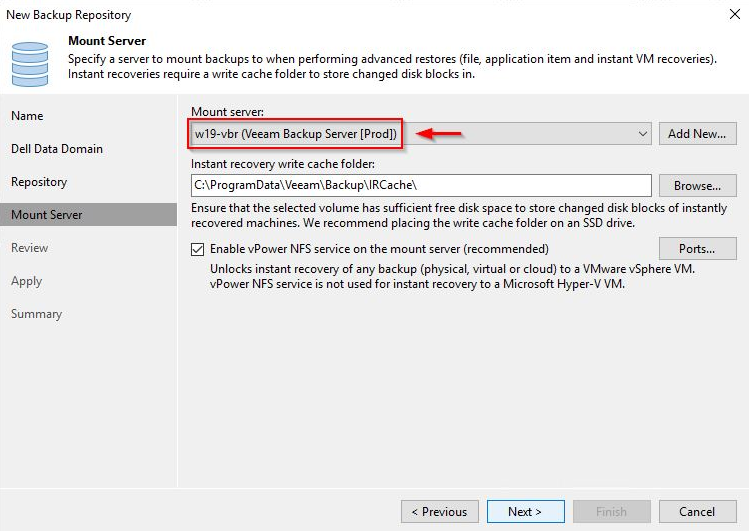
Specify the Mount Server to use and click Next.
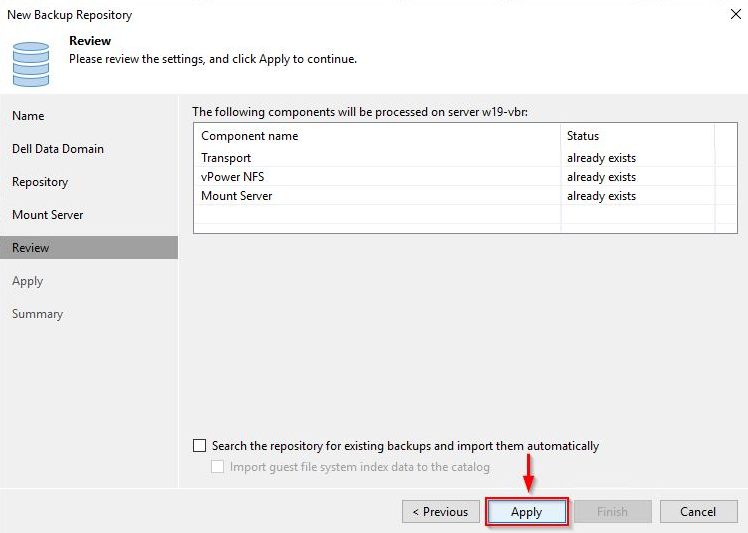
In the Review section click Apply to process the required components.
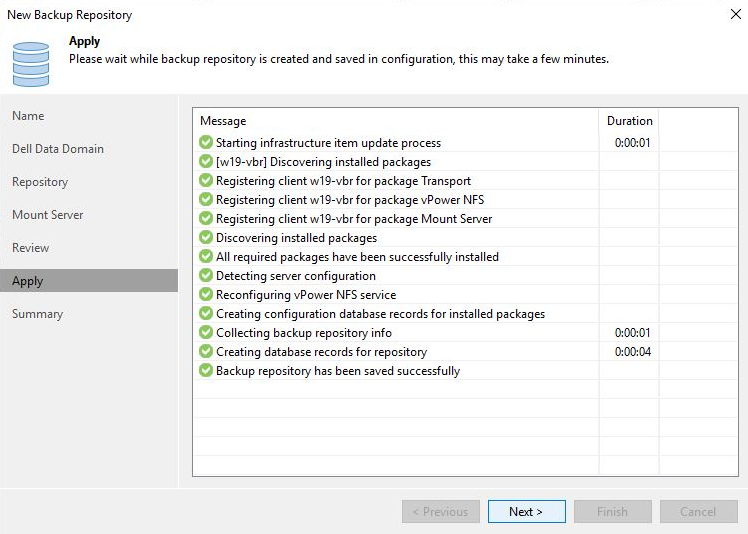
Click Next.
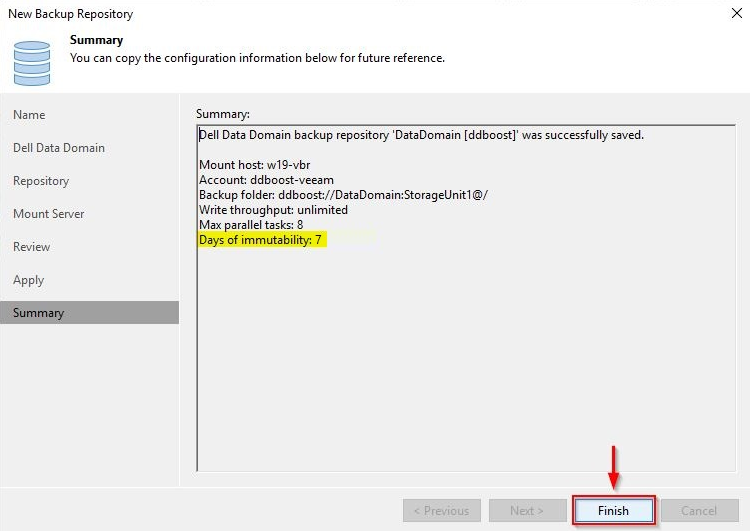
When the repository has been created successfully, click Finish to close the wizard.
Create a Backup Job
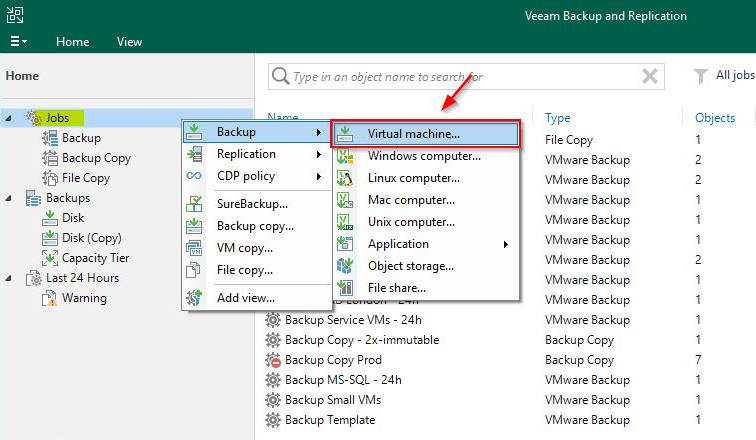
From Home area, right click the Jobs section and select Backup > Virtual machine.
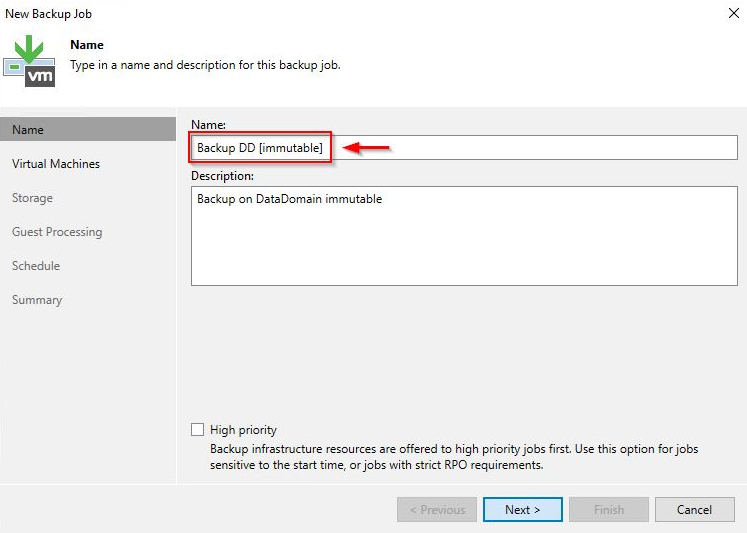
Specify a Name and click Next.
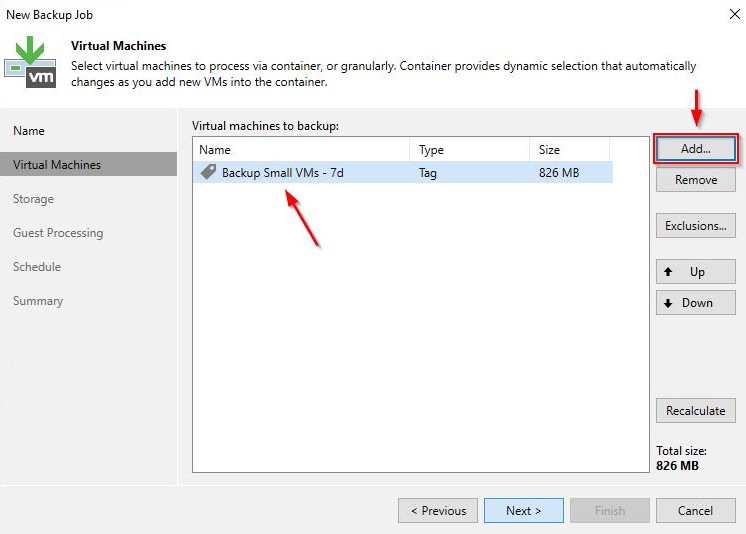
Click Add and select VMs to backup then click Next.
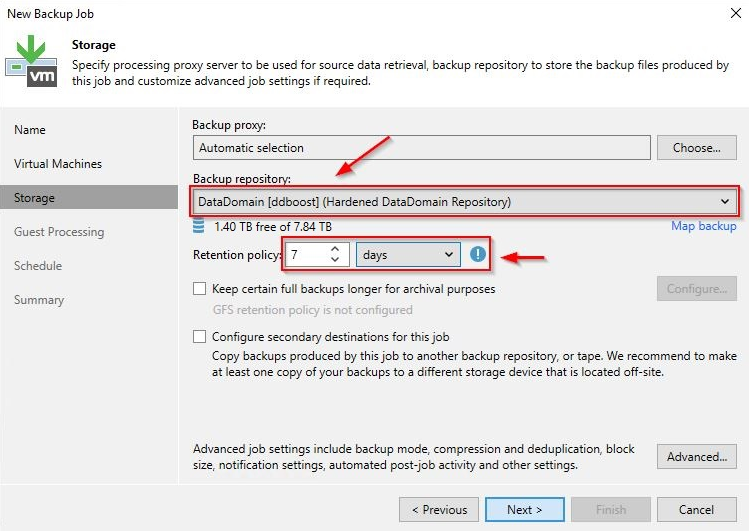
Select the just created Data Domain as Backup repository and specify the desired Retention policy. Make sure the value set is equal or greater than the immutable retention configured. Click Next.
Click Yes to apply the correct settings for the Data Domain.
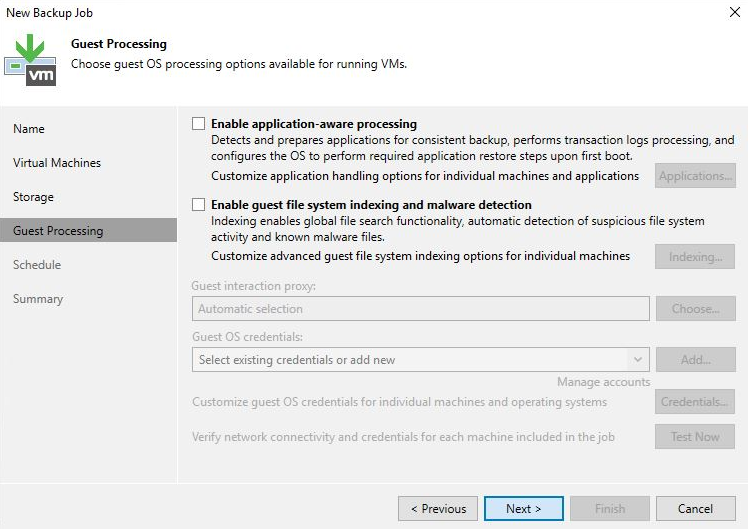
If you don’t need to enable the application-aware processing, click Next.
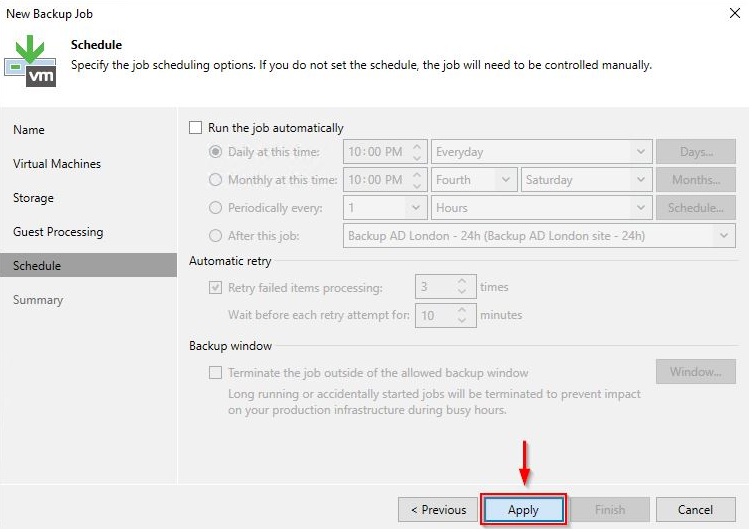
Click Apply.
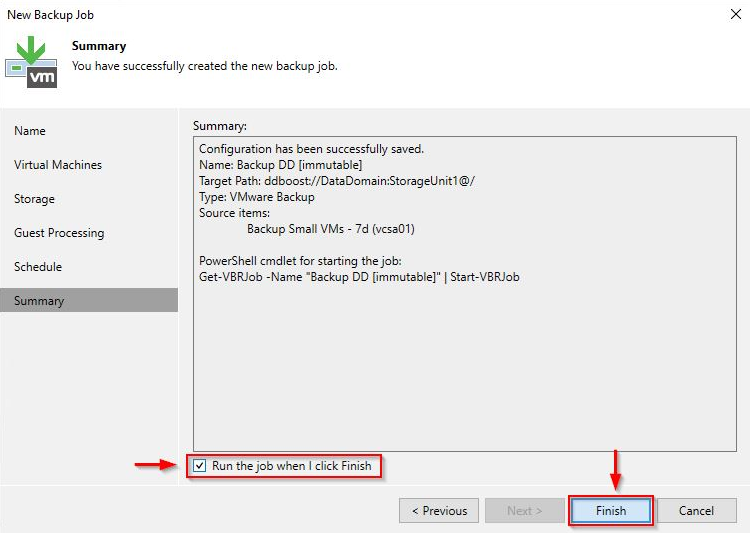
Enable the Run the job when I click Finish option then click Finish.
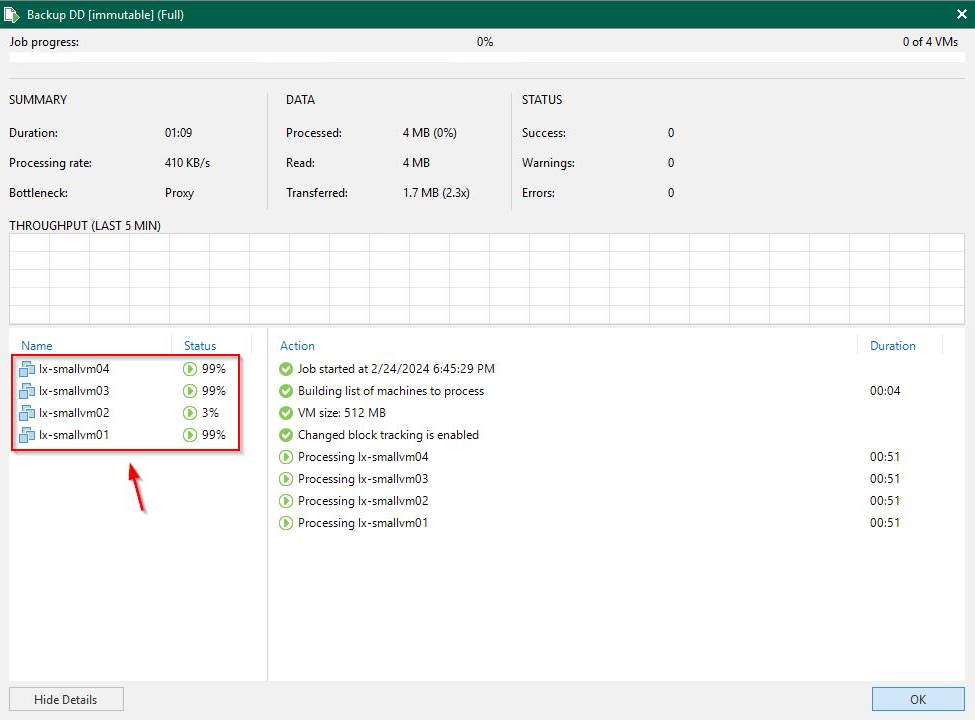
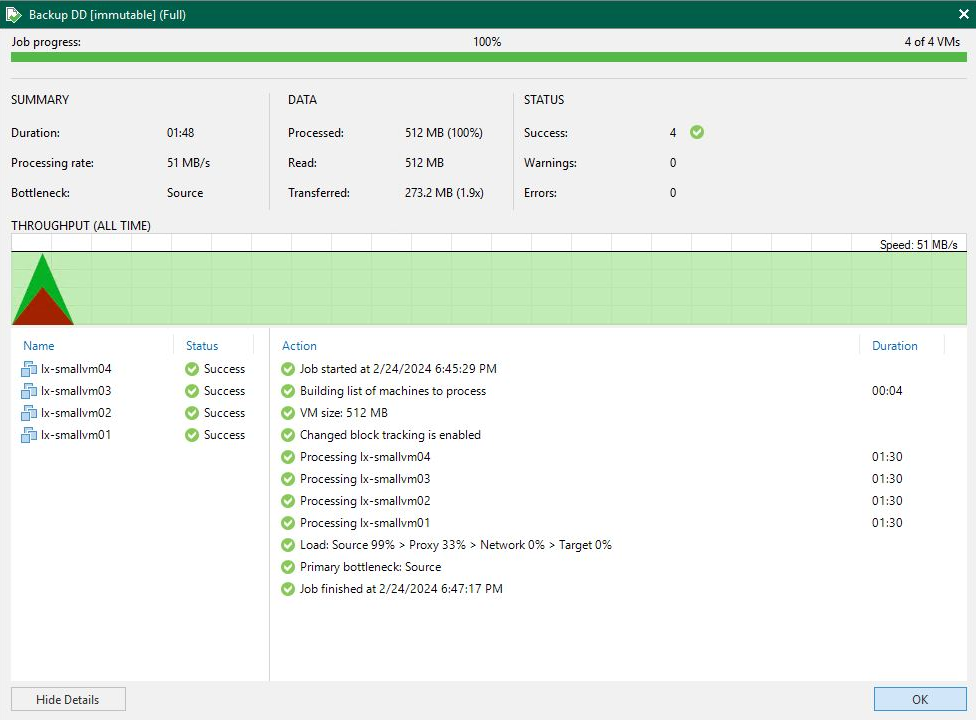
The configured Backup Job is being processed.
After some minutes the backup has been completed successfully.
Test the backup immutability
Once the backup has been processed, it’s time to test if the backup is immutable.
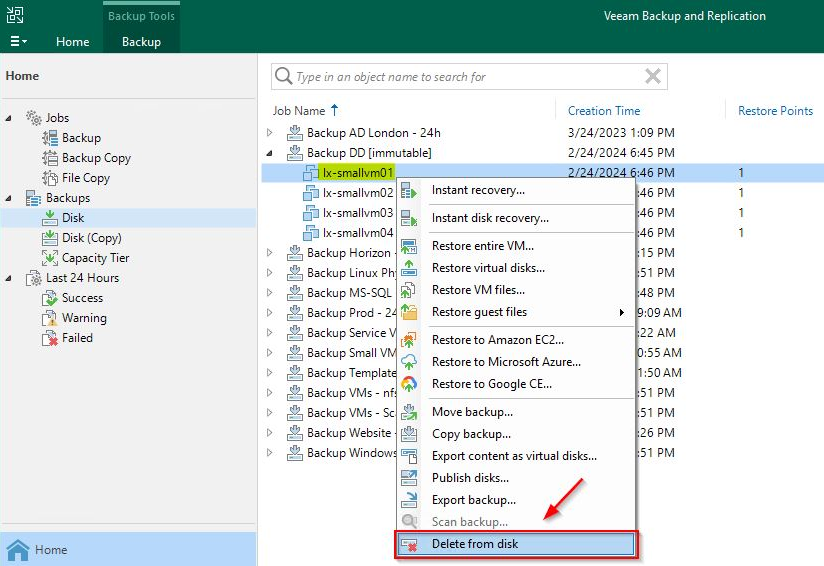
Go to Backups >Disk section and right click a VM in the processed backup. Select Delete from disk.
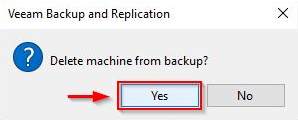
Click Yes to confirm.
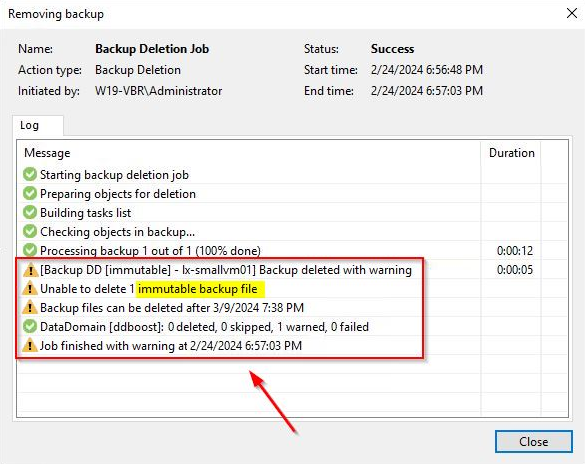
As expected, the backup cannot be deleted since it’s immutable.
Finally is possible to leverage the Data Domain Retention Lock when this storage device is used as Veeam Backup Repository protecting backups against deletion, overwriting and changes.


