Azure File Sync is a service that enables to synchronize data between file servers (On-Premise or Cloud) and Azure. In addition to synchronization, you can enable tiering between file servers and Azure File Sync. It can help to save space on file servers by keeping only most used files.
An Azure File Sync client must be deployed on file servers in order to replicate data to Azure. The agent has to be registered to Azure File Sync service. Once the file server is registered, you can replicate to Azure an entire folder.
Since Windows Admin Center 1904, you can prepare a file server to replicate really quickly. WAC will download and install the agent on the file servers for you. Only the Azure configuration is not included inside WAC. Maybe in a next release, who knows?
In this topic, I’ll show you how to implement Azure File Sync without connecting to the file servers, neither in PowerShell nor RDP.
Prepare Azure environment
The first step consists to create Azure resources to make Azure File Sync work. First, I create a Storage Account (Storage v2 – LRS) called demofilesync.
Once the Storage Account is created, navigate to the storage account settings and select the file service. Create a File Share. I called mine demo.
Go back to the marketplace and look for Azure File Sync. I create one called demostoragesync. Be careful, the storage account and the storage sync must be in the same Azure region.
Once the storage sync resource is created, open its settings and create a Sync Group as presented in the following screenshot.
Give a name to the sync group and select the storage account and the file share.
At this stage, the Azure File Sync is ready to be the target for replication.
Configure File Server from Windows Admin Center
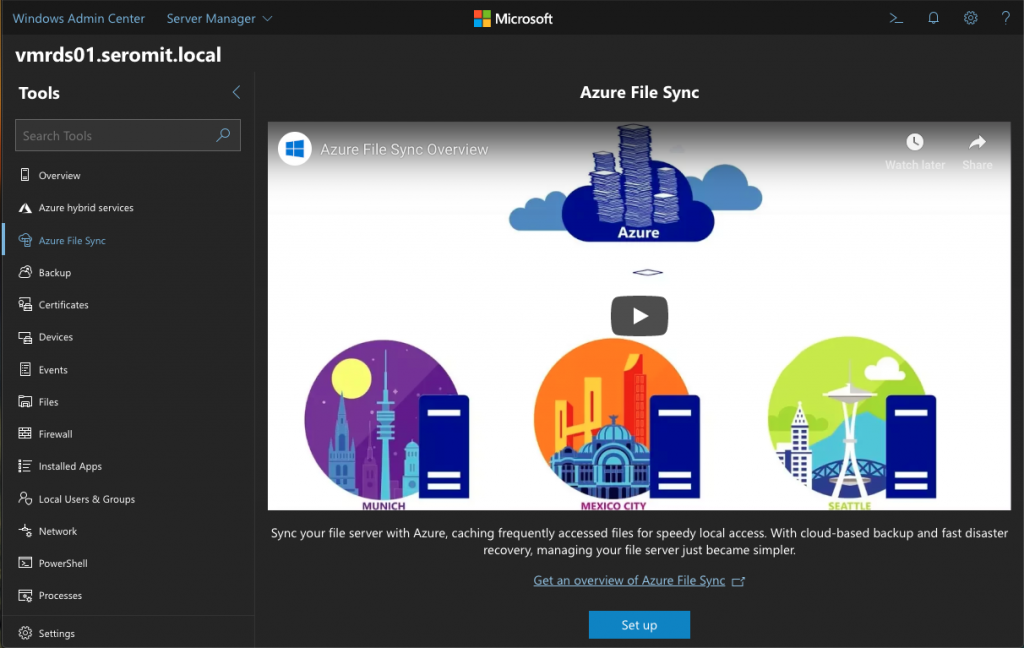
To configure File Server, open a Windows Admin Center instance and register the file server you want. Open its settings and navigate to Azure File Sync. From there, you have a video that introduce the service. Just click on Set up.
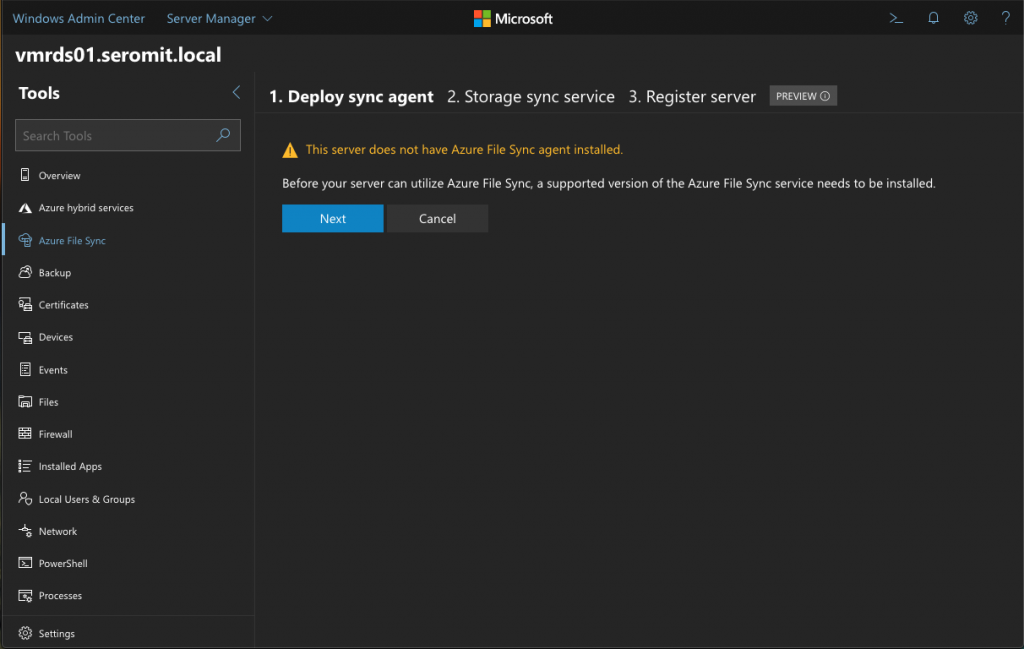
The wizard notices you that the agent is not installed. Just click on Next to install the agent.
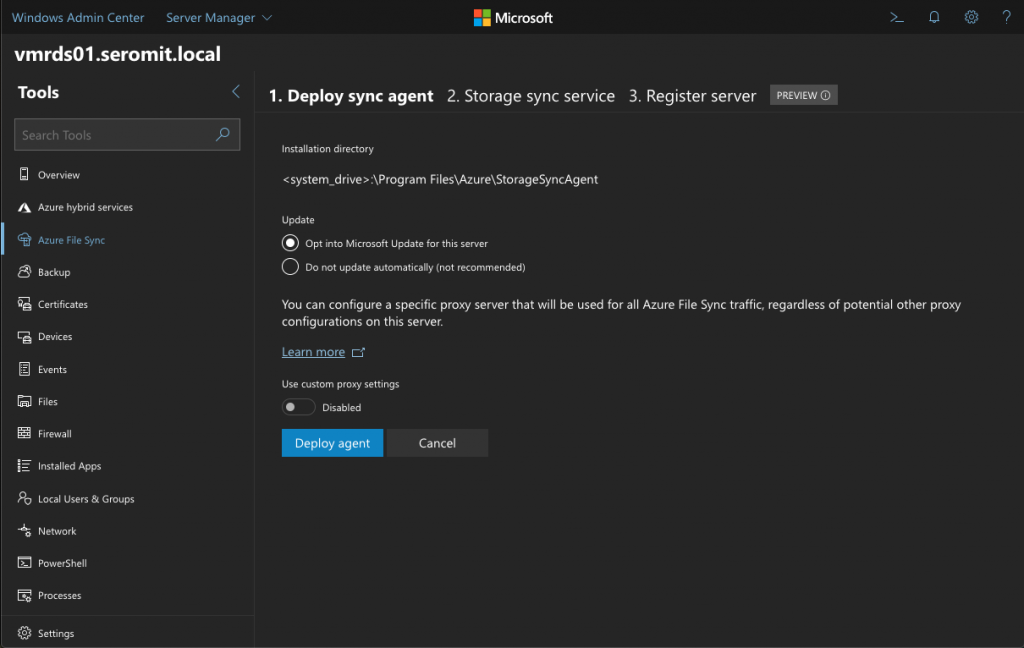
Before the installation, you have some options for the agent installation. You can choose to update the agent from Windows Update and you can define a proxy.
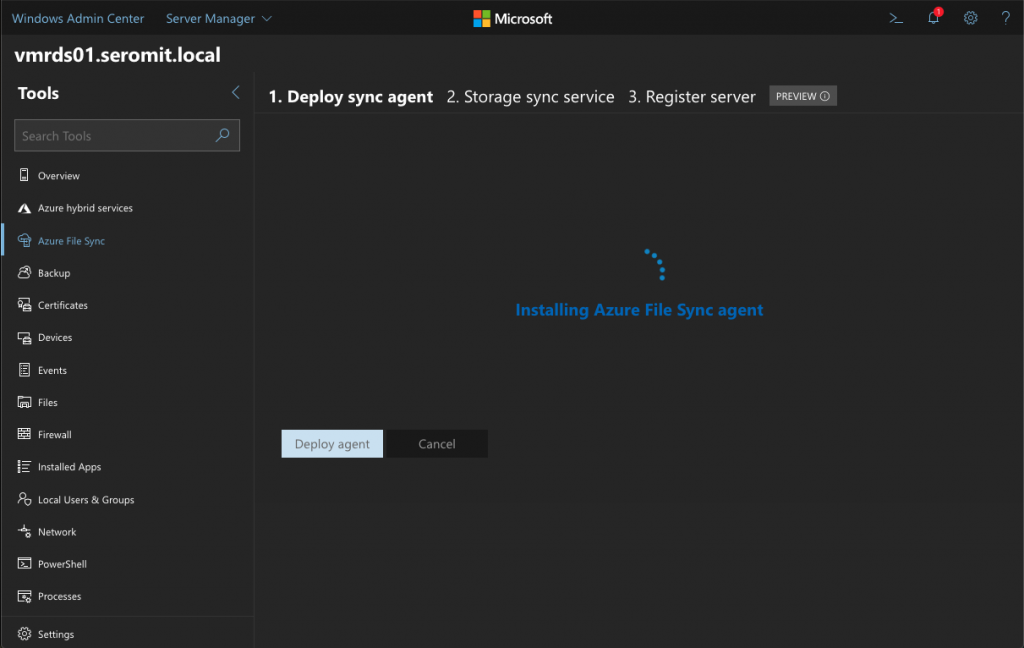
Once you clicked on Deploy agent, you get a “circle progress bar” until the end of the installation.
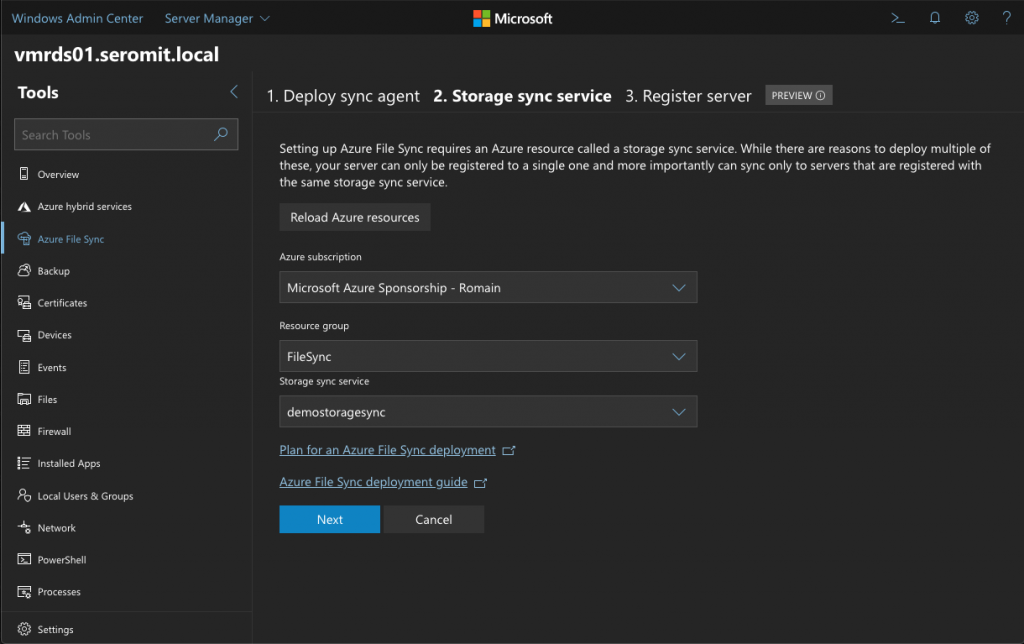
When the agent is installed, the wizard asks you some Azure information such as the resource group and the name of the Storage Sync service.
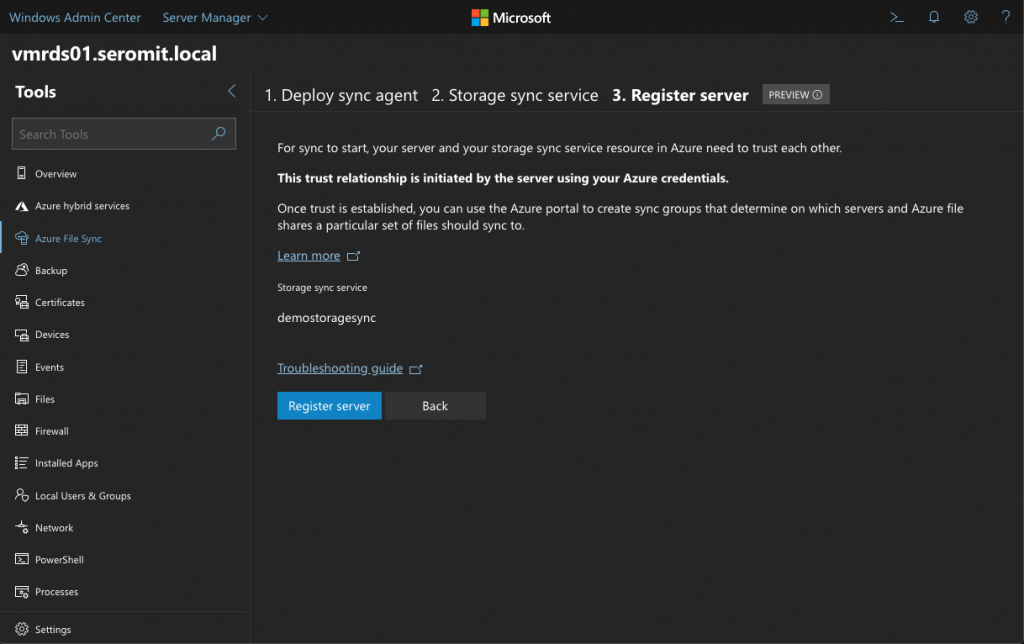
In the next screen, just click on Register server to add the server to Storage sync service.
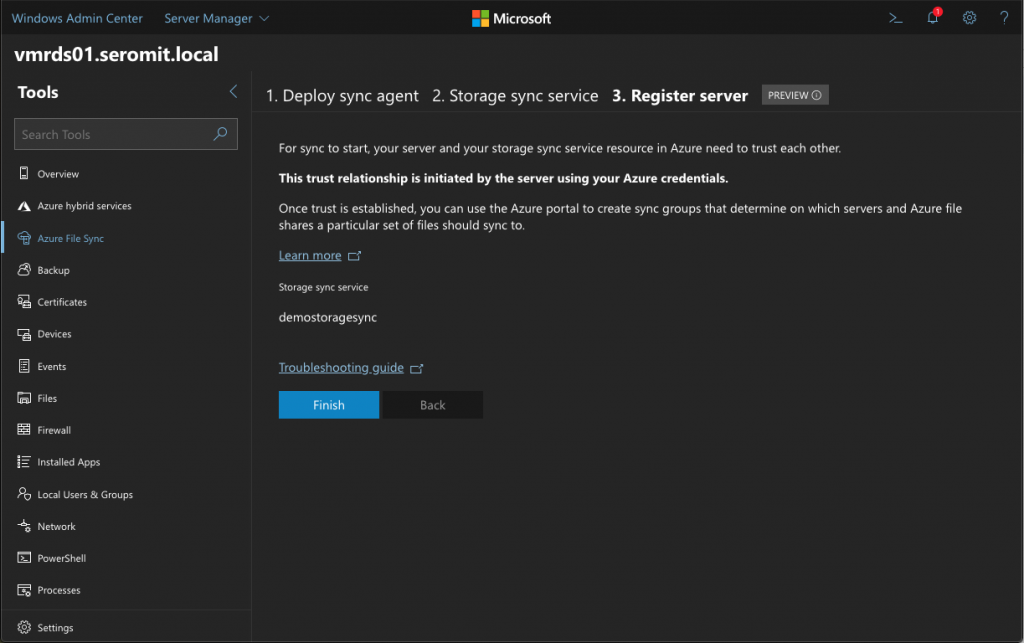
Click on finish to close the wizard.
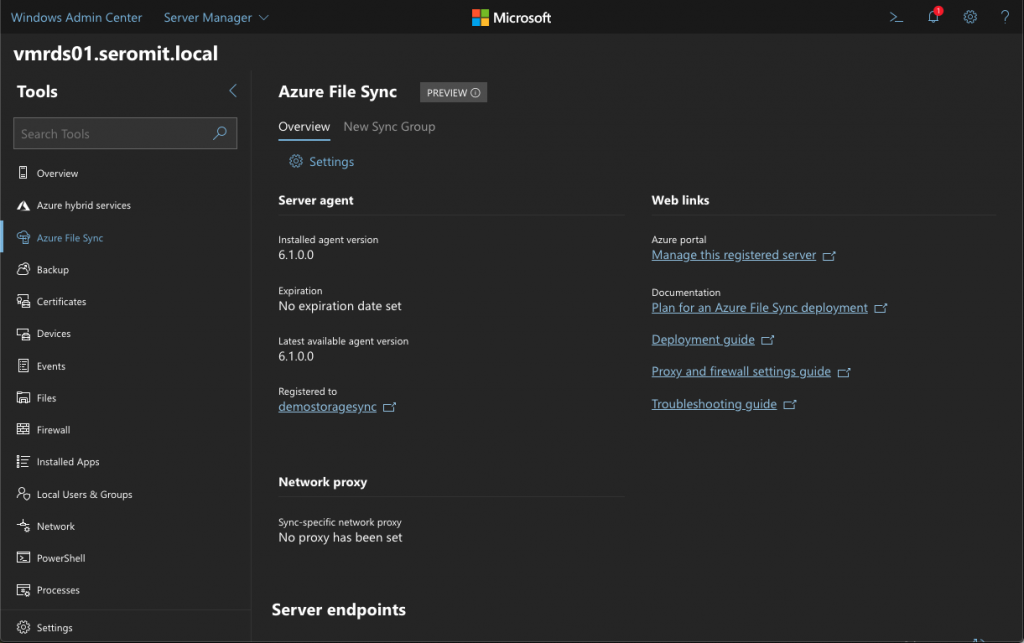
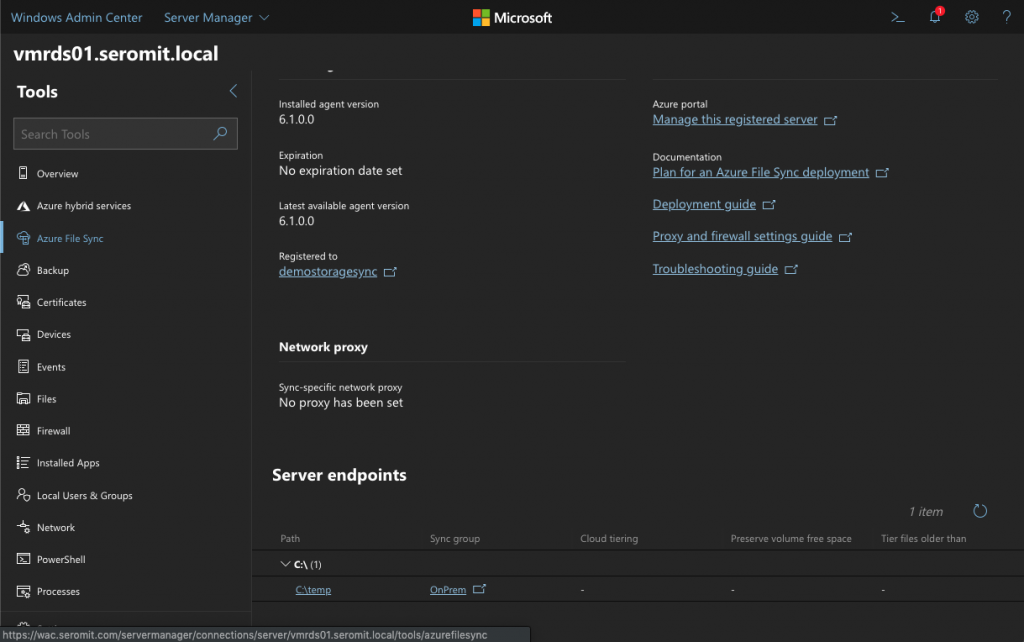
Now that the file server is registered, you can get information about Azure File Sync agent such as the version or the proxy. Click on New Sync Group.
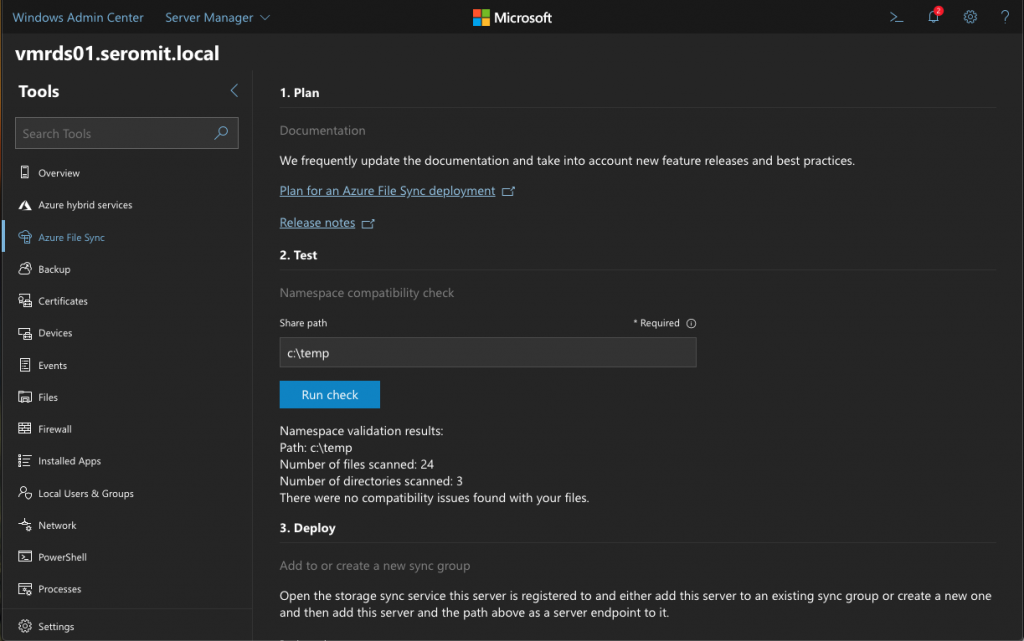
Specify the share path you want to synchronize. Then click on Run Check to verify if there are any issues. Unfortunately, you can’t enable the replication from there and you have to jump back to Azure Portal.
Enable the replication
Once the agent is installed and ready, open again the sync group in the Storage sync service (Azure Portal). Then click on Add server endpoint. Specify the file server and the path.
Once the server endpoint is added, go back to Windows Admin Center. In the Azure File Sync view, you should get information in Server Endpoints section. Now you just have to wait until the replication is initiated.
Conclusion
Windows Admin Center is the Azure File Sync implementation. All the File Servers can be configured from WAC. Currently you can’t deploy and configure Azure resources from WAC. I truly hope that will be available in the future.


