Windows Server 2016 has been released in October 2016 and comes with a new feature called Containers. Containers already exists in Linux world and enables to make OS virtualization. Basically, a container is an isolated place where an application can run without affecting the rest of the system and without the system affecting the application (MSDN definition).
What is a container
Like I said above, a container is an OS virtualization environment to run multiple isolated systems on a container host. Container uses namespace isolation technology that includes all resources that an application needs as process list, files, ports and so on. The container can only access to the resource of its namespace.
Several files and services are shared between containers. When an application in a container make a change on a file for example, the container creates its own copy of this file.
Windows Containers
There is two kind of Windows Container: Windows Containers and Hyper-V Containers.
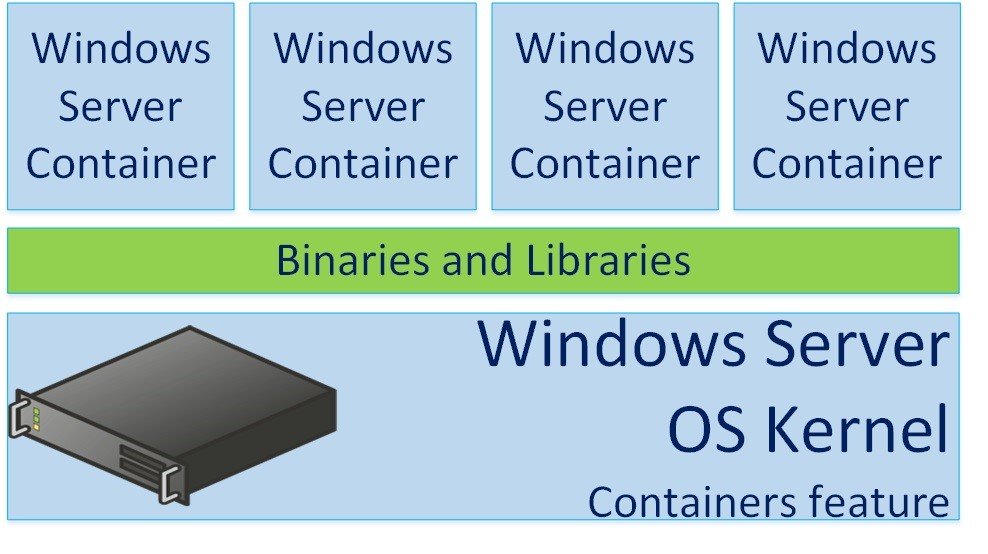
Windows Server Containers share the host kernel and libraries. In this way, you don’t need to deploy an OS and you have not to “waste” RAM or disk for multiple operating system. In this scenario the containers boot quickly, you have a great density and you can deploy several instances of the application on the same machine.
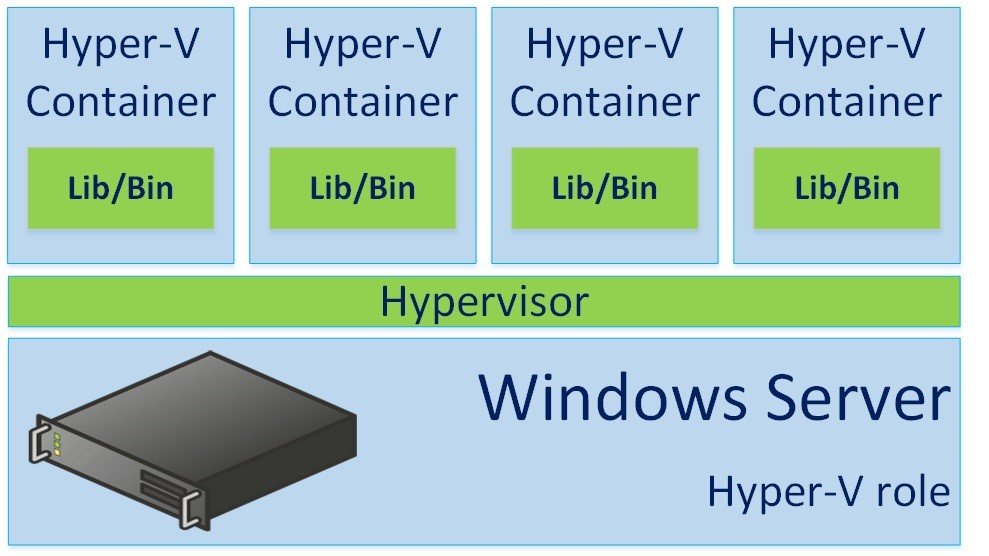
The main disadvantage about this scenario is about security. If your container host is corrupted, the issue can impact several containers and so several applications. This is true also about a container which can impact the container host. In multi-tenants scenarios, this can be a huge problem because several customers can be impacted. To resolve this, Hyper-V containers have been developed. This kind of containers has their own copy of OS Kernel and their own memory assigned. This enables to make isolation and so a security boundary.
Because in this scenario you assign memory and you have multiple copy of the kernel, you have less density than Windows Server Containers. The startup time is also longer. But you have a great security boundary for the multi-tenants scenario.
Container OS Image and Image
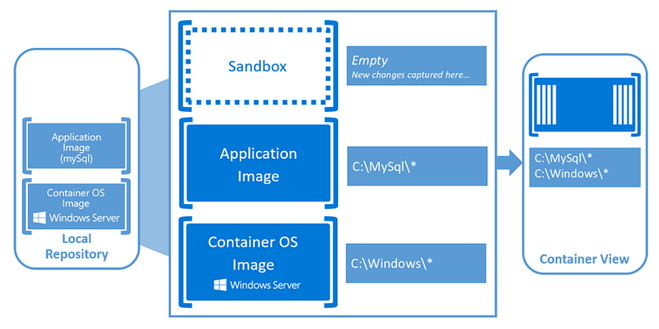
The container can only be deployed from images. The container OS image is the operating system environment. This image cannot be modified.
Now you deploy a container from the OS Image and you make change by installing IIS for example. Changes are captured in the Sandbox. You can then stop this container and convert it to a Container Image. Then this container image can be used to deploy new container with IIS pre-installed. To finish these Container Images can be shared in an Image repository.
To deploy container host and containers themselves, I have followed this topic.
Requirements
To prepare your physical or virtual server as container host you need:
- A system running Windows Server 2016 (Datacenter for unlimited Hyper-V Containers)
- 10GB available storage for OS Base Image and setup scripts
- Administrator permissions on the machine or VM
For this topic, I have used a virtual machine as container host.
Install feature
To install Docker engine and requirements, install the below module first:
Install-Module -Name DockerMsftProvider -Repository PSGallery -Force
Then run the following cmdlet:
Install-Package -Name docker -ProviderName DockerMsftProvider
To finish, restart the computer. After the restart, you will be able to run containers.
Restart-computer
Basic command
Since Windows Server 2016 Technical Preview 4, the PowerShell module for containers has been removed. In the final release of Windows Server, you have to use the Docker command to manage containers and related services such as a network. This section introduces some Docker command to manage your containers.
Review network configuration
First section I’d like introduce you is about the network. When you have installed Docker on the system, a NAT switch is automatically created. You can review it by using “standard” Windows cmdlet:
Get-VMSwitch
In Docker world, you can review networks by using the following command:
Docker network ls
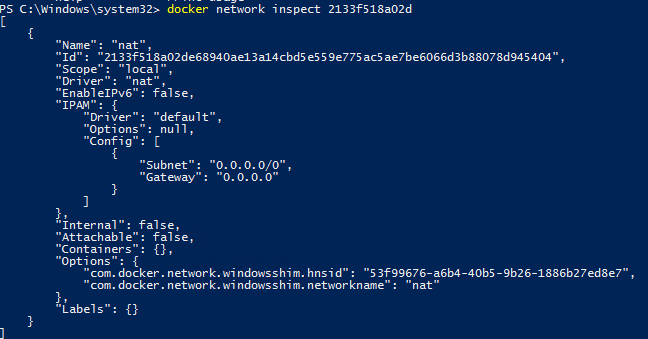
If you want show more information about a network, you can run the below command:
Docker network inspect <network ID>
You can create more network by using this command
docker network create
The NAT network is not the only available. You can create transparent network (this is almost the same than Hyper-V external network), L2 bridge and so on.
List container
You can list the running containers by using this command:
Docker container ls
The above command doesn’t show the stopped container. If you want get information about stopped containers, you have to run the following command:
Docker container ls -a
Download Windows Server Core image
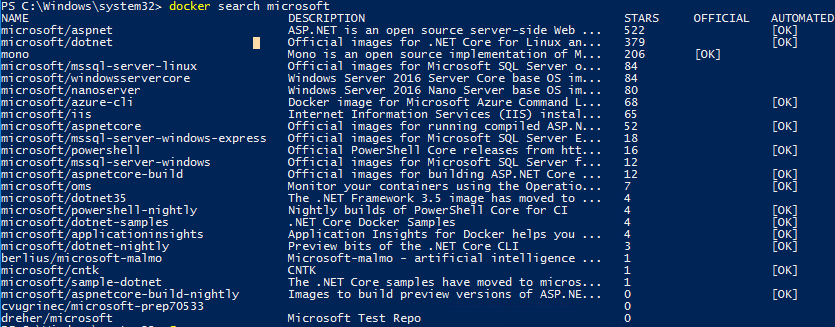
To run container, you have to use an image. Change can be applied in this image and committed later to a custom image. But first, you should download an image from Docker repository. You can search for an image by using this command:
In the above screenshot, I have searched for images related to Microsoft. Now I download the image called microsoft/windowsservercore (be careful to the case). To download an image, run the following command:
Docker pull <image name>
Once the image is downloaded, you can run the below command to list image in your local repository:
docker image ls
Create a custom image
To create a custom image, I’ll use the previously downloaded image. Then I’ll add the IIS role in the container and to finish, I’ll commit the changes to a new image.
So first, I start the container based on image microsoft/windowsservercore. I use the below command to start an interactive PowerShell inside the container. I don’t specify the name so it will be generated by docker. The docker run command create and start the container. If the container already exists, the command just start the container.
docker run -it microsoft/windowsservercore “powershell”
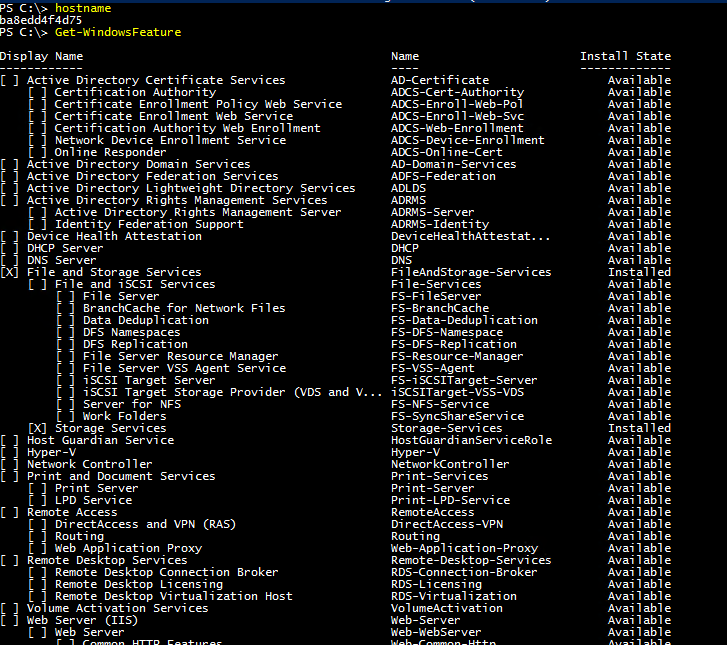
Once the container is running, I show the available features.
Then I run the following PowerShell cmdlet to install IIS inside the container.
Once the Web-Server is installed inside the container, you can leave it. Then I have retrieved the container name (with Docker container ls -a). The random name of the container is sharp_mestorf. To commit the change to a new image, you must stop the container first:
Docker container stop sharp_mestorf
Then I commit the change to a new image:
Docker commit <docker source> <image name:tag>
N.B: be careful about the image name, it must be in lower case.
To finish, I start a container called IIS01 with the new image. I run also an interactive PowerShell inside the container.
docker run –name IIS01 -it custom/iiscore:IIS “powershell”
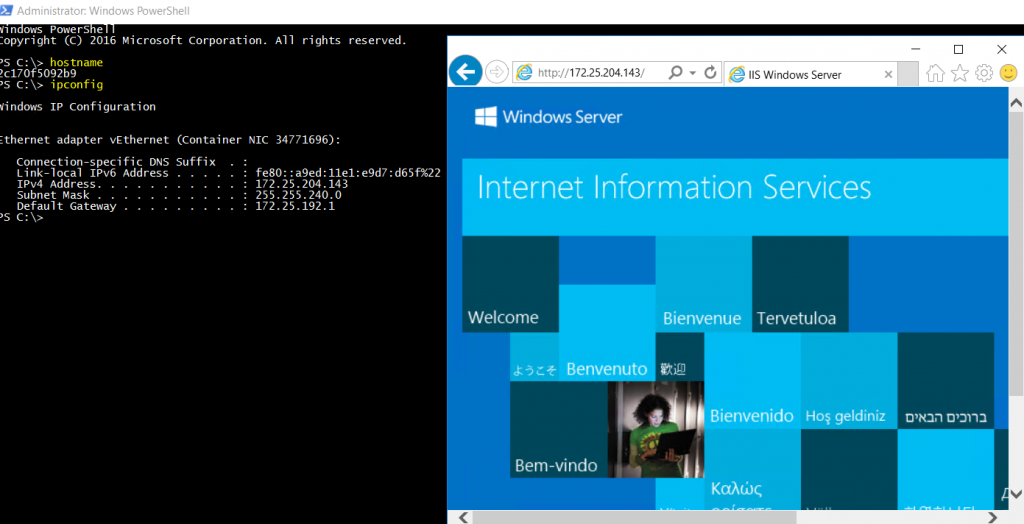
I retrieve the IP address and I browse it from Edge:


