In this article, I will explain how to create adaptive cards in Microsoft Teams and how to use message actions.

What is an adaptive card?
An adaptive card is a way to interact in Microsoft teams. Which mean that you select a message, you can click on the three dots and use the message actions. If you click on a message action, an adaptive card will be opened and you will be able to interact with it further.
Getting started
Open a web browser and go to Power Automate in order to create a new workflow.
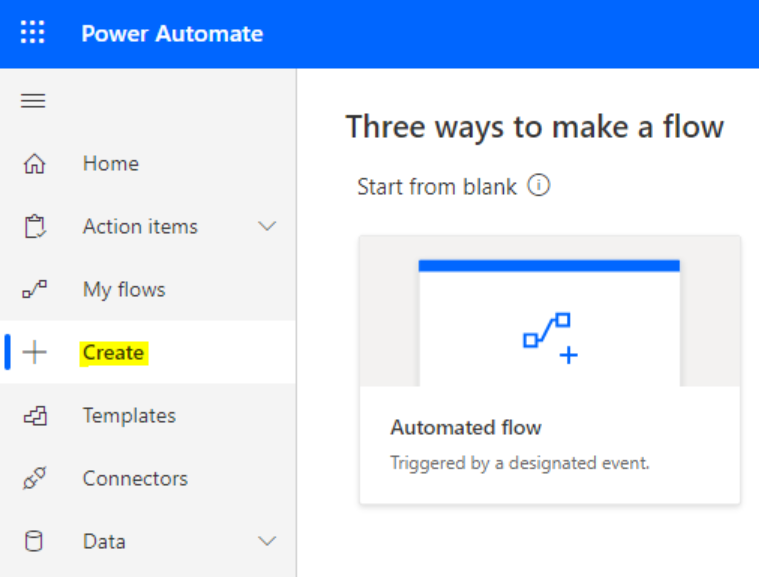
On the menu sidebar click “Create” and then click on “Automated flow” to create a new one.
A new window appears, then click « skip » to create a blank workflow.
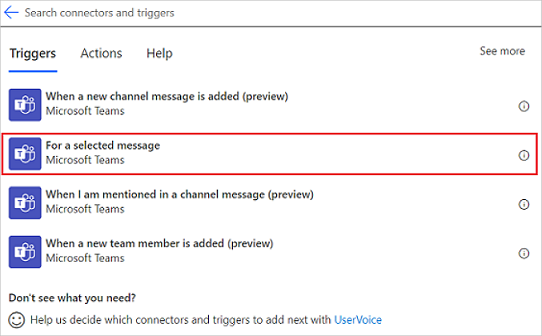
Enter a name for your flow then, select the “For a selected message” trigger. Be careful, the name of the flow is used within Microsoft Teams. So you must be sure to provide the good name.
If you want to collect information from your users, you can create an adaptive card in which users will enter information such as:
- Date
- Phone number
- …
If you don’t need any other information from your users, you don’t need to create adaptive card. Information will be sent to the next step in your flow.

A great thing is that you can create an adaptive card directly in the browser because you have access to the adaptive card designer built in. Then, you can customize the card depending on your needs.
On the left, you can select card items (drag & drop) and on the right, you can modify the item properties:
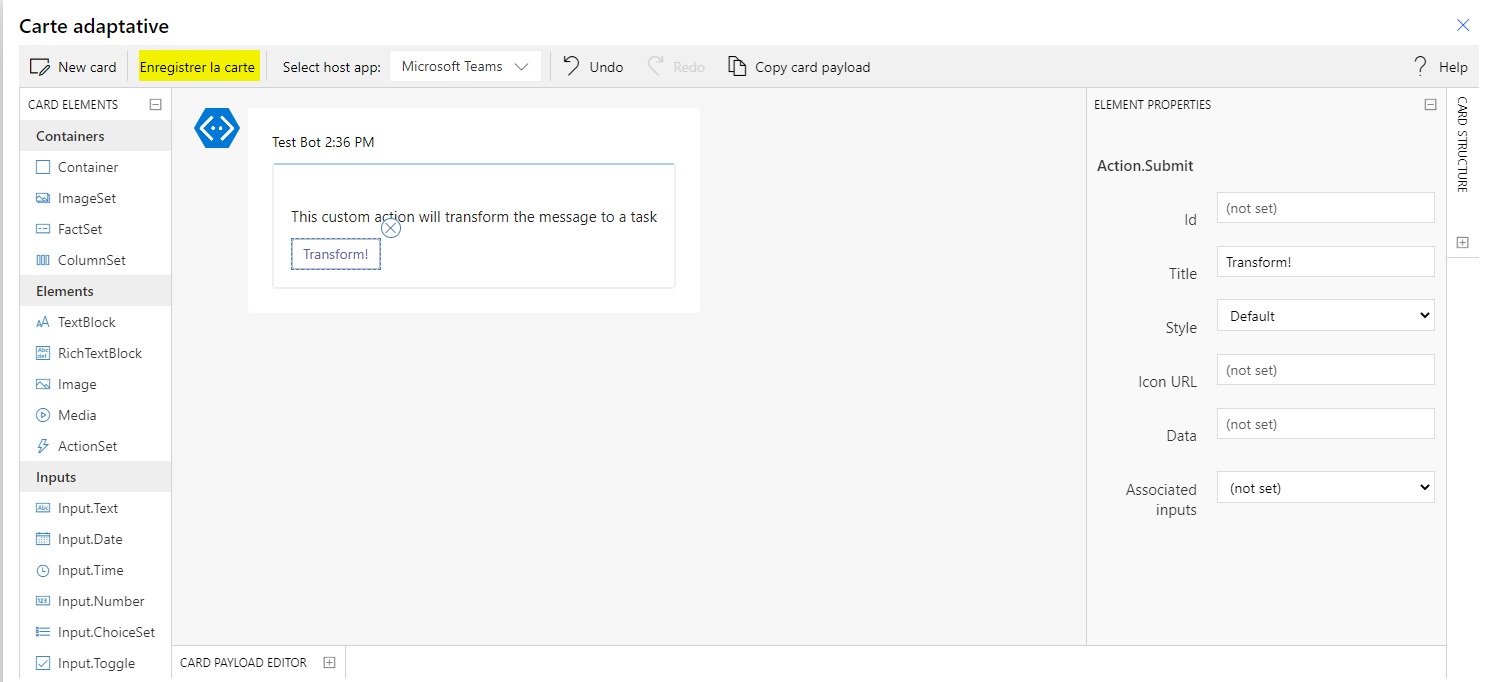
In my case, I don’t need information from users, so I just create a simple card with a button.
When the card is ready, you can save it. Then, you need to add a second task in your flow.
In my case, I want to transform a message to a task, and this task will be created in my to-do list via Microsoft To-Do List.
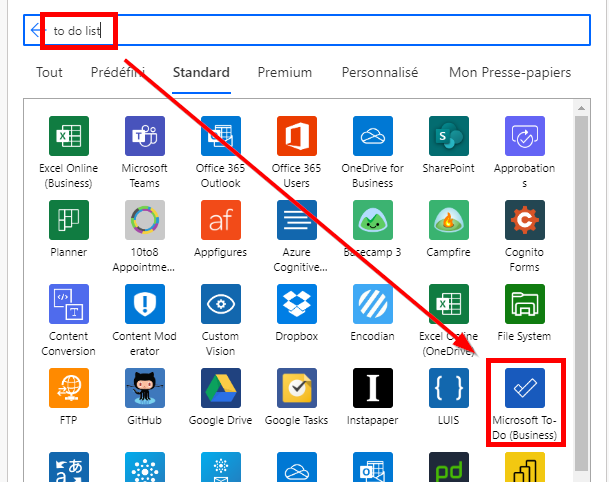
In the new step, you can select the task list in which the message will be created, then you can select the dynamic value “Plain text message output”. In that way, when you run your message action, the flow will copy the content of the message and past it in your To-Do List.
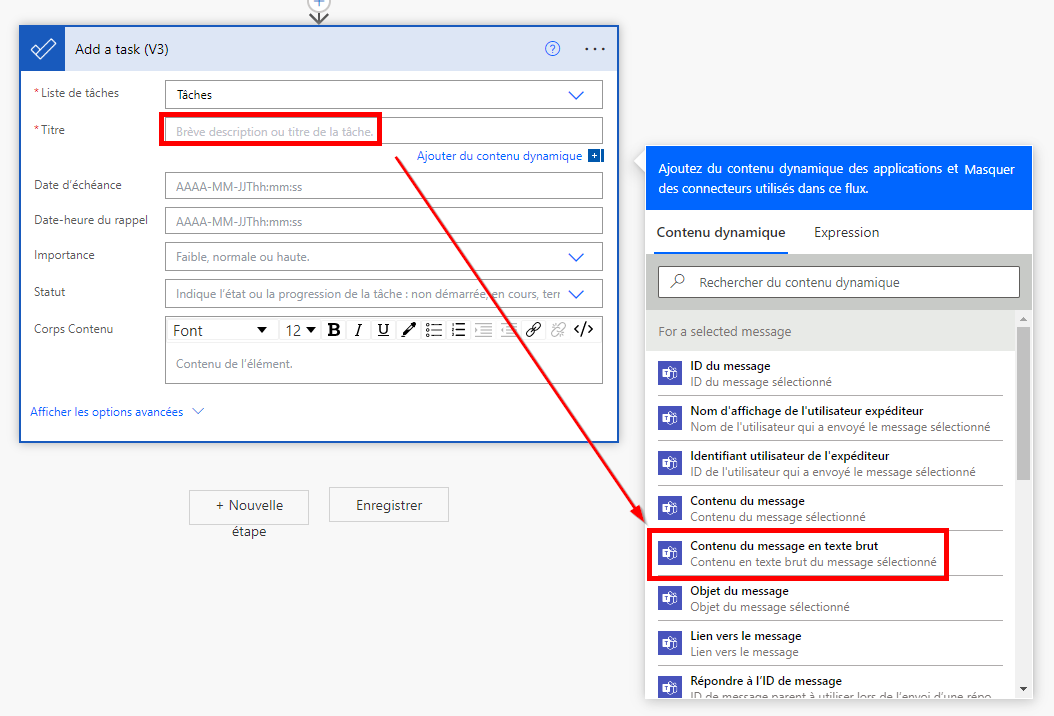
Once your workflow is done, you should have something like the following:

You can check in the “Flow” tab to confirm that your flow is ready.

Now, switch to Microsoft Teams to test the action task.
If you use Teams on the web app, you might see a display bug like the following:
![]()
If you switch to Microsoft teams, you should not have any problem. In my case, I renamed the flow to “Add a task” and I can confirm that the new action task appears:
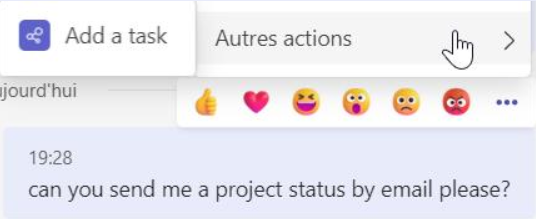
When you click on the task, your adaptive card will appear
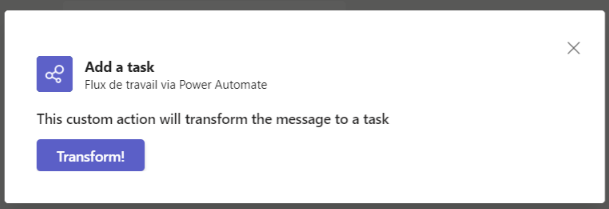
Click on the “transform” button, then you should have a new task in your Microsoft To-Do List

Of course, you can add steps as much as you want. One interesting step would be to add the last step in your flow that posts a message in your teams chat to notify the user when the flow is completed.


