Introduction
In part two of this multi part blog series, we covered the creation and configuration of a GitHub account, to host a GitHub repository for a Quick Start template, and then we examined Visual Studio Code integration with Git and lastly we pushed commits to a remote repository on GitHub.
In the final post, we will modify and deploy sample and custom template and parameter JSON files.
If you missed Part I and Part II, please make sure to check them here Part I and Part II before you continue with the last part.

Objectives
During this post, we will cover the following topic:
- Modify and deploy sample template and parameter JSON files.
- Deploy custom JSON files using Azure Portal.
- Deploy custom JSON files using Windows PowerShell.
Modify and deploy sample template and parameter JSON files
It is rarely necessary to construct a JSON-based Azure Resource Manager template from scratch. In many instances, you will be able to find a sample template to use as a starting point for your own template. A basic understanding of how templates are constructed, combined with an appropriate sample template to use as a starting point, will allow you to create your own custom templates with relative ease which is the focus in this post.
For additional information on authoring and modifying template files, please review the Authoring Azure Resource Manager templates documentation at https://azure.microsoft.com/en-us/documentation/articles/resource-group-authoring-templates/.
In Part II , we examined the 101-vm-simple-windows template that is available on GitHub. We subsequently added this template to our own Git repository.
In this section, we will customize this template and its related parameters JSON file using Visual Studio Code to meet our specific requirements. We will then stage and commit the changes to the local and remote Git repository.
1. Open Visual Studio Code, and then navigate to the C:\GitHub\ARM-Templates\101-VM-simple-windows
2. In the tree pane, click json.
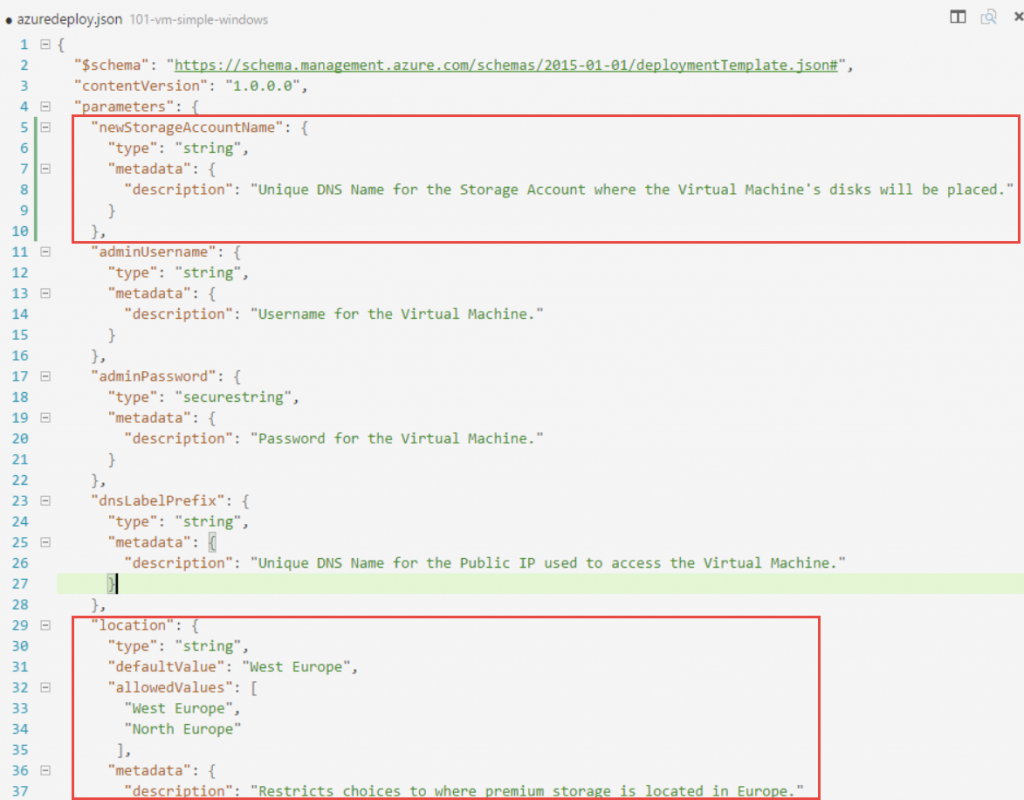
3. Type the following code after line 4.
"newStorageAccountName": {
      "type": "string",
      "metadata": {
        "description": "Unique DNS Name for the Storage Account where the Virtual Machine's disks will be placed. "
      }
    },
4. Type the following code after line 28.
"location": {
      "type": "string",
      "defaultValue": "West Europe",
      "allowedValues": [
        "West Europe",
        "North Europe"
       ],
      "metadata": {
        "description": "Restricts choices to where premium storage is located in Europe."
      }
    },
In this case, we are creating a default value and restricting choice to locations where Premium storage is available in Europe. For a list of datacenters showing the services offered by each, please see http://azure.microsoft.com/en-us/regions/#services.
5. On the File menu, click Save.
6. Click the Git icon on the left.
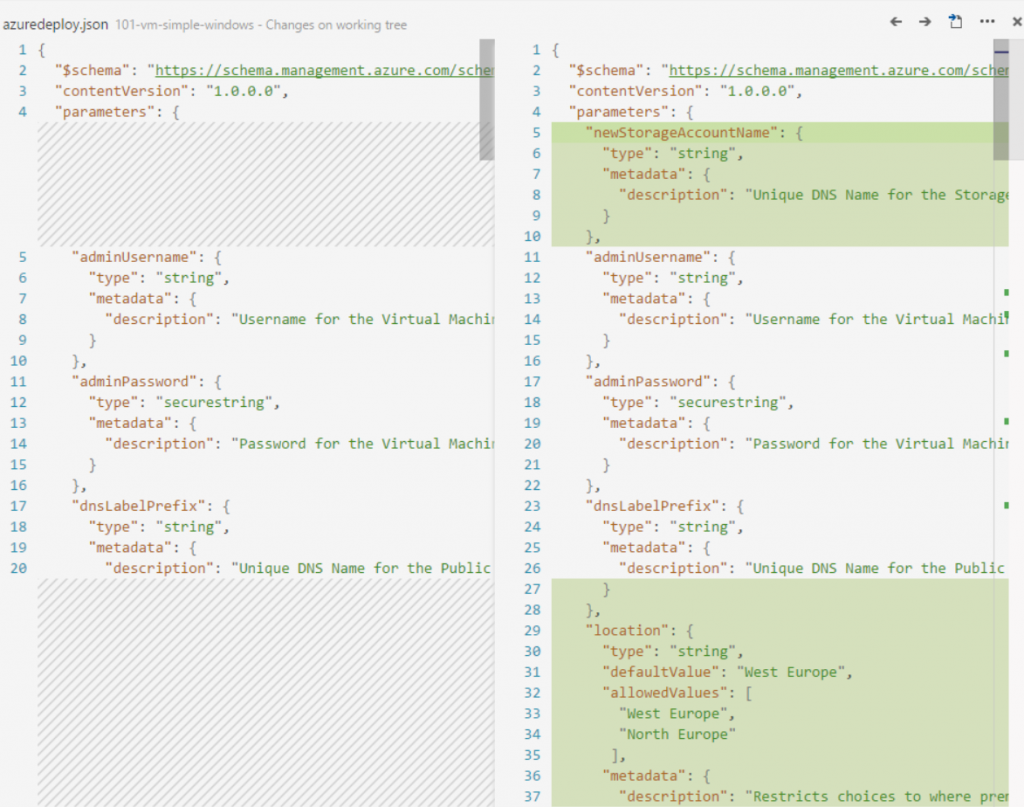
7. Under CHANGES, click json. Two screens appear as shown in the following screenshot. The left screen shows the original file, and the right screen shows the changes.
8. Review your changes, right-click json, and then click Stage.
9. On the left, click the Explore
10. Click parameters.json.
11. In azuredeploy.parameters.json, add key/value pairs for the location, adminPassword, parameters, and then provide unique names for the storage account and DNS name, as shown in the following 
12. Save the azuredeploy.parameters.json file.
13. Click the Git icon in the navigation pane, right-click parameters.json, and then click Stage.
14. Click the ellipsis…, and then click Commit Staged.
15. In the Message box, type Update1, and then press CTRL+ENTER. A snapshot of the files is now committed to the local C:\GitHub repository.
16. Click the ellipses…, and then click Push.
17. Switch to your browser and open the GitHub page, and then press F5 to refresh the page.
You should see that the two JSON files have been pushed to the remote repository on GitHub.
Deploy custom JSON files using Azure Portal
In the previous section, we modified the sample JSON to meet specific requirements and subsequently committed the changes to both a local and remote Git repository. In this section, we will review the steps to deploy the custom template using the Azure portal.
1. Open Visual Studio Code, and then navigate to C:\GitHub\ARM-Templates\101-vm-simple-windows.
2. In the tree pane, click json.
3. Click anywhere in the details pane, press CTRL+A, and then press CTRL+C to copy the contents of the file to the clipboard.
4. Open your browser and sign in to the Azure portal @ https://portal.azure.com, and then sign in to the account you are using for your Azure trial subscription.
5. In the Azure portal, in the navigation pane, click New.
6. On the New blade, click See all.
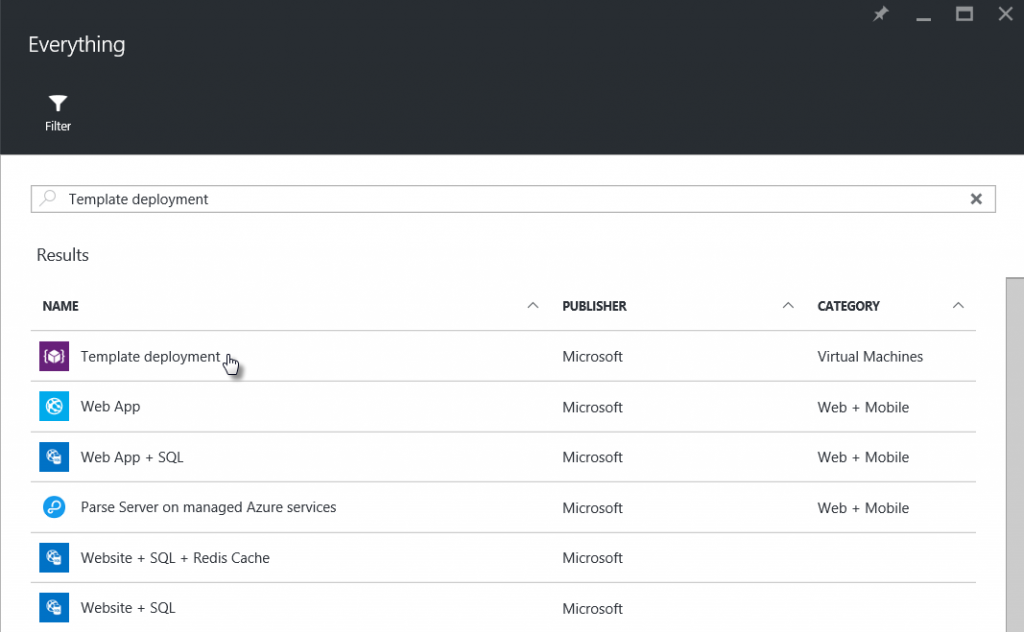
7. In Search everything, type Template, click Template deployment, and then press ENTER.
8. In the results, double-click Template deployment as shown in the following screenshot.
9. On the Template deployment blade, click Create.
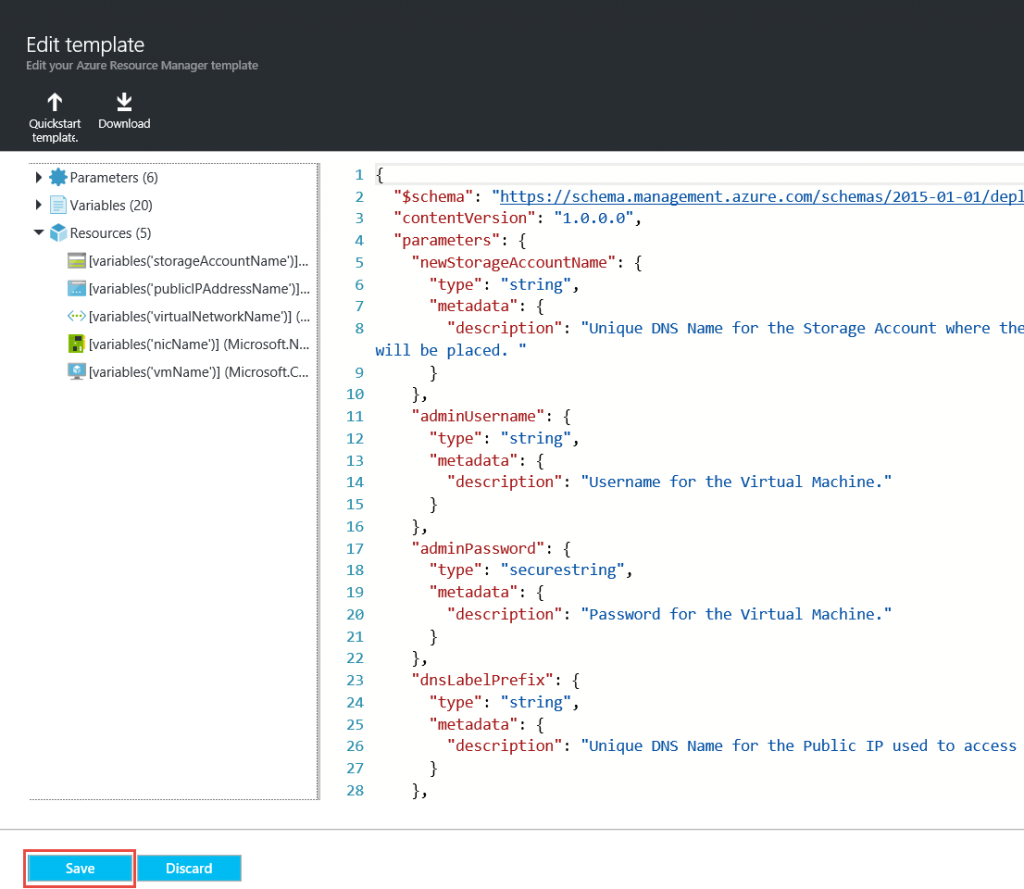
10. On the Custom deployment blade, click Edit template. 
11. On the Edit template blade, delete all the lines of JSON script.
12. Click in the template area, and then press CTRL+V to paste the JSON script that you copied to the clipboard earlier.
14. Click Edit parameters. The Parameters blade should appear immediately. If it does not, this means that something is wrong with your JSON script, most likely a mismatch between opening and closing braces or brackets.
15. On the Parameters blade, note the presence of the NEWSTORAGEACOUNTNAME (string) and LOCATION (string) parameters that we added to the original JSON script.
16. Close the Parameters and the Custom deployment blades without creating the deployment, because we will deploy the custom template using a PowerShell command in a later step.
17. When prompted, click OK to discard unsaved edits.
18. Close all open blades in the portal to return to the Start
19. Leave the Azure portal open for subsequent steps.
Deploy custom JSON files using Windows PowerShell
In the previous section, we reviewed the steps to deploy custom JSON template using the Azure portal. In this section, we will deploy the custom template using Windows PowerShell with 4 different options.
1. Open Windows PowerShell ISE
2. In the command pane, type and run the following command to install and import AzureRM PowerShell module.
Install-Module AzureRM
3. In the command pane, type and run the following command to login to Azure subscription.
Note: Sign in to the account you are using for your Azure trial subscription.
Login-AzureRmAccount
4. In the command pane, type and run the following commands:
In this step, we are defining the variables that we will be using in a later step.
# Variables
$LocName = “West Europe”
$deploymentName = “MyDeployment”
$templatePath = “C:\GitHub\ARM-Templates\101-vm-simple-windows\azuredeploy.json”
5. Option 1: Create a deployment using predefined parameters.
In the command pane, type and run the following commands:
$rgName = “MyDeploymentRG01”
# New Azure Resource Group
New-AzureRmResourceGroup -Name $rgName -Location $LocName
# Create a deployment using inline parameters
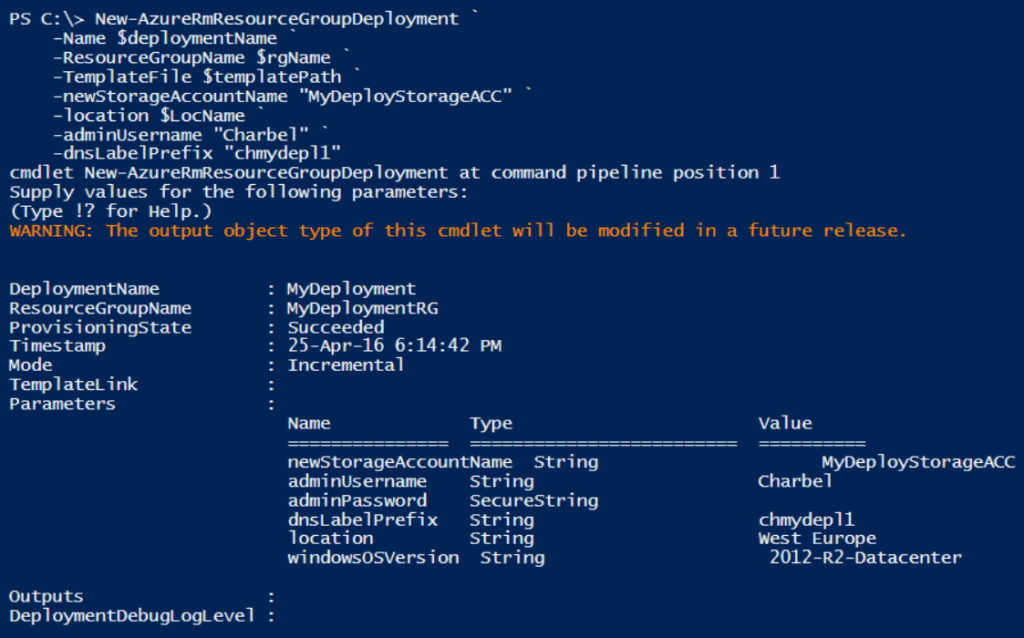
New-AzureRmResourceGroupDeployment `
-Name $deploymentName `
-ResourceGroupName $rgName `
-TemplateFile $templatePath `
-newStorageAccountName “MyDeployStorageACC” `
-location $LocName `
-adminUsername “Charbel” `
-dnsLabelPrefix “chmydepl1”
In option 1 of the custom template deployment, we created a new resource group called “MyDeploymentRG01”.
We defined the required parameters and then we started the deployment. You will be prompted for the admin password. If you don’t specify any of the parameter, you will be prompted to enter each one manually.
After a short period of item, the deployment will be completed and you will have the first SimpleWindowsVM deployed as shown in the following screenshot:
6. Option 2: Create a deployment using a parameter object.
In the command pane, type and run the following commands:
$rgName = “MyDeploymentRG02”
# New Azure Resource Group
New-AzureRmResourceGroup -Name $rgName -Location $LocName
# Create a deployment using a parameter object
$parameters = @{“newStorageAccountName”=”MyDeployStorageACC”;”location”=”West ` Europe”;”adminUsername”=”Charbel”;”dnsLabelPrefix”=”chmydepl2″}
New-AzureRmResourceGroupDeployment `
-Name $deploymentName `
-ResourceGroupName $rgName `
-TemplateFile $templatePath `
-TemplateParameterObject $parameters
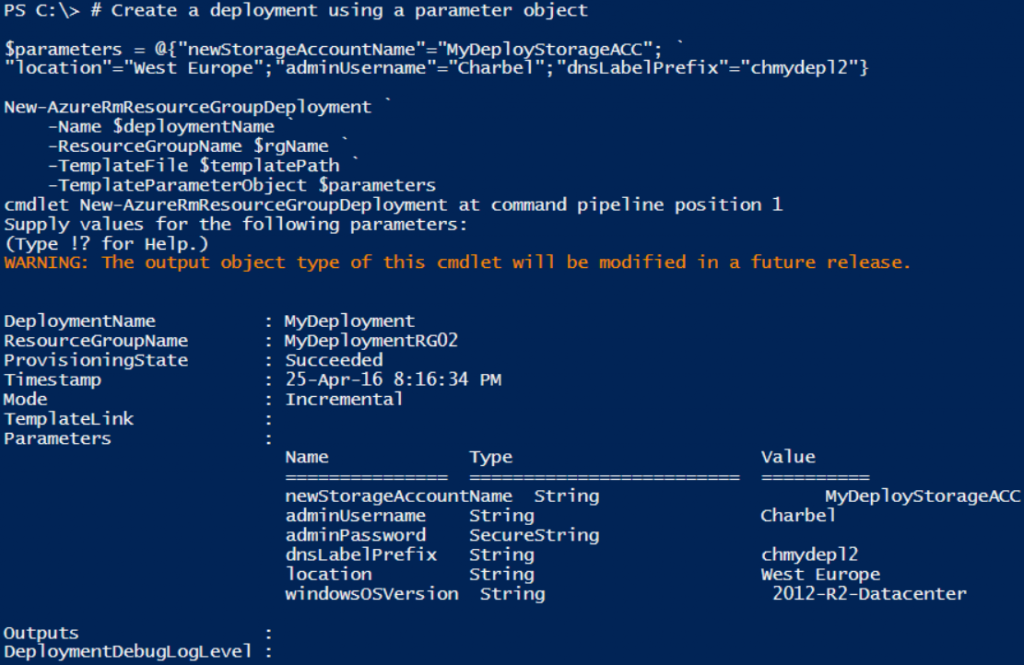
In option 2 of the custom template deployment, we created a new resource group called “MyDeploymentRG02”.
We defined the required parameters as a parameter object in a hash table. You will be prompted for the admin password.
After a short period of item, the deployment will be completed and you will have the second SimpleWindowsVM deployed as shown in the following screenshot:
7. Option 3: Create a deployment using a parameter file.
In the command pane, type and run the following commands:
$rgName = “MyDeploymentRG03”
# New Azure Resource Group
New-AzureRmResourceGroup -Name $rgName -Location $LocName
# Create a deployment using a parameter file
$parameterFilePath = “C:\GitHub\ARM-Templates\101-vm-simple- ` windows\azuredeploy.parameters.json”
New-AzureRmResourceGroupDeployment `
-Name $deploymentName `
-ResourceGroupName $rgName `
-TemplateFile $templatePath `
-TemplateParameterFile $parameterFilePath
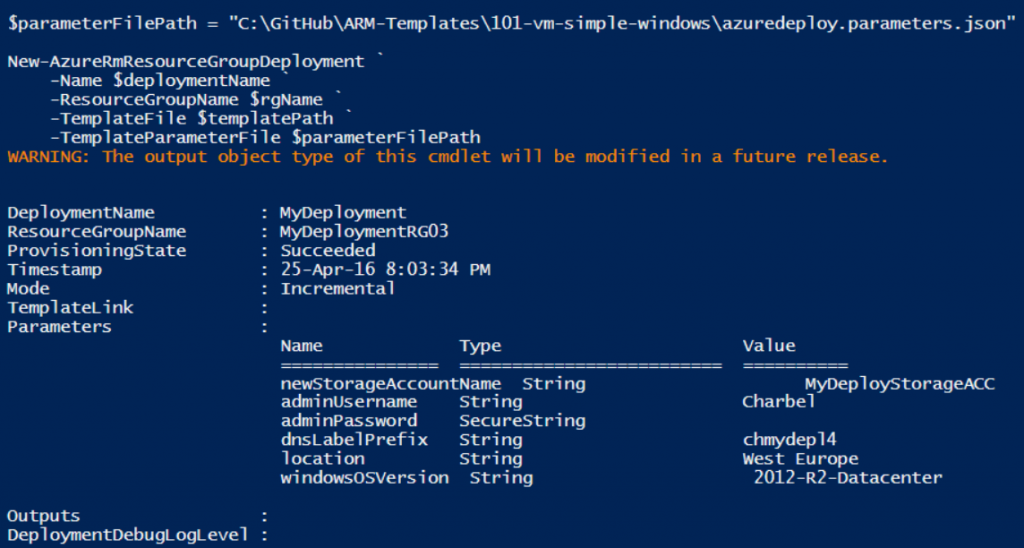
In option 3 of the custom template deployment, we created a new resource group called “MyDeploymentRG03”.
We defined the required parameters using the JSON parameter file azuredeploy.parameter.json
By using option 3, you will not be prompted to enter any parameter. All parameters will be injected directly from the JSON parameter file.
After a short period of item, the deployment will be completed and you will have the third SimpleWindowsVM deployed as shown in the following screenshot:
8. Option 4: Create a deployment using an online template.
Open your browser and switch to your GitHub page.
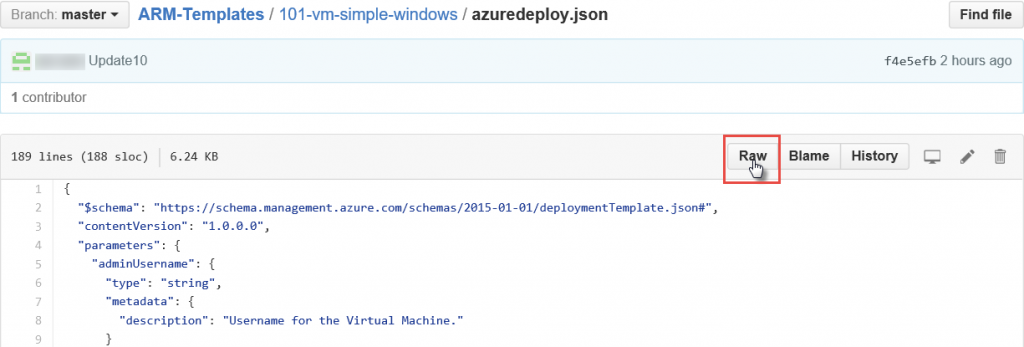
In the tab that displays the contents of your GitHub Templates repository, click azuredeploy.json.
On the azuredeploy.json page, click Raw as shown in the following screenshot:
Copy the URL displayed for the raw version of the azuredeploy.json file as shown in the following screenshot to the value of the $templateURI below:
$rgName = “MyDeploymentRG04”
# New Azure Resource Group
New-AzureRmResourceGroup -Name $rgName -Location $LocName
# Create a deployment using an online template
$templateURI = “PASTE-THE-URL-COPIED-FROM-THE RAW-VERSION”
New-AzureRmResourceGroupDeployment `
-Name $deploymentName `
-ResourceGroupName $rgName `
-TemplateUri $templateURI `
-TemplateParameterFile $parameterFilePath
In option 4 of the custom template deployment, we created a new resource group called “MyDeploymentRG04”.
We used the JSON parameter file azuredeploy.parameter.json from the previous step which is available on the local repository, and then we specified the online JSON template which is available online on GitHub repository.
By using option 4, you will not be prompted to enter any parameter as well, we used an online template instead of local copy.
After a short period of item, the deployment will be completed and you will have the fourth SimpleWindowsVM deployed as shown in the following screenshot:
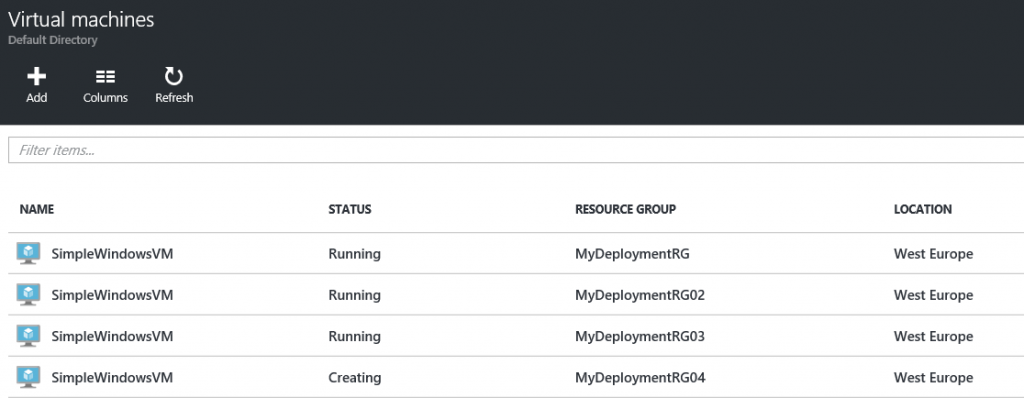
9. Switch to Azure portal now and confirm all Simple Windows VMs are created successfully:
10. Last but not least, we will remove all Azure resource groups used in this guide.
In the command pane in the ISE window, type and run the following command:
Get-AzureRmResourceGroup | Remove-AzureRmResourceGroup -Force
Conclusion
In the final post, we have customized a sample template and related parameters JSON file using Visual Studio Code, and then staged and committed the changes to the local and remote Git repository.
We covered the steps on how to deploy the custom template using the Azure portal, and finally we deployed the custom template using Windows PowerShell with 4 different options.
I hope this series of blog posts was informative for you and I would like to thank you for reading!
- Live Webinar: Save $10K + on SQL Deployment in Microsoft Azure
- Extend Active Directory to Microsoft Azure


