Windows 365 was announced by Microsoft in July 2021 and was globally released in August. The marketing definition is that Windows 365 is a PC in the Cloud. For IT guys, it is a well-known solution called Virtual Desktop Infrastructure (VDI). In traditional approach of VDI, you have to deploy several servers and manage applications before using a virtual desktop. With Windows 365, all the infrastructure is managed by Microsoft. You just need an Azure virtual network where DNS are set to your Active Directory Domain Services.
Windows 365 is built on top of Azure Virtual Desktop (AVD); the other Microsoft solution that provide remote apps, remote desktop and … personal virtual desktop. So currently we have two solutions that can provide the same service with some distinctions. From my point of view, Windows 365 is easier to deploy than AVD. Everything is manageable from Microsoft Endpoint Manager whether it be deployment, configuration, or updates. However, Windows 365 suffers of some lack of basics features for production such as backup, DRP or monitoring. I also was disappointed by the Active Directory Domain Services requirement where AVD doesn’t need it anymore. But Windows 365 has an interesting approach and I’m sure that Microsoft will fill the gap with the time.
In this topic I’d like to show you the steps to deploy your first Windows 365 Cloud PC from Microsoft Endpoint Manager.
Requirement to follow this topic
Several things were deployed to make work Windows 365 before I wrote this topic. So to follow this topic you need:
- An Active Directory Domain Service and an Azure AD
- Because Windows 365 needs to contact your Active Directory Domain Service, most of the time you need a connection between your On-Premises and Azure such as a Site-to-Site VPN or Express Route.
- An Organizational unit is created in Active Directory Domain Service for Windows 365. This OU is synchronized with Azure AD Connect. An account is created with the permission to create computer object in this OU.
- An Azure AD Connect with Hybrid AD Join configured
- An Azure Virtual Network where DNS are set to your Active Directory Domain Services
- If you want to deploy your cloud PC from a custom image, you have to create an image based on Gen1 VM
- A license to use Microsoft Endpoint Manager and Windows 365. All the configuration is done through Microsoft Endpoint Manager.
When you buy a Windows365 license, it appears at the same place than O365 / M365 license in your admin portal. Just activate your license like the others.
Deployment preparation: configure the network
Open Microsoft Endpoint Manager (https://endpoint.microsoft.com) and navigate to Devices – Windows 365. From there you can manage the configuration and the deployment of Windows 365.
Then navigate to On-Premises network connection and select Create.
Now specify a name for the network and select the right Azure subscription, Azure virtual network, and subnet. Don’t forget that the DNS configuration of this virtual network must be set to your Active Directory Domain Service (and so usually be connected to your on-premises through Site-to-Site VPN or Expressroute)
Next specify the domain name, the OU where Windows 365 computers will belong and the account that have the right to create computer objects in this OU.
The wizard indicates that some permissions will be created. You can also review your configuration. Once everything is good, click on Review + Create.
Once the network is created, Microsoft Endpoint Manager checks for you all the requirements and indicates you if anything is wrong.
Deployment preparation: upload a custom image
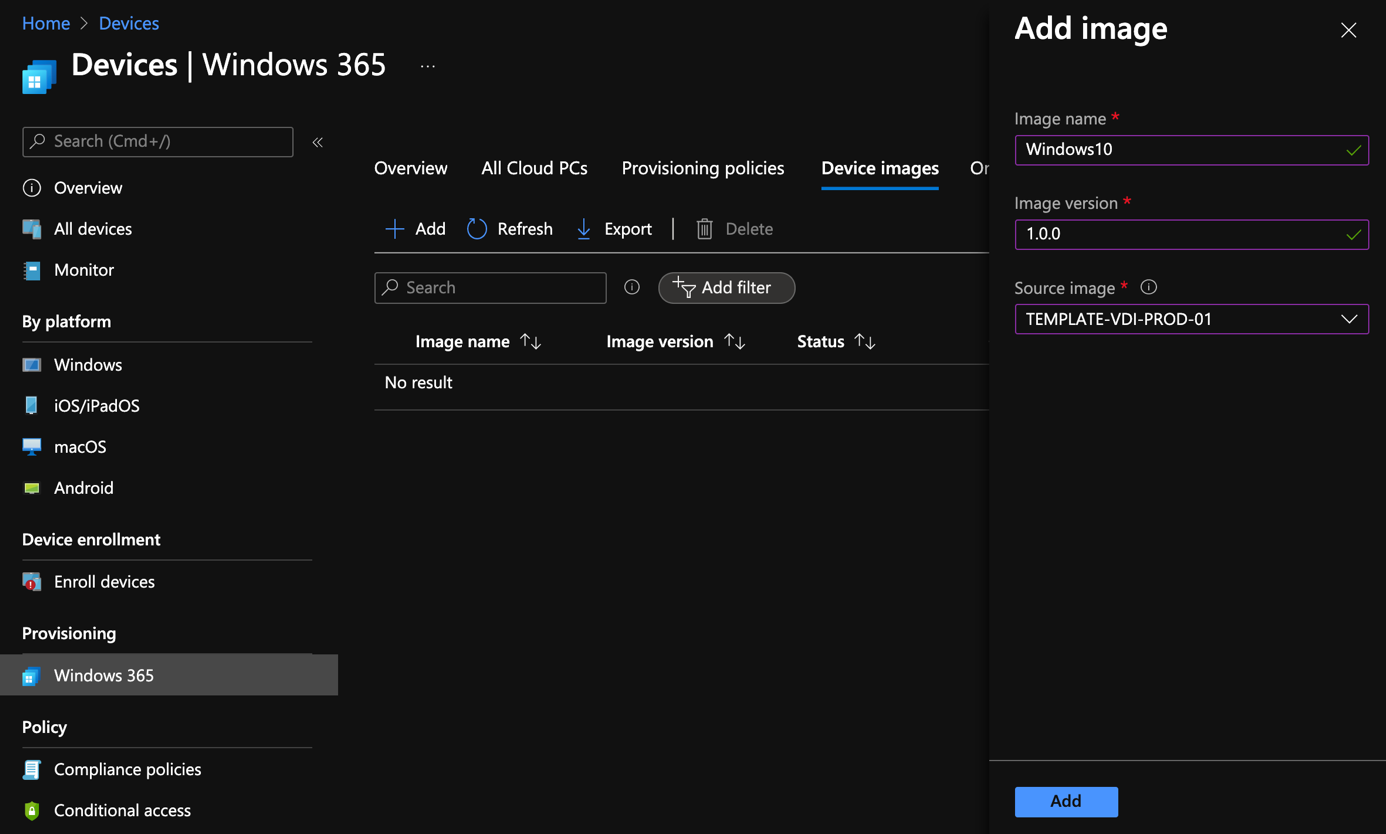
To upload a custom image, navigate to Device images. From there you can select Add. Then select an image that is in your Azure tenant. The image must be a gen1 image.
Deployment preparation: user settings
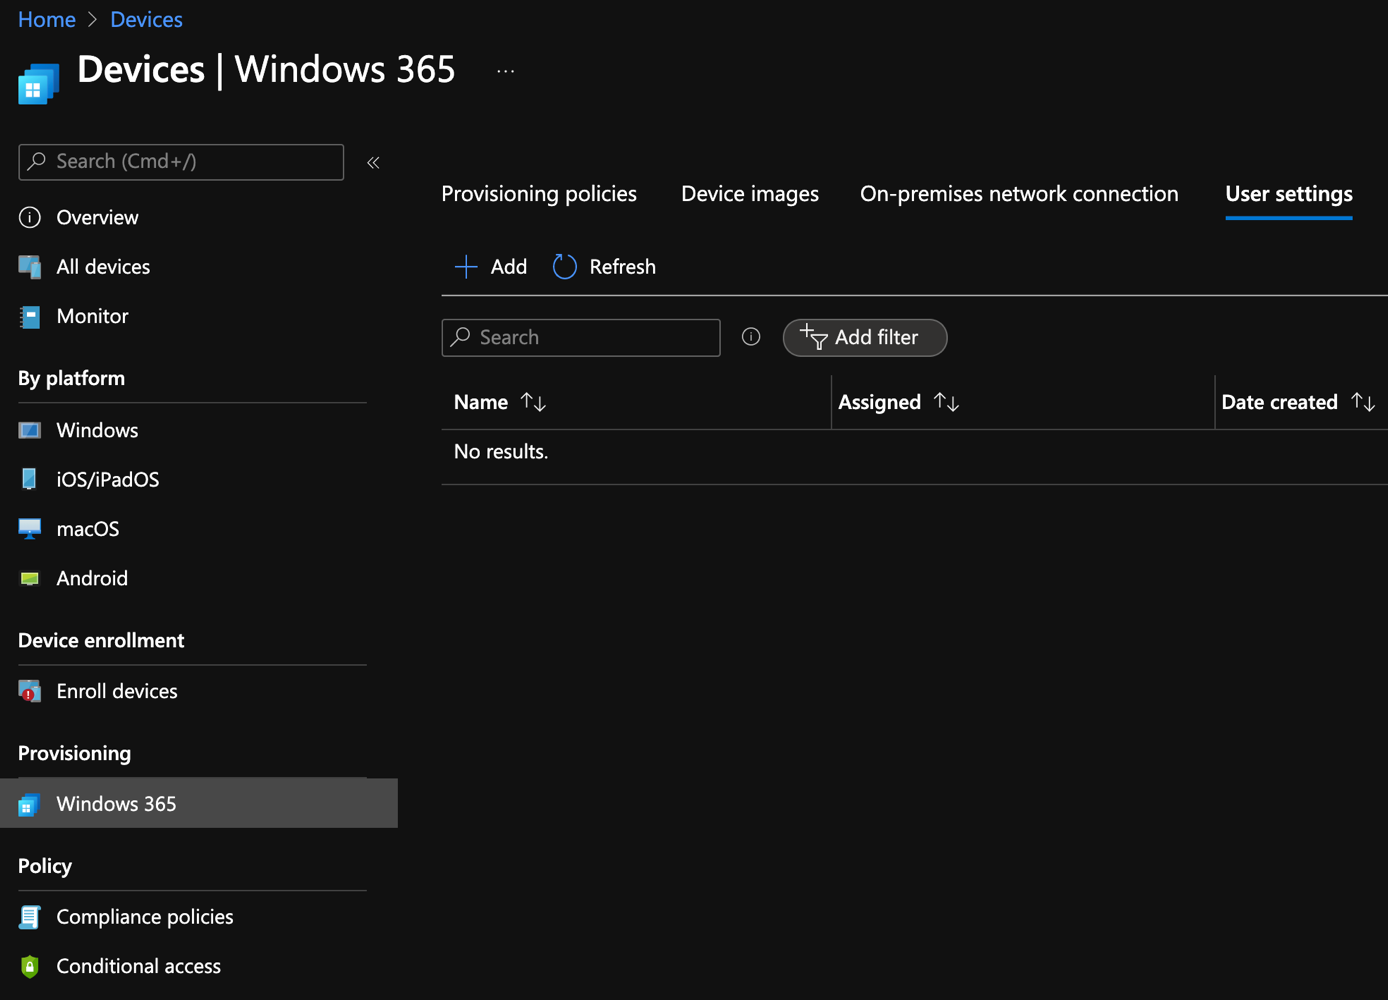
For the moment there is a single setting in user settings: choose if your user is admin or not of the local system. To do so, navigate to user settings and then select add.
Then provides a policy name and choose either you want your end user administrator of cloud pc or not.
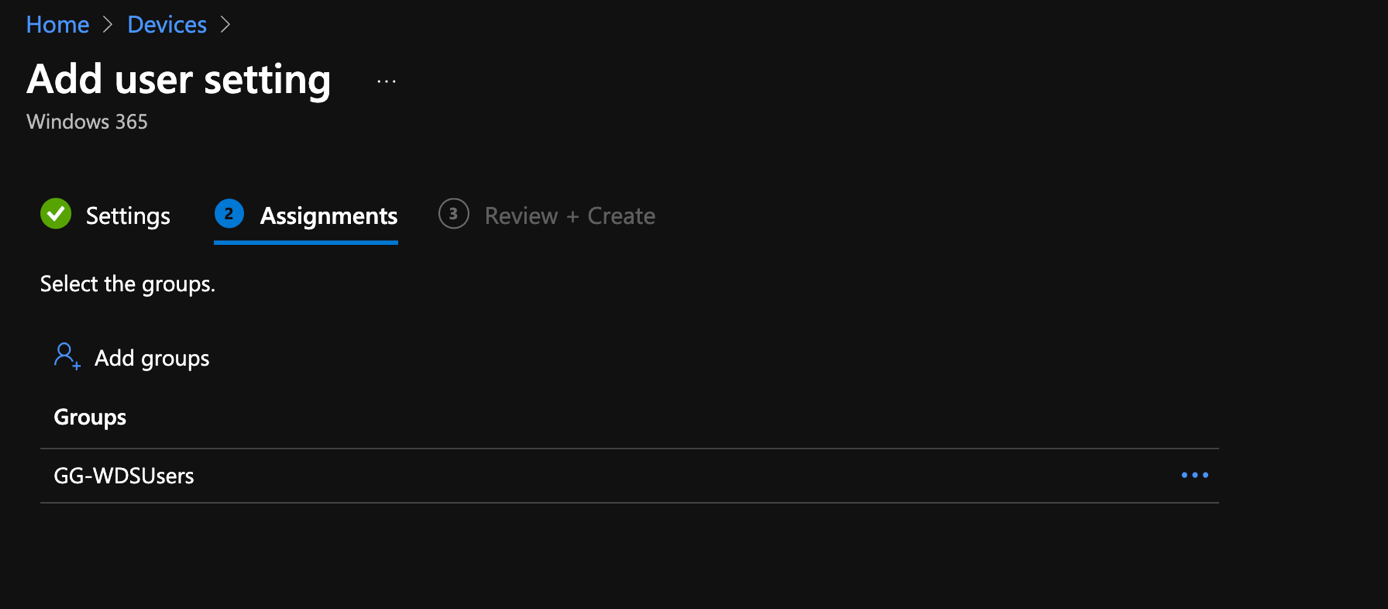
Next you have to assign the policy to an Azure AD group.
Deployment preparation: provisioning policies
To start the Windows 365 Cloud PC deployment, we need a provisioning policy. Navigate to provisioning policies and select create policy.
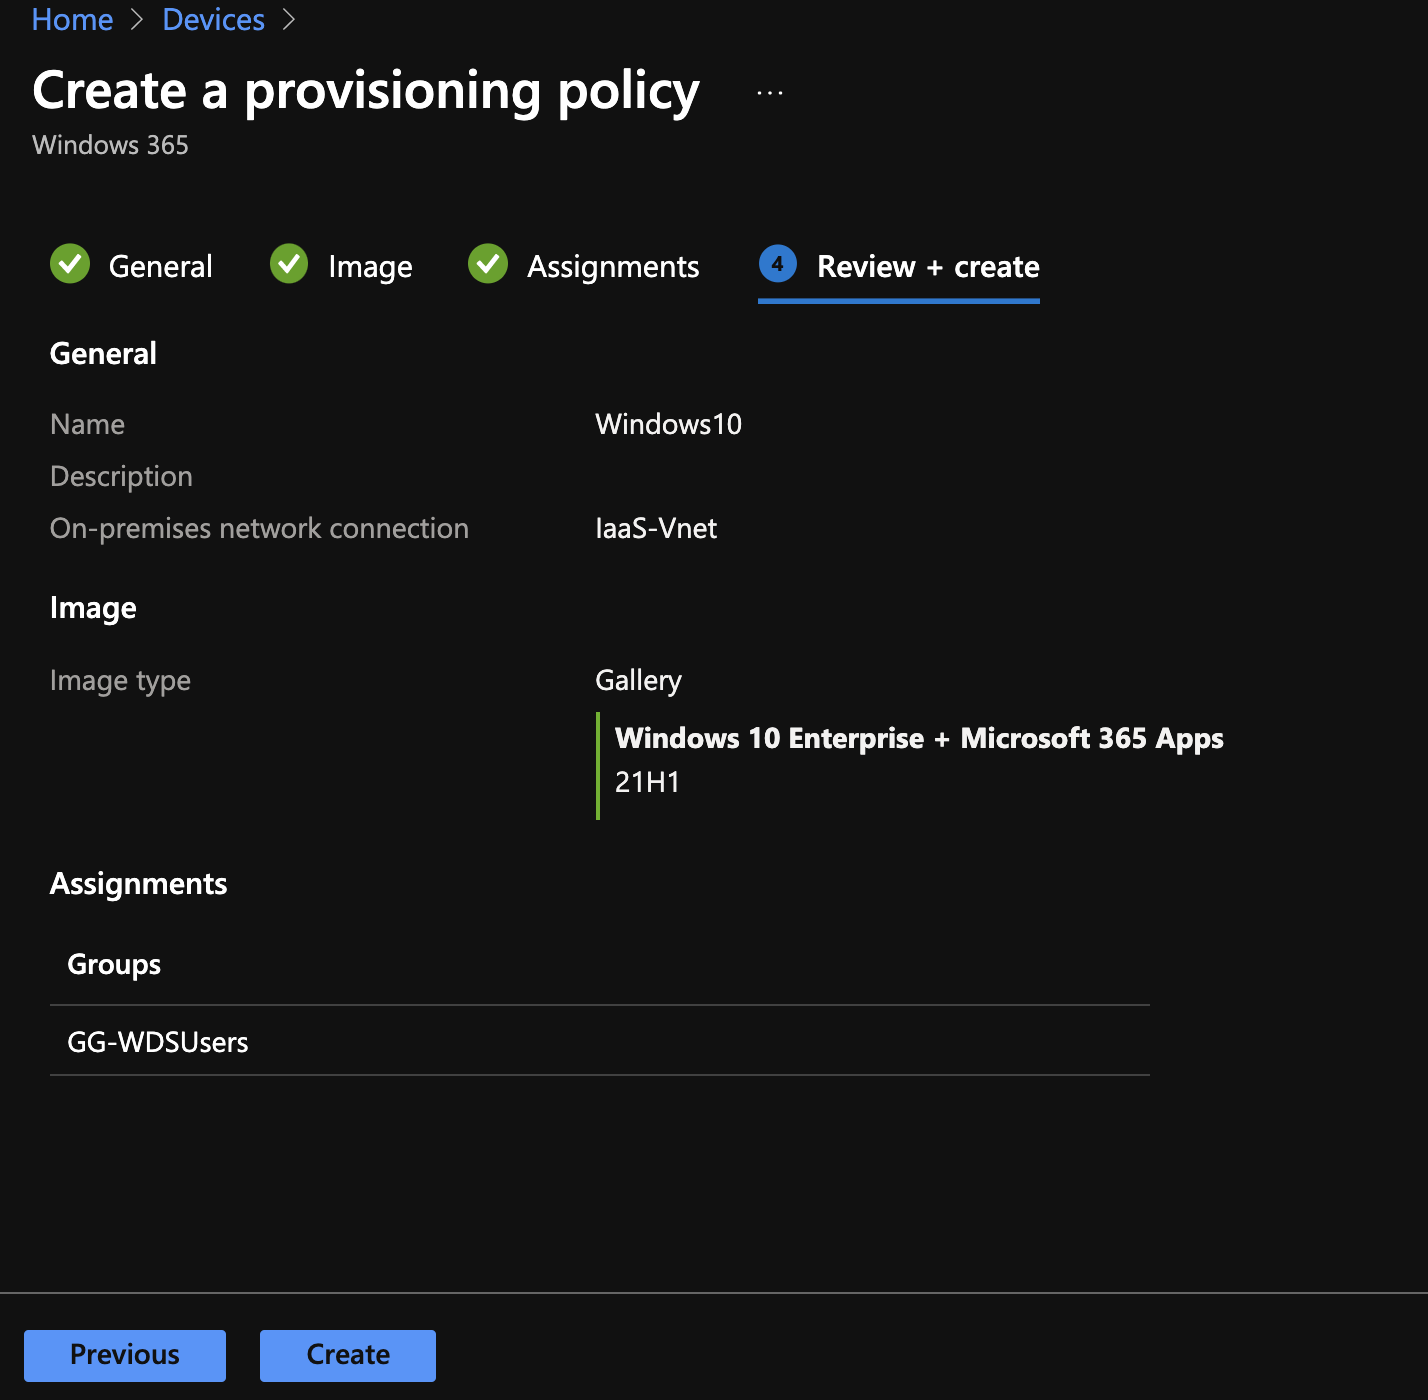
Next specify the policy name and select the On-Premises network connection you have created early.
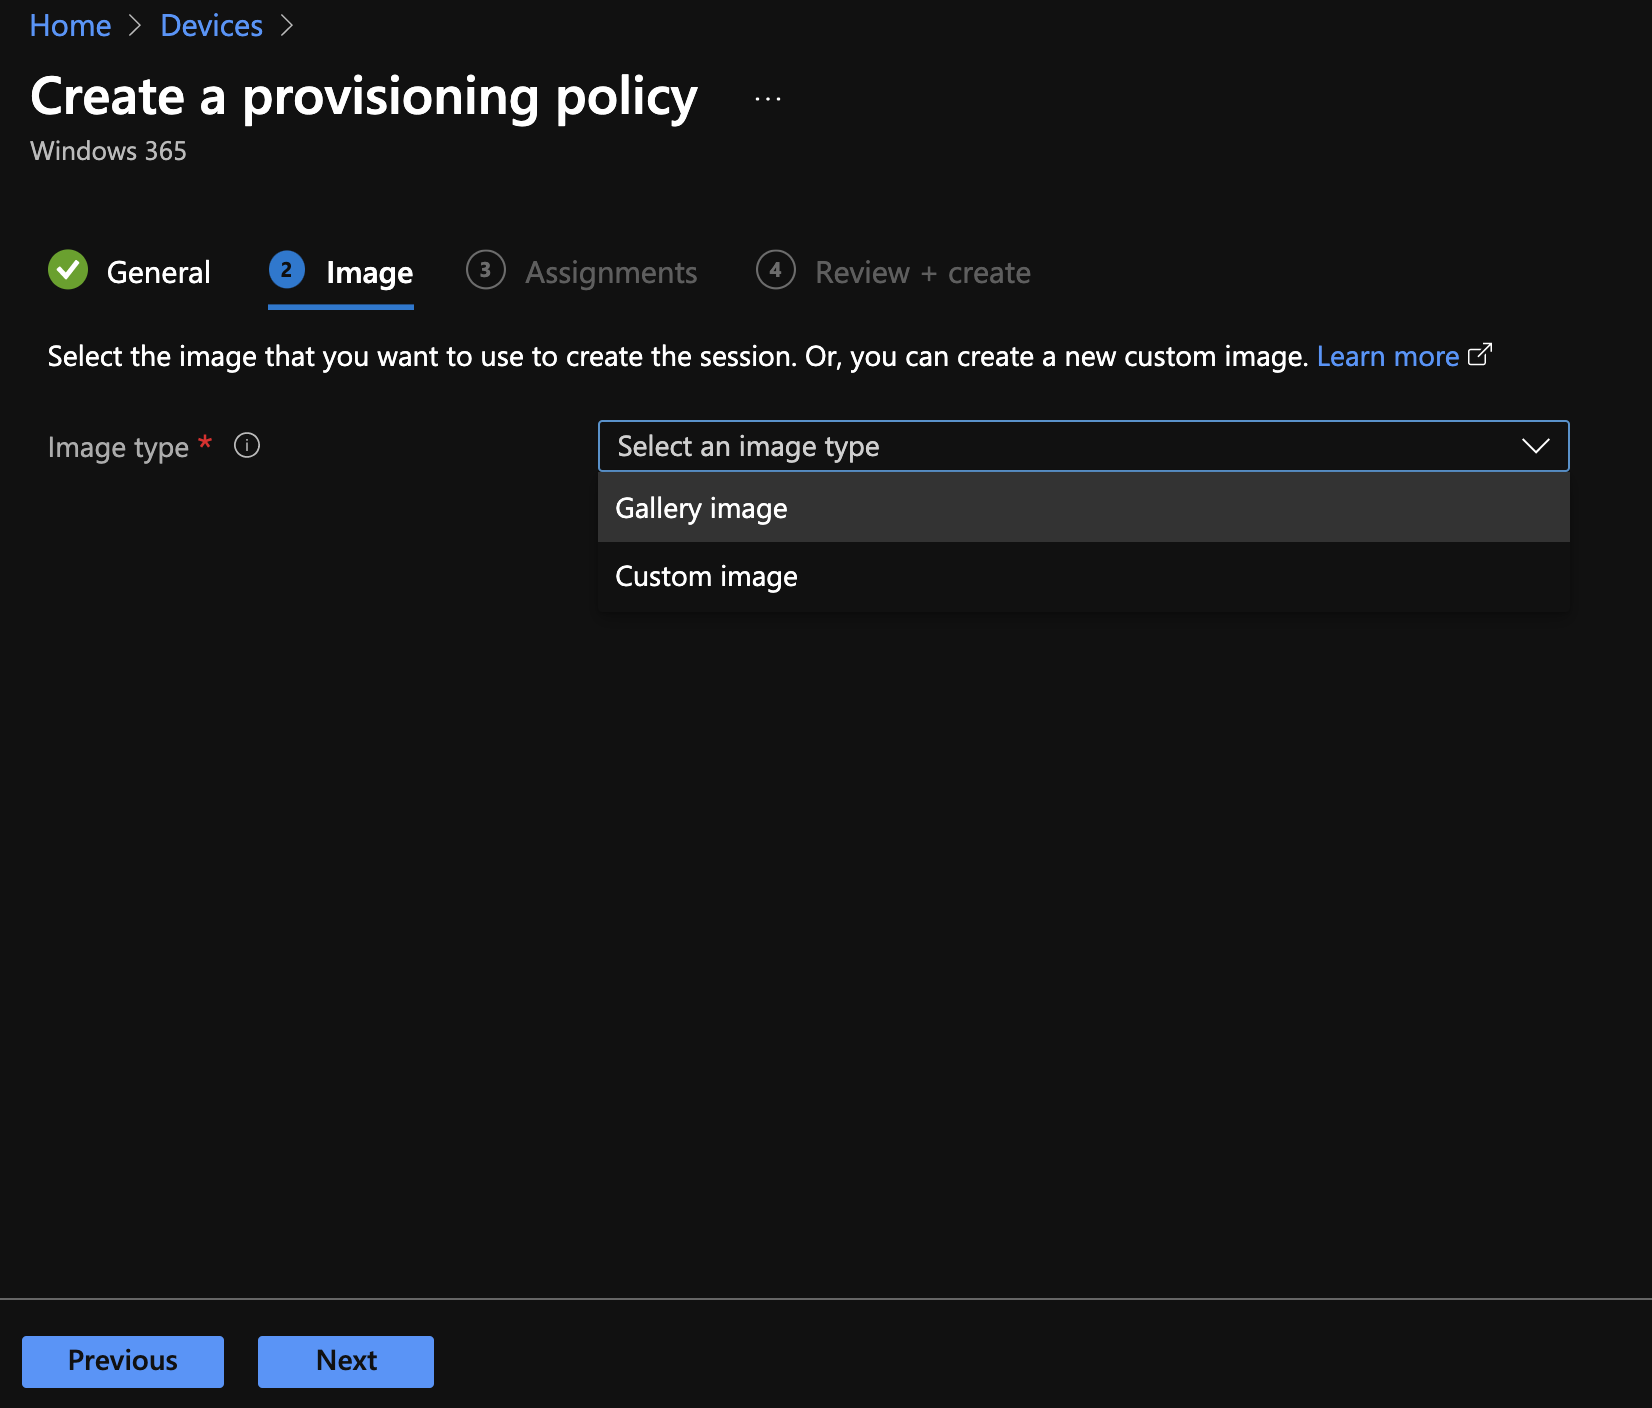
Next you can choose from which image you deploy Windows 365 Cloud PC: from a custom image or from gallery. If you have published a custom image early, you can select it. For this example I’ll use an image in the gallery.
I selected the latest Windows 10 build with Microsoft 365 Apps.
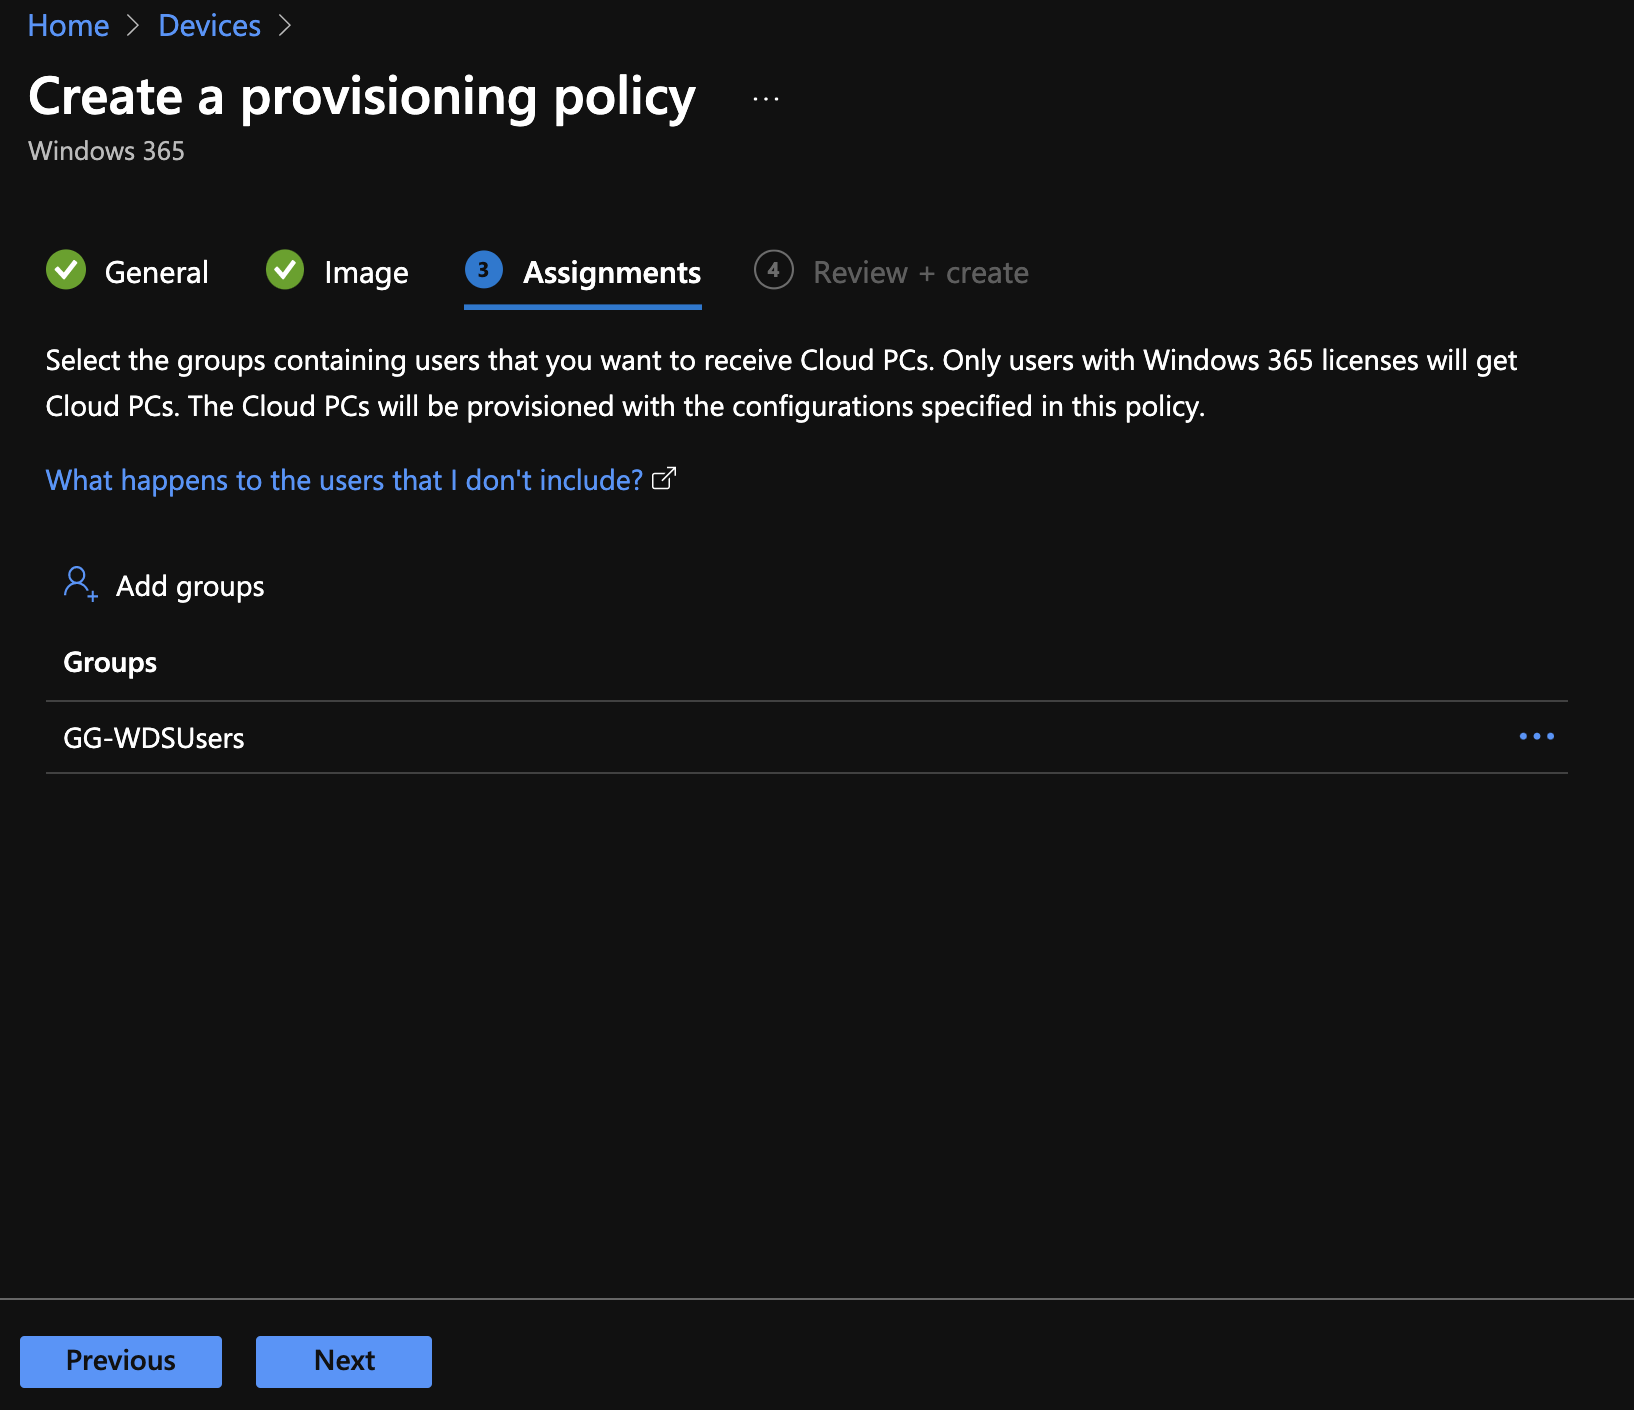
Then you have to assign the policy to an Azure AD group.
To finish you can review your settings. If everything is good, click on create.
That’s it, we have done all configuration to provision our first Windows 365 Cloud PC. We’ll see after that the provisioning should start soon after you created the provisioning policy.
If in Microsoft Endpoint Manager you have already created profiles or applications, you can assign them to the Cloud PC.
Windows 365 provisioning
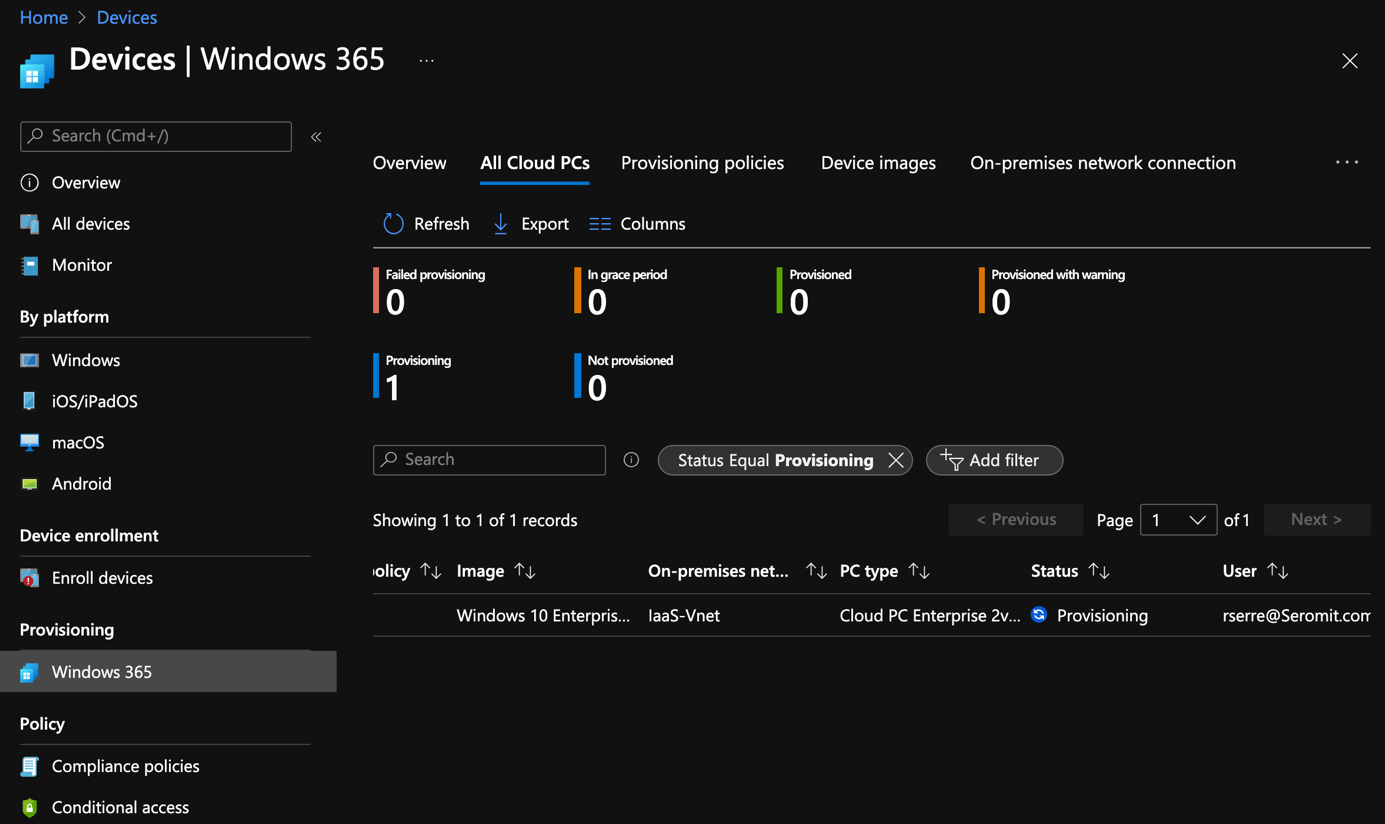
Just after I created the provisioning policy, the deployment started. So now I just have to assign Windows 365 license to users in order to provision a cloud pc to end user. Obviously, the user must belong to the group where you assigned the policies.
Once the Cloud PC is provisioned, you should get the following status:
End users experience
The end users have two ways to connect to their Cloud PC. The first way is the web browser through https://windows365.microsoft.com:
The second way is the Remote Desktop application that we already used for Azure Virtual Desktop. This application is available for Windows 10, MacOS, iPhone / IpadOS and Android.
Conclusion
As you have seen; Microsoft did a great job to make the deployment really easy. Everything is done through Microsoft Endpoint Manager, and it takes 15 minutes to configure Windows 365 deployment. Then you can use existing apps and profiles you set in Microsoft Endpoint Manager. Good job on this point.
However, Windows 365 lacks some features such as GPU (coming later this year I think), backup, DRP or monitoring and it is an issue for production from my point of view. Currently, Windows 365 requires also Active Directory Domain Services and so most of the time a connection to your On-Premises network.
At the moment I prefer to recommend to my customers to use Azure Virtual Desktop than Windows 365 which supports DRP, backup, GPU and monitoring. You don’t need also ADDS for your Azure Virtual Desktop hosts. Moreover, these hosts can be managed through Windows 365. So the only advantage of Windows 365 is the way to deploy Cloud PC. It’s not enough to convince me to switch from Azure Virtual Desktop to Windows 365.
Windows 365 is young and I’m sure Microsoft will fill the gap and I’ll keep an eye on it because it is promising solution.


