Nowadays, automation became an essential part of every single job in order to save time in your day-to-day tasks. Automation is part of IT jobs, but it is important to think automation even if you do not work in IT.
Automation can be done using scripting languages, but you can also use low-code application if you do not have scripting skills. Microsoft has released a new Power Automate Desktop app on Windows 10 that helps you to automate your tasks on your Windows 10 device. The Microsoft Power Automate desktop app was only available to Windows 10 Enterprise users but recently, Microsoft has announced that the automation tool is available for free to all Windows 10 users.
First, you must download the app on your Windows 10 using the following link: https://flow.microsoft.com/fr-fr/desktop/, then double click on the installer
Click Next to start the installation. Do not forget to select the following checkbox if you want to use web apps in flows
At the end of the installation, you can launch the Power Automate Desktop app
You must sign in with a Microsoft account
After sign in, the desktop app will open, and you will see the New Flow button to create your first flow.
Enter a friendly name and click Create
You will see a new page with 3 sections:
- Actions: on the left, you will see the available actions that you can use in your flow to automate your task.
- Flow: it is the main section in which you will create your flow by dragging dropping the actions. You will be able to use the output of an action and redirect it to the input of the next action.
- Variables: on the right, you will can create variables to use in your flow.
Now, you can create a flow depending on your needs. In this guide, I will create a simple flow that will:
- Connect to my Azure subscription
- Get the virtual machines information
- And write the information in a text file
These actions are pretty simple to automate using a PowerShell script for example, but if you do not have PowerShell skills, it is the best way to achieve this!
First, we need to use the “Create session” action in the Azure section. In this action, I use a service principal:
In the second action, I use the “Get subscription” and I just need to enter the dynamic variable named “%AzureClient%” which is the output variable of the previous action.
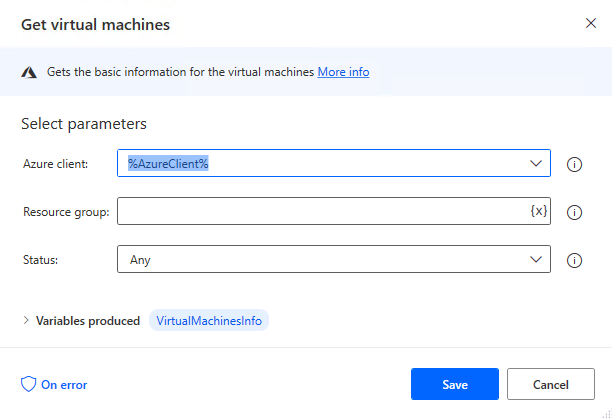
Then, I use the “Get virtual machines” with the same variable and if needed, it is possible to filter by resource group and status.
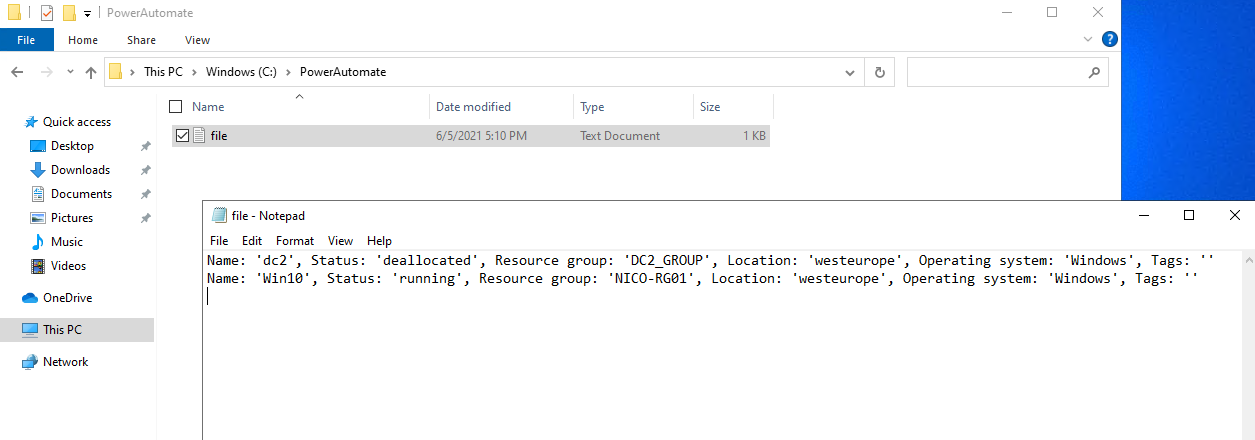
To finish, I use the “Write text to file” action to send the result in a text file. In this action, just add the “%VirtualMachineInfo%” variable and the file path.
That is all. Now, click the “play” button to run the flow and check the result. Open the text file and confirm the content:
Please note that you do not need to open the file to confirm the result, you can check the variables on the right side to see the value of each variable.


