VMware is a well-recognized industry mogul in the field of virtualization. VMware vSphere provides a compelling solution for virtualization management and deployment. It is extremely popular in enterprise and cloud computing environments because of its features, such as high availability, resources management, and security.
On the other hand, KVM is an open-source hypervisor, implemented as a Linux kernel module, that supports multiple operating systems, including Linux, Windows, and various other Unix-like operating systems. Thanks to its versatility, it is a popular solution for virtualization. Widely used in data centers and cloud computing environments, KVM enables efficient utilization of hardware resources and provides flexibility in managing VMs.
As KVM does not require costly licensing and is generally considered more flexible than vSphere in terms of customizing VMs, switching to KVM in certain scenarios can prove beneficial for individuals or organizations. That’s why it won’t hurt to know how to convert a VMware virtual machine to a KVM one.
VMware vs KVM
While both VMware and KVM are popular virtualization technologies that essentially fulfill the same purpose, there are, of course, significant differences between their VMs – such as:
- Resource management: While VMware vSphere employs a comprehensive suite of management tools (vSphere, vCenter, vRealize Suite, etc), KVM relies on command-line tools and third-party management solutions.
- Hypervisor: KVM leverages the existing Linux kernel as its hypervisor. On the contrary, VMware uses its own.
- OS support: VMware supports Windows, Linux, and macOS, whereas KVM supports primarily Linux and some other Unix-like OSs.
- Cost: VMware provides commercial solutions that require licensing fees. KVM is open-source software and is free to use.
Convert VMware to KVM using StarWind V2V Converter
Admittedly, since using KVM VMs in certain cases may be more appropriate than using VMware VM, a lot of people face the need to convert from one VM format to another. The best way to migrate VMware to KVM is using an easy-to-use conversion tool like StarWind V2V Converter / P2V Migrator.
StarWind V2V Converter / P2V Migrator is a specialized software utility for converting virtual machines from one format to another. As it goes, it has some unique features that set it apart from other conversion tools, such as supporting a wide range of VM formats. That includes such popular choices as VMware, Hyper-V, KVM, and VirtualBox.
StarWind V2V Converter offers a range of features for converting and cloning VMs, focusing on ease of use, versatility, speed, and automation. This solution allows for quick and easy cloning of VMs. That is a useful feature for creating backups or for testing and development purposes. StarWind V2V Converter also supports automation via PowerShell scripting, providing seamless integration into the existing workflow.
Now, it’s time to migrate VMware to KVM!
A Linux-based VM on ESX host (alpine-demo-sw) will be converted from a standalone ESXi 6.7 host. Windows Server VM will be used as a gateway between ESXi and KVM hypervisors. This isn’t necessary, however, since any Windows VM or physical host or just a laptop will do (we just need to install StarWind V2V Converter somewhere).
The goal is to convert this VM to a standalone KVM host.
- Select the VM that needs to be converted and moved from ESXi host to KVM host.
2. Turn off the VM.
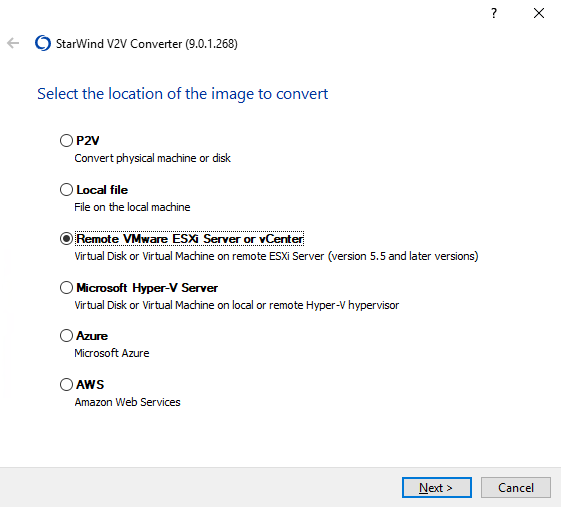
3. Install and start StarWind V2V converter on a Windows instance. This Windows instance will be used as a gateway between ESXi and KVM hosts. Select Remote VMware ESXi Server or vCenter and click Next.
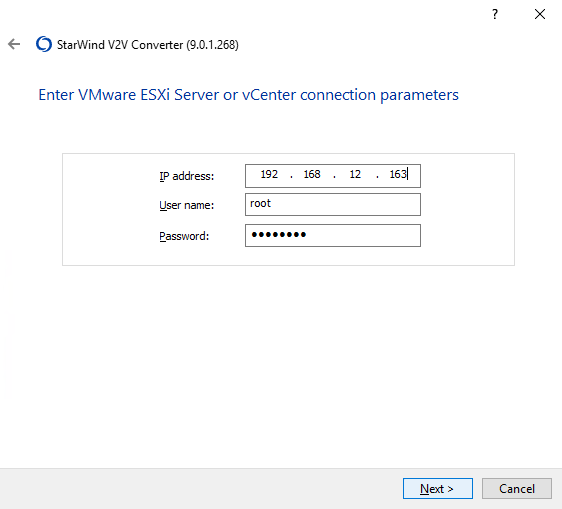
4. Specify IP address, username and password of the ESXi host, click Next:
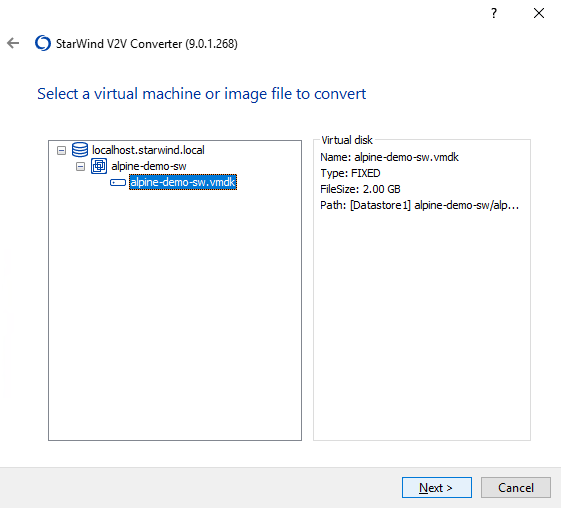
5. Select the .vmdk file of the VM you wish to convert, click Next.
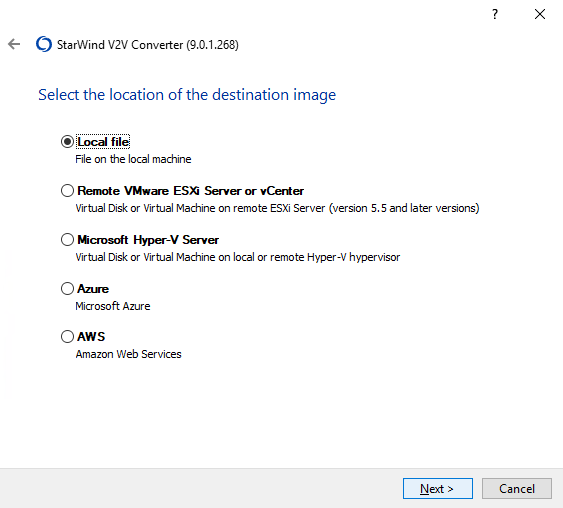
6. Select Local file as destination of the converting process, where qcow2 VM disk will be saved, click Next.
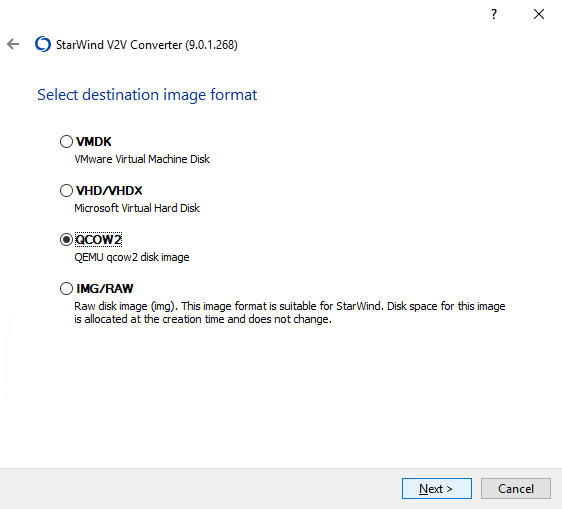
7. Select QCOW2 as a destination image format, click Next.
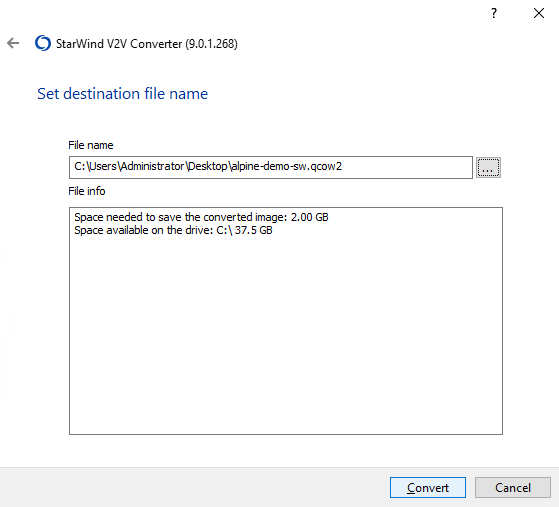
8. Set destination file name, click Convert.
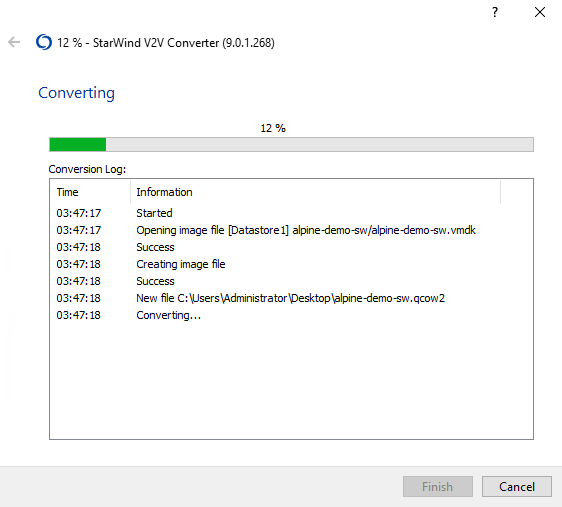
9. The conversion process starts.
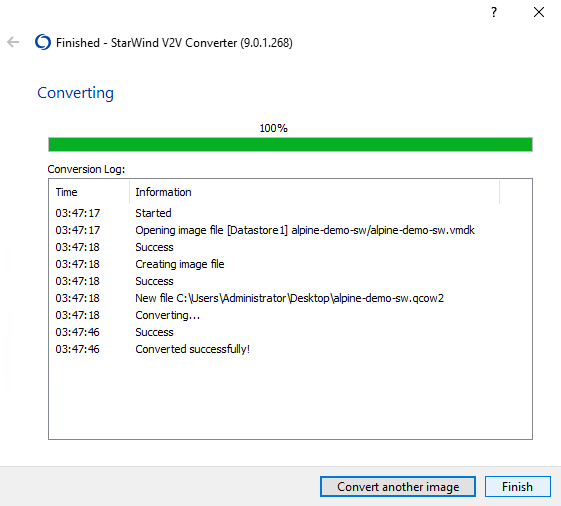
10. When the conversion process ends, click Finish.
11. Converted .qcow2 VM appears in the destination folder.
12. Copy the .qcow2 image of the VM from Windows instance to KVM instance via SSH, e.g. using WinSCP tool.
13. Create a new KVM VM using copied .qcow2 image.
$ virt-install --name alpine-demo-sw --memory 2048 --vcpus 1 --disk /home/sw/alpine-demo-sw.qcow2,bus=sata --import --os-variant alpinelinux3.7 --network default –-wait 014. Now you can view the mounted VM using command.
$ virsh list --all15. Connect to the VM using remote access software e.g. Virt-Viewer to start working with it.
Here we are, all done!
Conсlusion
To sum up, it is safe to state that both VMware and KVM are efficient and performative virtualization technologies that obviously each have its own strengths and weaknesses. Choosing between them depends on multiple factors such as the specific use case, the OSs and apps in question, and the available resources/budget.
This material has been prepared in collaboration with Viktor Kushnir, Technical Writer with almost 4 years of experience at StarWind.


