In this guide, I will explain to create and display a notification using PowerShell. To perform this task, I will use PowerShell and especially, the BurntToast module which is a custom module available on GitHub. You can download the module or use the PowerShell Gallery to install on your machine: https://github.com/Windos/BurntToast. The PowerShell Module works on Windows 10 and Windows Server 2019. At the time of writing, the latest version on PS Gallery is 0.8.5.
Notifications can be useful to display important information on your machine or to display information remotely on user workstations for example. In this guide, I will describe how to install this custom module, and then how to create your own notification locally.
First, run the following command to install the module for the PowerShell Gallery:
PS > Install-Module BurntToastDo not forget to run your console as administrator before running the previous command.
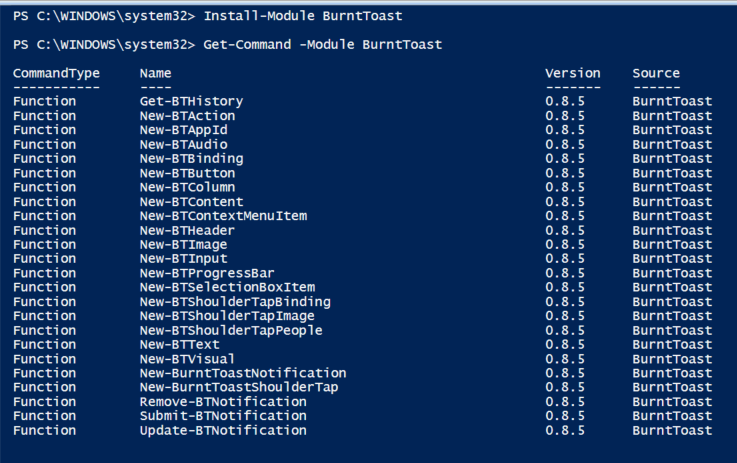
Once the module is installed, you can run the “Get-Command” cmdlet to understand how to use the module. I will not cover all the cmdlet, but as you can see, it is easy to create a very complete notification.
The module is installed, then we can run the following cmdlet without additional arguments:
PS > New-BurntToastNotificationThis basic cmdlet will create our first notification on the machine!
Of course, as you can imagine, it is possible and very simple to customize the notification. We can customize the notification to adjust the logo, the text, add buttons, ….
Using the following command, I can easily add a logo with the “AppLogo” argument:
PS > New-BurntToastNotification -AppLogo "C:\Temp\logo.png"Now, I just add the “Text” argument to add:
- The notification title
- The notification description
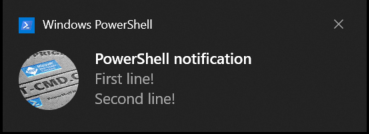
PS > New-BurntToastNotification -AppLogo "C:\Temp\logo.png" -Text 'PowerShell notification','Fist line!','Second line!'It is very easy to understand, the first argument matches the title, and you can add two arguments to display a description in your notification. Two lines are the maximum allowed by the module.
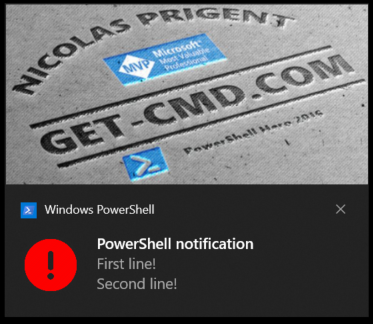
Depending on the notification content, you can also adjust the logo, in this example, I added a critical logo to notify users:
Now, we will add the ‘hero image’ which is the image on top of the notification. The following command creates a new Image element for Toast Notifications:
PS > New-BurntToastNotification -AppLogo "C:\Temp\logo.png" -Text 'PowerShell notification','Fist line!','Second line!' -HeroImage "C:\Temp\logo.png"This feature is very cool, you can add the company logo if you want to display notification on user’s workstations.
To finish this guide, we can add buttons on this notification. Thanks to these buttons, users can perform basic tasks. The following command lines will add two buttons on the notification:
PS > $Leftbutton = New-BTButton -Content 'Left Button' -Arguments 'https://www.google.com'

PS > $Rightbutton = New-BTButton -Content 'Right Button' -Arguments 'https://www.starwindsoftware.com/'

PS > New-BurntToastNotification -AppLogo "C:\Temp\logo.png" -Text 'PowerShell notification','Fist line!','Second line!' -HeroImage "C:\Temp\logo.png" -Button $Leftbutton, $Rightbutton
Of course, the module lets you perform other customizations to suit your needs, such as:
Adding sounds
Adding alarm clock
…


