Before we dive into how to enable Active Directory Recycle Bin in Windows Server 2016, we will first explain what it is and when Microsoft introduced this feature.
Active Directory Recycle Bin simply allows you to restore deleted objects from Active Directory. It can be a user account, computer account or a whole Organizational Unit (OU). Who did not accidentally delete an AD object in his career?
Without this feature enabled, you had only a few choices. Either you could restore if you used a backup solution allowing you to restore individual AD objects (many virtualization backup vendors do that nowadays). Or you have had less chance and your AD server wasn’t configured to be backed up and you have to recreate the user and reinstall his profile on his computer.
If we look a little bit to the history, we can see that Active Directory Recycle Bin has been around since Windows Server 2008 R2. You could easily restore a user, computer or organization unit (OU), but you had to use PowerShell commands. First, you had to search for the deleted object and then use a command which would restore the object.
Active Directory Recycle Bin in Windows Server 2016 (like in 2012R2) makes it very easy, but this feature is not enabled by default. You need to enable it manually. If you don’t, you can’t rely on it for accidental deletions of an object within your Active Directory (AD).
Windows Server 2016 makes this feature a little bit easier to work with. Microsoft has rounded the edges so we don’t have much work to seek where and how.
How to enable Active Directory Recycle Bin in Windows Server 2016 – The Steps:
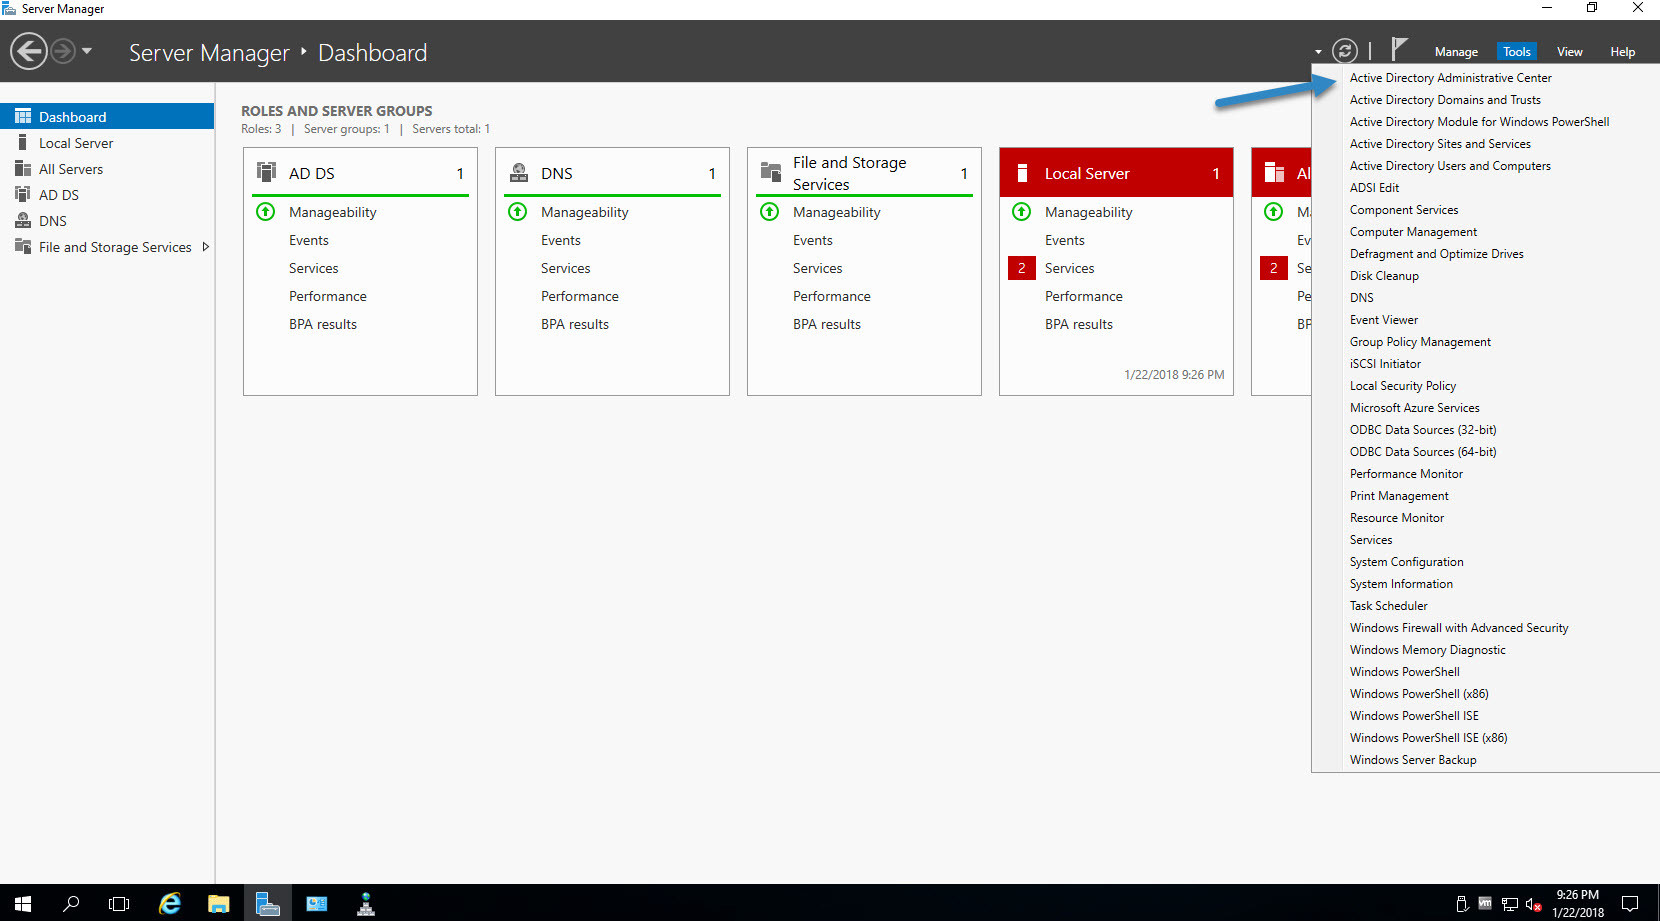
Step 1: Open Server Manager > Tools > Active Directory Administrative Center
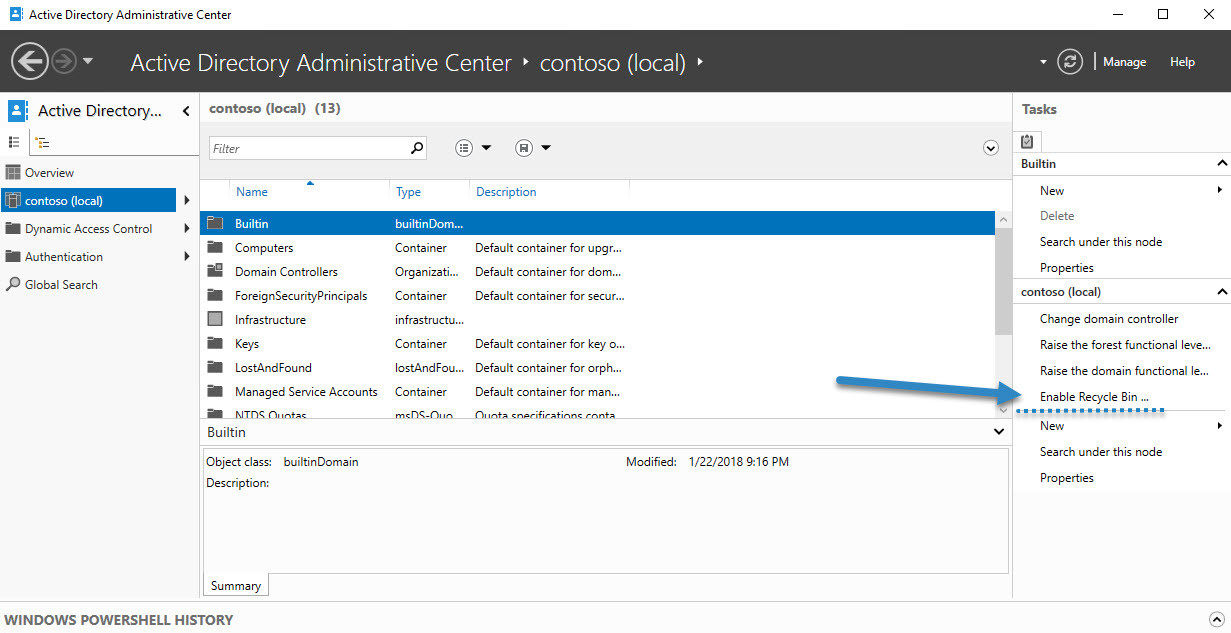
A new window will open up.
Then, Select Your Domain and click the Enable Recycle Bin on the right hand side.
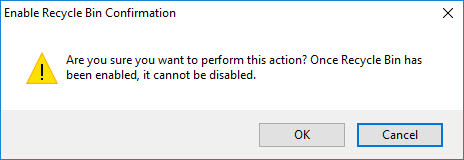
You’ll see a small pop-up appearing asking for a confirmation. Click OK to confirm.
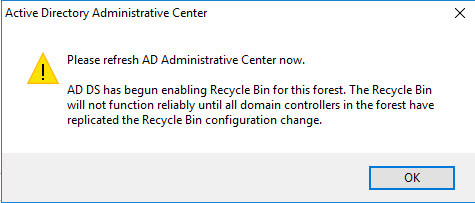
After confirmation, a new notification pop-up telling us that you’ll need to refresh the console and that a replication to all DCs within our forest is taking place. As we only use one DC for the purpose of this demonstration, we can just click OK and test the restore.
How to enable Active Directory Recycle Bin in Windows Server 2016 – Restore operations:
I deleted an account from my AD. The account called Vladan has been deleted. Let’s try to restore. We’ll need to reopen our AD administrative console (the same way we did in the previous steps).
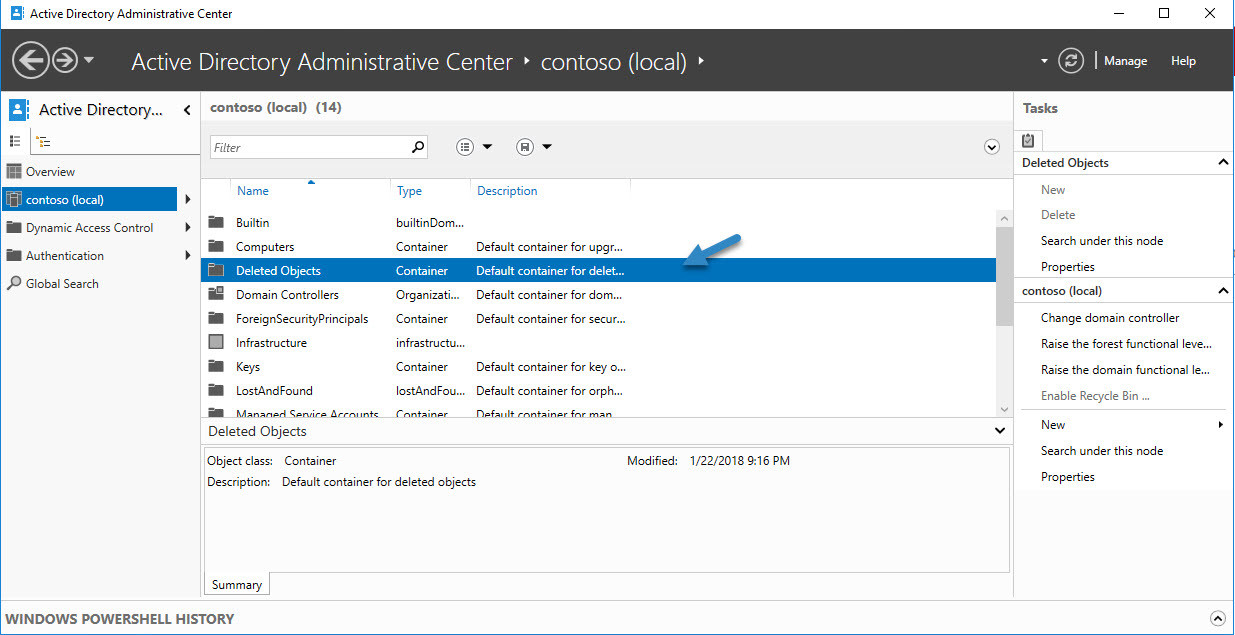
Now when selecting the domain, on the right you’ll see the Deleted objects. Double click the Deleted objects folder in order to look inside.
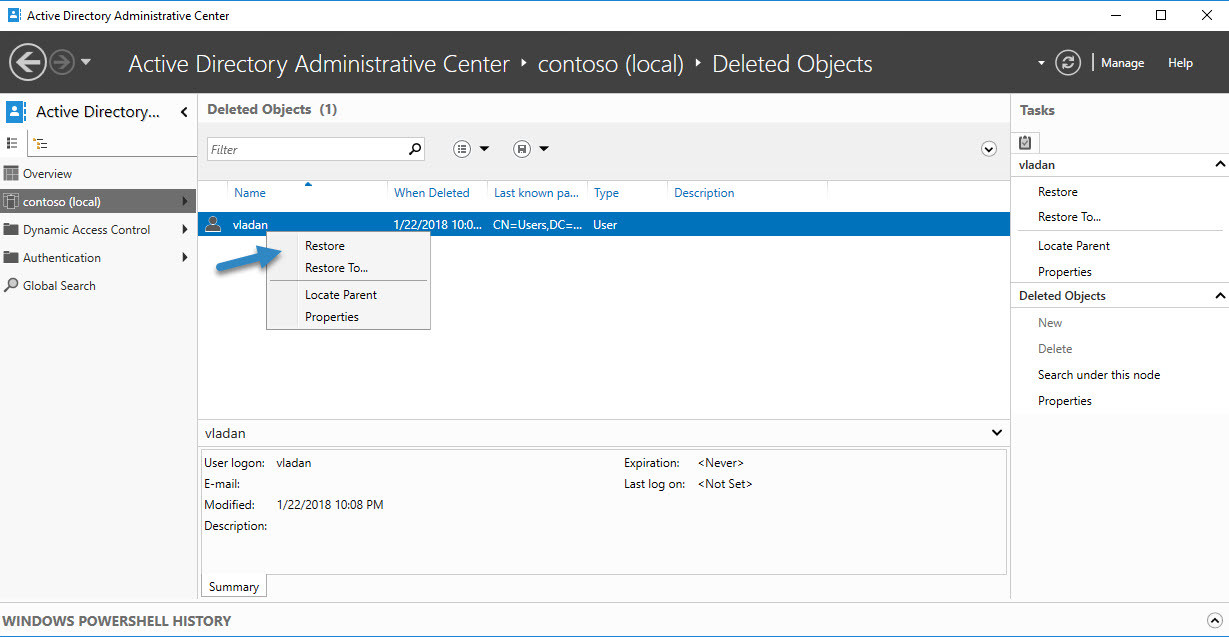
And after double-clicking the folder, we can see that the user account is there and we have an option to restore it.
Two options:
- Restore – simply restores to the original location
- Restore To – allows us to specify a new location
Well, this is it. There are no additional steps. We quickly restored an AD account, but this could be a large OU or several accounts deleted in once. This ends our demonstrations.
Few constraints:
- The AD DS forest and domain must have a certain level. It must have at least Windows Server 2008 R2 or higher functional level (or at Windows Server 2016 functional level).
- In order to enable this feature, your admin account must be membership of the Enterprise Administrators.
- Keep in mind that the process of enabling the AD Recycle Bin is nonreversible (you can’t go back to disable it).
Wrap Up:
As you can see it’s fairly simple to stay protected within your AD environment. If you’re small shop or larger organization using several domain controllers, this is a number one feature to enable.


