INTRODUCTION
Windows 10 Creator Update introduced Quick Create to Hyper-V, the feature allowing to create a custom VM from a Hyper-V Quick Create gallery image. It is a handy tool for testing new software or OS features which developers and guys in QA may enjoy a lot. This being said, I describe today how to create a VM template and add it to a gallery.
WHERE CAN I FIND THE FEATURE?
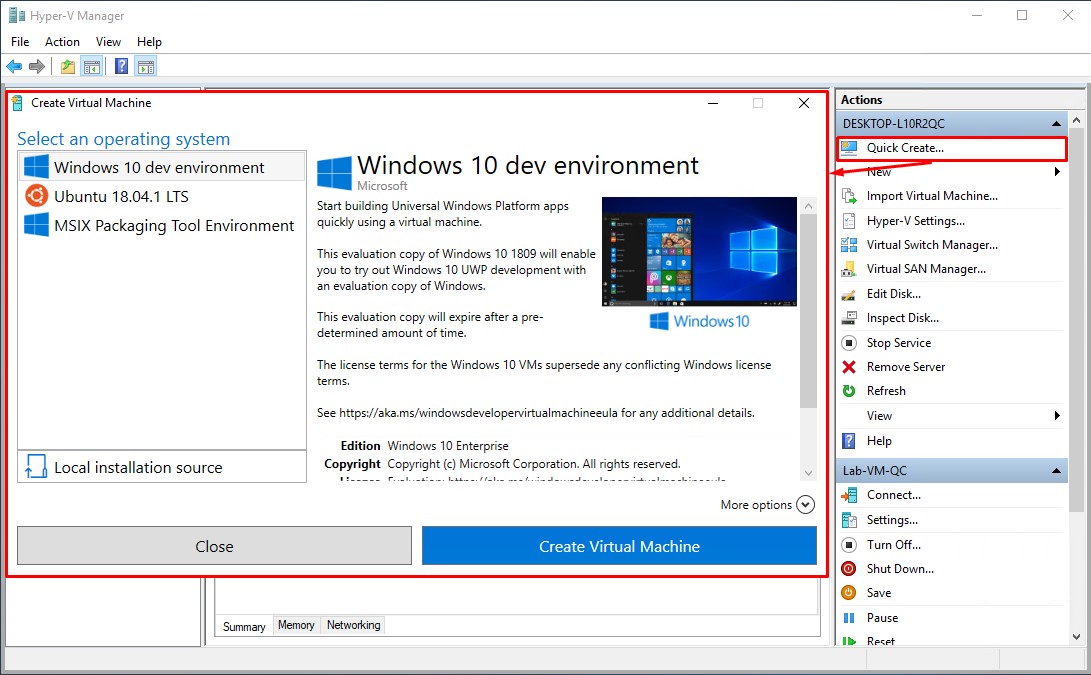
To start the wizard, go to the Actions menu and select Quick Create… there.
Usually, you deploy a VM and install the guest OS from an ISO file. If you do not want to tinker with the image, you can just use the gallery. Let’s see how that can be done.
HYPER-V QUICK CRETE VM GALLERY IN A NUTSHELL
Hyper-V Quick Create VM gallery contains a virtual disk image (that’s actually why you do not need an ISO file to create a VM from the gallery). Quick Create allows using several galleries that is very nice.
To understand how to quick-create a VM gallery, let’s break the whole process into components:
- Creating a VM image (*.iso or *.vhdx file). To make it highly available, save that image on the web server or a network share.
- Creating the gallery source (a *.json file).
- Including a gallery source to the VM Gallery UI.
Gallery elements
Here’re things that you should do:
- Create a JSON file with the image description. Alternatively, you can download it from the official website: https://go.microsoft.com/fwlink/?linkid=851584. You can add a custom VM description to it.
- Add that file to the gallery.
While creating a JSON file, specify the description of a VM that is to be included in the gallery.
Below, find a quick example of file contents.
{

"images": [

{

"name": "Contoso Developer Image",

"version": "1.0",

"locale": "en-US",

"publisher": "Contoso, Inc.",

"lastUpdated": "2017-11-07T17:00:00Z",

"description": [

"Your custom description goes here.",

"\r\n\r\n",

"Lorem ipsum dolor sit amet, consectetur adipiscing elit, sed do eiusmod tempor incididunt ut labore et dolore magna aliqua. Ut enim ad minim veniam, quis nostrud exercitation ullamco laboris nisi ut aliquip ex ea commodo consequat. Duis aute irure dolor in reprehenderit in voluptate velit esse cillum dolore eu fugiat nulla pariatur. Excepteur sint occaecat cupidatat non proident, sunt in culpa qui officia deserunt mollit anim id est laborum."

],

"disk": {

"uri": "\\\\contoso\\vmgallerysample\\contoso_developerimage.vhdx",

"hash": "sha256:7786a0b2ff0d726e095fbcdaded8e2bad8f53b72dda2dd19c7005f3540b5b927"

},

"logo": {

"uri": "\\\\contoso\\vmgallerysample\\contoso_logo.png",

"hash": "sha256:FBA62147CEF5CE712C359CABDF4028F01B6037E4746C1C1AE893A7A69A1E7A82"

},

"symbol": {

"uri": "\\\\contoso\\vmgallerysample\\contoso_symbol.png",

"hash": "sha256:B2ED239337157CE340C076C022F76EDFE95F8C88F2BBBA2B31C028B18297A39C"

},

"thumbnail": {

"uri": "\\\\contoso\\vmgallerysample\\contoso_thumbnail.png",

"hash": "sha256:d9900409281df2cea0facf0af59be7e0093aff145c686b63c5cf930fdf1f2510"

}

}

]

}
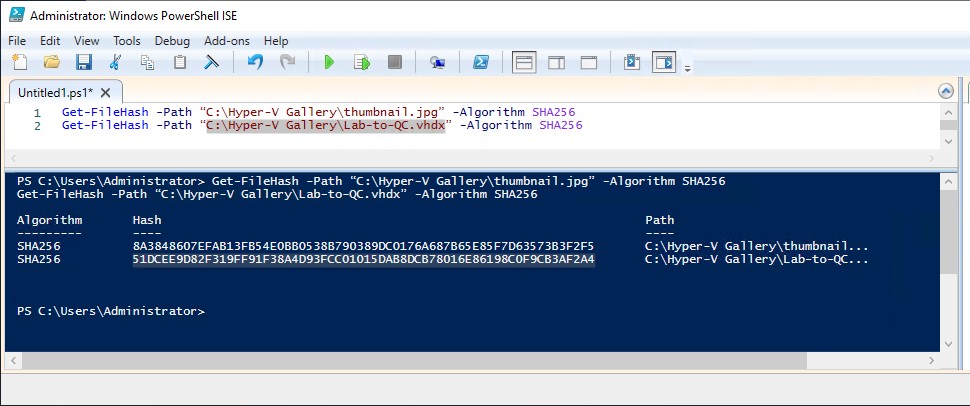
You also need to get the file hash SHA256 for associated files. I used the following PowerShell cmdlet for that purpose:
PS> Get-FileHash -Path “xxxx.yyy” -Algorithm SHA256
«xxxx.yyy» stands there for the name and file path.
Here’s how my JSON file looks like:
{

"images": [

{

"name": "Windows 2016 Core for lab",

"publisher": "Microsoft",

"lastUpdated": "2019-01-10T14:00:00Z",

"version": "10.0.17763",

"locale": "en-US",

"description": [

"This is a trial copy of Windows 10 1809 virtual machine. This VM is created to demonstrate the addition of VM to the gallery.",

"\r\n\r\n",

"This evaluation copy will expire after a pre-determined amount of time. ",

"\r\n\r\n",

],

"config": {

"secureBoot": "true",

},

"requirements": { "diskSpace": "10000000000"},

"disk": {

"uri": "file://C:/Hyper-V_Gallery/Lab-to-QC.vhdx",

"hash": "sha256:51DCEE9D82F319FF91F38A4D93FCC01015DAB8DCB78016E86198C0F9CB3AF2A4",

},

"logo": {

"uri": "file://C:/Hyper-V_Gallery/Windows10_Logo.png",

"hash": "sha256:F0AD5F761003FF19A739FD4D6F9723D11ED34C543A0C0B6A821D93185B65A453",

},

"symbol": {

"uri": "file://C:/Hyper-V_Gallery/Windows10_Symbol.png",

"hash": "sha256:4eb5a4e58f69b8ce2725ea4b2aee9466deadb9990e273882ba04d767b4b10f6b",

},

"thumbnail": {

"uri": "file://C:/Hyper-V_Gallery/thumbnail.jpg",

"hash": "sha256:8A3848607EFAB13FB54E0BB0538B790389DC0176A687B65E85F7D63573B3F2F5",

},

"details": [

{

"name": "Edition",

"value": "Windows 10 Enterprise",

},

{

"name": "Copyright",

"value": "Copyright (c) Microsoft Corporation. All rights reserved.",

},

{

"name": "License",

"value": "Evaluation: https://aka.ms/windowsdevelopervirtualmachineeula",

},

]

}

,

]

}
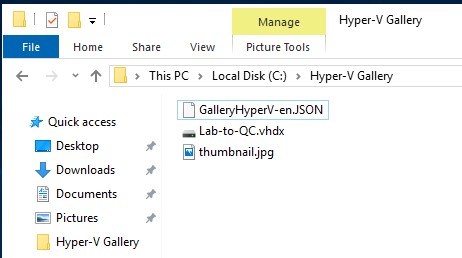
Apart from a JSON file, the gallery directory may contain the following components:
- VHDx file
- Logo
- Thumbnail
- Screenshot
Of course, it is not a must to include them all to the Hyper-V gallery directory. Here are some that I added. I used Microsoft’s logo today (hope, they don’t mind :)).
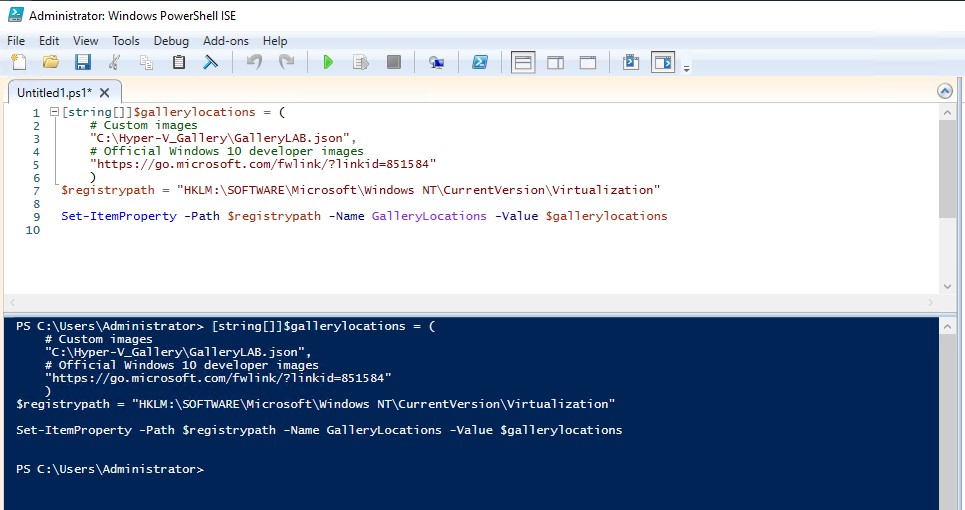
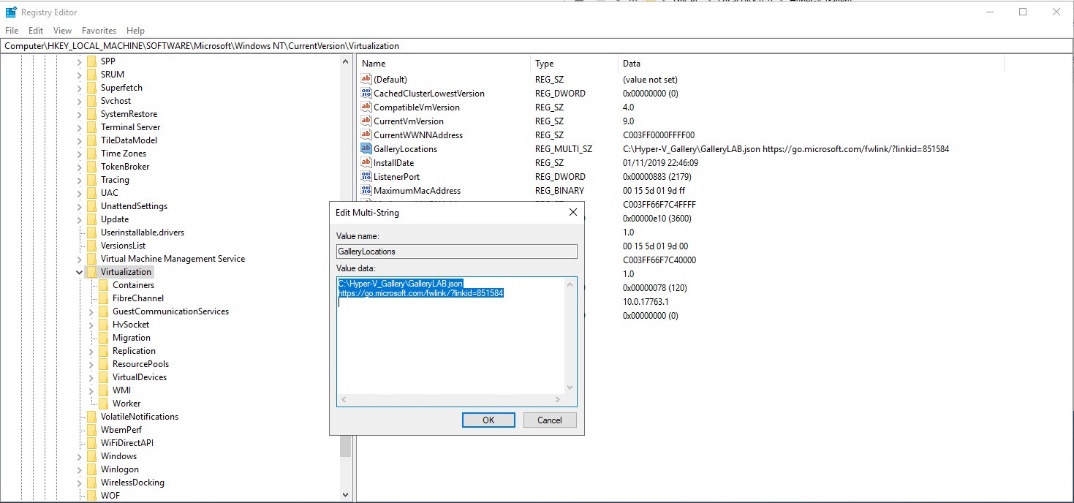
Specify the path to the Hyper-V VM directory by modifying the registry. In particular, you need to add changes to the HKEY_LOCAL_MACHINE\SOFTWARE\Microsoft\Windows NT\CurrentVersion\Virtualization key. Here’s a bunch of methods of how you can do that.
Setting values with PowerShell
[string[]]$gallerylocations = (

# Custom images

"\\contoso\vmgallerysample\contoso.json",

# Official Windows 10 developer images

"https://go.microsoft.com/fwlink/?linkid=851584"

)

$registrypath = "HKLM:\SOFTWARE\Microsoft\Windows NT\CurrentVersion\Virtualization"

Set-ItemProperty -Path $registrypath -Name GalleryLocations -Value $gallerylocations
Just modify the registry!
Modifying registry is quite simple. Specify the path to the JSON file in the GalleryLocations. If this key doesn’t exist, just create it!
If you need to apply changes on several computers on one domain, apply group policies.
INSTALLING A VM FROM THE GALLERY
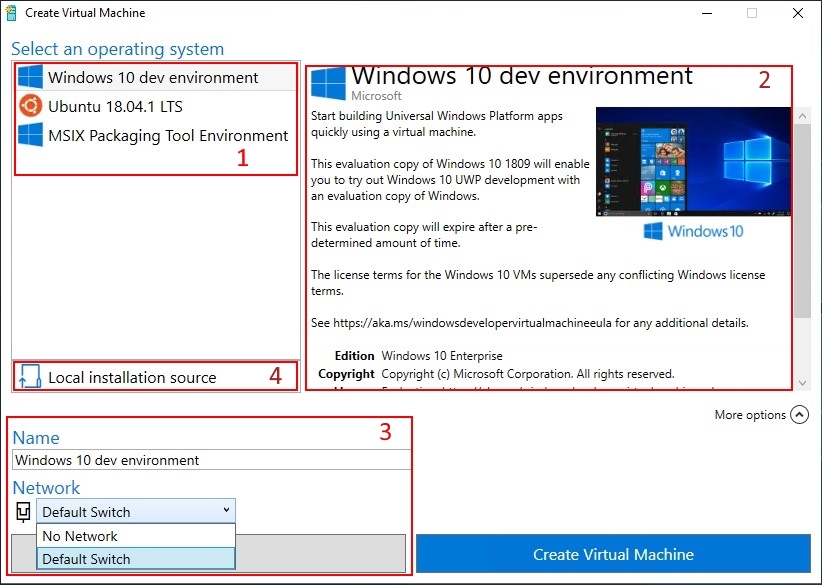
After starting the wizard, you can create a VM using any of existing images (there were 3 images while I was writing this article).
Create Virtual Machine wizard in a nutshell. 1 – available VM images, 2 – brief VM and OS description, 3 – interface for setting VM name and NIC, 4 – ISO file location
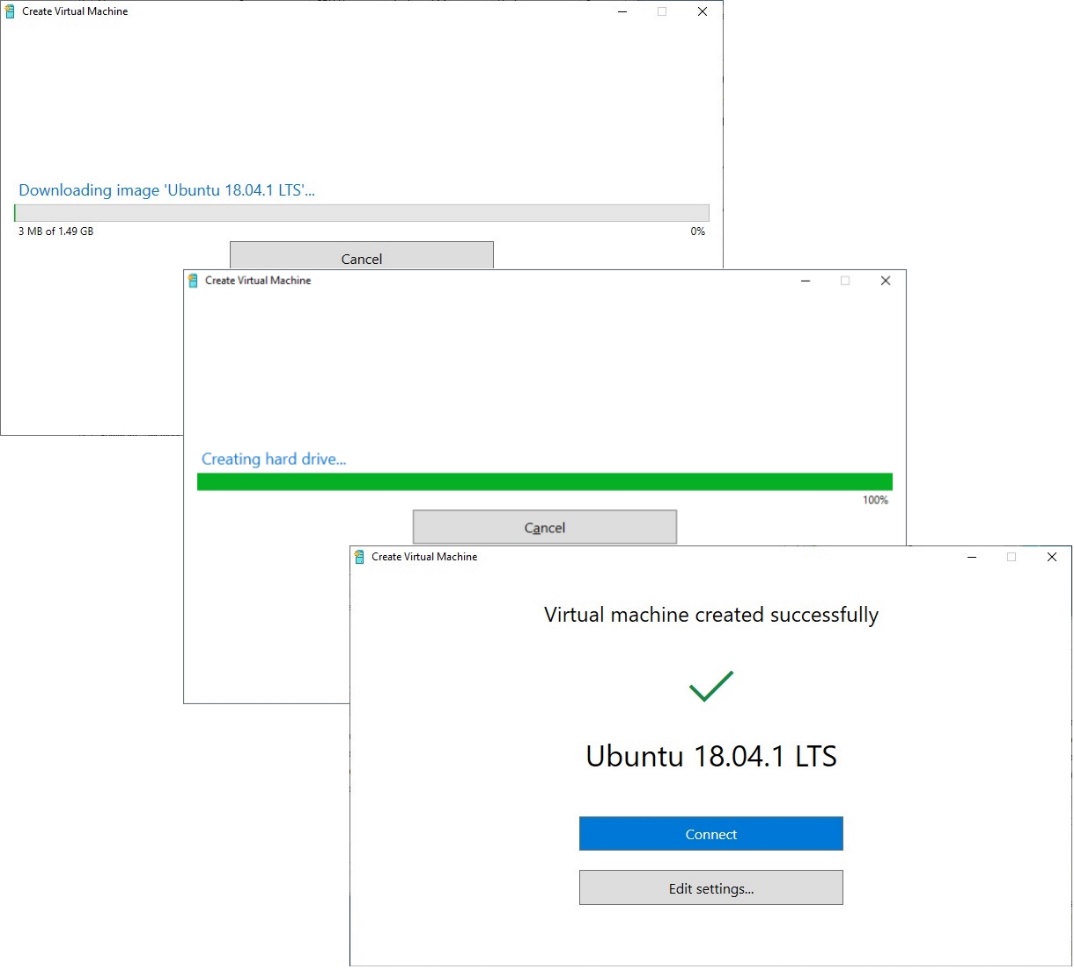
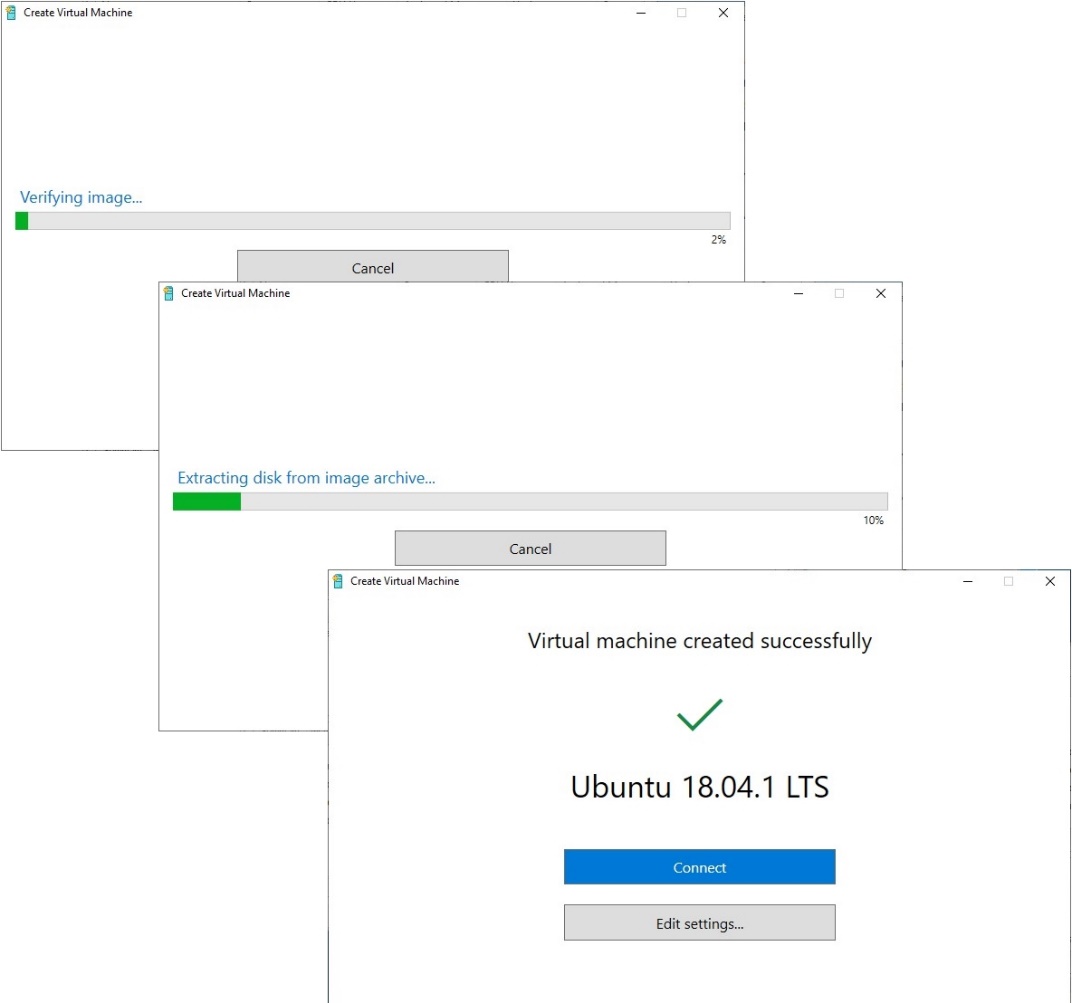
While deploying a VM from the gallery, its image is saved locally and gets subsequently deployed.
Here are some things that you should know about the default VM configuration:
- Generation 2
- RAM 2 GB
- DRAM is enabled
- 4 x vCPU
- vNIC is connected to the virtual switch.
Once the VM is created, you can either connect it or modify its settings.
If you need to create a VM using the same settings, the already downloaded image can be used.
In this way, with Quick Create in place, VM deployment becomes a matter of just a few clicks. But, if you still need to fine-tune the VM after its creation, you should better do the whole job manually.
CONCLUSION
Where can you use Quick Create? It seems useful for developers and QA because it saves them like tons of time needed for creating VMs with particular settings. Hope, soon it will be available for Windows Server. In this article, I described the feature quite briefly as nobody would probably like a long read on that thing. For more info, check these links:
https://docs.microsoft.com/en-us/virtualization/hyper-v-on-windows/user-guide/custom-gallery


