INTRODUCTION
Some time ago, I published here comparison of SQL Server Failover Cluster Instances (FCI) and SQL Server Availability Group (AG) performance while having them run on top of StarWind Virtual SAN (https://www.starwindsoftware.com/blog/hyper-v/can-sql-server-failover-cluster-instance-run-twice-fast-sql-server-basic-availability-groups-2-node-cluster-part-2-studying-fci-performance/). Today, I measure SQL Server AG performance on Storage Spaces. The next part sheds light on SQL Server FCI performance on S2D. Can I squeeze two times more TPM out of SQL Server FCI on S2D than SQL Server AG can provide on Storage Spaces?
THE TOOLKIT USED
Let’s take a look at the setup used for this study.
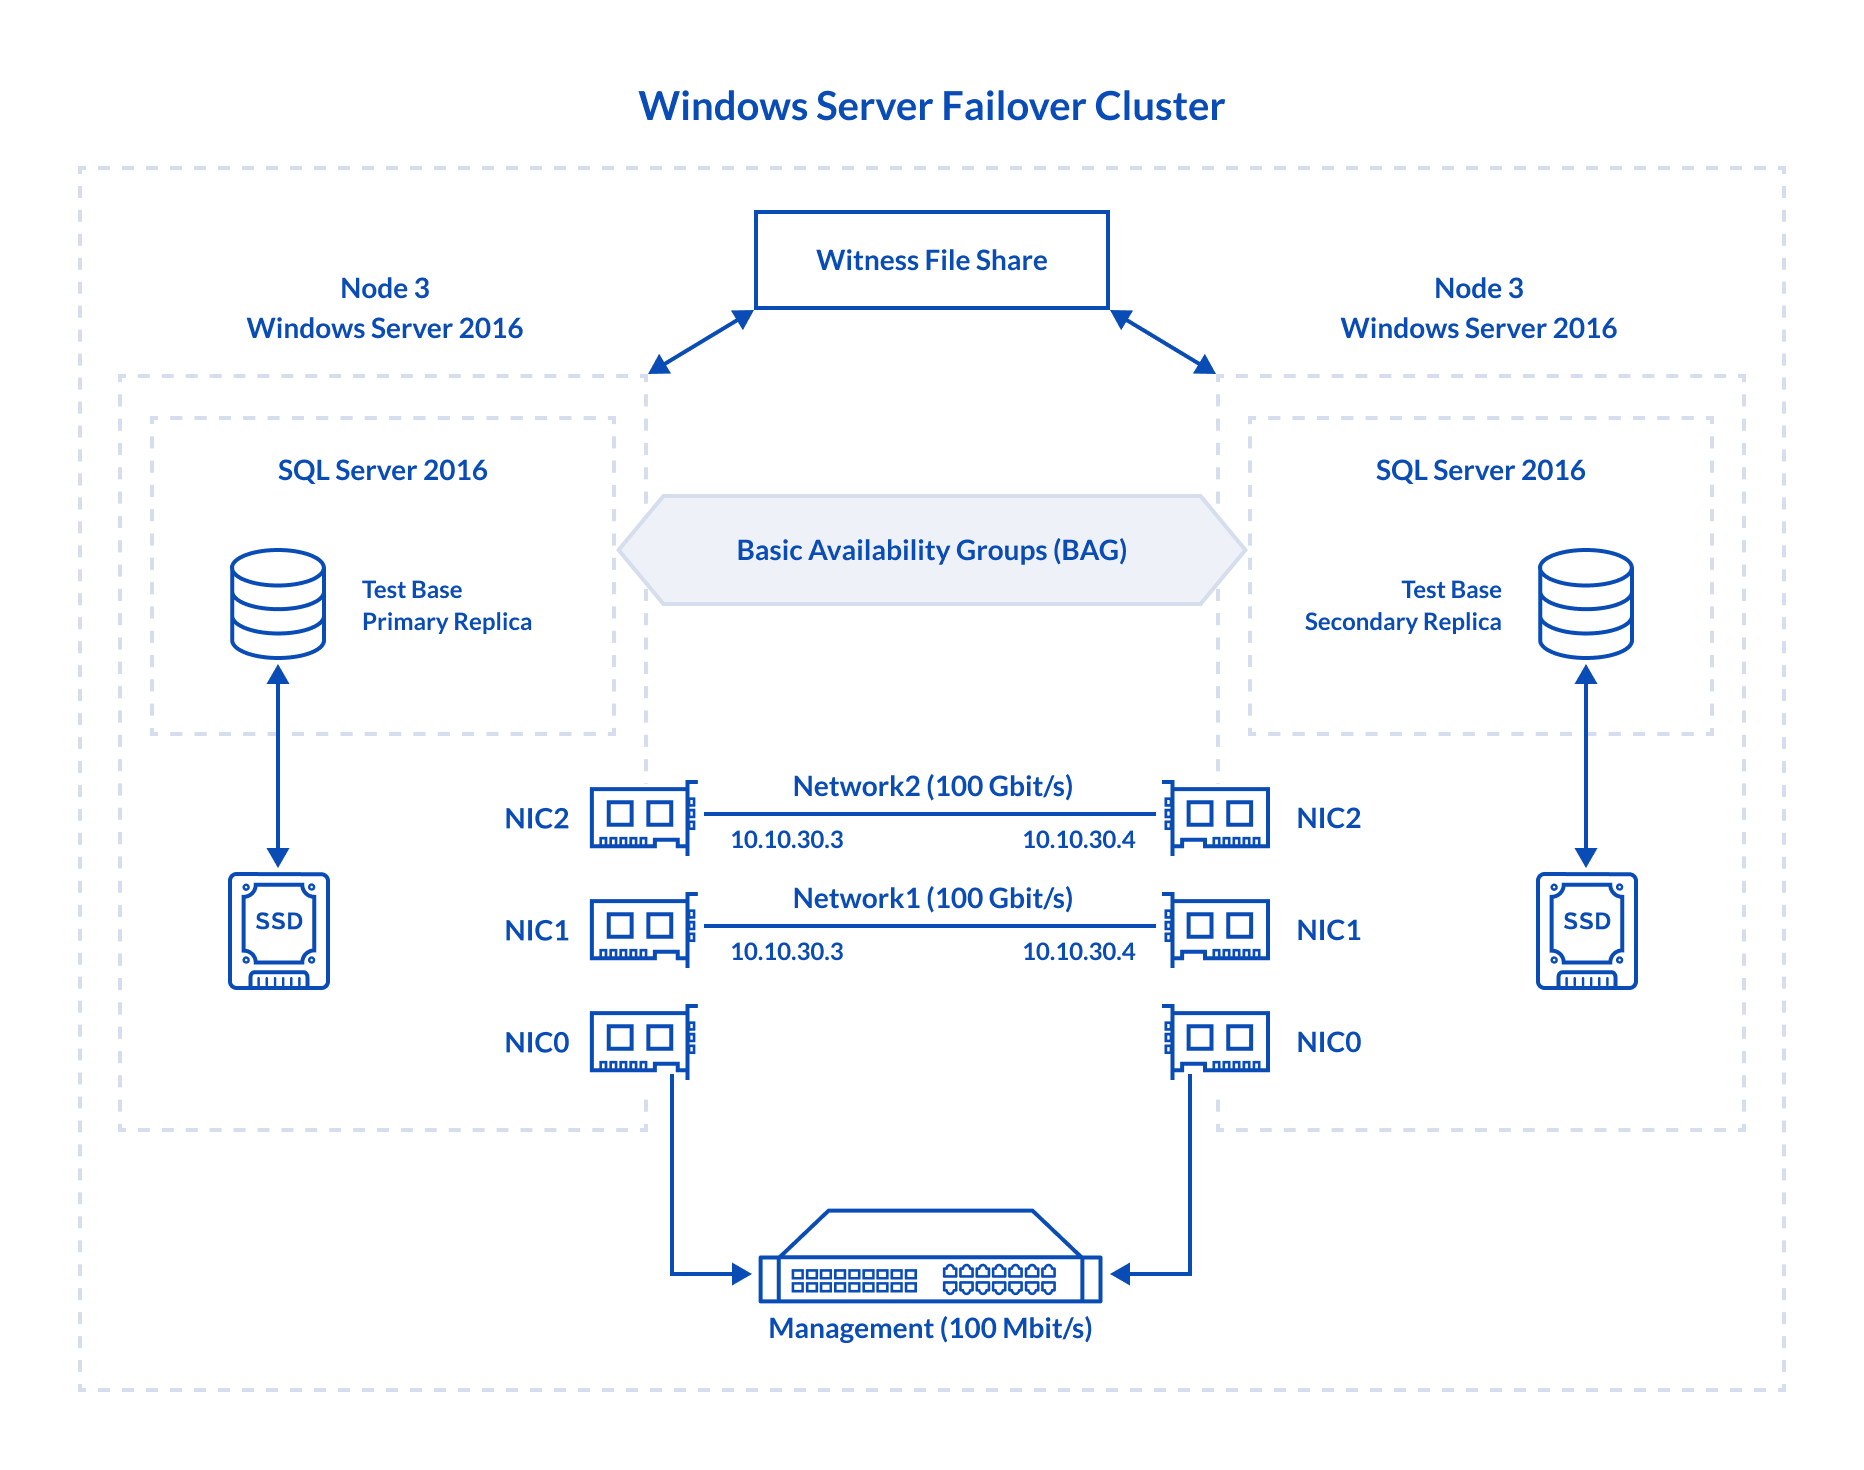
Unlike the setup used in my previous article, this time, I have 4 drives in each host. The thing is, S2D needs at least 4 drives on each node to be deployed (https://docs.microsoft.com/en-us/windows-server/storage/storage-spaces/storage-spaces-direct-hardware-requirements#minimum-number-of-drives-excludes-boot-drive). To compare SQL AG and FCI performance later, today, I also use 4 disks in underlying storage too.
Here are more details about the environment configuration:
- SRV153, SRV154: Both hosts are identical from the hardware point of view.
- Dell R730, CPU 2x Intel Xeon E5-2697 v3 @ 2.60 GHz, RAM 128GB
- Storage: 4x Intel SSD DC S3500 480GB
- LAN: 1x Broadcom NetXtreme Gigabit Ethernet, 2x Mellanox ConnectX-4 100Gbit/s
- OS: Windows Server 2016 Datacenter
- Database Management System: Microsoft SQL Server 2016
TESTING SQL SERVER AVAILABILITY GROUPS
Deploying SQL Server AG in a 2-node environment
Install Windows Failover Cluster first. Before I move further, I’d like to mention that I assigned a quorum vote to a separate Share Witness.
Next, start the Storage Spaces installation wizard on SRV153.
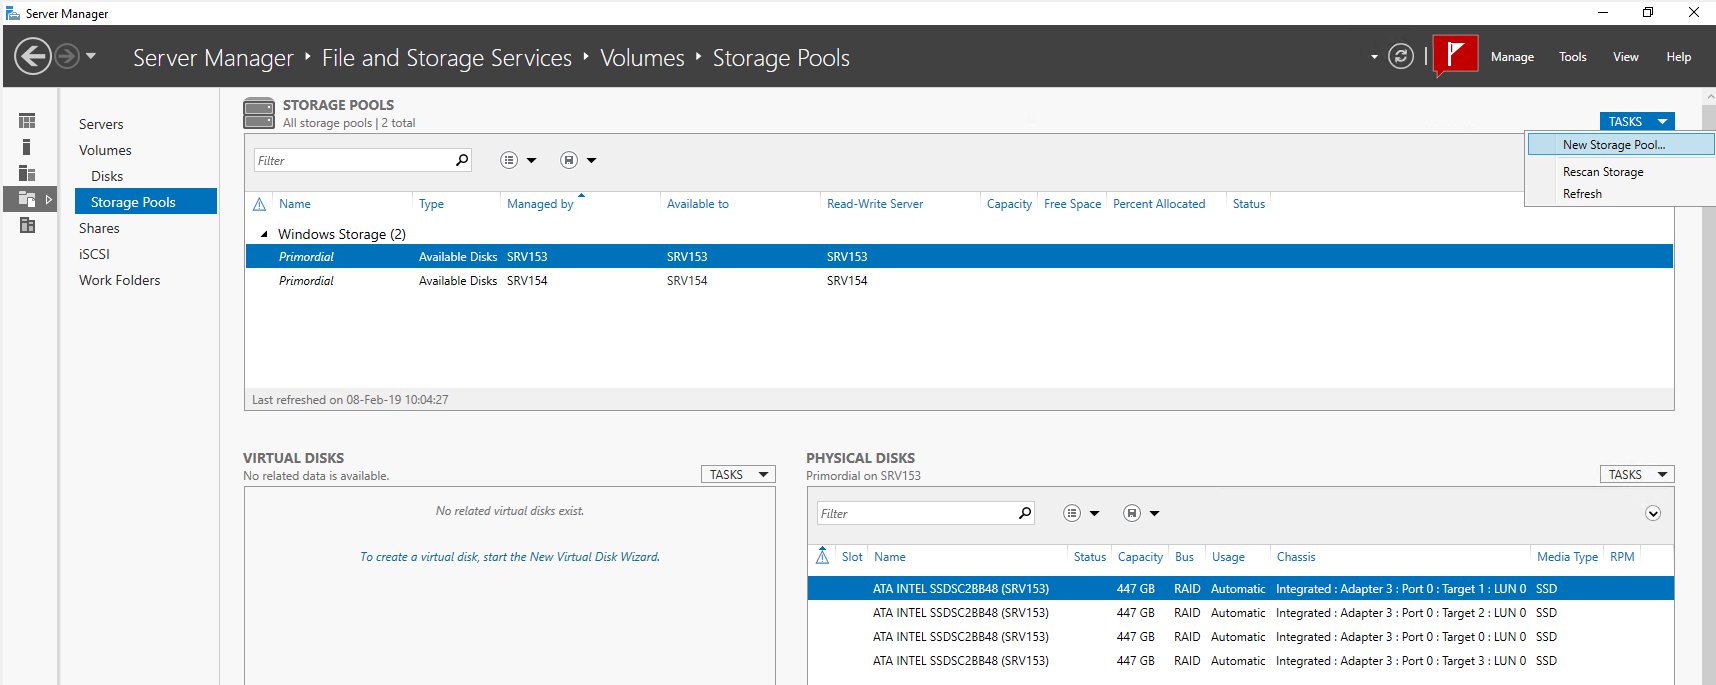
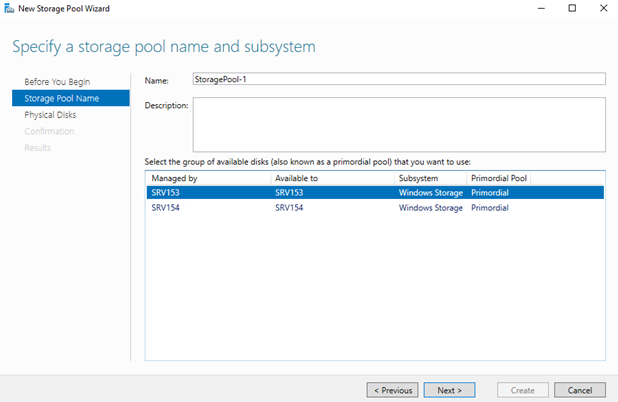
Select a node where you want to create the storage pool and enter the storage pool name.
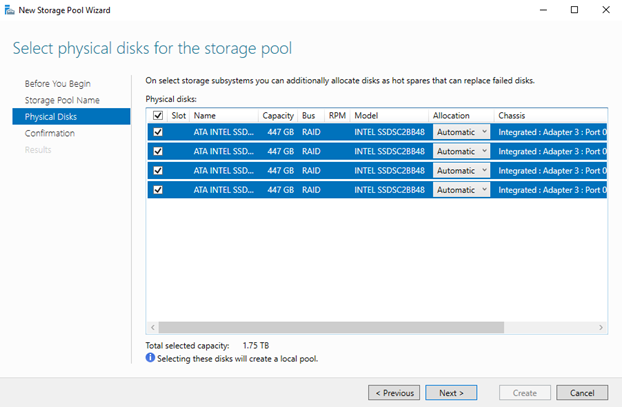
Select the disks which you want to include into the storage pool and press Next.
Verify the storage pool settings and click Create.
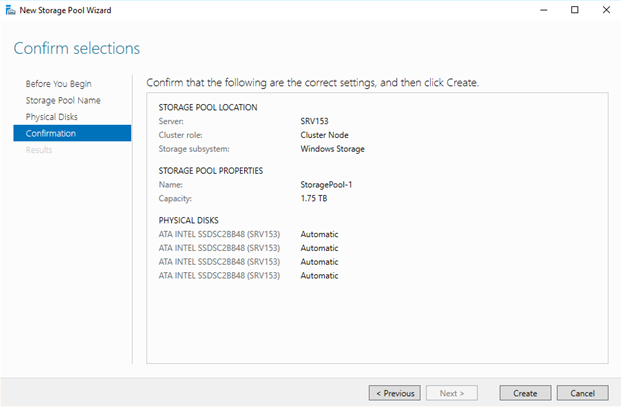
Once you are done with the storage pool creation, tick the Create a virtual disk when this wizard closes checkbox and press Close.
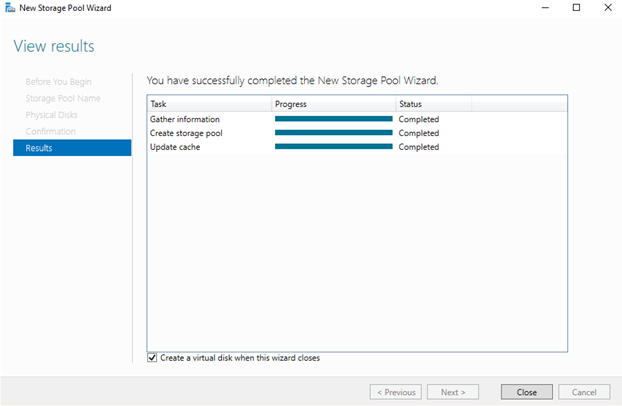
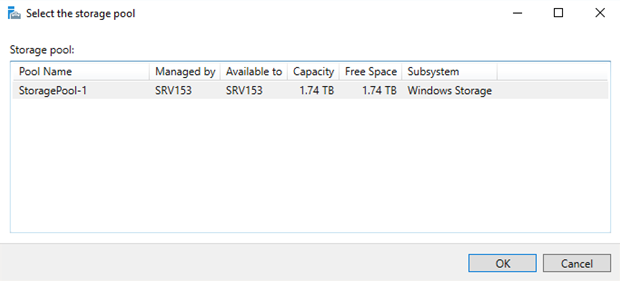
Select the storage pool afterward.
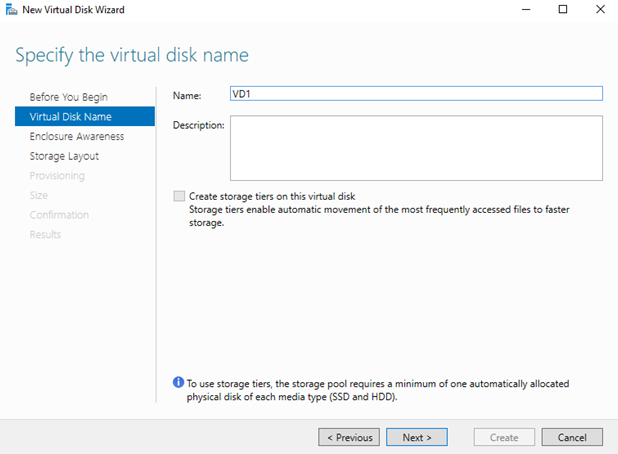
Name the virtual disk.
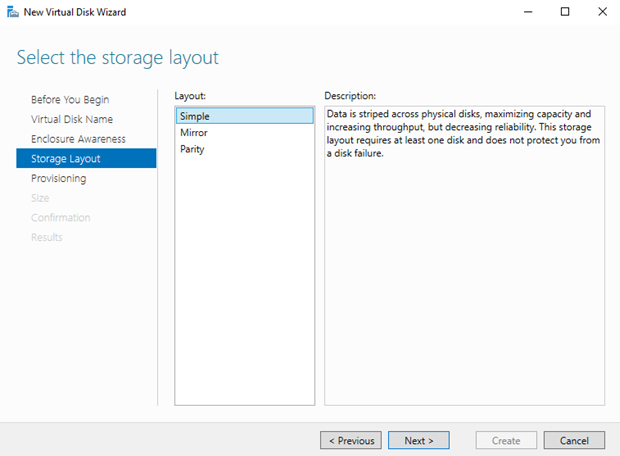
Select the Simple layout in the Select the storage layout tab.
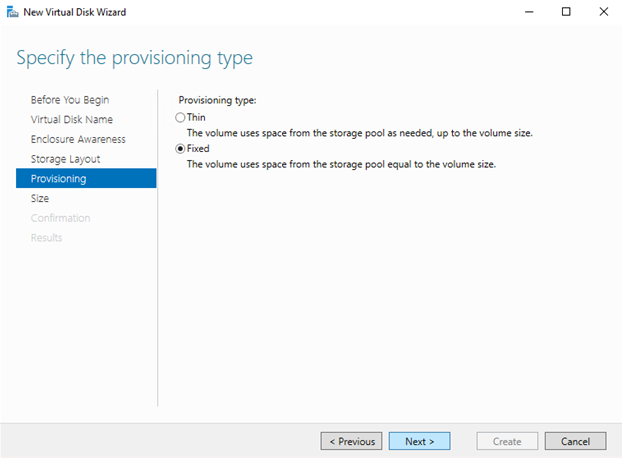
Specify the provisioning type afterward. Today, I used a Fixed disk.
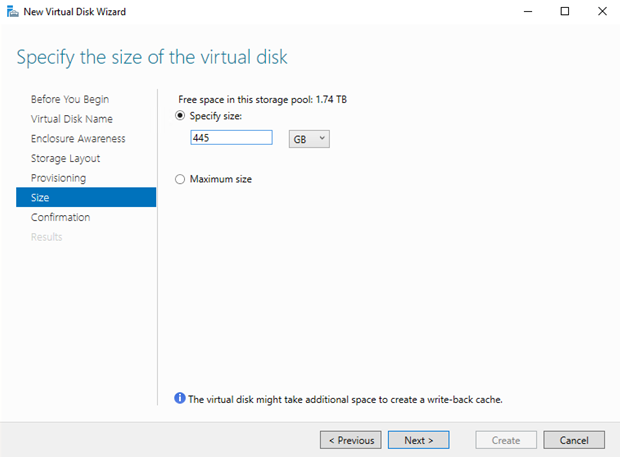
Then, specify the virtual disk size.
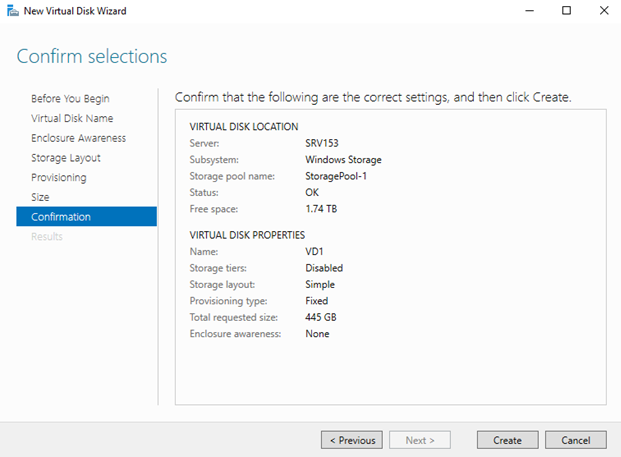
Confirm the virtual disk settings and click Create.
After you are done with virtual disk creation, tick the Create a volume when this wizard closes checkbox and close the wizard.
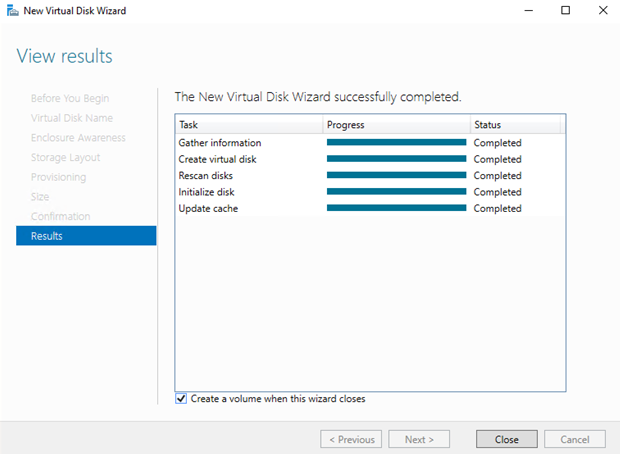
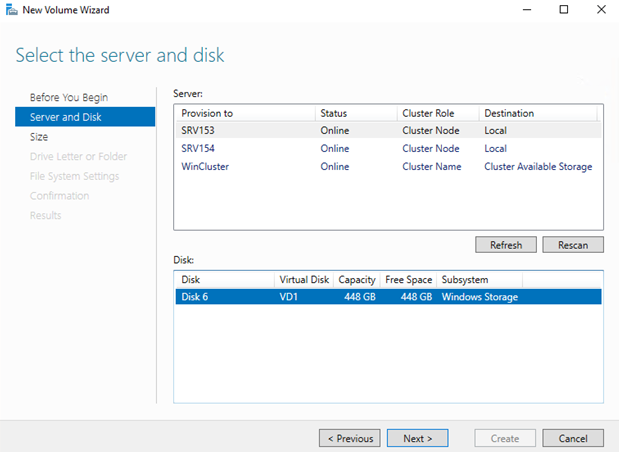
Select the recently created virtual disk in the New Volume wizard.
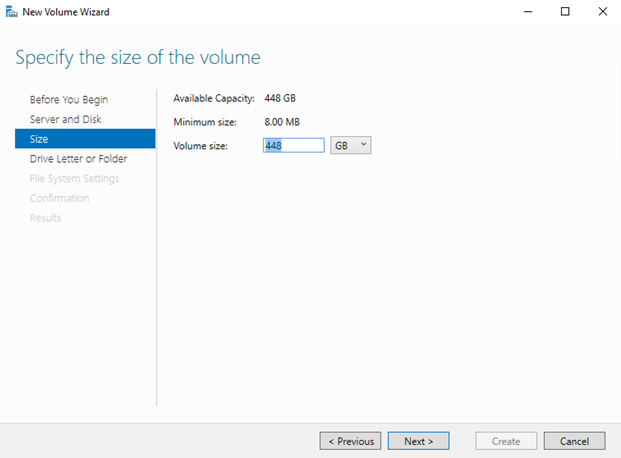
Next, specify the volume size.
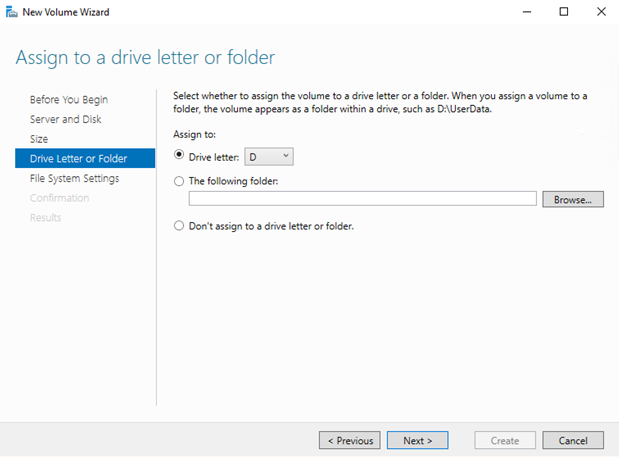
Assign the volume to a drive letter and press Next.
Choose the disk formatting and set the label.
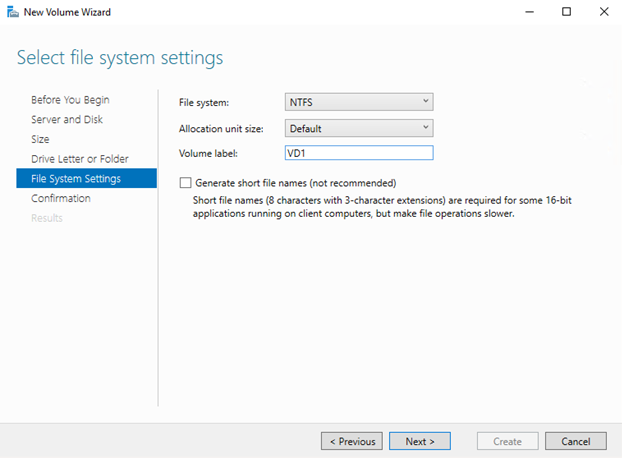
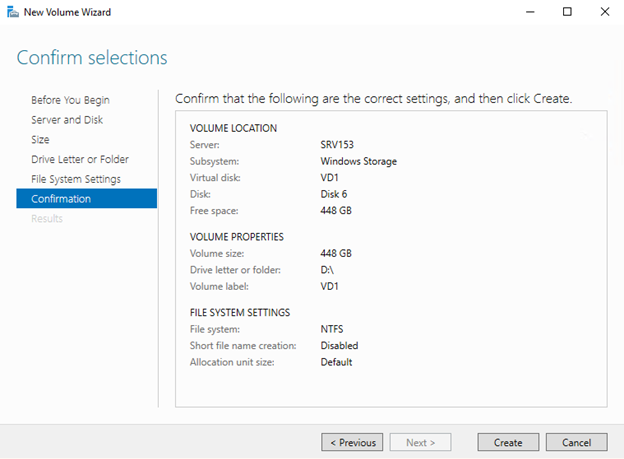
Confirm the parameters of a new volume creation by pressing the Create button.
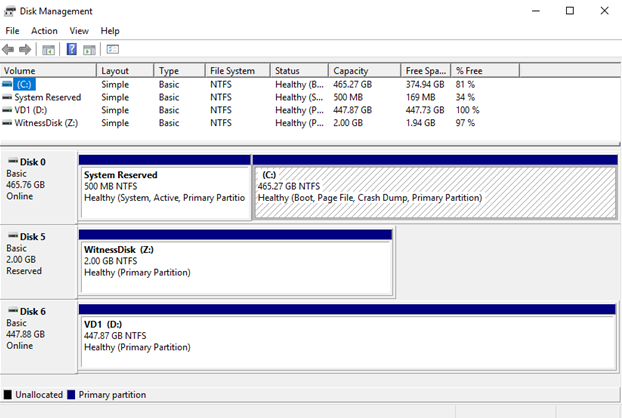
Once the wizard finishes volume creation, press Close. Go to Disk Management and check whether the volume has been added.
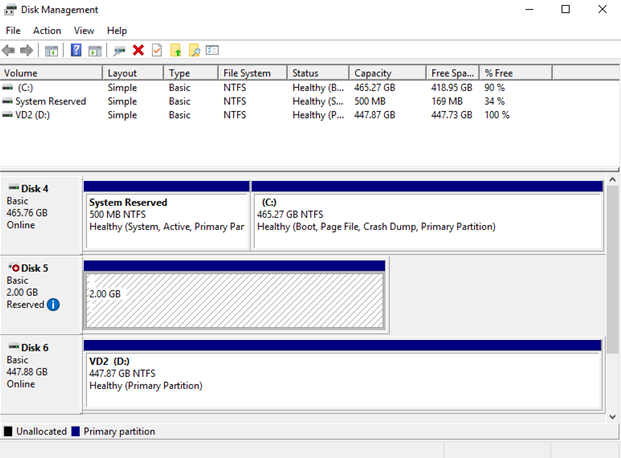
Create just the same disk on the SRV154 node.
Installing SQL Server AG
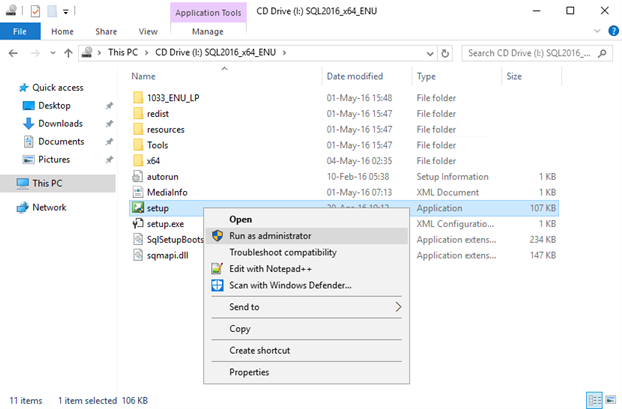
Now, let’s create a 2-node SQL Server AG with an empty database. First, install SQL Server 2016 on SRV153 from the image.
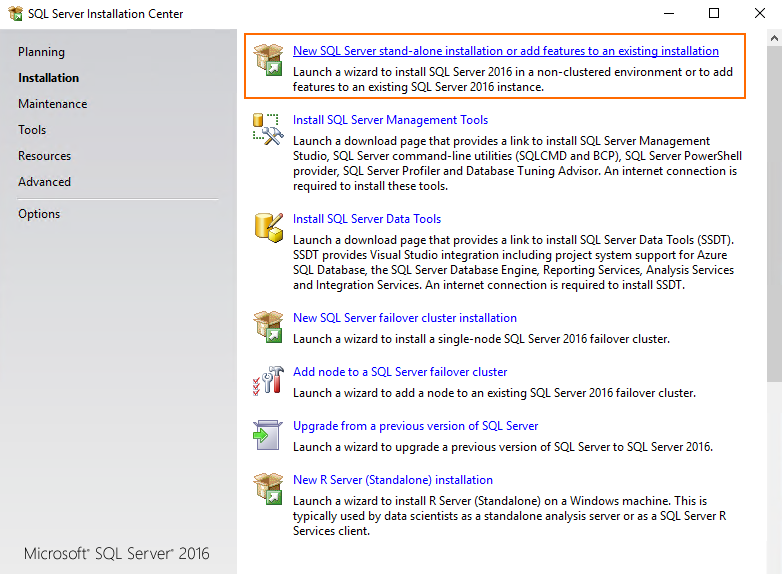
In SQL Server Installation Center, start SQL Server installation.
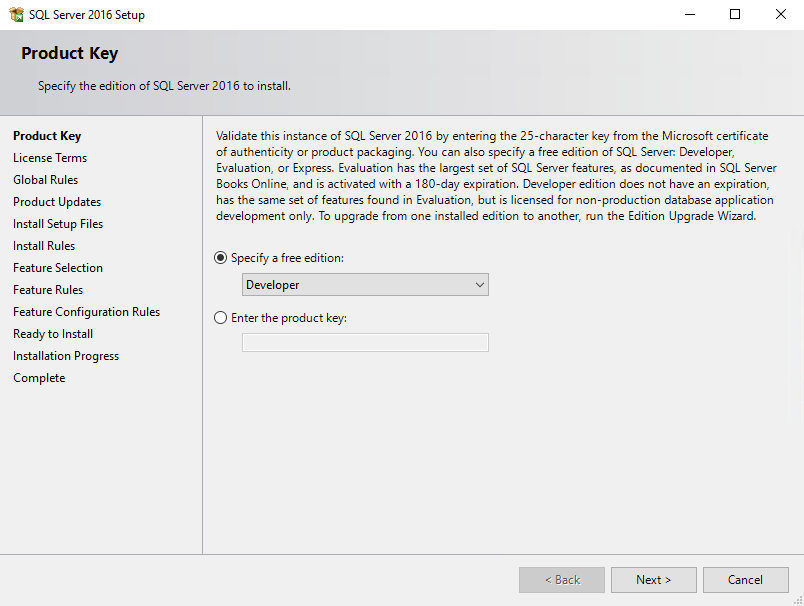
Enter the product key next. Today, I use the Developer free edition (it should be enough for study purposes).
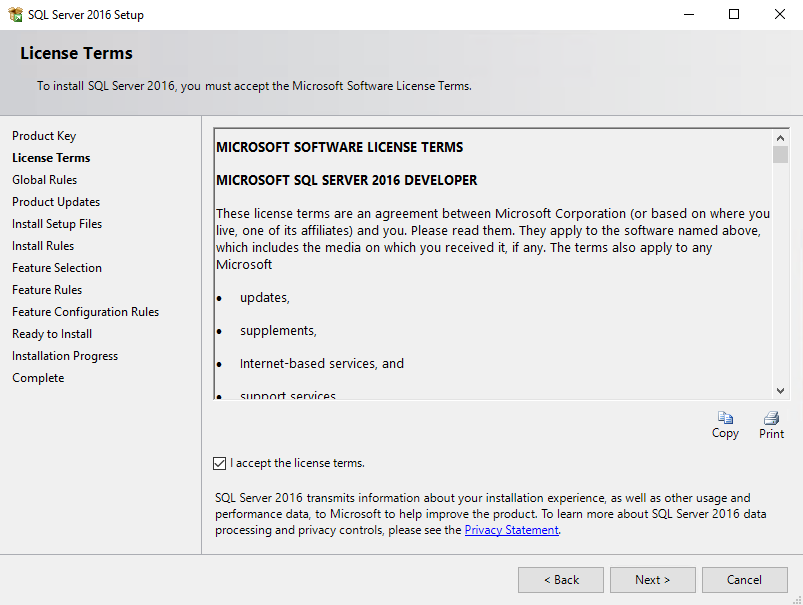
Look through the license terms (or pretend that you have read it ) and tick the checkbox saying that you accept it.
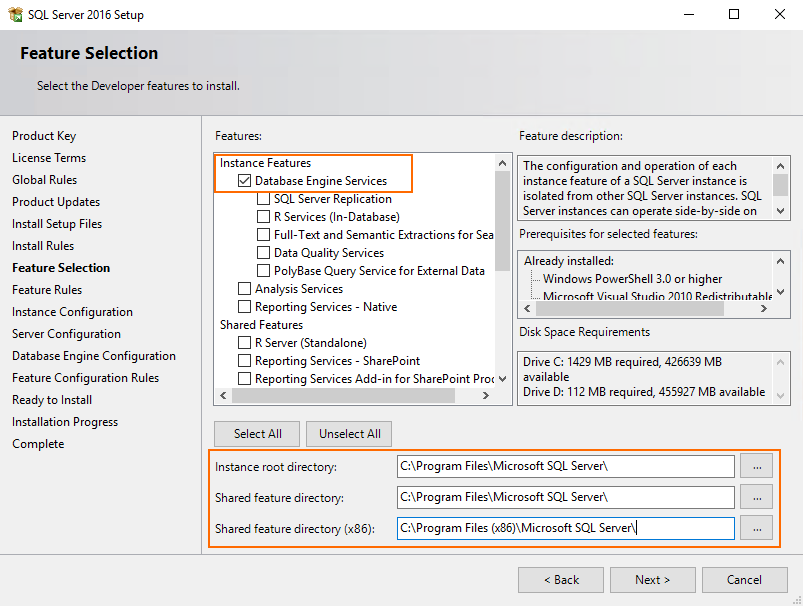
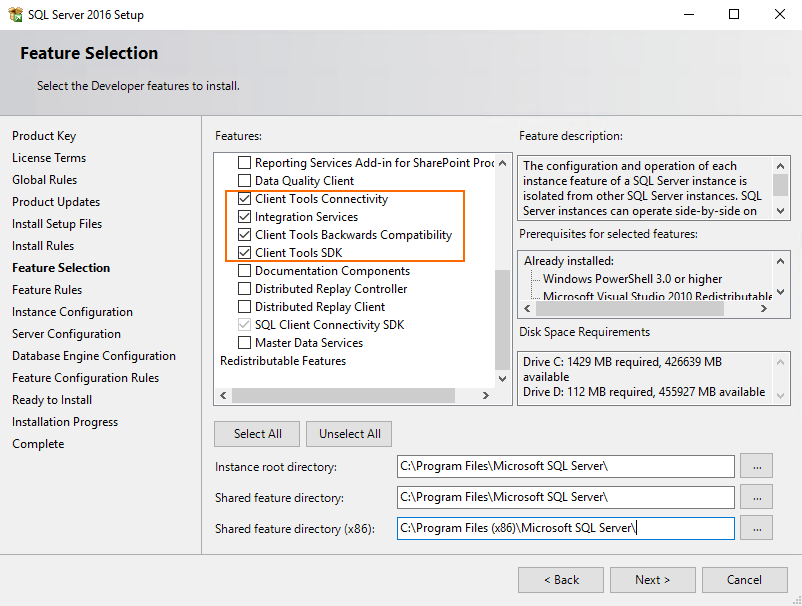
Select the necessary features and specify the path for SQL Server components installation.
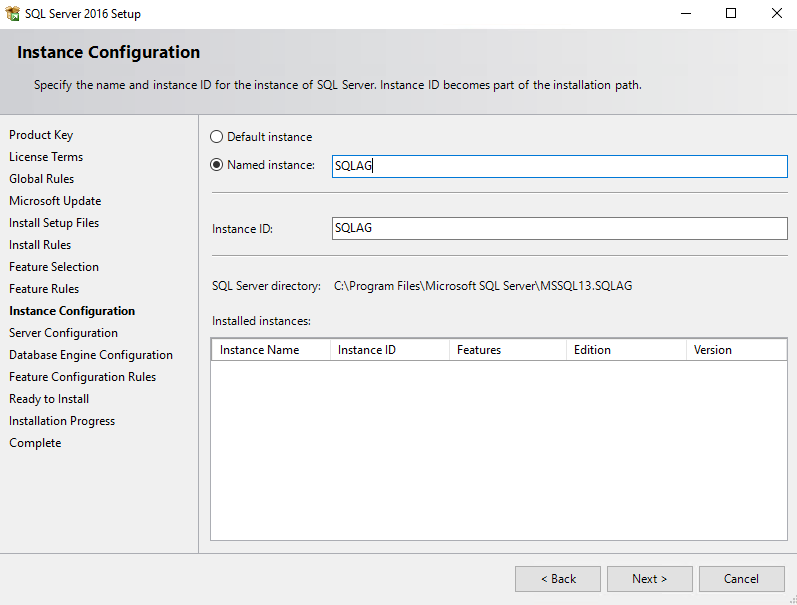
Enter the instance name.
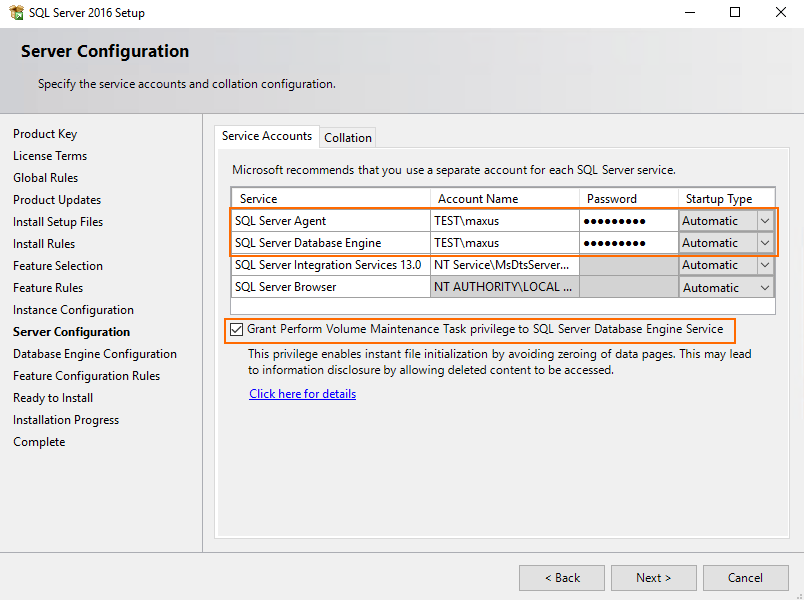
Enter the SQL Server credentials. Just use the domain credentials in order to avoid any possible issues with Availability Groups creation in the future.
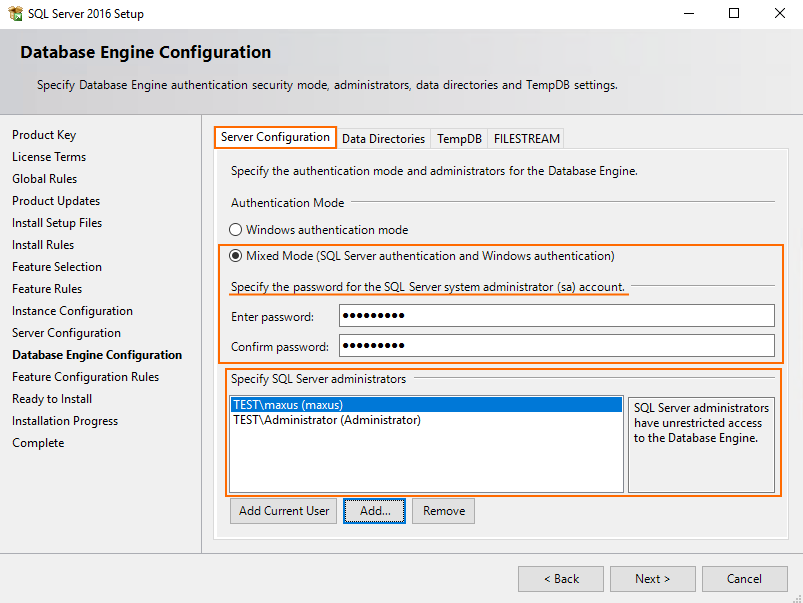
Specify the authentication security mode and system administrator account.
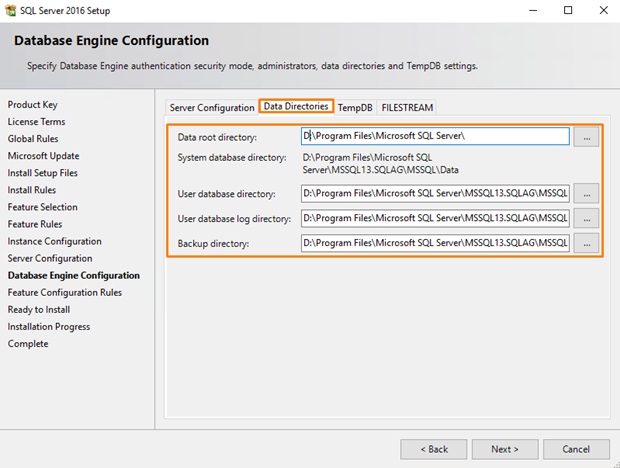
Enter the database directory afterward. Today, it is kept on a virtual disk D over Storage Spaces.
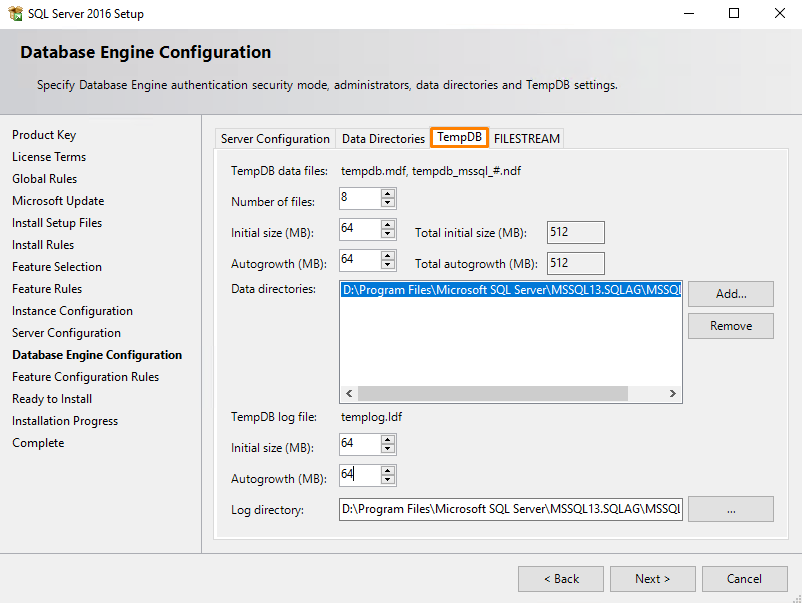
Now, specify TempDB settings in the self-titled tab.
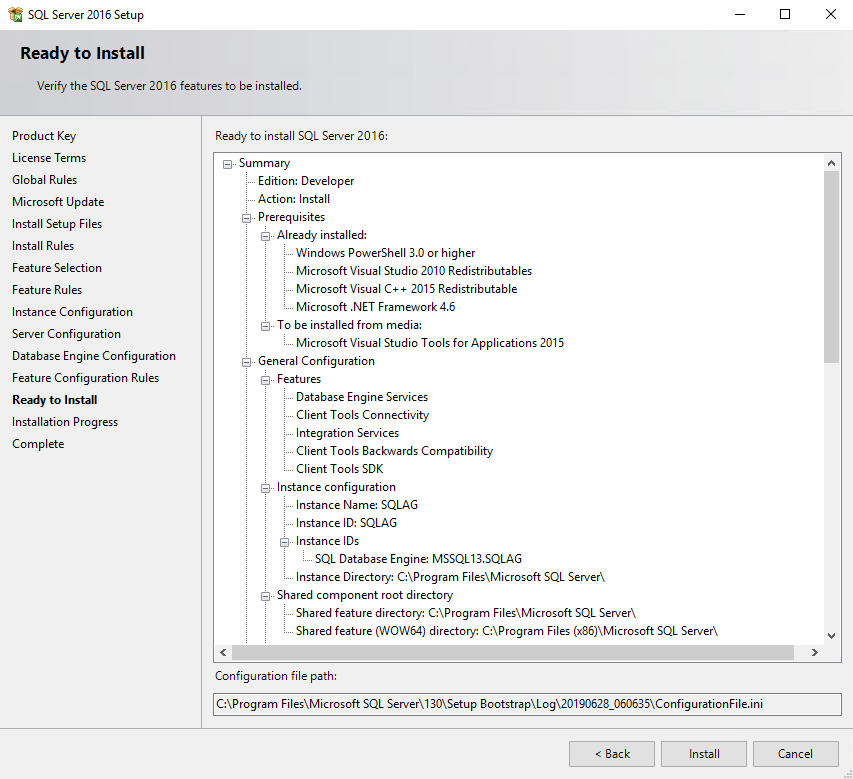
Make sure that everything is set right and press Install.
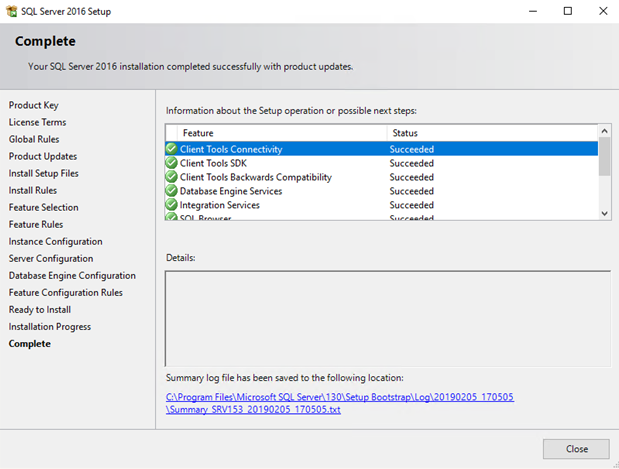
Once the installation wizard finishes, click Close.
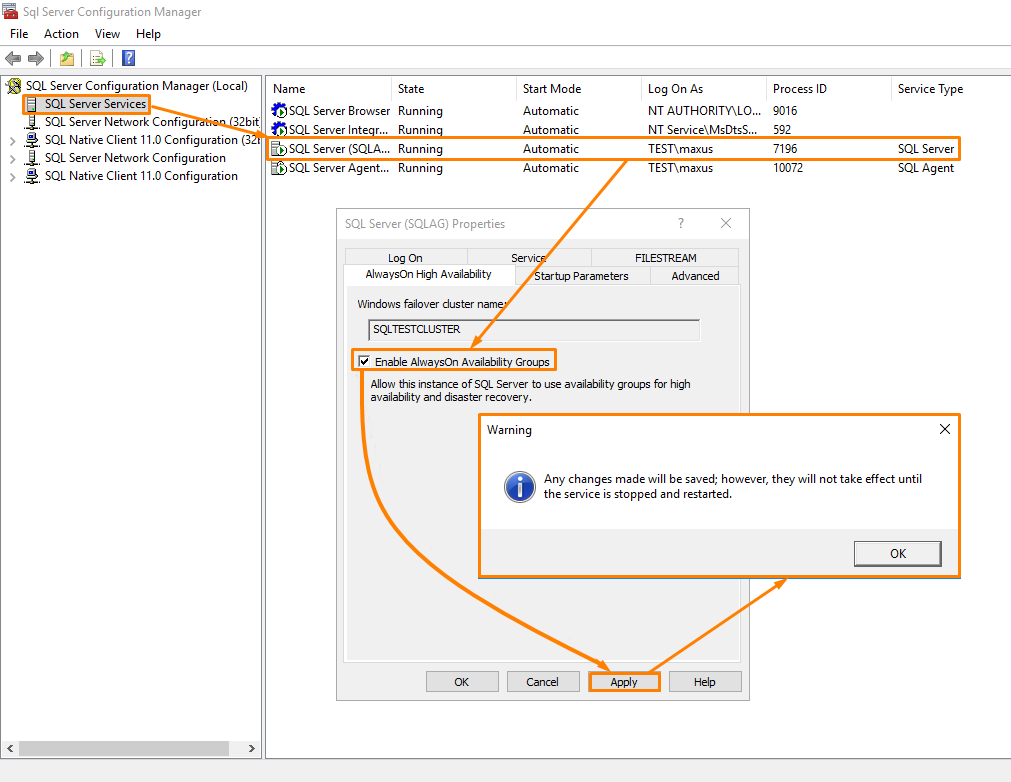
In order to start using Availability Groups, open SQL Server Configuration Manager, go to SQL Server (SQLAG) settings there, and enable AlwaysOn Availability Groups. Reboot the server afterward.
Well, that’s pretty much it for SQL Server AG installation. Repeat the whole process for SRV154 now.
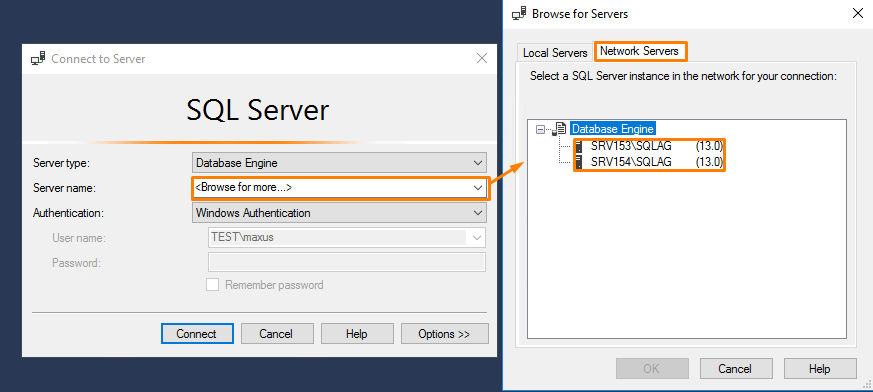
Once you are done with deploying SQL Server AG on SRV154, install SQL Server Management Studio and connect all nodes to the SQL Server (SQLAG).
Creating a test database
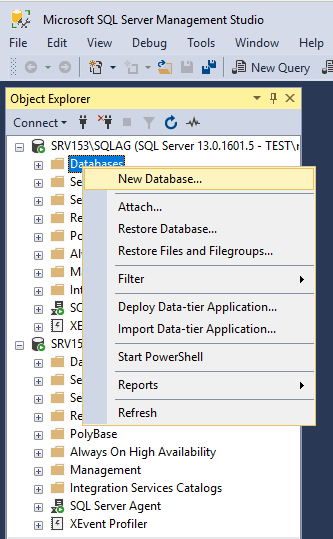
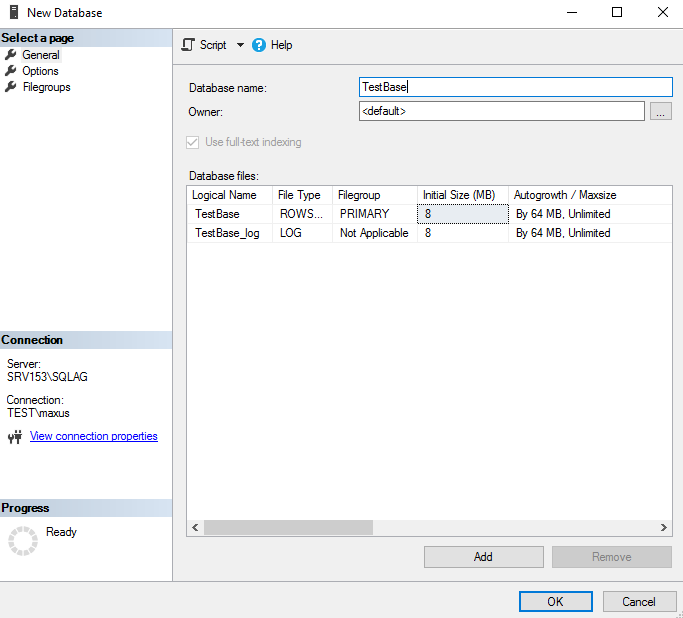
Create a new database.
Enter its name.
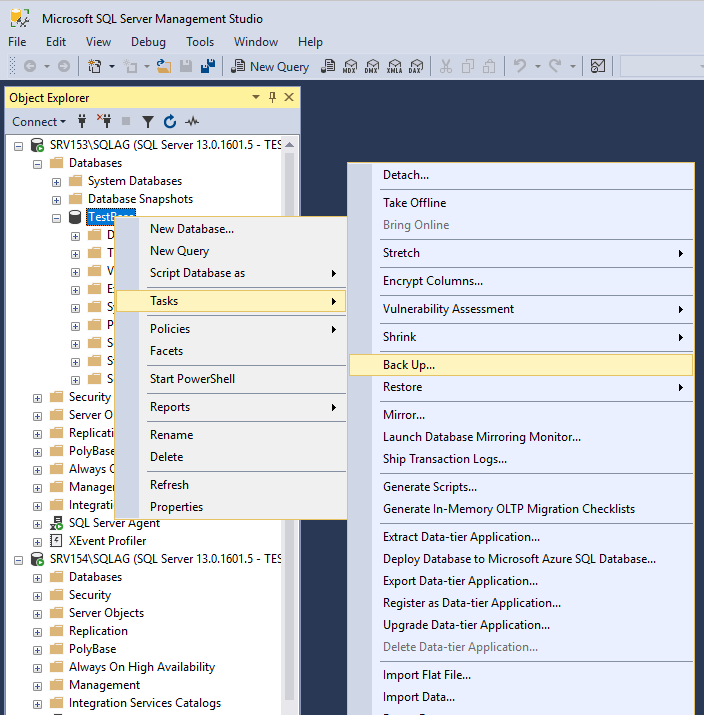
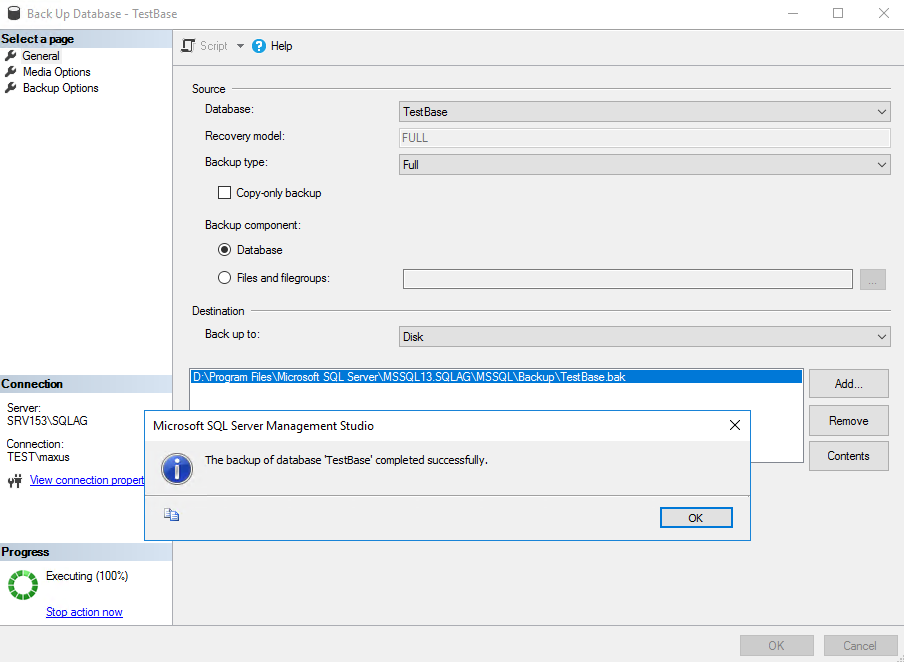
Back up that database afterward.
Create an availability group
After backing up, start Availability Group creation.
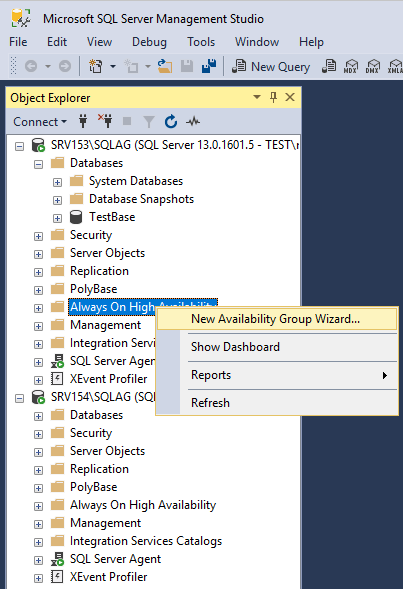
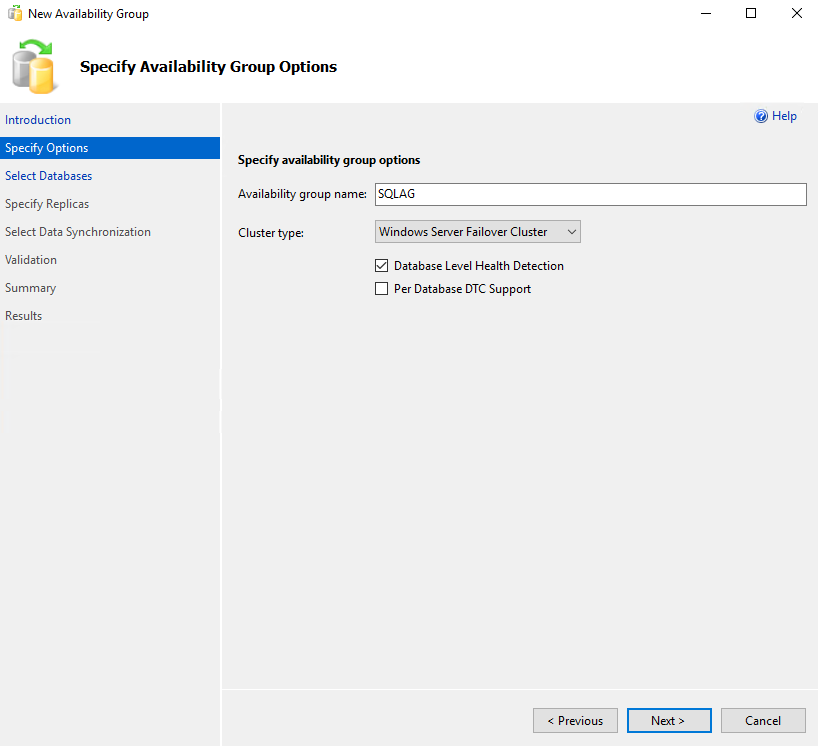
In the New Availability Group wizard, specify Availability Group name and tick the Database Level Health Detection checkbox.
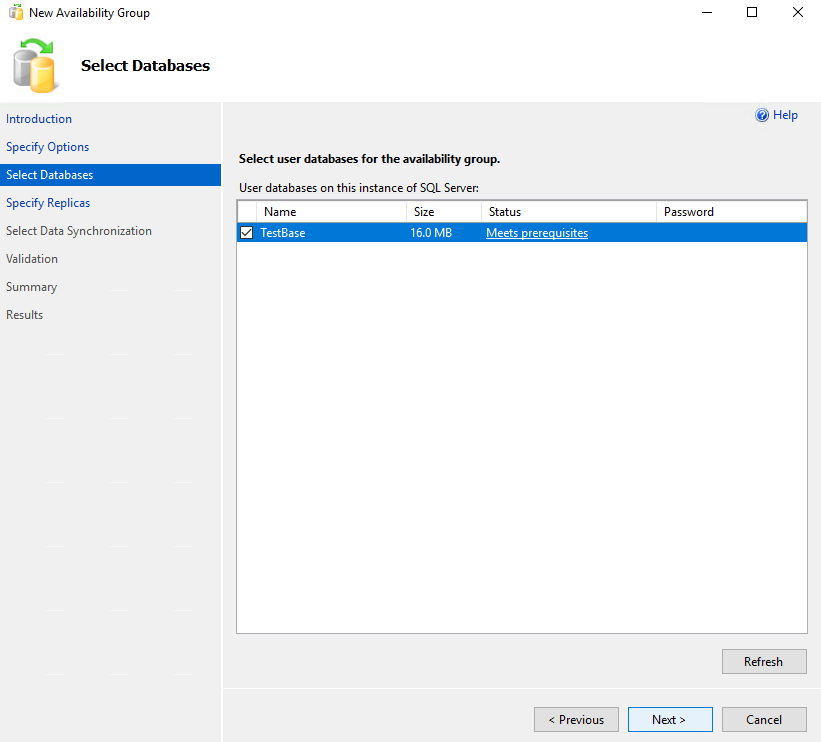
Now, select the database for Availability Group creation and press Next.
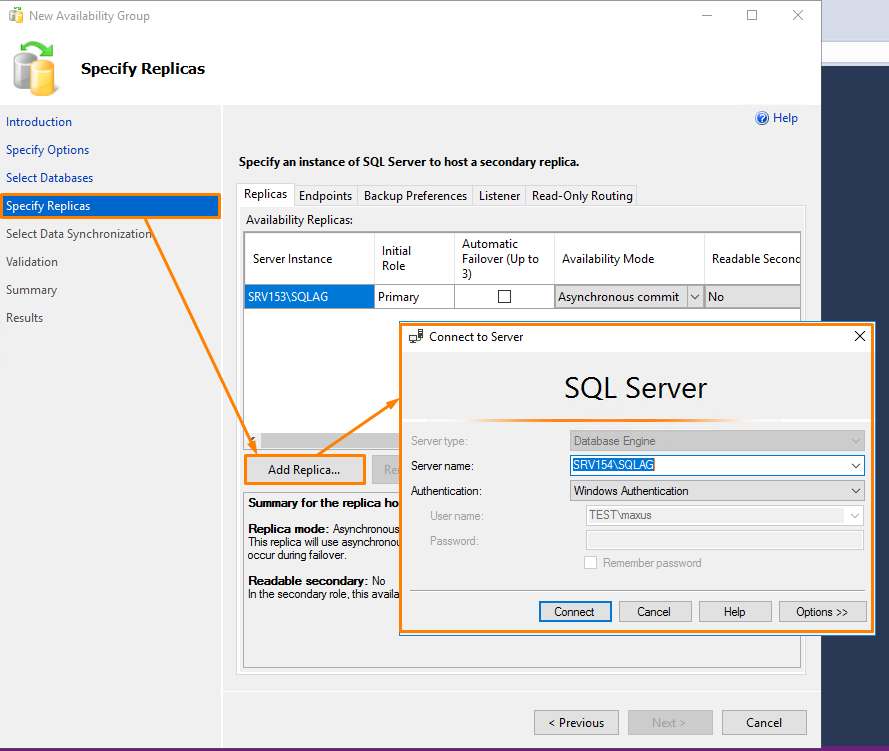
Add the database replica. Today I keep it on SRV154.
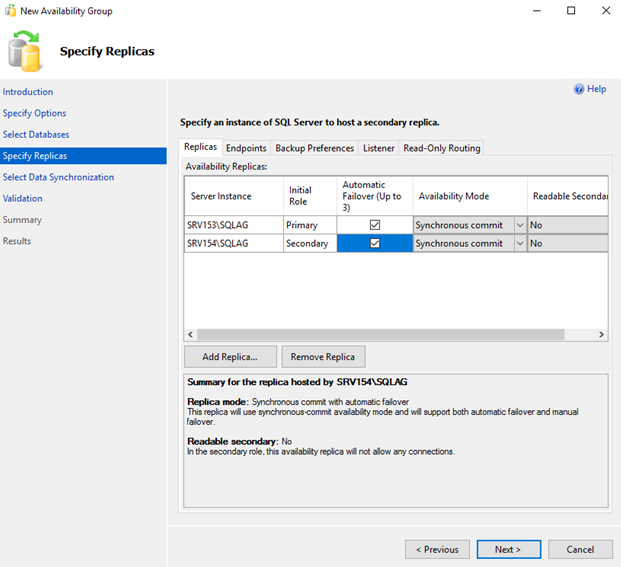
Here’s how everything looks like at the end.
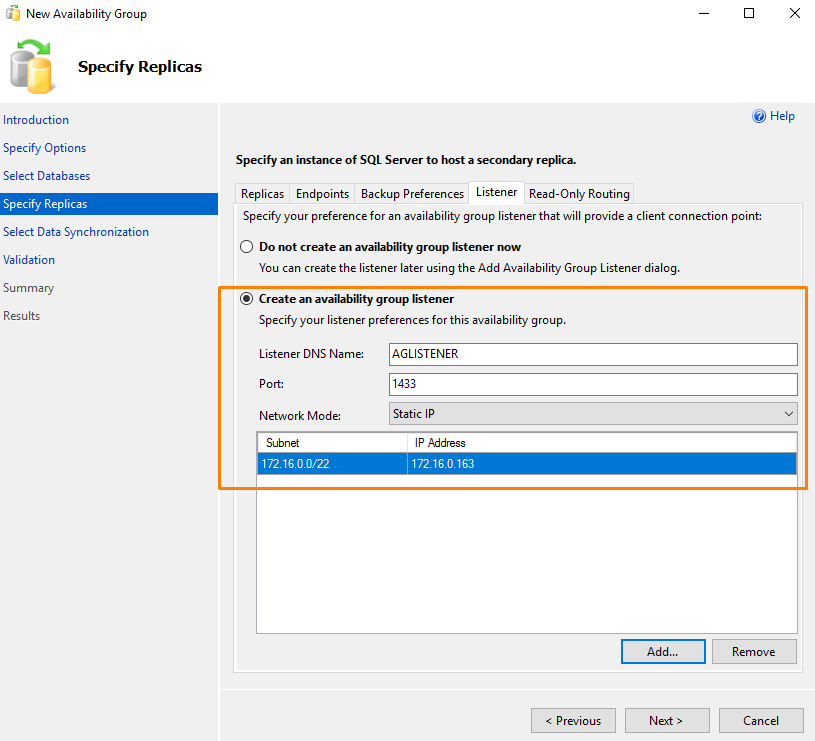
Go to the Listener tab and enter the IP and availability group listener DNS name.
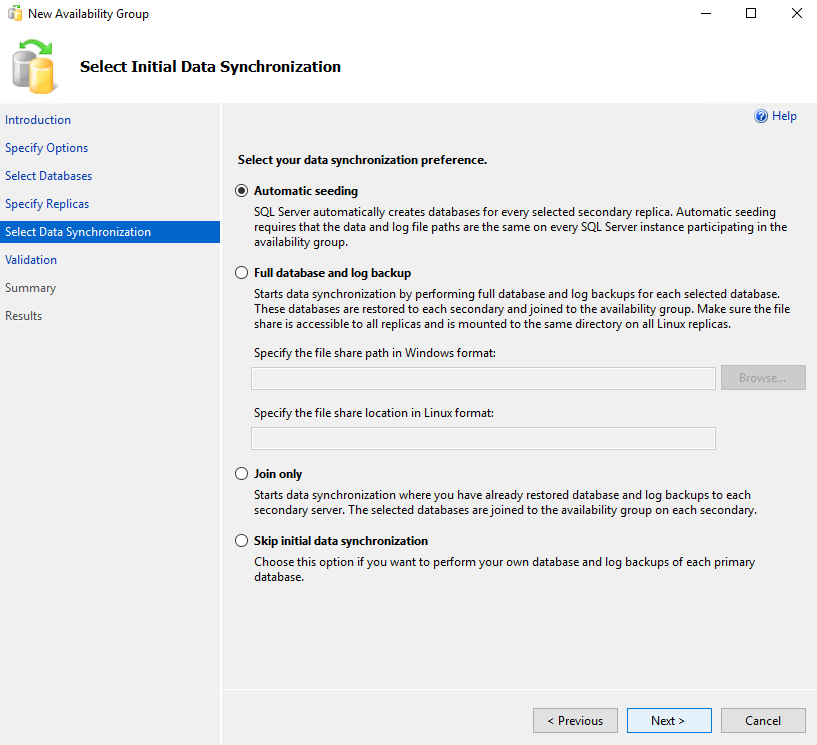
Next, in the Select Data Synchronization menu, select Automatic seeding.
Wait until all availability group components are validated and press Next.

At the Summary step, verify the choices made in the New Availability Group wizard.

Close the wizard once it completes successfully.
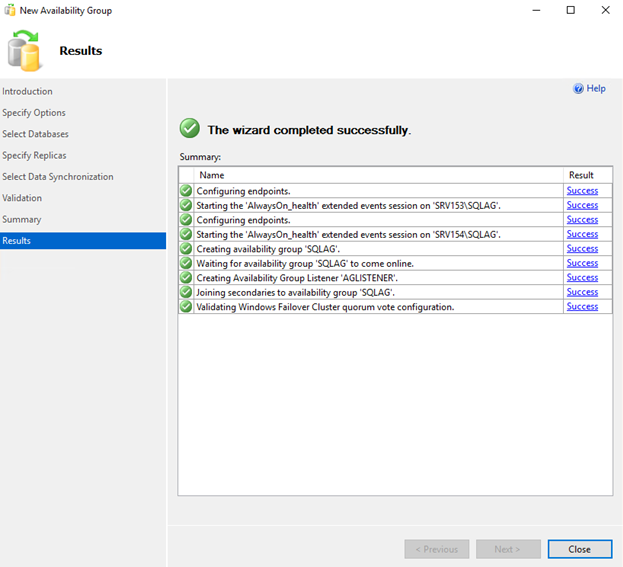
Once the Availability Group is created, go to Microsoft SQL Server Management Studio.
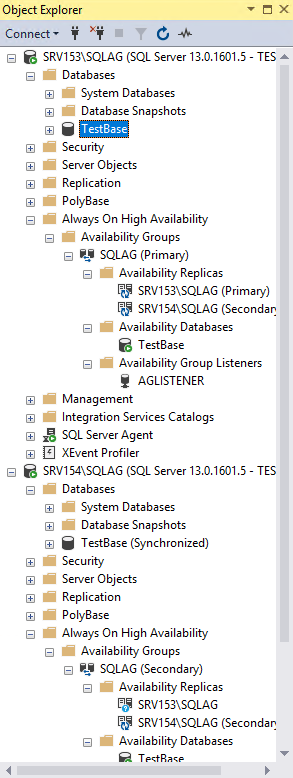
TEST TIME!
Populating the database
Today, I use HammerDB (https://www.hammerdb.com/download.html) to fill in the database (I called it TestBase).
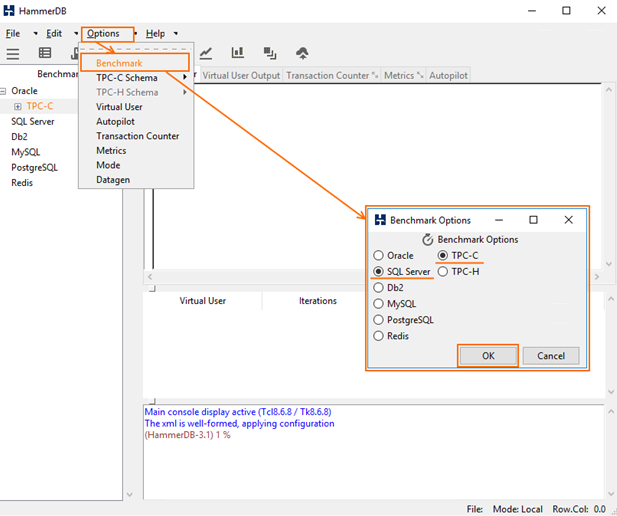
When you start HammerDB, select Benchmark in the Options menu. Find the Benchmark settings in the screenshot below.
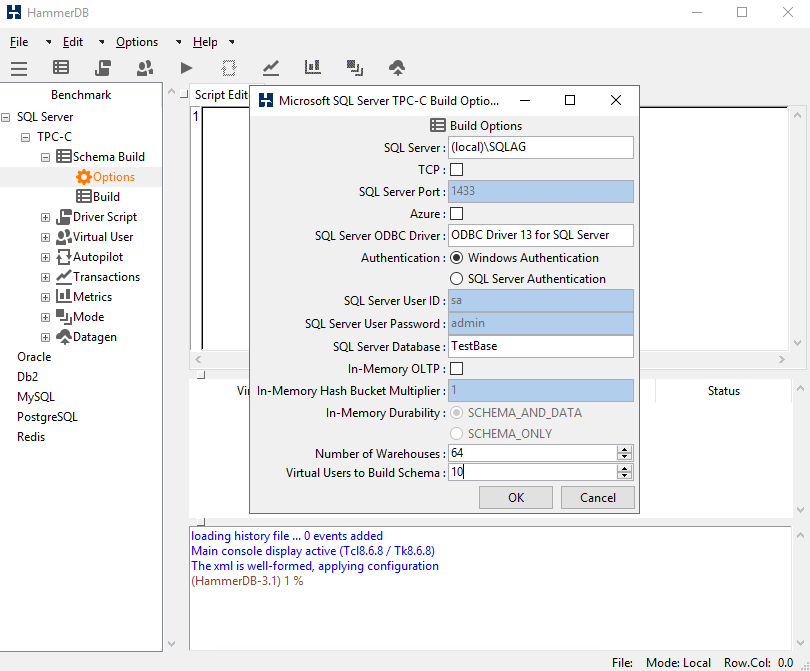
Go to the Schema build menu next and configure HammerDB connections. You also need to set the number of virtual users there.
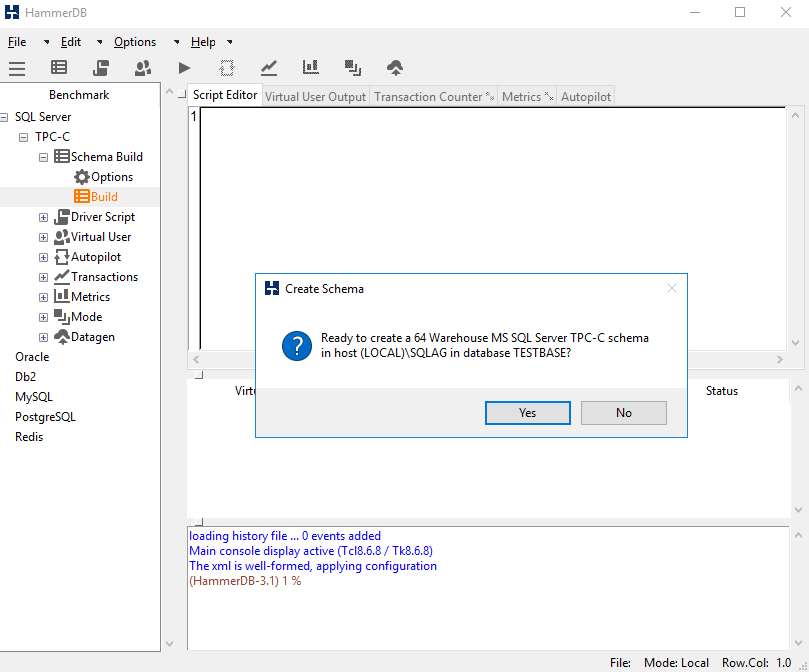
Double-click the Build menu and fill in the database with data.
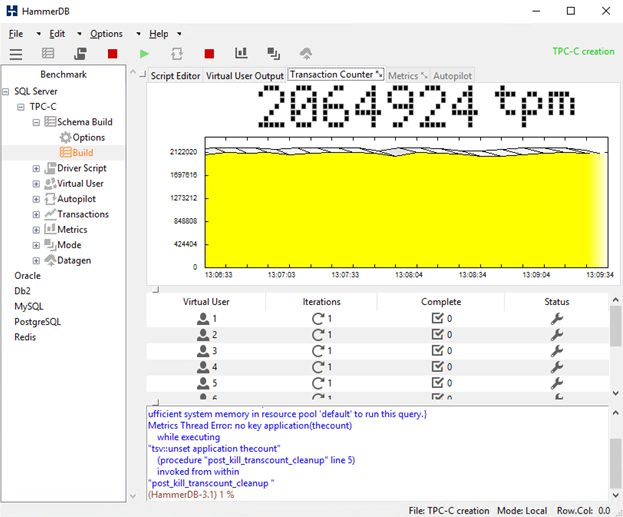
Once the database is populated with data, you can find all details about writing performance in the separate file.
Testing performance
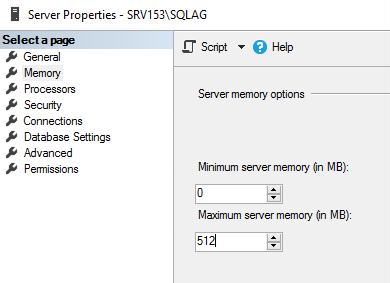
Once the database is filled in with data, reduce the amount of RAM available for SQL Server in order to prevent caching from altering the database performance.
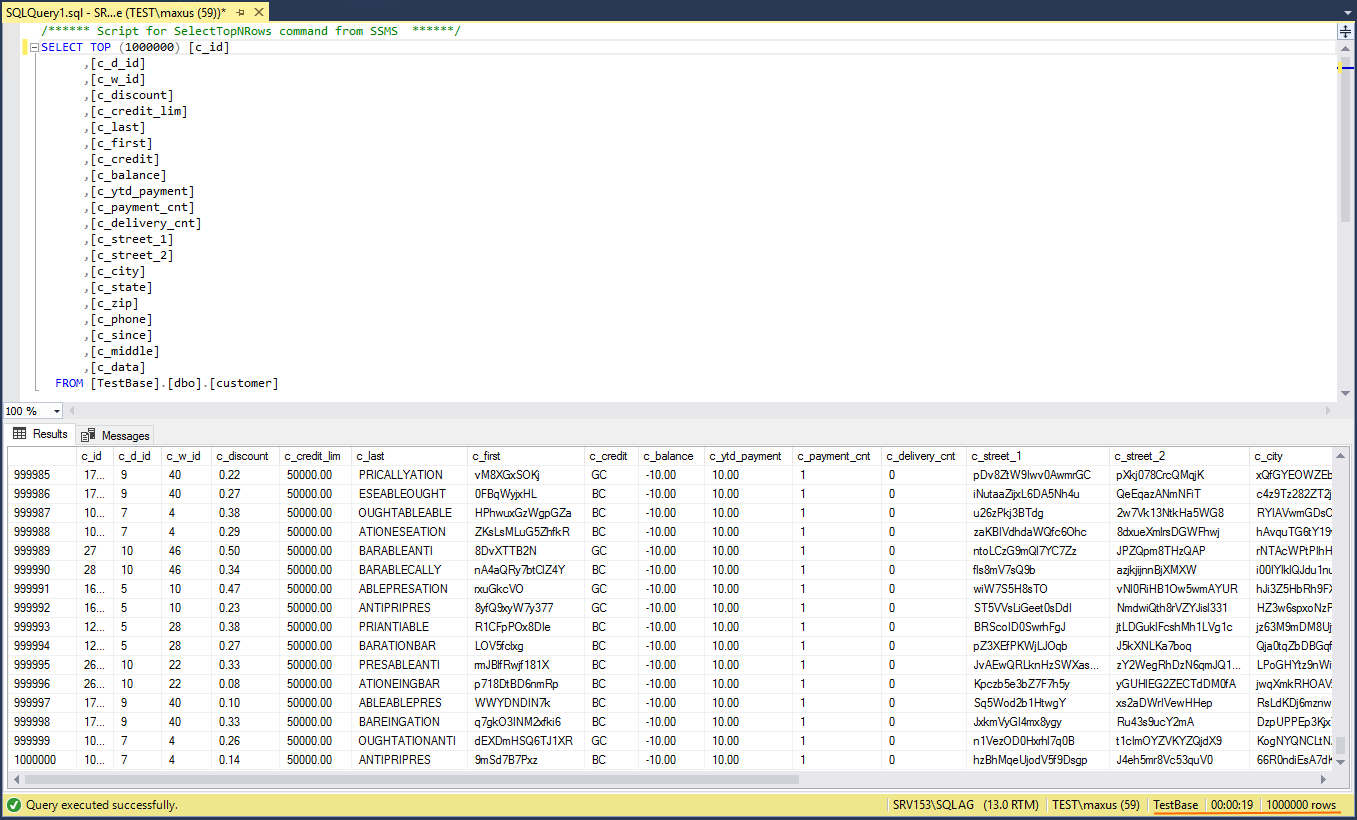
Now, it’s time to benchmark reading performance. I judged on reading performance based on how long it takes to read 1 000 000 lines from the dbo.customer database. In my case, it took 19 seconds to finish this request.
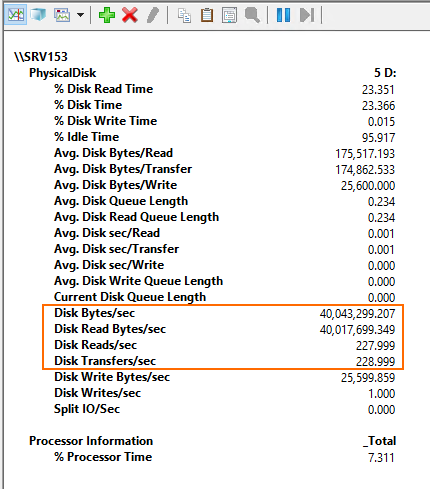
Here are some details about SQL Server AG reading performance.
Testing with SQLQueryStress
I also tested reading performance with SQLQueryStress, the utility allowing to estimate reading performance under the varying number of threads (number of virtual users = 1, 2, 4, 8, 10, 12).
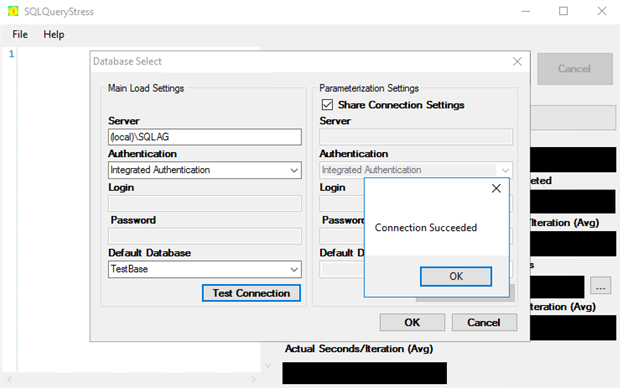
Start SQLQueryStress and press Database. Set up database connection and click Test Connection.
Enter the SQL query next. Specify the Number of threads and Number of Iterations parameters and press GO to start the test.
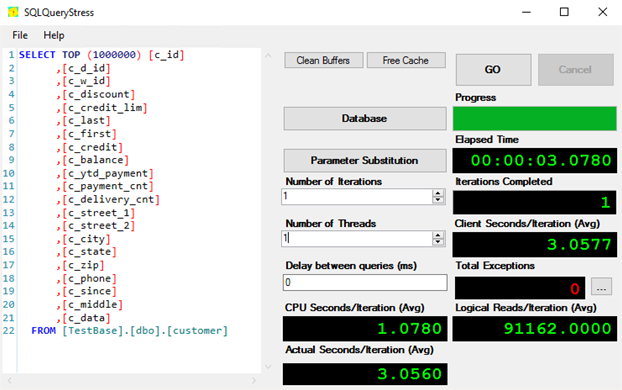
Take a look at database performance after testing it with SQLQueryStress under the varying number of threads.
| SQL Server AG | ||
|---|---|---|
| test run time. sec |
SSD. MB/s |
|
| threads=1 | 3.09 | 283 |
| threads=2 | 2.96 | 292 |
| threads=4 | 2.97 | 282 |
| threads=8 | 3.13 | 272 |
| threads=10 | 3.51 | 441 |
| threads=12 | 3.98 | 517 |
Run HammerDB again. Go to the Options menu. There, enter HammerDB connection parameters and the number of transactions per virtual user. Press OK. To run the recently prepared script, double-click Load.
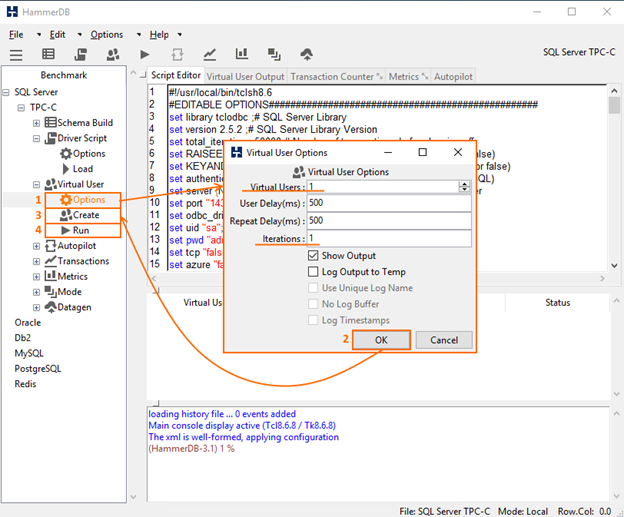
Now, go to the Virtual User menu and specify the number of users and iterations. Click OK and double-click Create afterward. Finally, click Run twice to start the test.
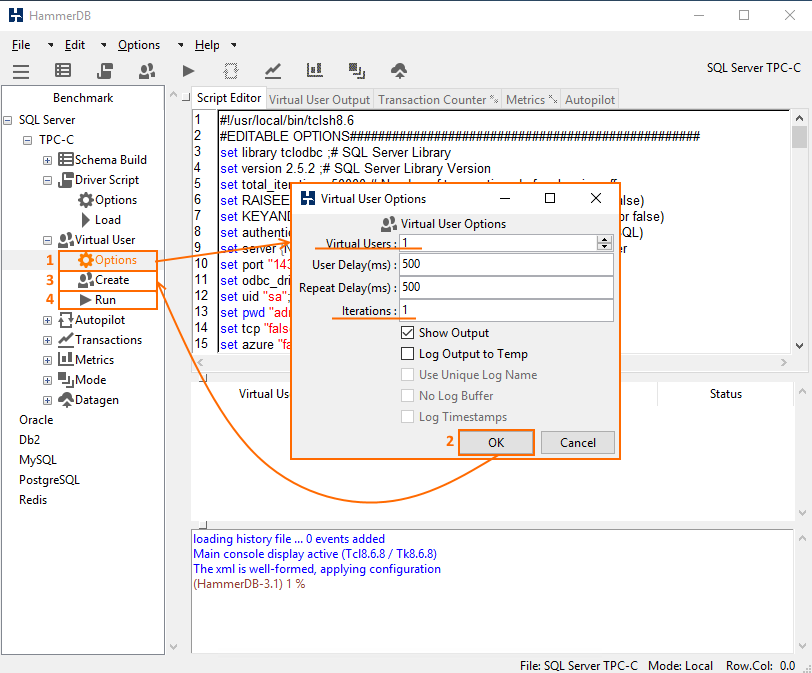
Find details about database performance under the varying number of virtual users in the table below.
| SQL AG test run time, min | |
|---|---|
| Virtual User=1 | 3 |
| Virtual User=2 | 3 |
| Virtual User=4 | 5 |
| Virtual User=8 | 7 |
| Virtual User=10 | 9 |
| Virtual User=12 | 10 |
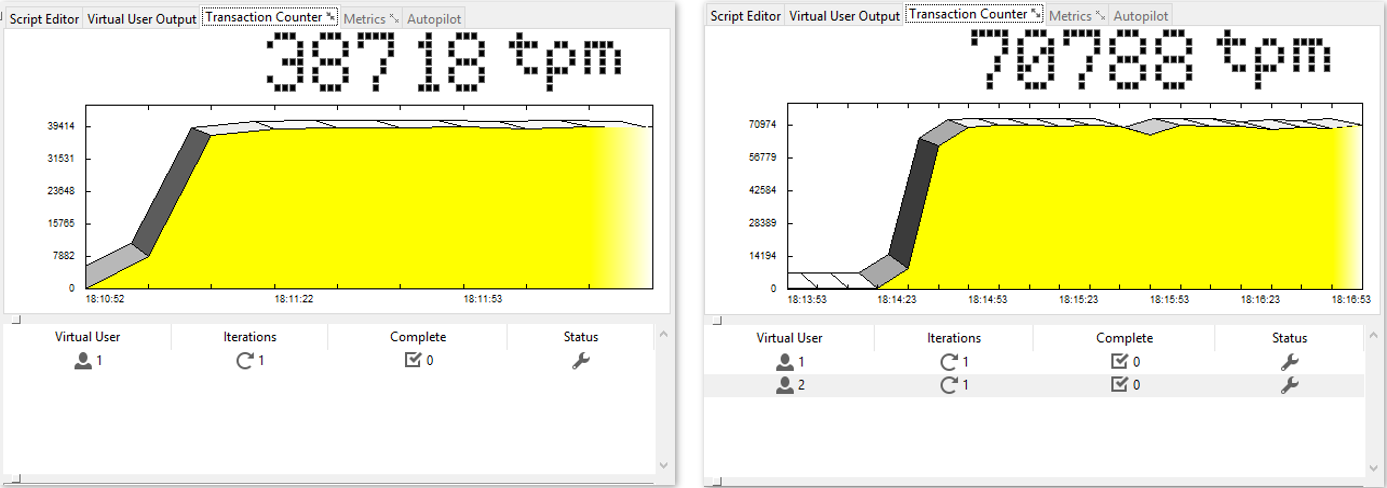
HammerDB, Virtual User = 1 and Virtual User = 2
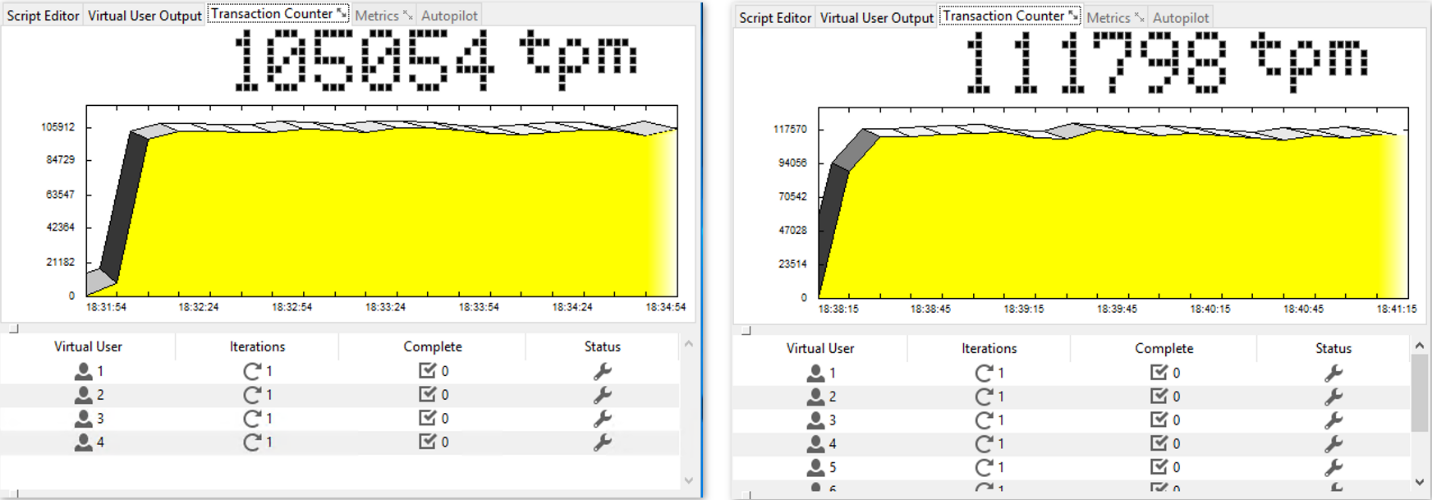
HammerDB, Virtual User = 4 and Virtual User = 8
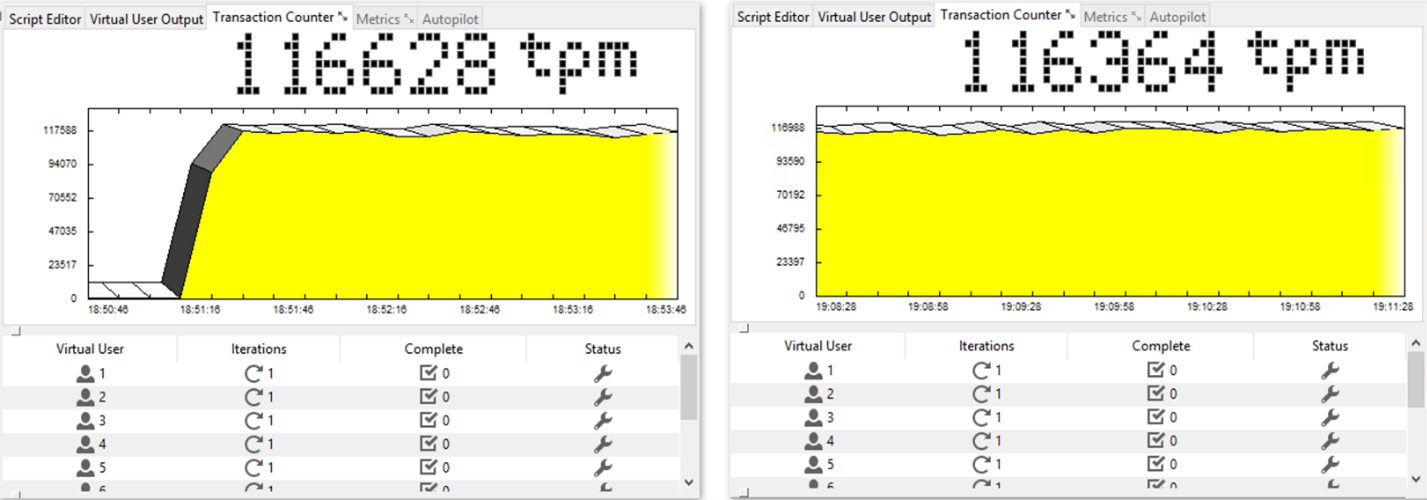
HammerDB, Virtual User = 10 and Virtual User = 12
CONCLUSION
Today, I got some numbers for performance of SQL Server Availability Groups run on Storage Spaces. My next article will shed light on SQL FCI performance in a 2-node S2D cluster. Stay tuned!


