INTRODUCTION
It is the second part of my research on SQL Server Availability Groups (AG) and SQL Server Failover Cluster Instances (FCI) performance. Before, I measured SQL Server AG performance on Storage Spaces (https://www.starwindsoftware.com/blog/hyper-v/can-sql-server-failover-cluster-instance-run-s2d-twice-fast-sql-server-availability-groups-storage-spaces-part-1-studying-ag-performance/). Today, I study the performance of SQL Server FCI on S2D, trying to prove that this thing can run 2 times faster than SQL Server AG on Storage Spaces.
THE TOOLKIT USED
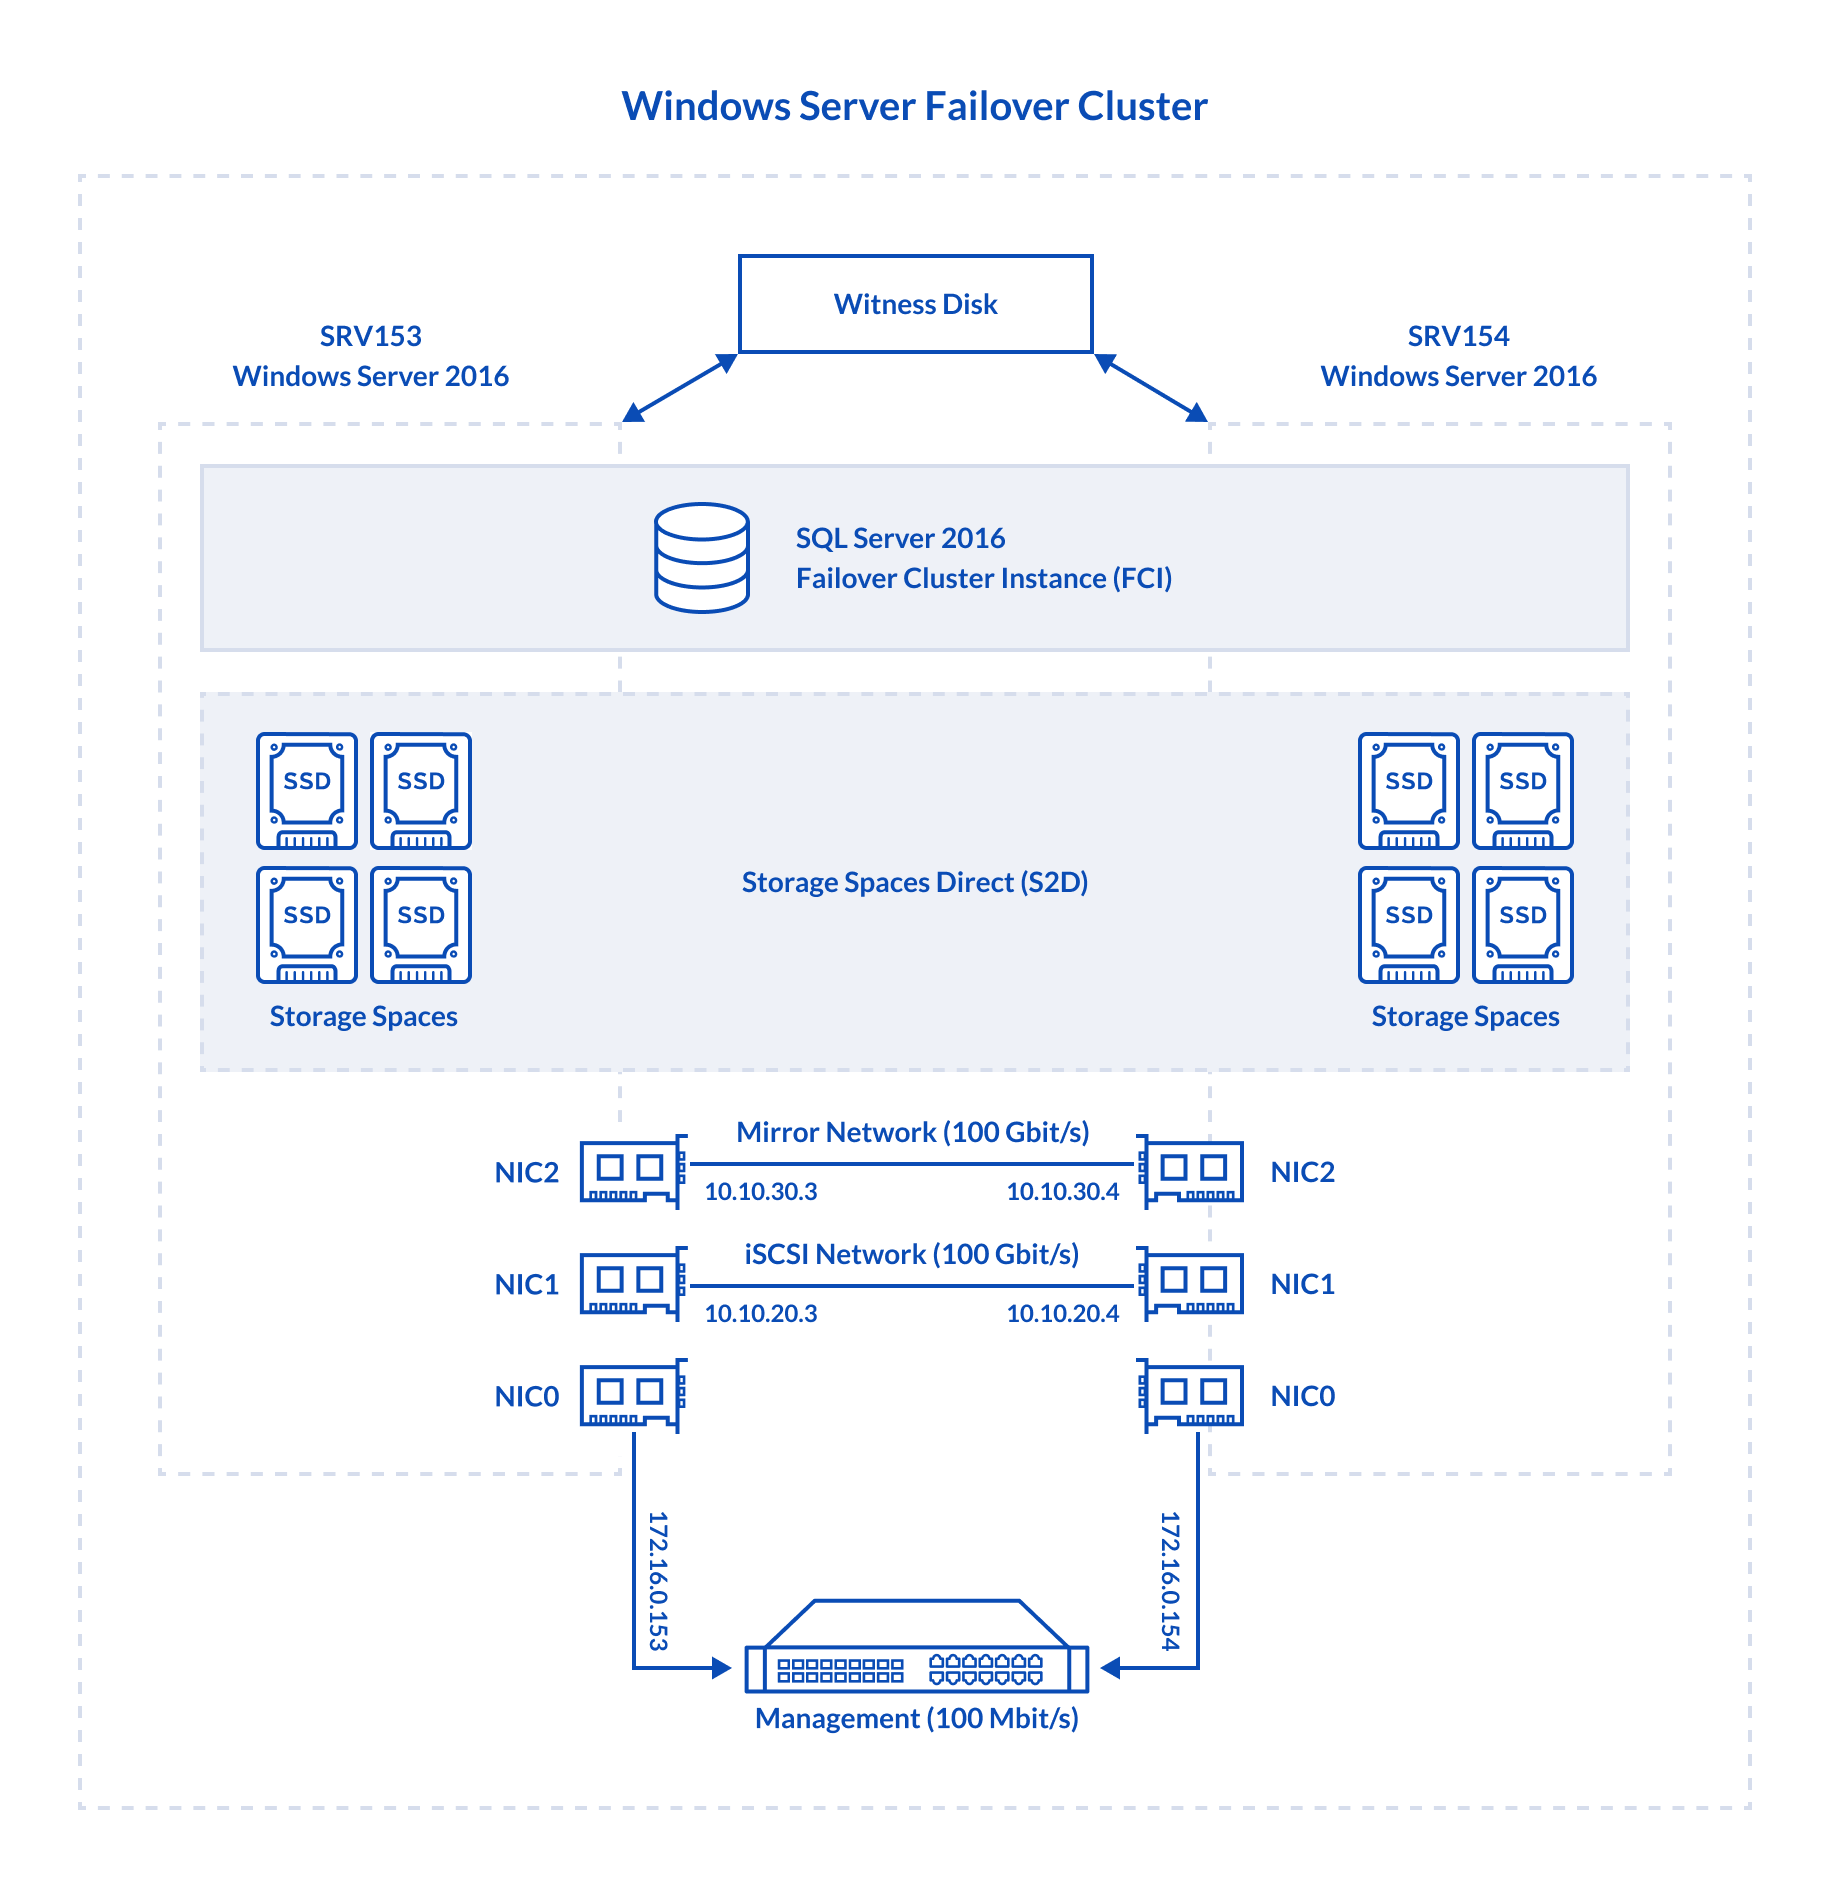
As you can see, in this article, I use 4 drives in the underlying storage for each host. The thing is, S2D needs at least 4 drives in each host to be deployed (https://docs.microsoft.com/en-us/windows-server/storage/storage-spaces/storage-spaces-direct-hardware-requirements#minimum-number-of-drives-excludes-boot-drive). No worries, I used just the same setup before (ADD HERE THE NEW LINK TO PART 1), so I still can compare the FCI and AG performance.
Now, let’s take a closer look at the setup configuration.
- SRV153, SRV154 both are absolutely identical from the hardware standpoint
- Dell R730, CPU 2x Intel Xeon E5-2697 v3 @ 2.60GHz, RAM 128GB
- Storage: 4x Intel SSD DC S3500 480GB
- LAN: 1x Broadcom NetXtreme Gigabit Ethernet, 2x Mellanox ConnectX-4 100Gbit/s
- OS: Windows Server 2016 Datacenter
- Database Management System: Microsoft SQL Server 2016
CONFIGURING MICROSOFT SQL SERVER FAILOVER CLUSTER INSTANCE
Installing the Hyper-V role
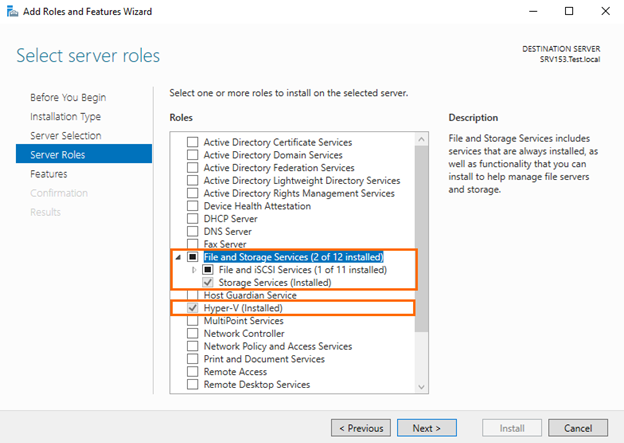
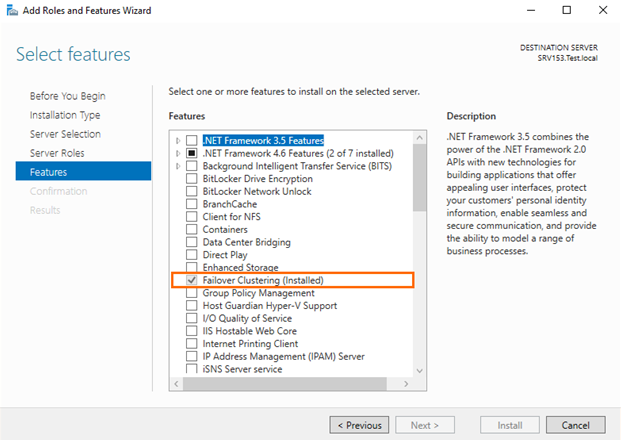
Before deploying Storage Spaces Direct, it is necessary to enable the Hyper-V role on each host. You can enable other roles that are needed for creating a failover cluster with PowerShell. Use this simple cmdlet below for that purpose:
|
1 |
Install-WindowsFeature –Name File-Services, Failover-Clustering -IncludeManagementTools |


Enable other server roles on each host in Server Manager.
Pooling and clustering
Afterward, check whether the nodes can be clustered.
|
1 |
Test-Cluster -Node 172.16.0.153, 172.16.0.154 -Include “Storage Space Direct”,Inventory,Network,”System Configuration” |

Once the script finishes Validation Report <data>.html is formed. It is a report where all problems (and their solutions) encountered during cluster creation are listed.
|
1 |
New-Cluster -Name WinCluster -Node 172.16.0.153,172.16.0.154 -NoStorage -StaticAddress 172.16.0.165 |

Start Failover Cluster Manager and check whether cluster creation has run smoothly.

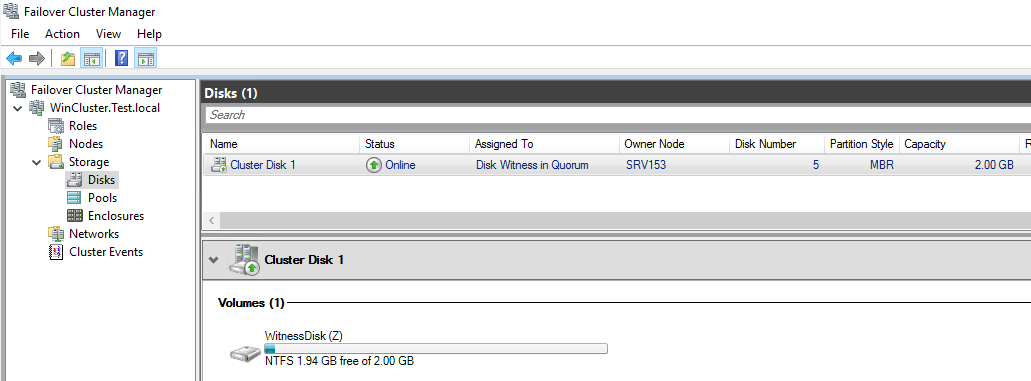
Assign the quorum vote to some disk witness afterward (today, I use Cluster Disk 1 for that purpose).
Check which disks can be pooled together on each host.
|
1 |
Get-PhysicalDisk –CanPool $true | Sort Model | ft FriendlyName, BusType, CanPool, OperationalStatus, HealthStatus, Usage, Size |

It is very important to check the BusType parameter value for each disk. The problem is that your disks may not be pooled due to being in RAID. Even though they are displayed in PowerShell as ones that can be pooled and connected to S2D, in real life, they just will not do that.
Why? It’s just one of those Microsoft’s limitation. Find more on how drives can be connected for S2D here: https://docs.microsoft.com/en-us/windows-server/storage/storage-spaces/storage-spaces-direct-hardware-requirements#minimum-number-of-drives-excludes-boot-drive.
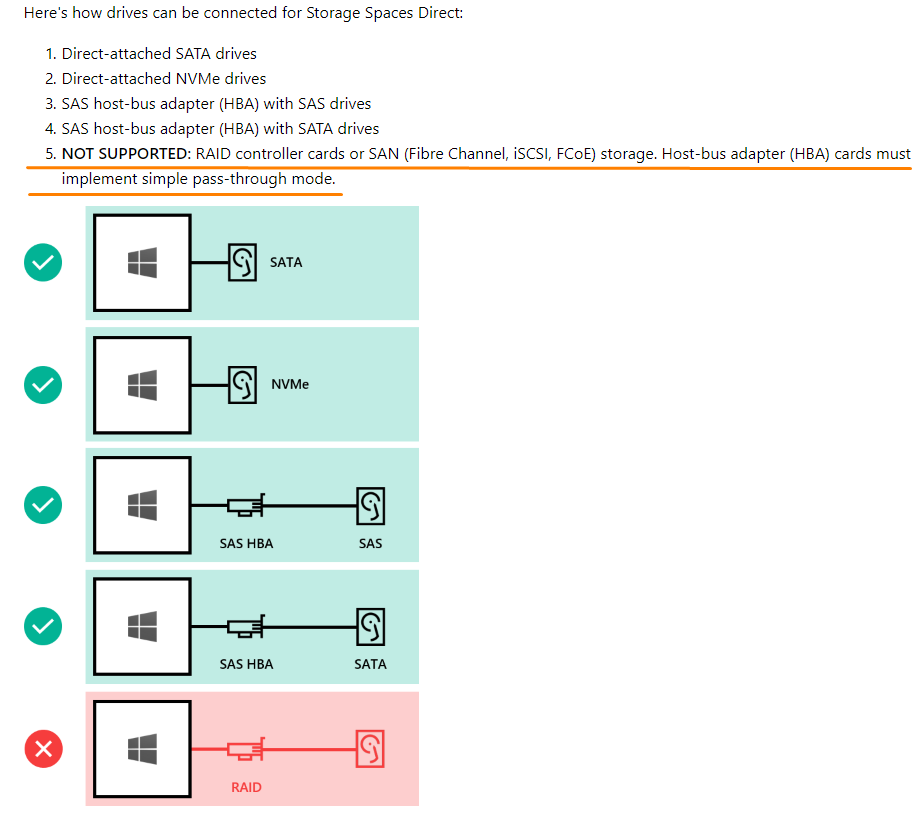
I find such BustType value pretty weird since those disks aren’t in RAID! They all are connected in the pass-through mode. Probably, there may be some troubles with detecting this parameter value in Windows Server 2016. Below, find the proof that none of those drives is in RAID.
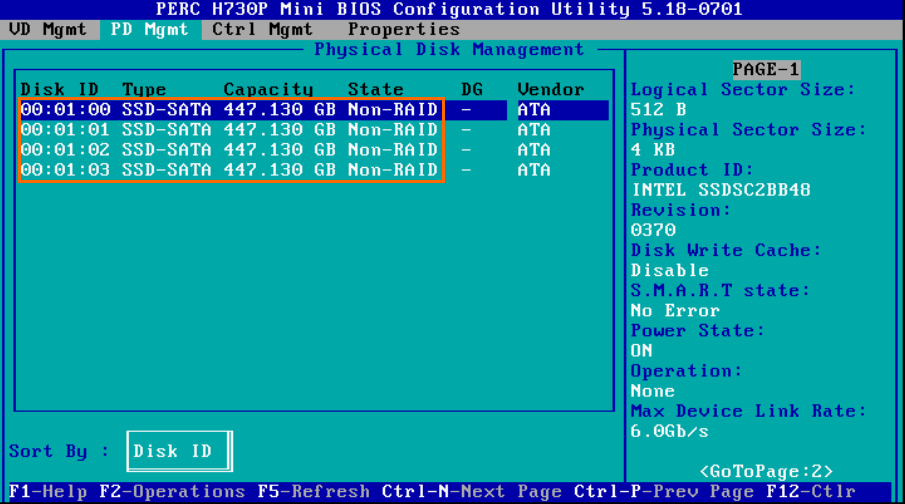
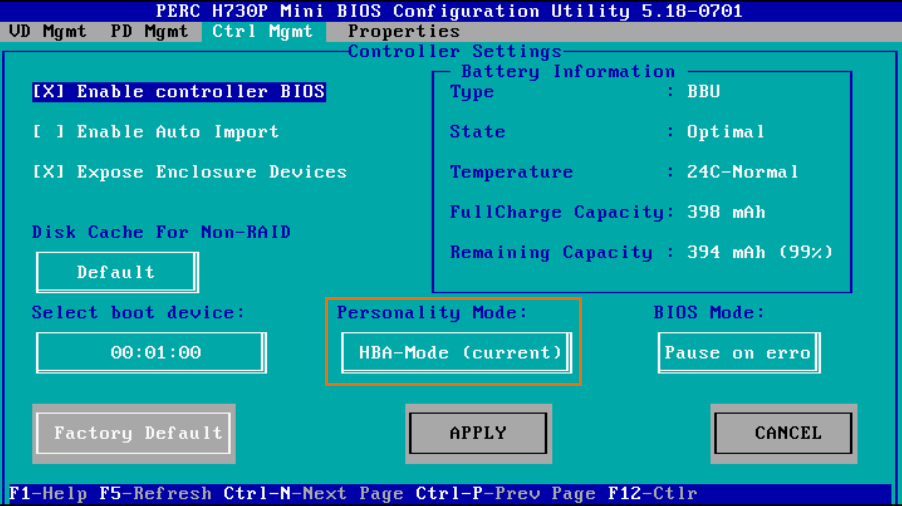
PERC H730P was working in HBA mode, so there should be no problems with pooling disks.
Now, let’s try to enable S2D with the Enable-ClusterStorageSpacesDirect cmdlet.

Unfortunately, I cannot do that due to inappropriate BusType value. No worries, there’s still a way allowing to overcome this limitation. Just run the (Get-Cluster).S2DBusTypes=0x100 command! Subsequently, deploy Enable-ClusterStorageSpacesDirect one more time.

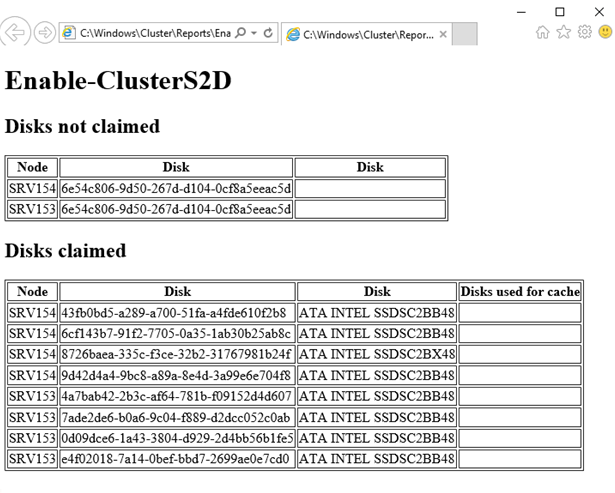
Once the command finishes, check the pool creation report. Find it at the following path: C:\Windows\Cluster\Reports.
CREATING A CLUSTER SHARED VOLUME
Once you are done with enabling S2D, open Server Manager to make sure that pool creation has run smoothly.
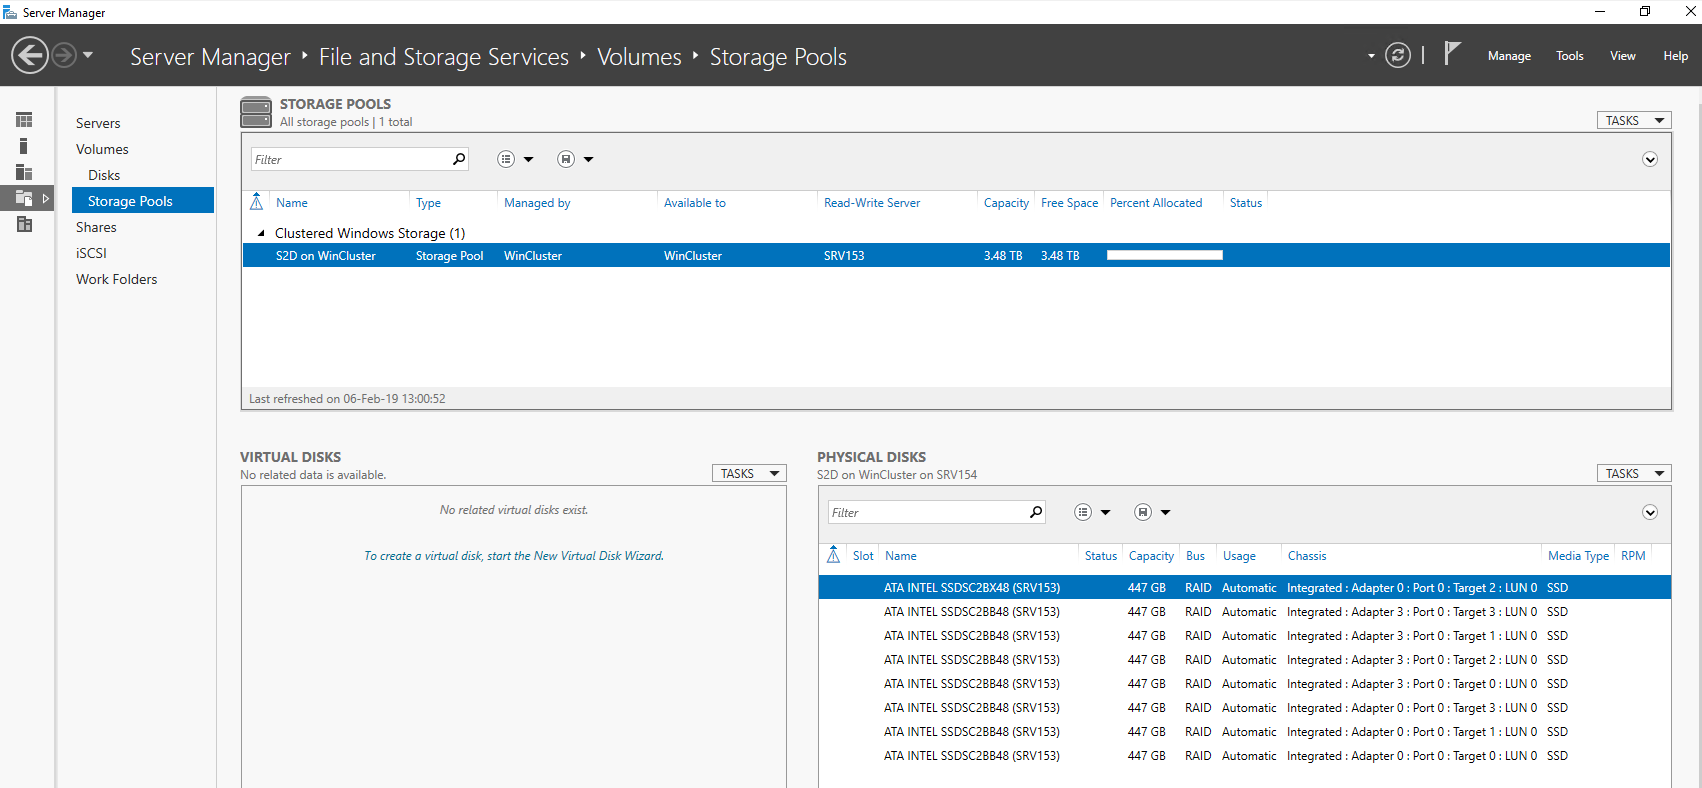
Next, go to Failover Cluster Manager to make sure that the pool belongs to the cluster.
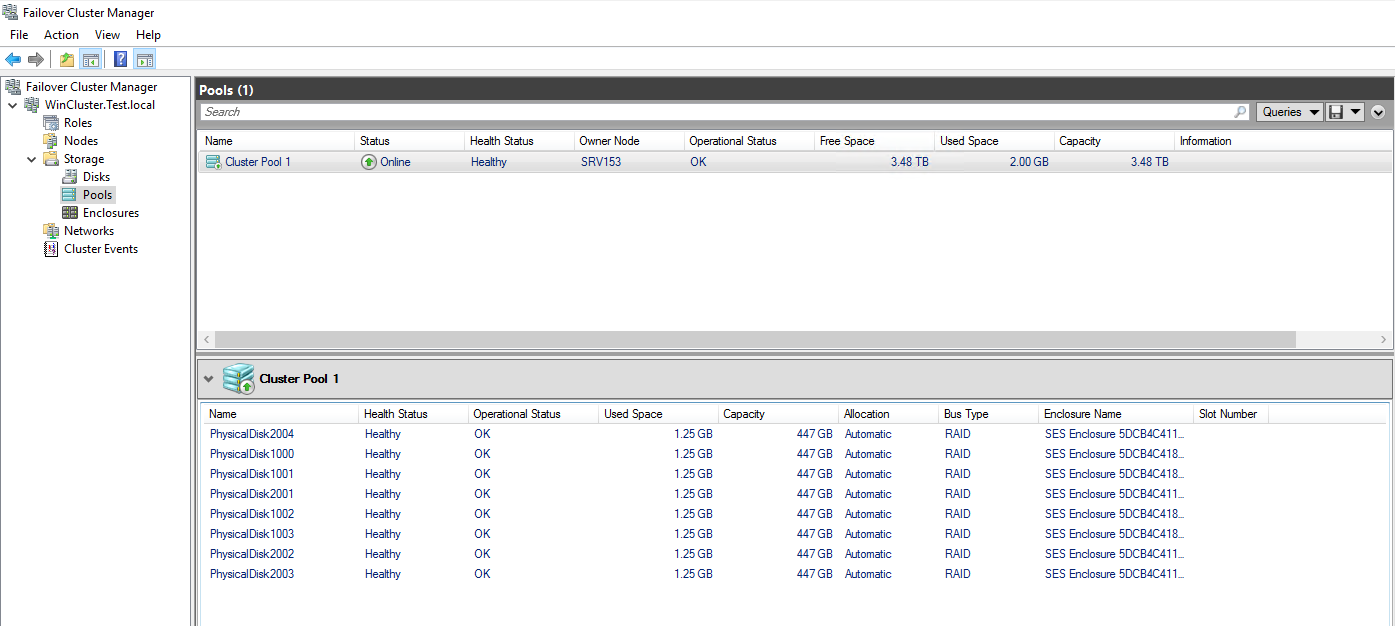
Then, run this command to create a new virtual disk in S2D cluster, format it to ReFS, and create a Cluster Shared Volume.
|
1 |
New-Volume –StoragePoolFriendlyName “S2D*” –FriendlyName <disk_name> –FileSystem CSVFS_ReFS -Size 445GB -ResiliencySettingName Mirror -PhysicalDiskRedundancy 1 |
To max out virtual disk performance, select Mirror for resiliency type. Set PhysicalDiskRedundancy parameter to 1 (two-way mirror). Find more details here: https://docs.microsoft.com/en-us/windows-server/storage/storage-spaces/plan-volumes.
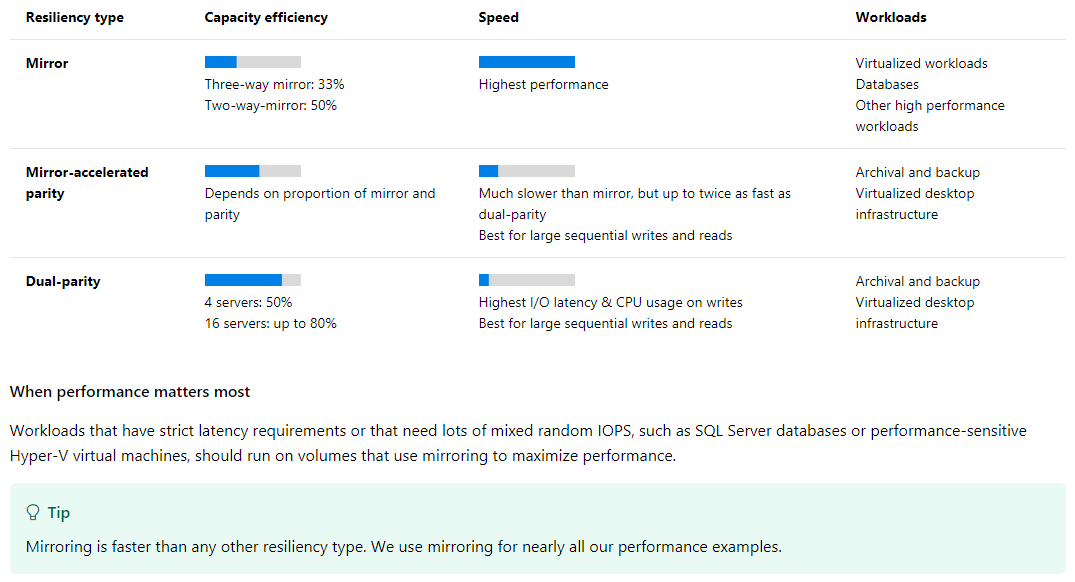
Next, let’s create one more virtual disk where the test SQL database resides.
|
1 |
New-Volume –StoragePoolFriendlyName “S2D*” –FriendlyName VD1 –FileSystem CSVFS_ReFS -Size 445GB -ResiliencySettingName Mirror -PhysicalDiskRedundancy 1 |

Go to the Failover Cluster Manager to make sure that the virtual disk has been successfully created.
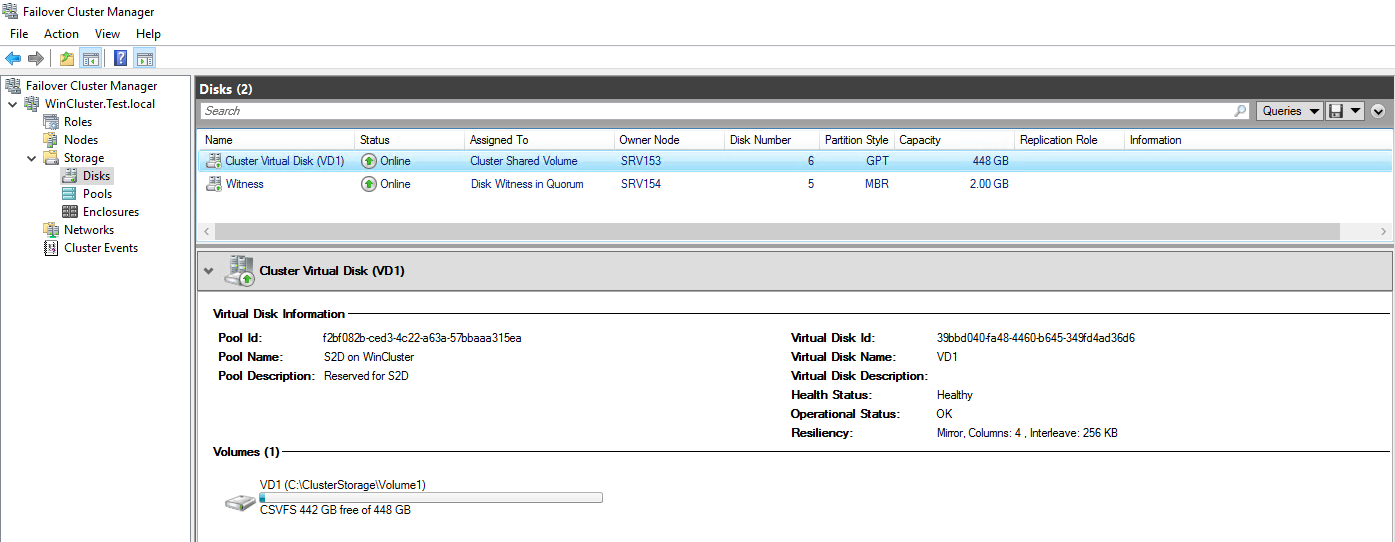
Go to Server Manager next.
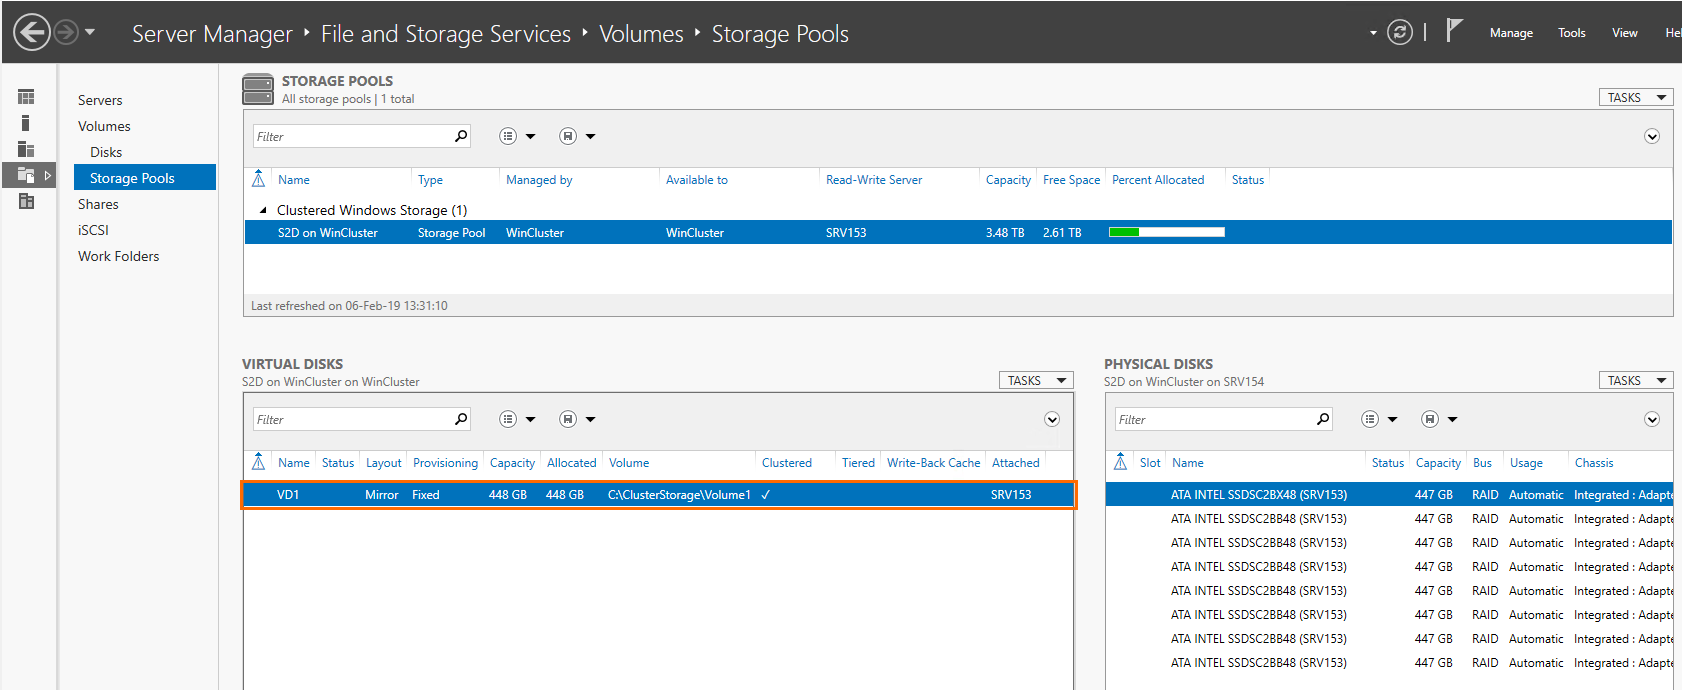
Cluster Shared Volume for SQL database resides at C:\ClusterStorage\Volume1.
SETTING UP SQL SERVER FCI
At this stage, I describe how SQL Server FCI with an empty database was deployed in a 2-node S2D cluster.
Let’s install SQL Server 2016 on SRV153 from the image.
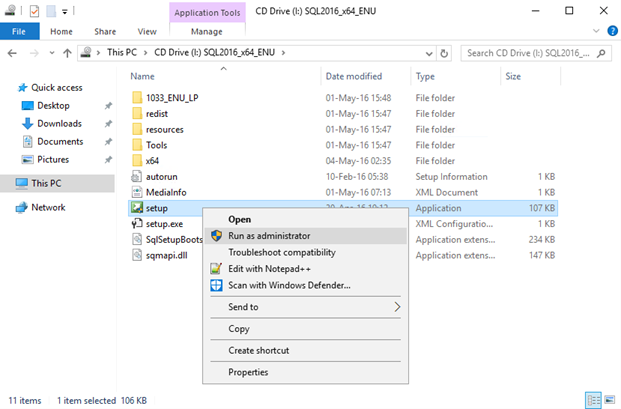
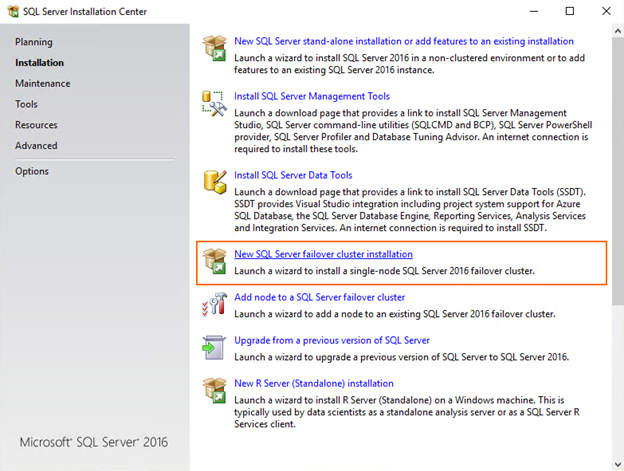
Select New SQL Server failover cluster installation.
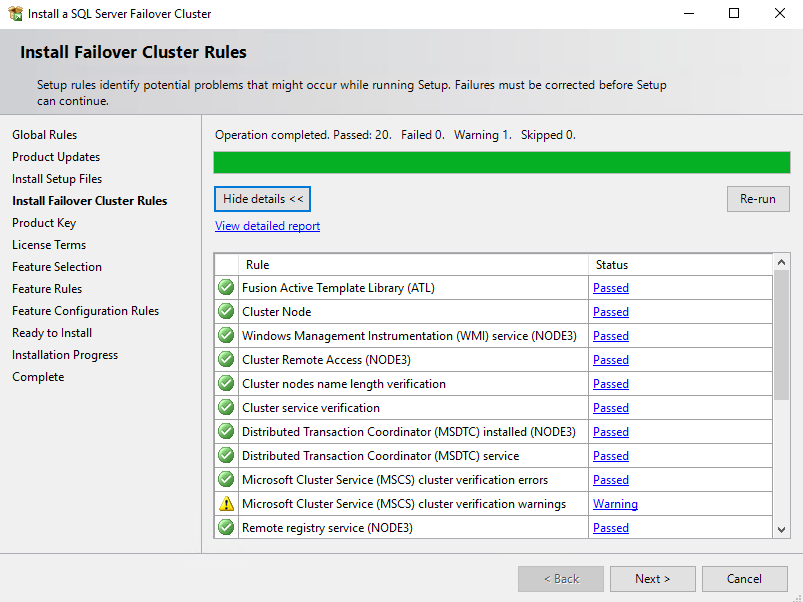
Press Next after failover cluster rules are successfully installed.
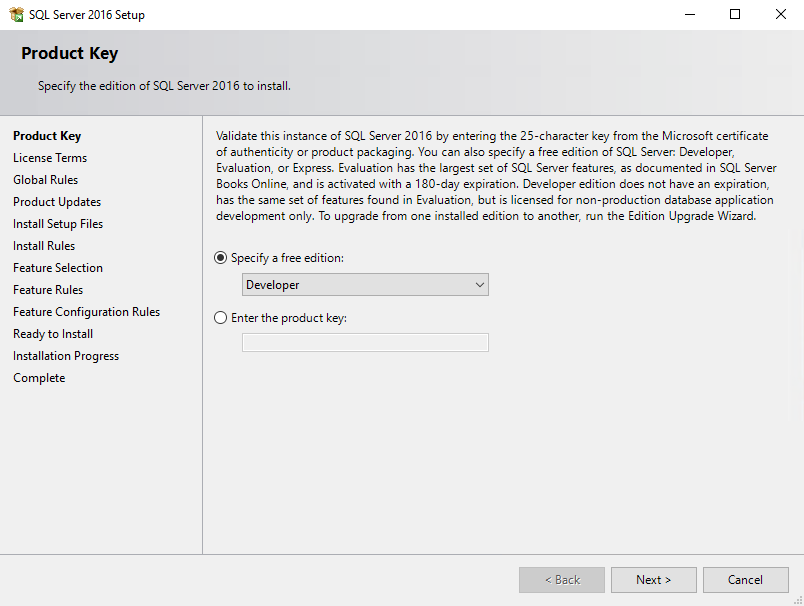
In the Product Key menu, select the Developer free edition.
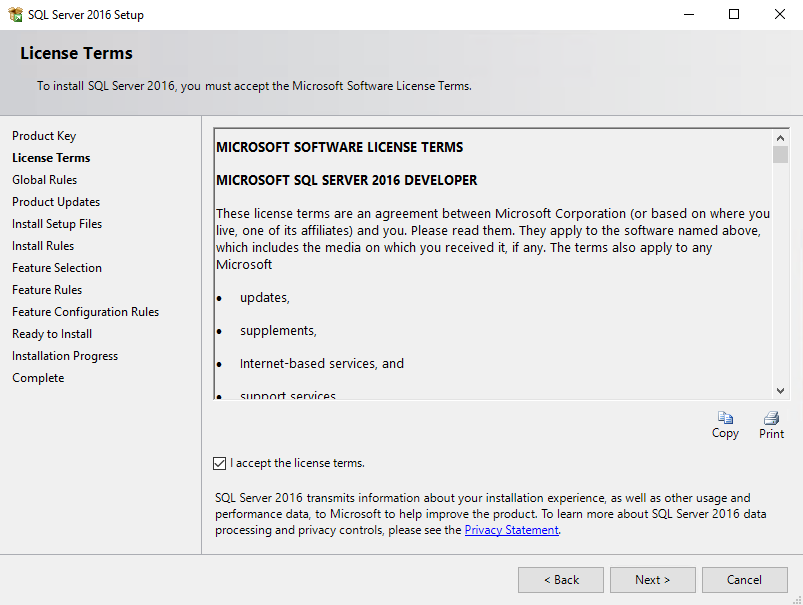
Quickly skim the license, tick the I accept the license terms checkbox, and finally click Next.
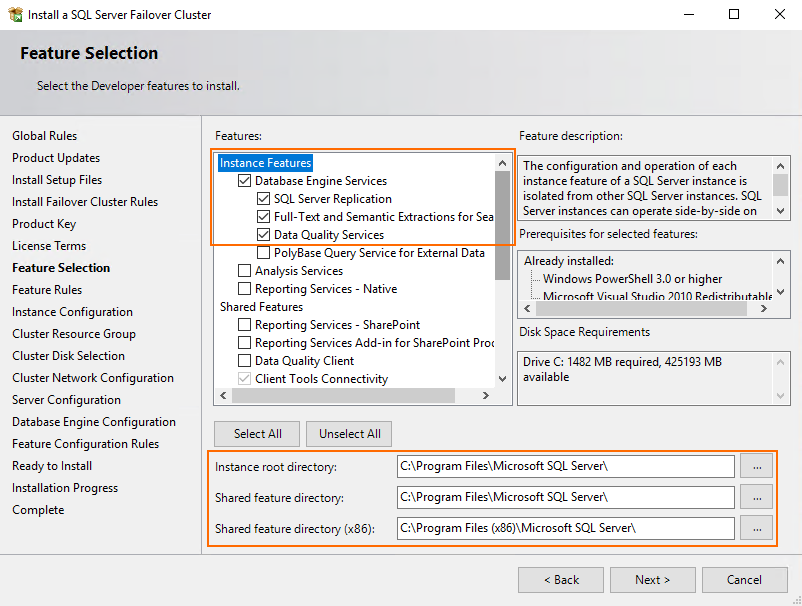
Select the necessary instance features and specify the instance root and shared feature directories.
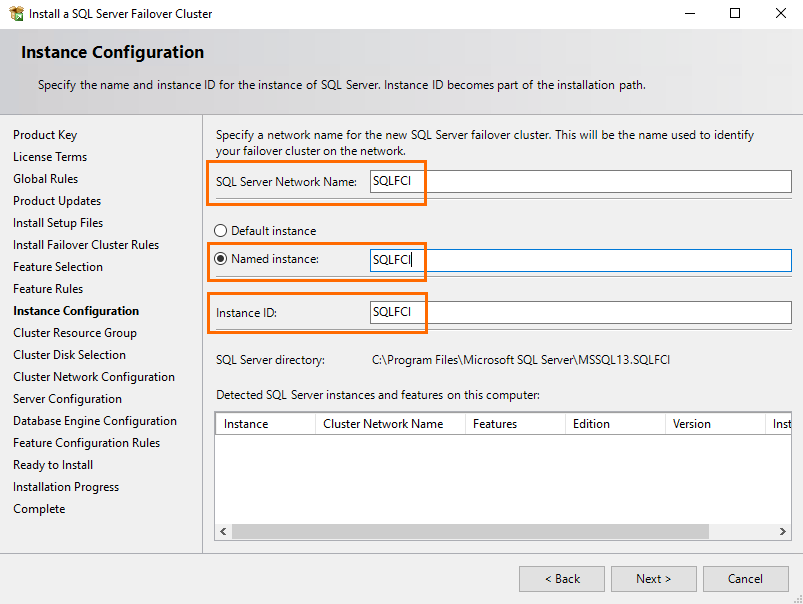
Enter the SQL Server network name. Select the named instance option and specify its name. Eventually, enter the instance ID. Here, I filled all those fields identically.
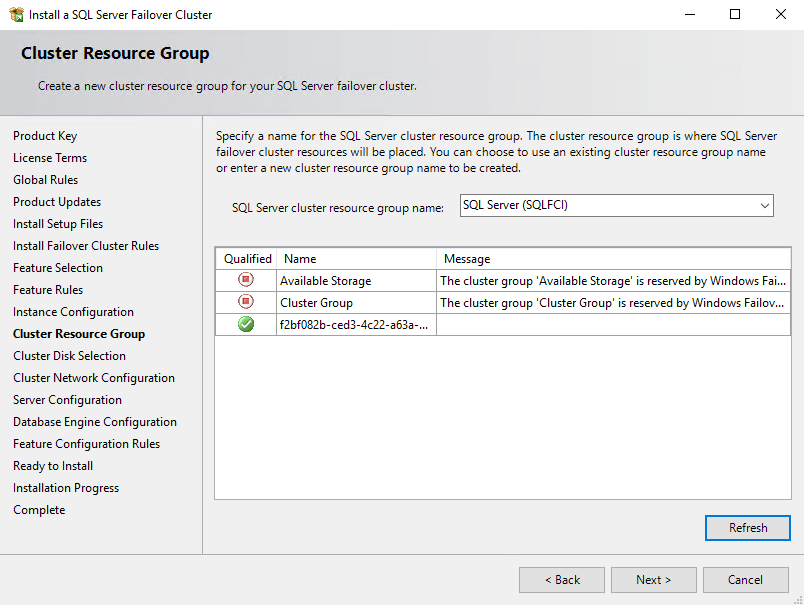
Select an automatically created SQL Server cluster resource group.
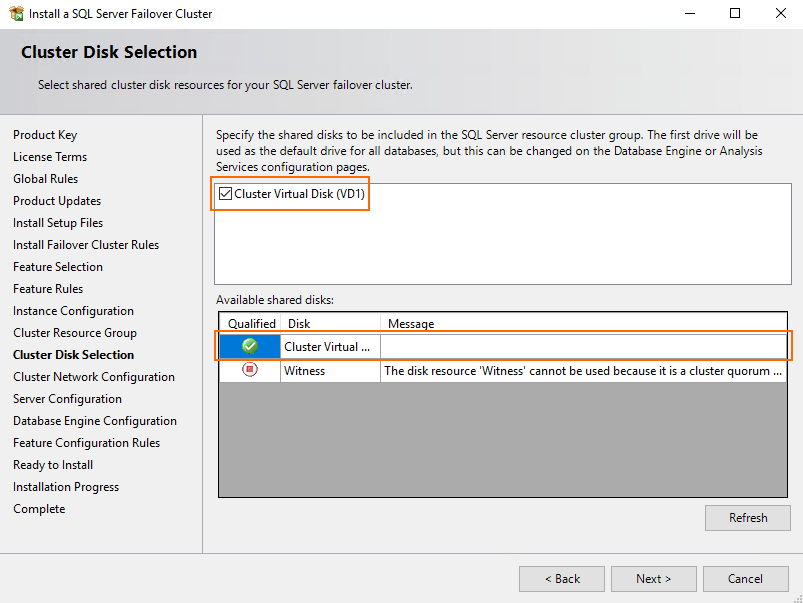
Select the recently created shared cluster disk.
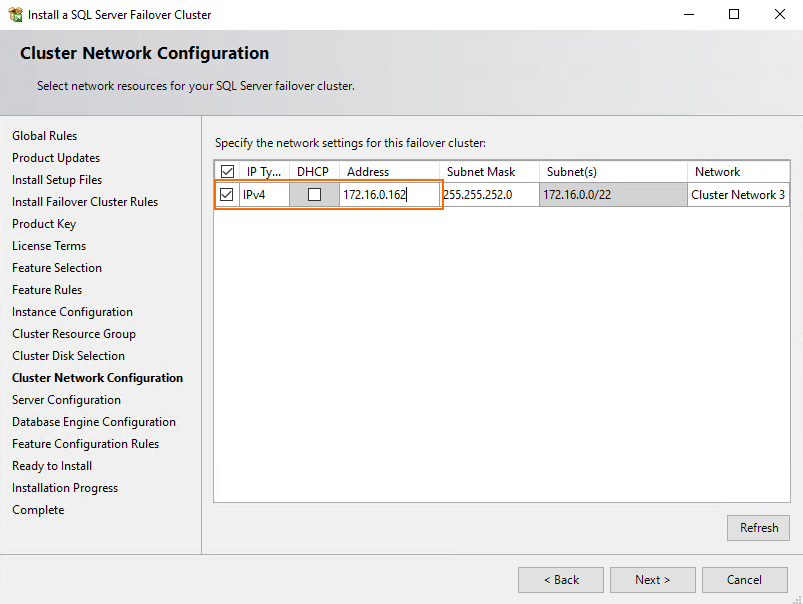
Specify failover cluster IP, or use DHCP.
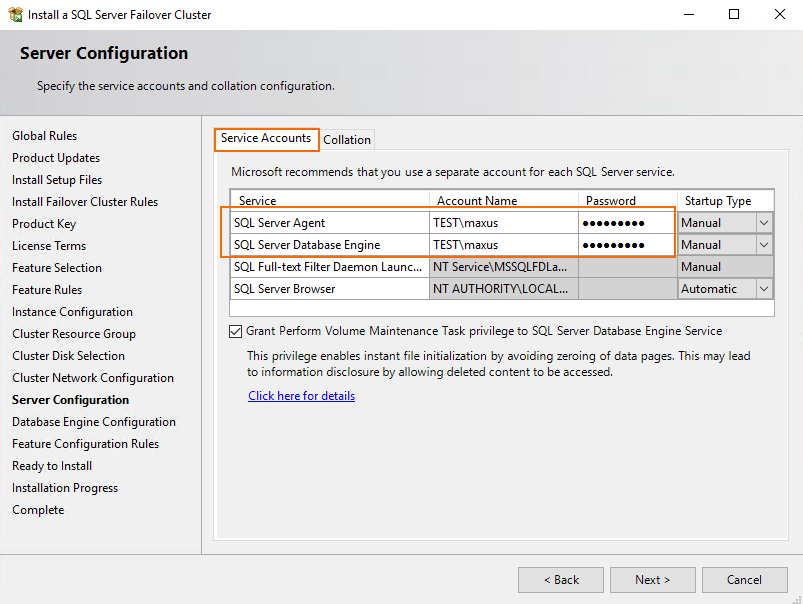
Specify SQL Server Database Engine and SQL Server Agent credentials. Today, I just reused the domain ones.
Now, decide on the authentication mode and enter the password for SQL Server system administrator account.
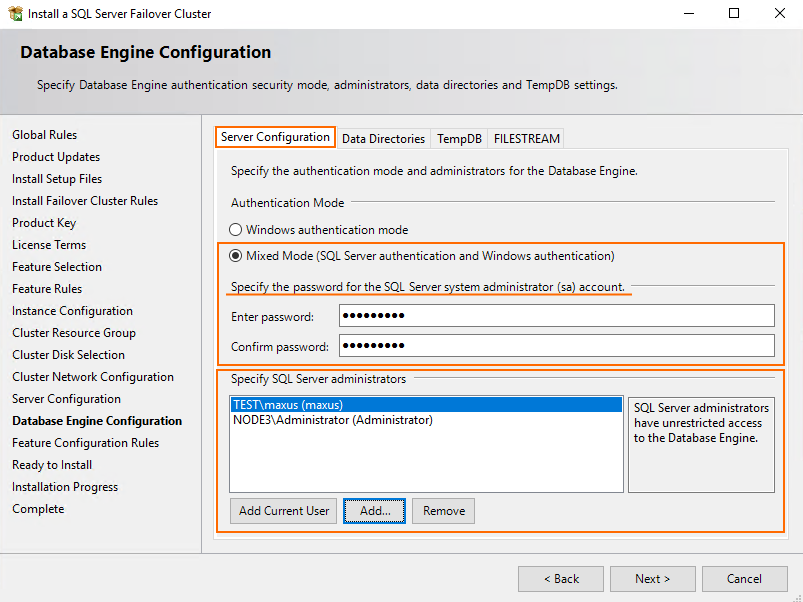
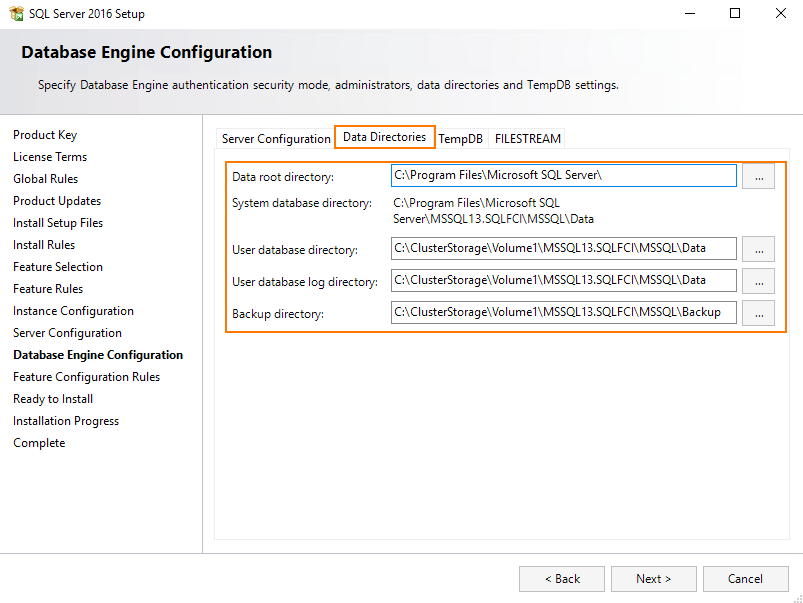
Now, specify the path to the database.
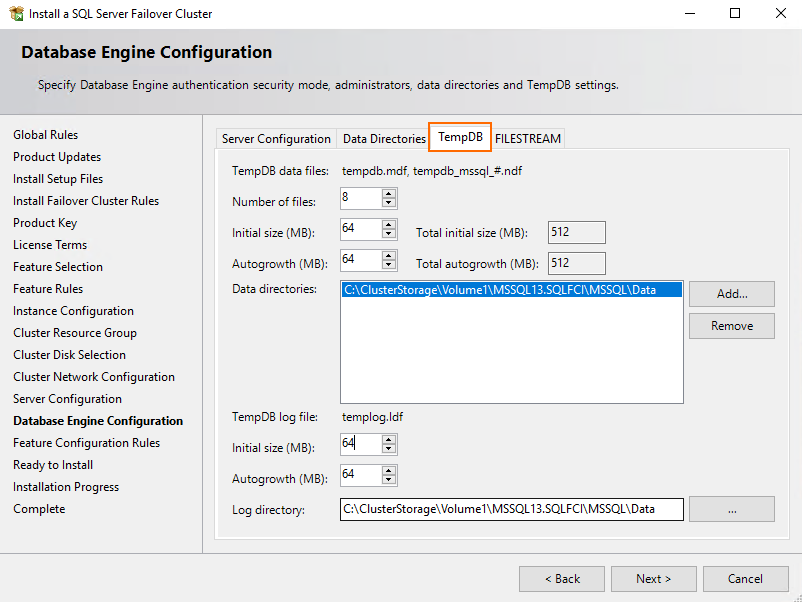
Go to the TempDB tab afterward and enter the necessary values for TempDB data files and TempDB log files parameters.
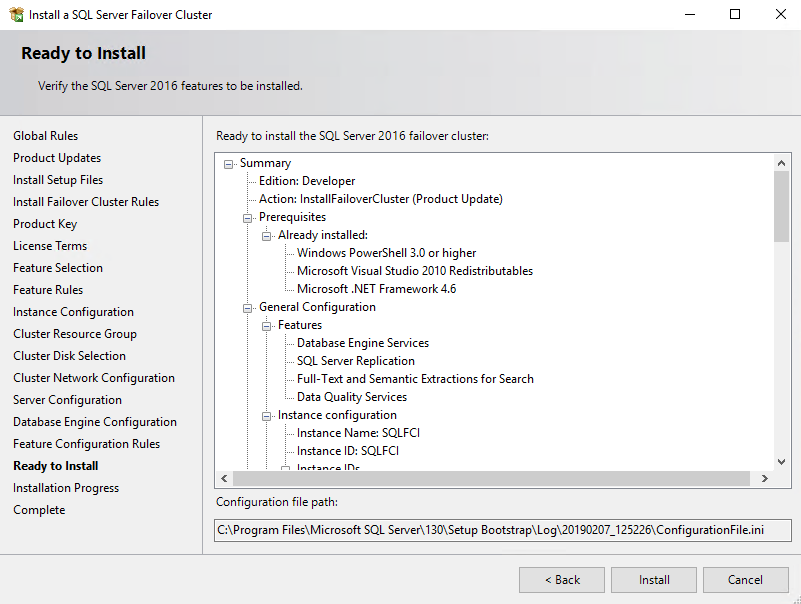
Verify all settings and press Install.
Once the installation wizard finishes, click Close.
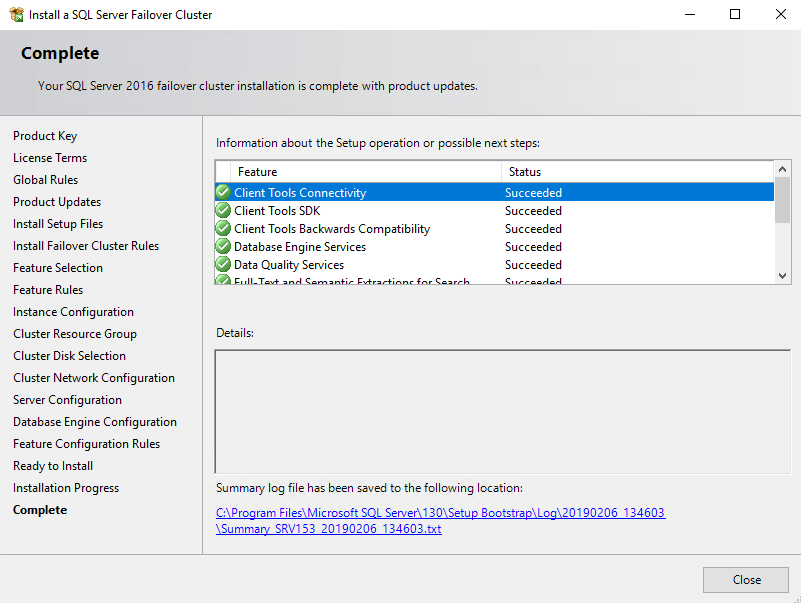
That’s it for SQL Server FCI installation on SRV153. Now, let’s add SRV154 to SQL Server failover cluster. For that purpose, select Add node to a SQL Server failover cluster at the first step of installation wizard.
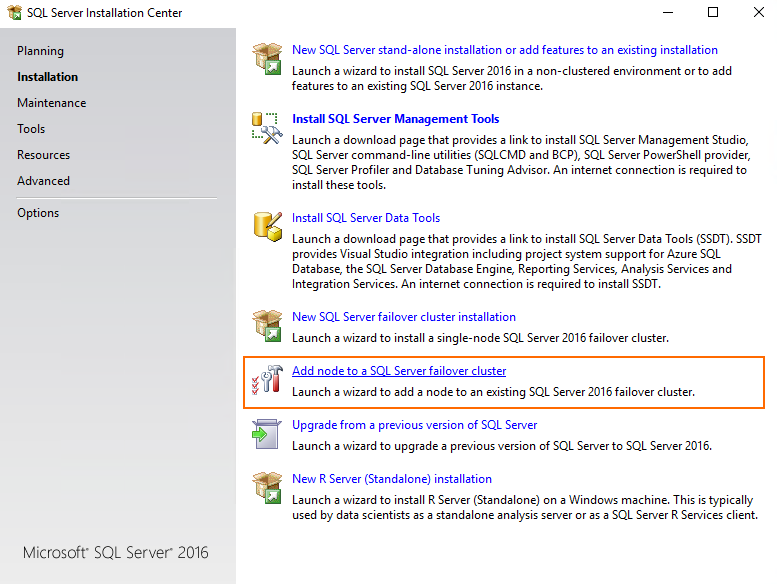
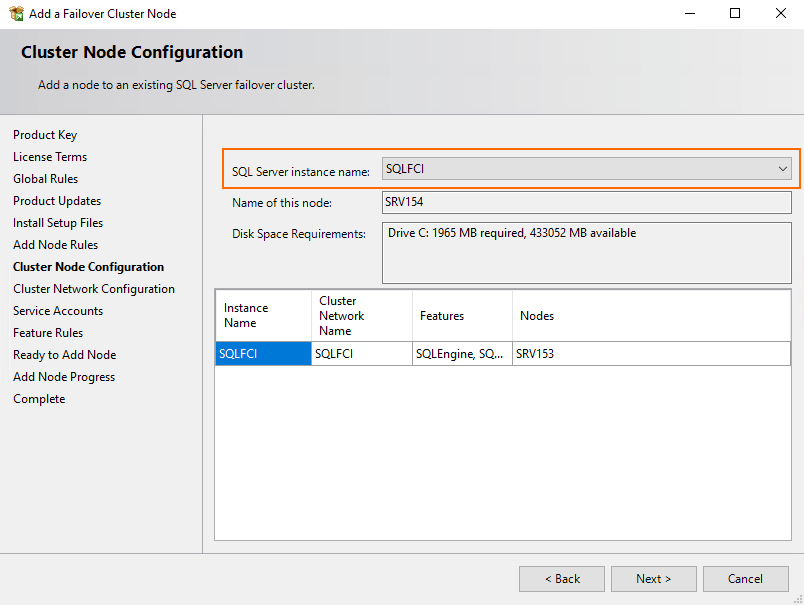
The further installation process looks pretty the same as I described it here for SRV153. To make the long story short, I will focus only on some differences.
At the Cluster Node Configuration step, select the previously configured instance (SRV153 in my case).
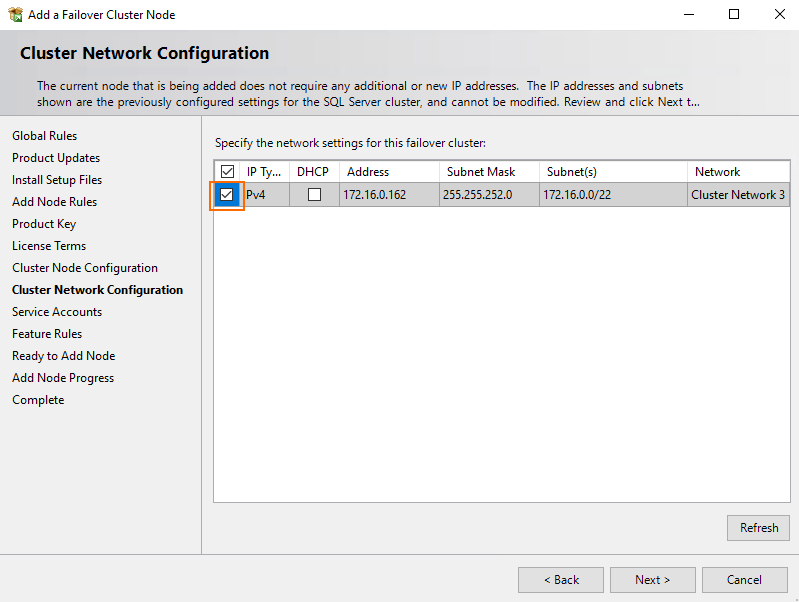
During the Cluster Network Configuration stage, just select the already existing configuration and press Next.
Well, that’s it! Other installation steps look the same as ones described for SRV153. Click Close once you are done with SQL Server FCI installation.
Start SQL Server configuration manager and check whether the Failover Cluster role has been successfully installed.

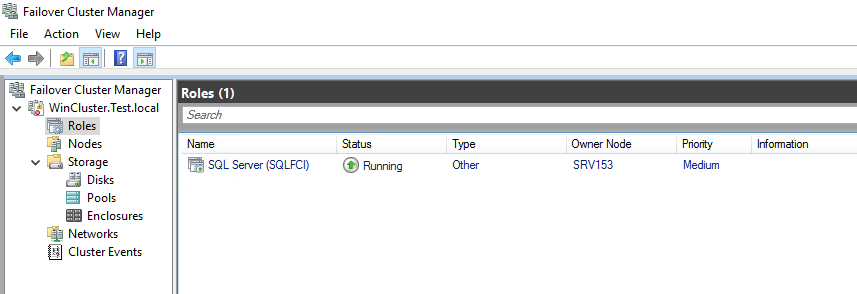
If things look fine, you can start creating a database!
Creating a database
Install Microsoft SQL Server Management Studio on SRV154 and connect it to SQL Server FCI.
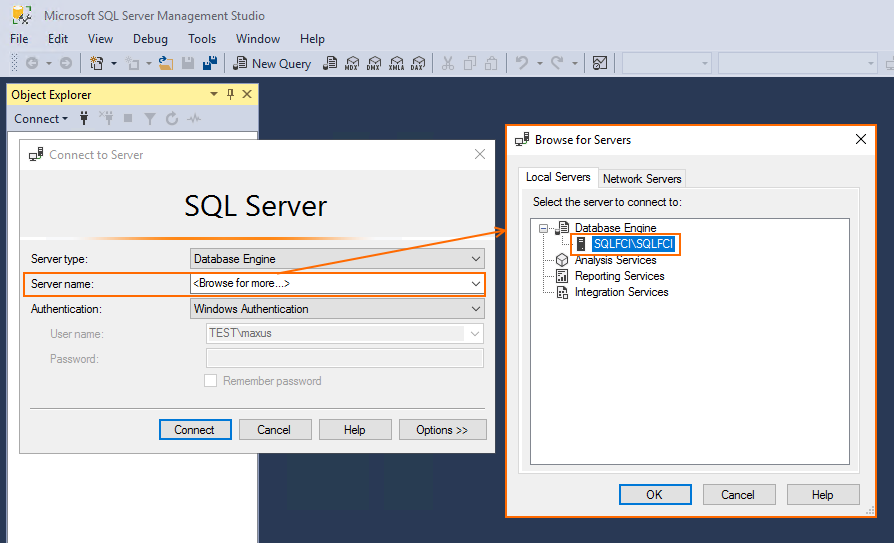
Create an empty database (TestBase).
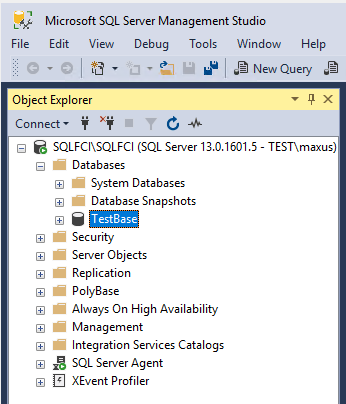
Test time!
Today (just like in those 3 previous studies), the database was filled with HammerDB.
First, specify the utility benchmarking settings (Options > Benchmark).
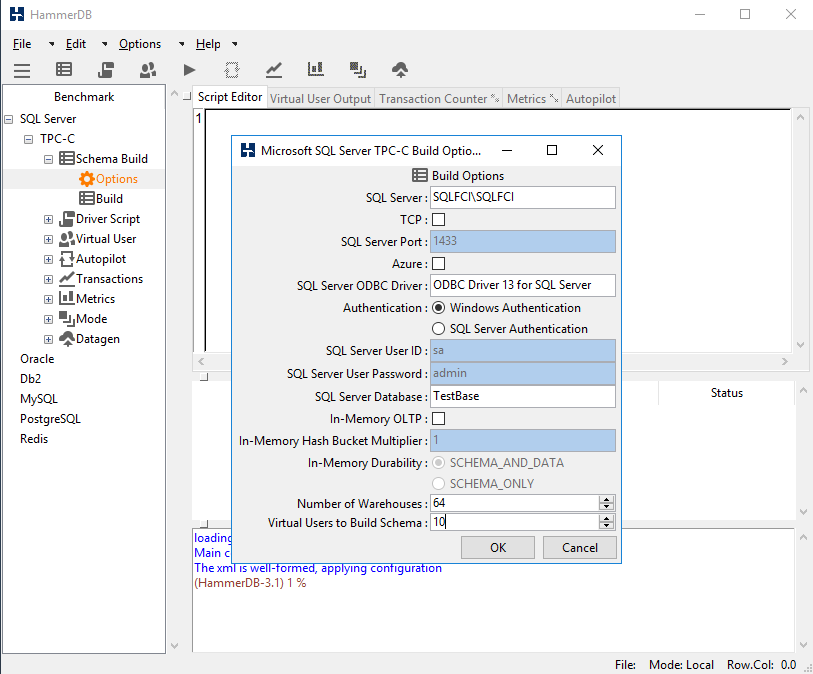
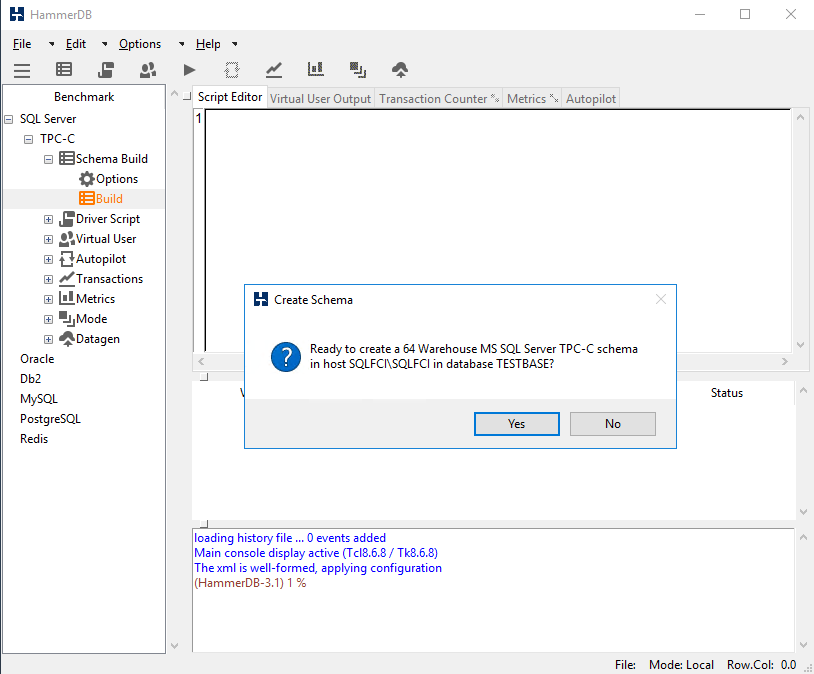
Double-click Build, press Yes, and see the database getting flooded.
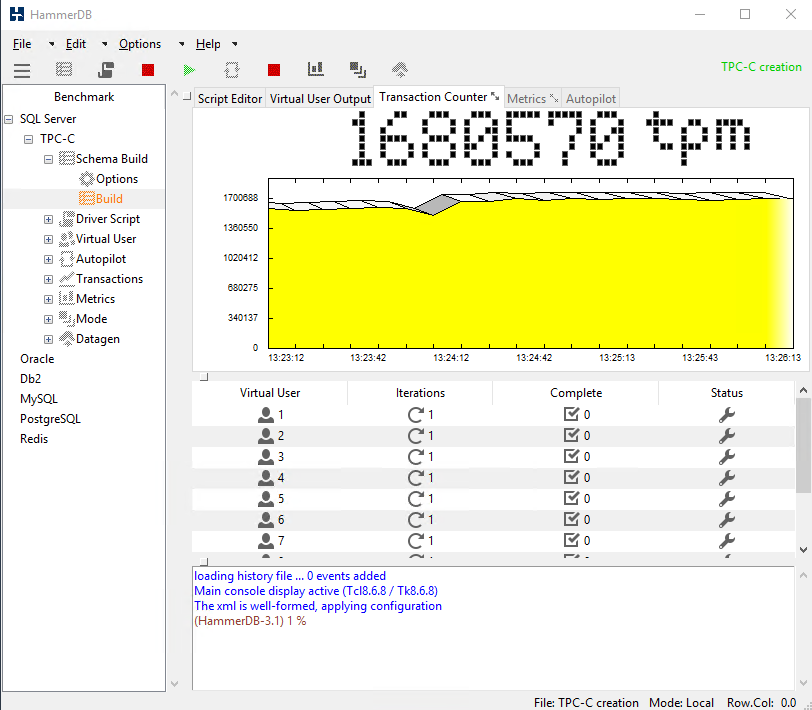
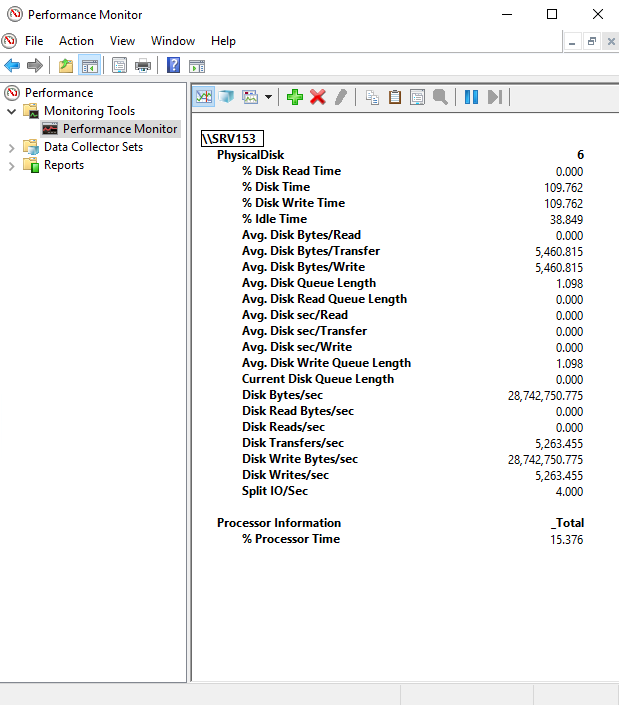
Once the database is populated, you can find all the details about its writing performance in the separate file.
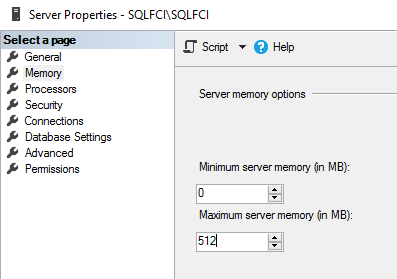
Reduce the maximum server memory to 512MB on both nodes to prevent caching from altering SQL Server FCI Performance.
Now, let’s study solution’s reading performance. Go to SQL Server Management Studio and initiate reading of 1 000 000 lines from the dbo.customer database. Today, SQL Server FCI processed this request in 5.3 seconds.
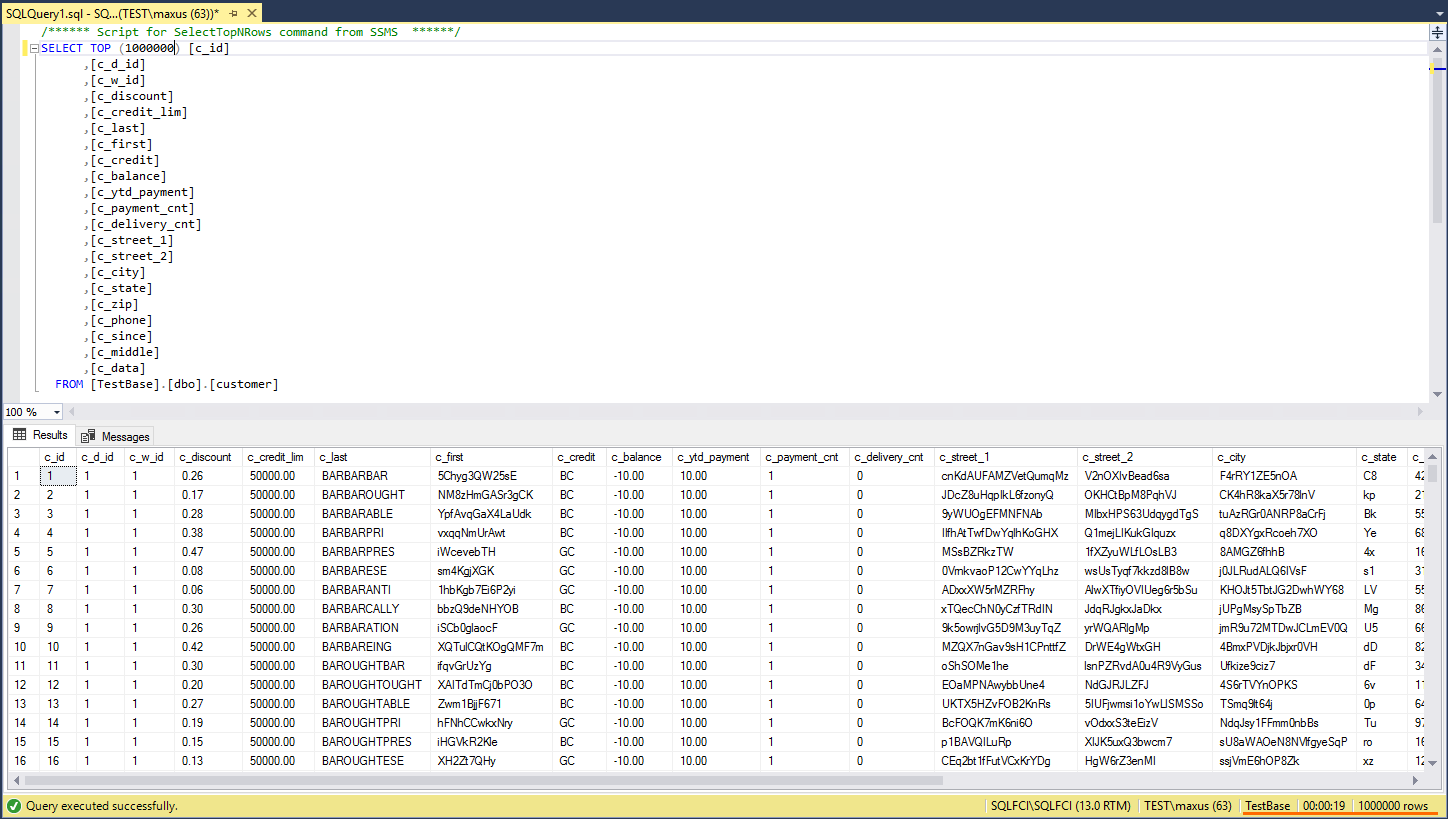
Here are more details on SQL Server FCI reading performance.

Testing with SQL QueryStress
Now, using SQLQueryStress, let’s see how the number of threads (number of virtual users) impacts database reading performance. Here are the values for the number of virtual users parameter: 1,2,4,8,10,12.
Start the utility and go to the Database tab. Enter database connection settings and click Test Connection.
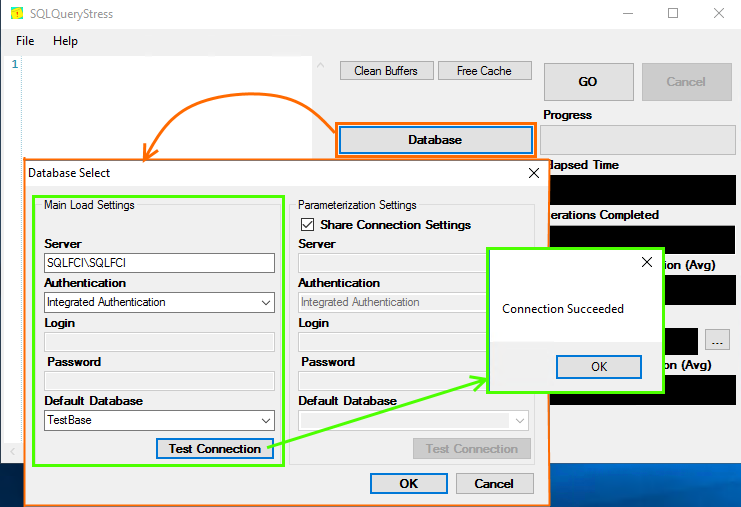
Next, enter the Number of Iterations and Number of Threads parameter values.
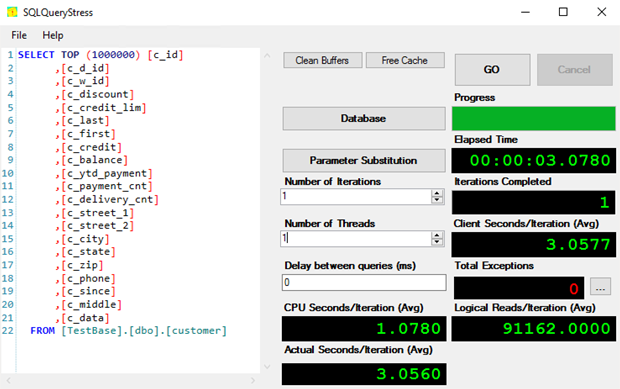
The table below highlights on database reading performance under a varying number of threads.
| SQL FCI | ||
|---|---|---|
| test run time, sec |
S2D, MB/s |
|
| threads=1 | 3,14 | 240 |
| threads=2 | 2,92 | 268 |
| threads=4 | 4,77 | 346 |
| threads=8 | 10,34 | 475 |
| threads=10 | 13,60 | 525 |
| threads=12 | 16,24 | 550 |
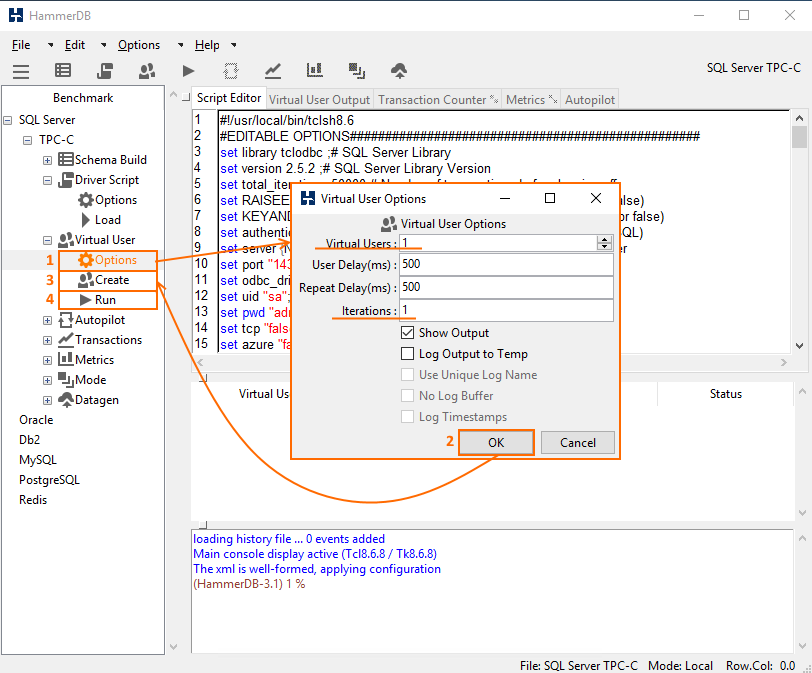
Run HammerDB (OLTP pattern) again to see what’s going on with database reading performance under a varying number of virtual users. In the Options menu, specify connection settings and the number of transactions per virtual user. Press OK and double-click Load to prepare the script.
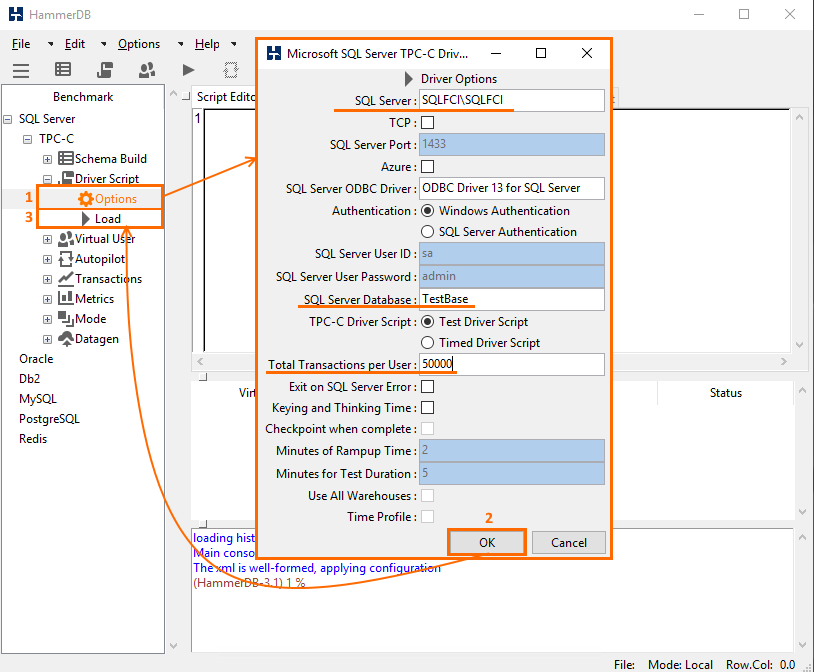
Now, in Virtual User menu, double-click Options. Specify the values for Virtual Users and Iterations parameters. Press OK and double-click Create. To start tests, press Run twice.
The table below highlights how fast reading occurs under the varying number of threads.
| SQL FCI test run time, min |
|
|---|---|
| Virtual User=1 | 5 |
| Virtual User=2 | 5 |
| Virtual User=4 | 6 |
| Virtual User=8 | 10 |
| Virtual User=10 | 11 |
| Virtual User=12 | 12 |
Now, let’s take a look at some plots to see how performance actually changes under a growing number of virtual users (measured with HammerDB).
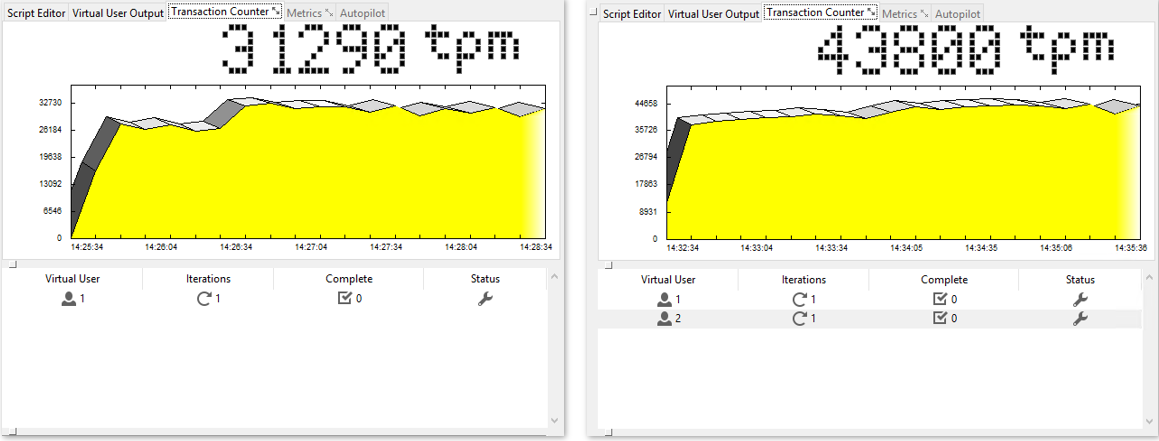
Figure 1: Virtual User = 1, Virtual User = 2
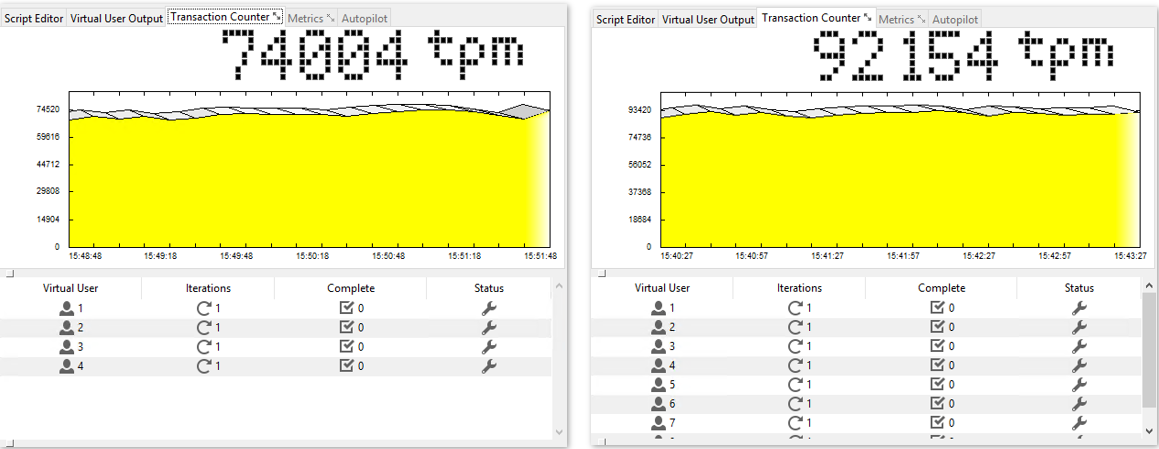
Figure 2: Virtual User = 4, Virtual User = 8
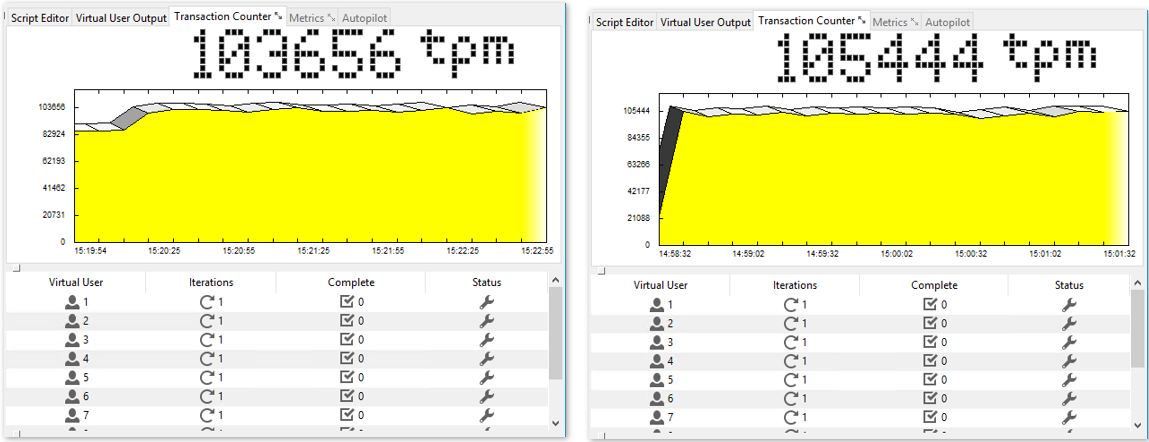
Figure 3: Virtual User = 10, Virtual User = 12
CONCLUSION
Today, I have measured SQL Server Failover Cluster Instances performance in a 2-node S2D cluster. In my next article (I hope to finish it very soon), I will compare SQL Server FCI and SQL Server AG performance.


