INTRODUCTION
This post addresses Hyper-V live migration – the topic which any admin faces with at some point. In my salad days of working as an admin, Hyper-V live migration was a saving grace, so I decided to write an article about it.
Live migration is Hyper-V feature for moving non-disruptively a VM from one host to another. Users love this feature for flexibility and absence of downtime. You can easily migrate a VM from one host to another and it neither idles nor has to be shut down. On top of that, live migration, when paired with failover clustering, allows building highly available and fault-tolerant systems. Well, that’s why these technologies always come hand in hand.
In this article, I want to cover some live migration and migration wizard settings that ensure maximum performance of this process.
THE SETUP CONFIGURATION
Here is the configuration of the setup that I used to study how live migration works.
- 1 x Intel(R) Xeon(R) CPU E5-2609 @ 2.40GHz;
- 8GB (1 x 8 GB) RAM;
- 1 x 200 GB HDD;
- 1 x 1 Gb/s LAN;
- OS: Microsoft Windows Server 2016
Below, find the list of VM guest OS:
1. Microsoft Windows 7 Professional SP1 Build 7601
2. Microsoft Windows 10 Enterprise N LTSC v1809 Build 17763.1, no UEFI
3. Microsoft Windows 10 Enterprise N LTSC v1809 Build 17763.1, with UEFI
Some real-life process on the VM was simulated with 7zip. I was archiving such folders: Program Files, Program Files (х86), ProgramData, and Windows. Why? Look, I wanted to imitate a real process on the VM and archiving seemed good enough for today’s study purpose.
To make a long story short, here’s how to configure Hyper-V live migration:
1. Set up the server for live migration and how many connections for simultaneous migrations are allowed.
2. Set up live migration protocols
3. Live migration. Select the type of the migration and what to do with VM items.
Now, let’s look at each step in more detail.
Phase 1 – Configuring the target host
First, you need to enable incoming and outgoing live migrations.
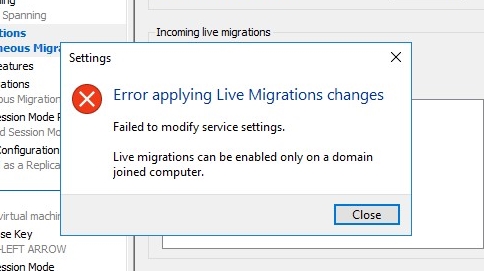
You need to join the server to the domain; otherwise, the live migration won’t be available. You’ll just get an error, and nothing more than that.
Hyper-V hosts can be either in one domain or in different domains, whatever. The thing is, they should be set as trusted hosts for each other. Here is an article on how to install and set up an AD controller for Hyper-V:
Starting from Windows Server 2012, you can use carry out multiple migrations at the same time. By default, there are only 2 active connections between the hosts during live migration.

Should you need to involve more connections in simultaneous live migrations, just adjust the number in that box.
Note that this number should be neither too big nor too small. On the one hand, using multiple connections for live migrations is a key to smarter utilization of network bandwidth. On the other hand, the more connections are involved in live migration, the more resources on both source and destination hosts are consumed. So, whatever number you set in that box, you should understand that by playing around with that parameter you may bottleneck your environment performance.
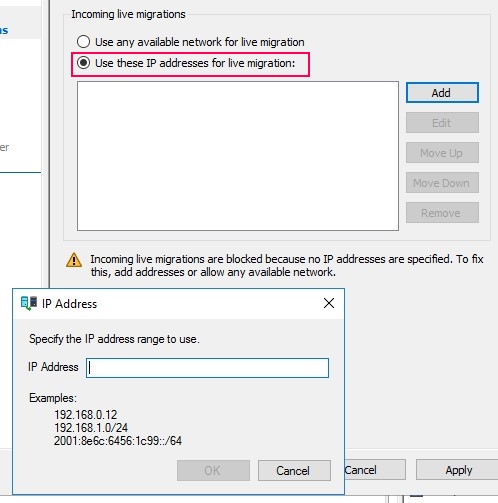
Next, you need to specify in the Incoming live migrations menu the IP you intend to use for live migrations.
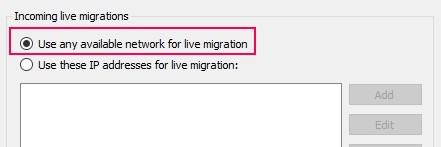
Otherwise, you can just leave the Use any available network for live migration option enabled.
Phase 2 – Setting authentication and live migration
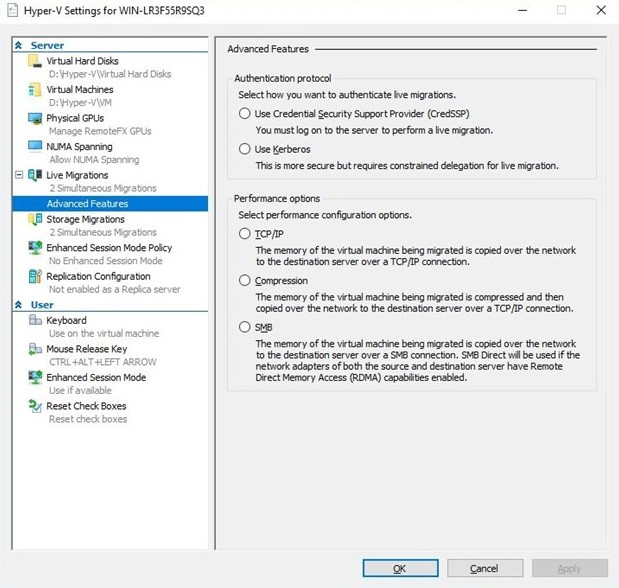
Initially, go to the advanced features.
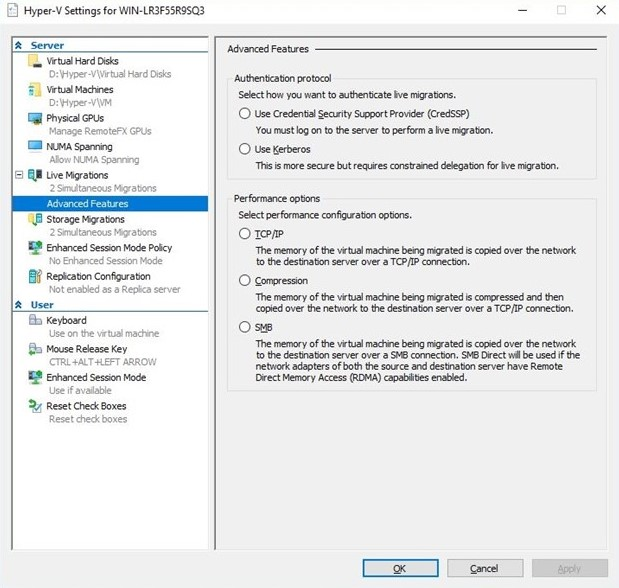
Next, set up the authentication settings in the Authentication protocol field.
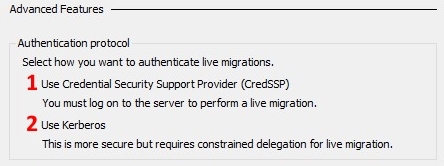
Here are some details about each protocol:
CredSSP (Credential Security Support Provider) enables applications to delegate users’ credentials from a client to a target server for remote authentication. Data is transmitted via an encrypted Transport Layer Security Protocol channel.
Kerberos is an authentication protocol providing a mechanism for mutual authentication between a client and server. Mutual authentication occurs between these entities before the connection is established. The problem is that this protocol assumes that transactions occur on an open network, a network where both clients and servers aren’t physically secure. In this way, packets can leak out or be modified. Note that you need to enable Kerberos constrained delegation before triggering live migration remotely.
Once you decide on the authentication protocol, go to Performance options to select the performance protocol for live migration.
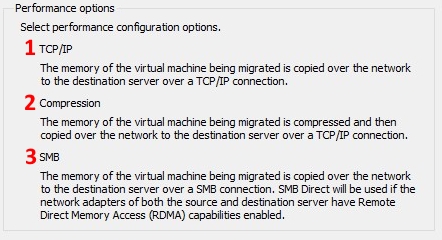
Now, let’s talk about each option in more detail.
1. TCP/IP allows VM memory migration to the destination server over a TCP/IP connection. Host opens the TCP port 6600 and transfers the data at the maximum available speed. Note that this option does not allow compression
2. With compression enabled, memory and virtual disks are compressed and are copied over TCP/IP. Note that compression consumes CPU resource but network bandwidth will never be a bottleneck. Speaking about CPU utilization, if your VMs consume all host CPU, migration won’t benefit from compression at all. Live migration with inline compression is available starting from Windows Server 2012 R2.
3. Also, you can carry out live migration via an SMB 3.0 connection. You can use either SMB Direct or SMB Multichannel for live migration. The former can be used when NICs on both target and destination servers support RDMA. This protocol allows offloading CPU, making the entire migration process not that resource consuming and faster. SMB Multichannel, in its turn, can be used when you set up the right multichannel configuration. SMB does not use compression, still it features RDMA.
Even if your NICs do not support RDMA, you still should enable SMB to ensure the maximum throughput. First, SMB features multipathing. This means that you always have all your NICs involved in live migration… even if you migrate only one VM. So, enabling SMB seems a good idea for multichannel migration.
If you use TCP/IP or enable compression, multiple simultaneous live migrations between two hosts will involve just one set of adapters due to algorithms of leveraging workloads. Taking all I wrote above, you should choose SMB over TCP/IP if the throughput is really high. You should choose compression over SMB if you have some extra CPU resource but you have limited network throughput.
Phase three – Live migration via the live migration wizard
Once you decide on the protocols, let’s, finally, live migrate a VM. Right-click on a VM, press Move.
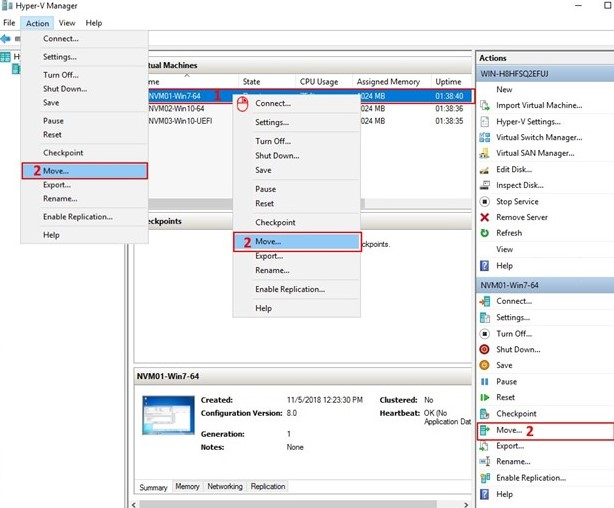
Live migration wizard enables to move either the VM or its storage alone.
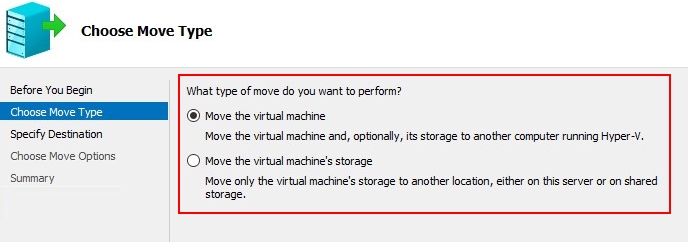
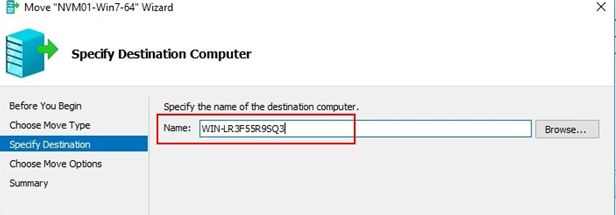
Once you choose any of those options, specify the name of the destination host.
Now, decide what you want to do with the VM items. Below, I write about each option in detail.
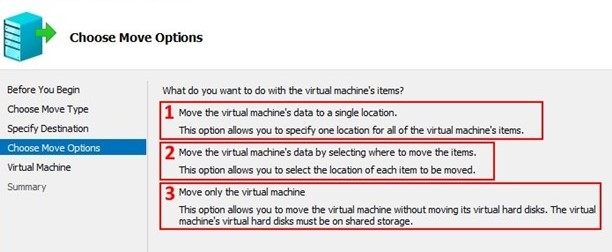
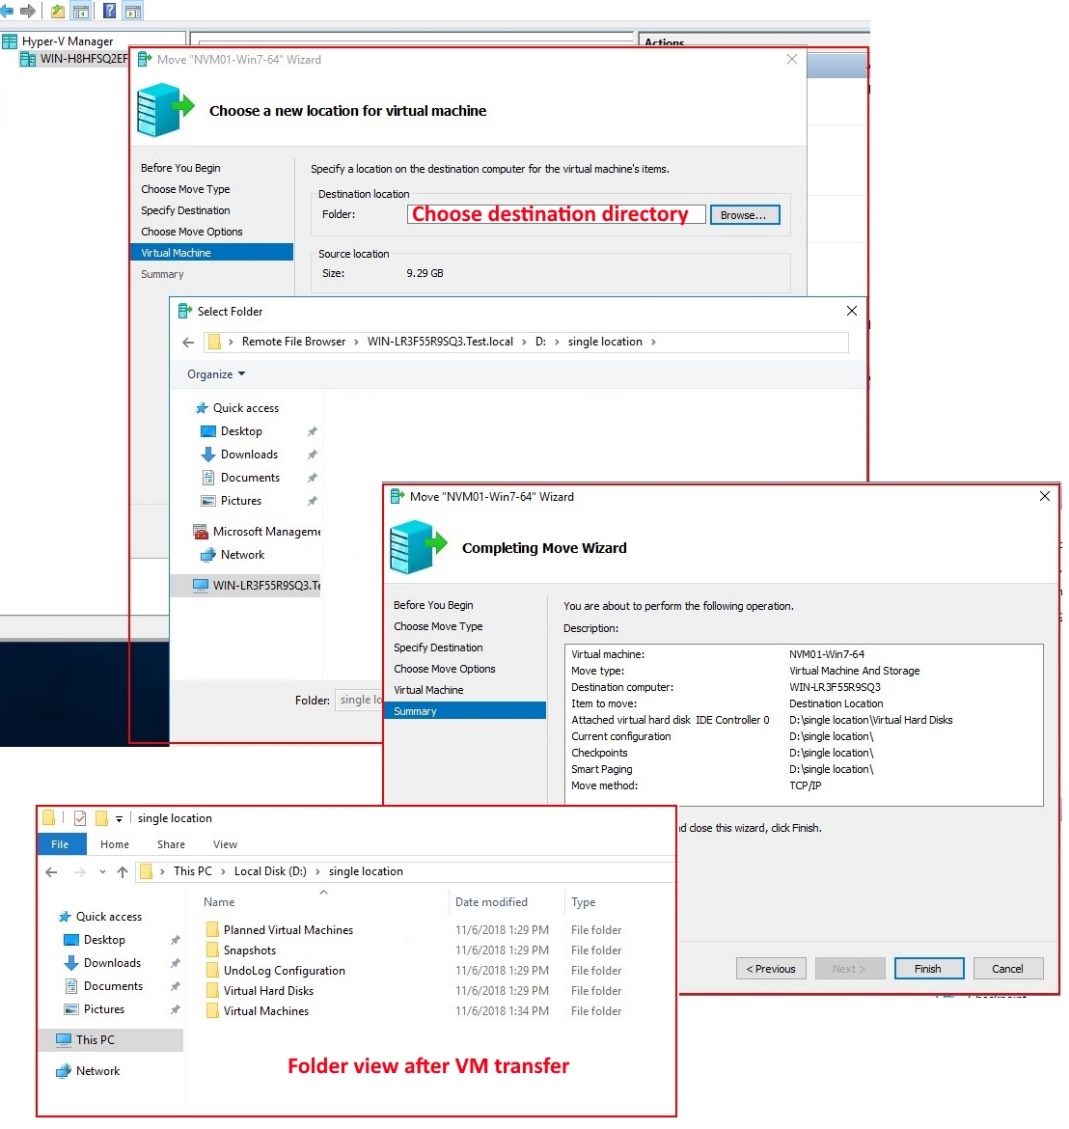
1. Move the virtual machine’s data to a single location. As the name implies, this option allows moving a VM and all its items from one location to another. At this point, it should be noted that data will be transferred without being divided by the catalogs that were created while setting up Hyper-V.
2. Now, let’s look at the Move the virtual machine’s data by selecting where to move items option in detail since there are three ways to move the storage.
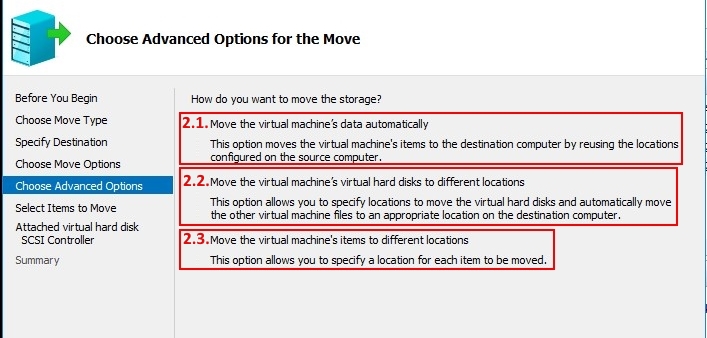
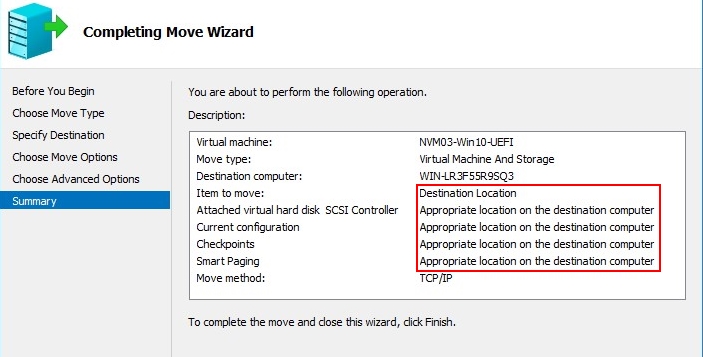
2.1. Move the virtual machine’s data automatically. Migration wizard finds the VM storage location and moves the data in the same directory as they were located on the parent host.
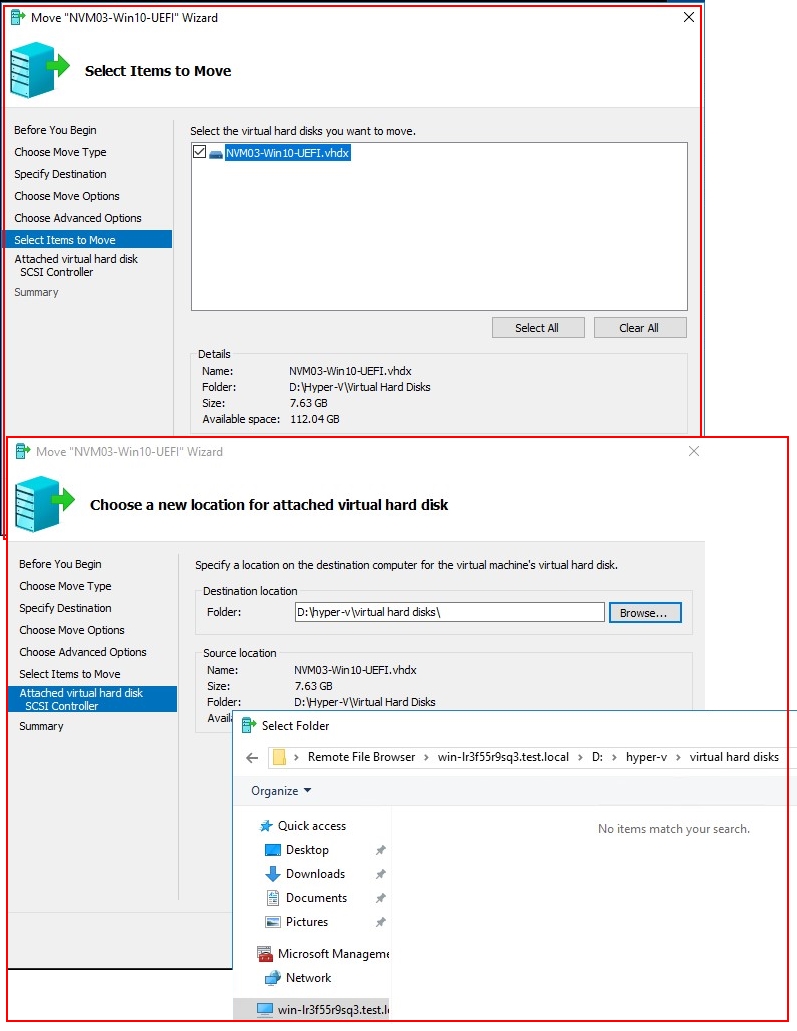
2.2. Move the virtual machine’s virtual hard disks to different locations. This option allows specifying the location to move for each VM element. You also can move VM disks to different locations. Even if the VM uses several virtual disks, you can select the necessary items and set the new location on the remote host.
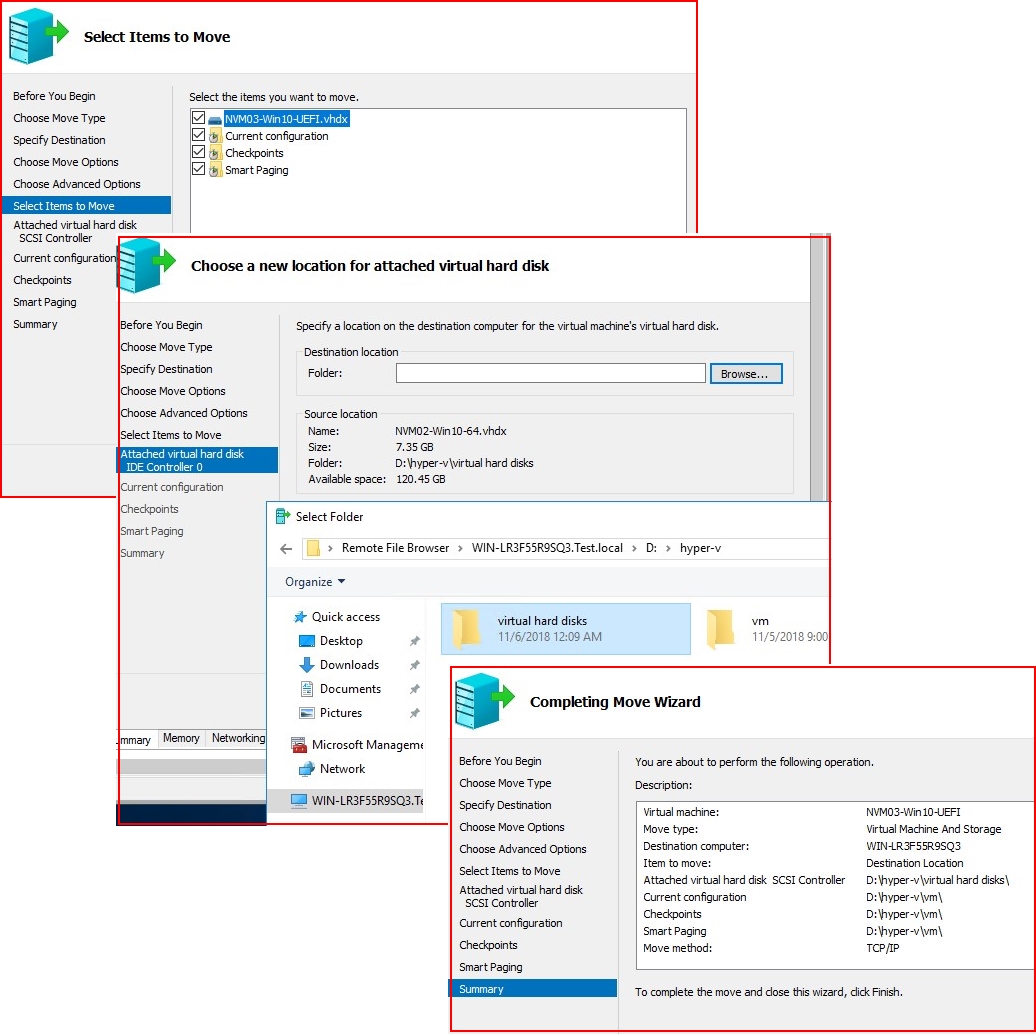
2.3. Move the virtual machine’s items to different location allows migrating VM items to different directories.
3. The Move only the virtual machine option enables to move only the VM without relocating any of its items. Keep in mind that VM items should reside on the shared storage that can be accessed both by the target and destination hosts. It can be a NAS device, a file server, a shared cluster disk, or just a shared folder.
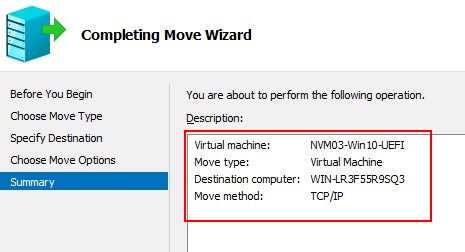
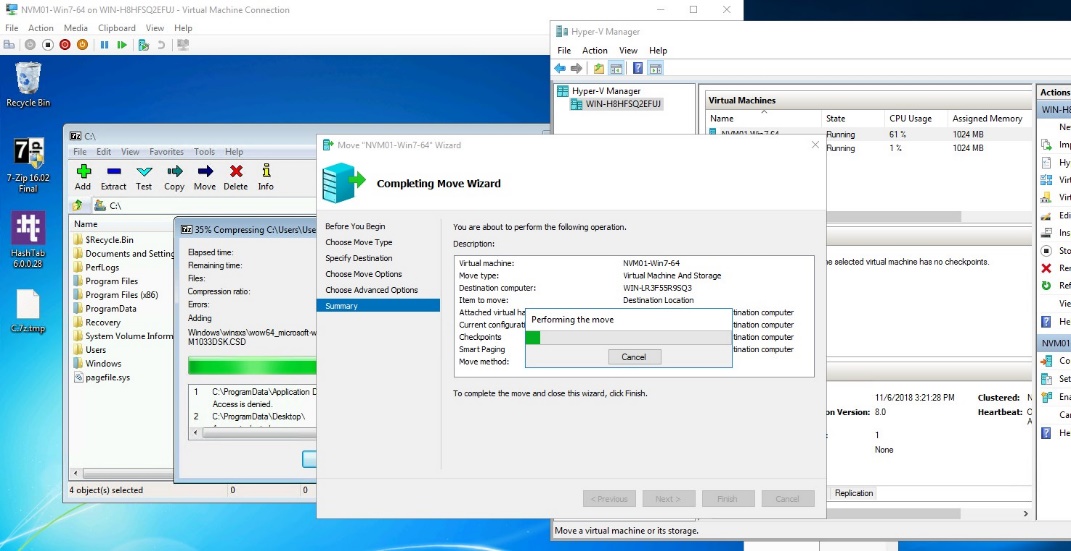
And, finally, the migration starts. The VM won’t be shut down and keeps on working as usual.
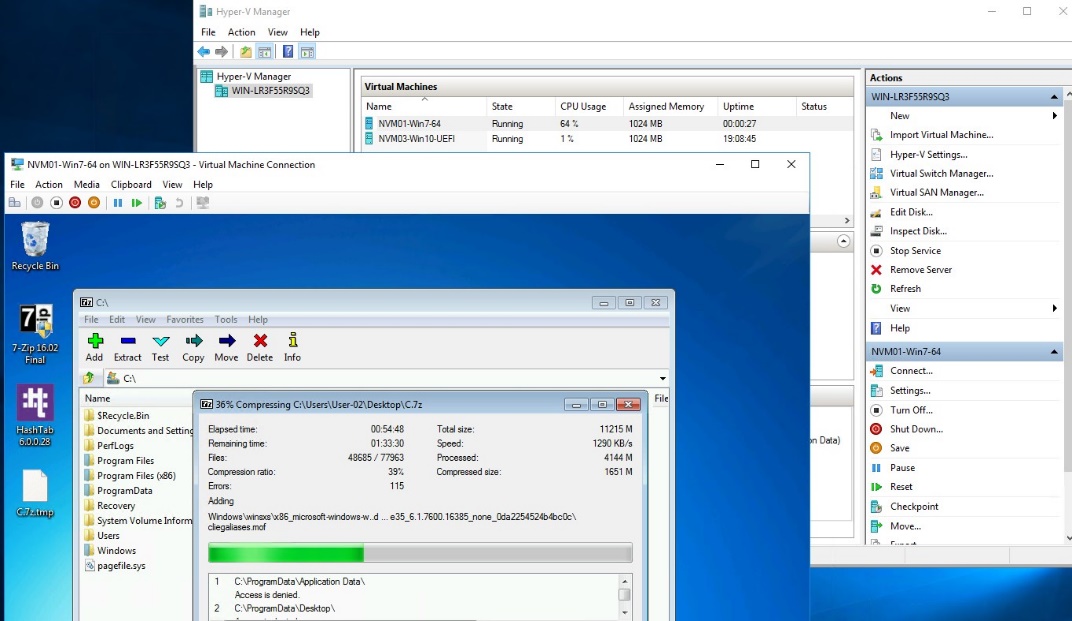
And, that’s it! The VM has been migrated non-disruptively.
CONCLUSION
Today, I’ve discussed some Hyper-V live migration settings and how to ensure high performance of this process. Well, it is not an in-depth study. Here, I rather discussed the key points about live migration settings and the migration wizard. Should you need more details any specific live migration settings, just do a little googling.
Always use SMB as a protocol. It allows using network bandwidth and CPU smarter. However, if you can allocate some compute resource for compression, go ahead and use compression.
Now, just a couple of words about each option of VM migration:
- Move the virtual machine’s data automatically is great if you have identical configurations of virtual disks and VM descriptions on both hosts.
- Move the virtual machine’s items to different locations works great if you want to keep VM items separately and you want to specify where they should be kept.
- Move only the virtual machine just migrates the VM from host to host. For my money, it is the best way to migrate a VM as there won’t be massive data transfers and network won’t be bottlenecked.


