DevSecOps is an approach for implementing security practices within the DevOps process. Security is easier to implement if the requirements are defined early, which means that you should implement security at the beginning of your project and most important, you should consider security in all phases of the development workflow.
DevSecOps is not a single tool or technique, but you can now start your DevSecOps journey in Azure very quickly using Microsoft Defender for DevOps which is still in preview as the time of writing this article.
In this article, I will enable Microsoft Defender For DevOps with Azure DevOps.
Getting Started
Defender for DevOps is free during the preview period, then you should check the pricing page in the next weeks.
Open the Azure Portal and go to Defender for Cloud. Then, click Add environment -> Azure DevOps
A simple wizard will appear. First, you must enter the basic information:
- Enter a name for the connector
- Select the subscription
- Select the resource group and the region
The second tab, you must enable the “DevOps” plan
The third tab, click Authorize to grant access to your Azure DevOps tenant.
If you encounter some errors, just check in your Azure DevOps tenant that OAuth is enabled for third-party application:
To finish, review the information and validate the wizard to enable Defender for DevOps.
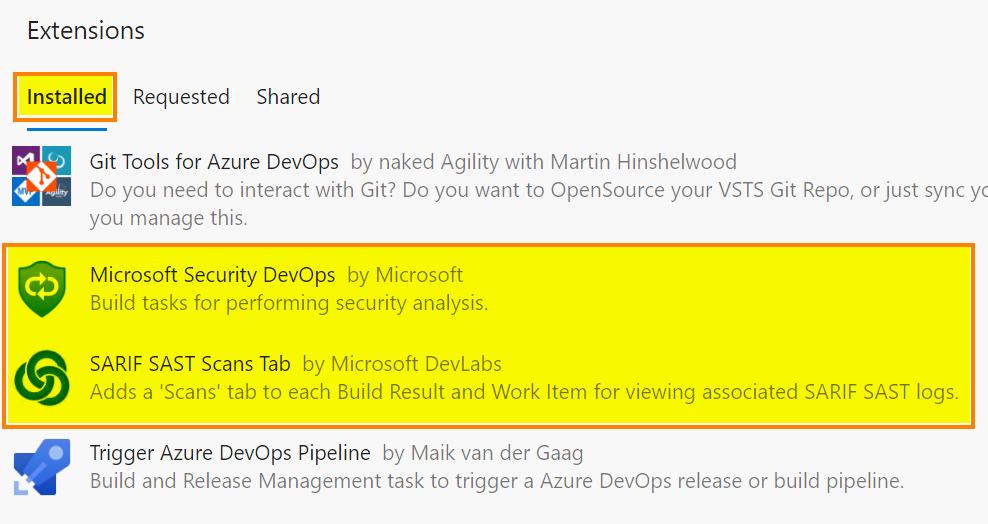
Now we need to install two extensions in the Azure DevOps tenant.
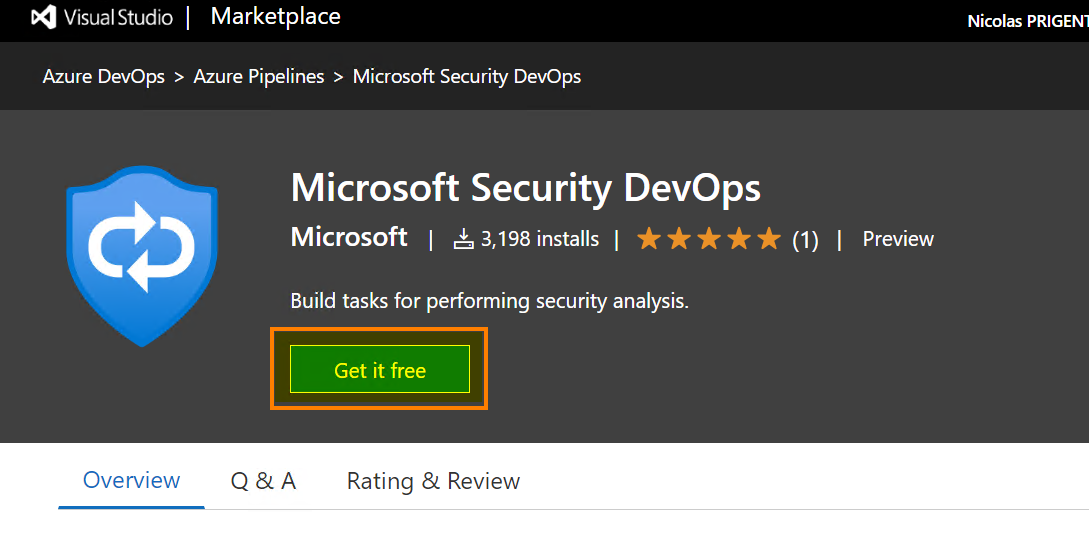
Microsoft Security DevOps : https://marketplace.visualstudio.com/items?itemName=ms-securitydevops.microsoft-security-devops-azdevops. Microsoft Security DevOps installs, configures, and runs the latest versions of static analysis tools (see the screenshot below)
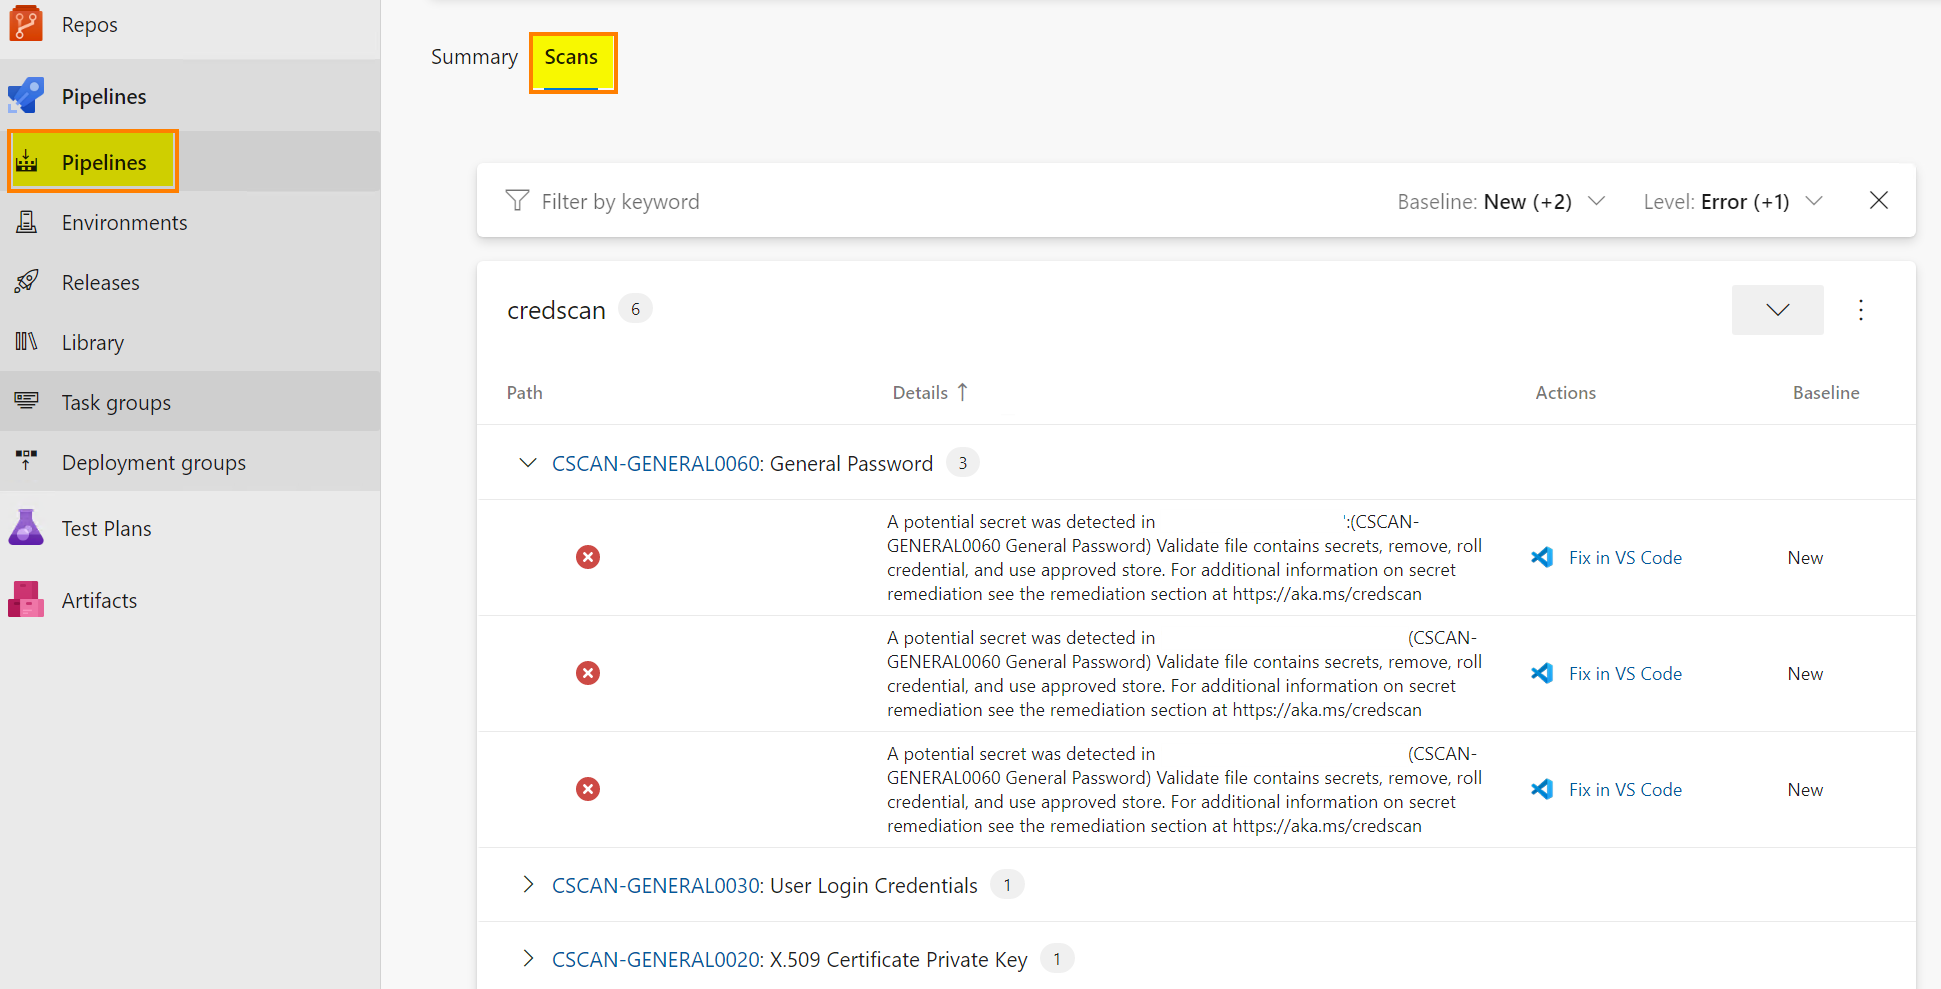
SARIF SAST Scans : https://marketplace.visualstudio.com/items?itemName=sariftools.scans. This extension will add a tab called “Scans” to display the generated analysis results.
Go to the marketplace and search for “Microsoft Security DevOps” and click “Install”
Validate the wizard to install the extension
Click Install to enable the extension
Repeat the same steps to install the SARIF SAST Scans extension
Go to the pipeline section and create a new one. In this article, I use a very simple example:
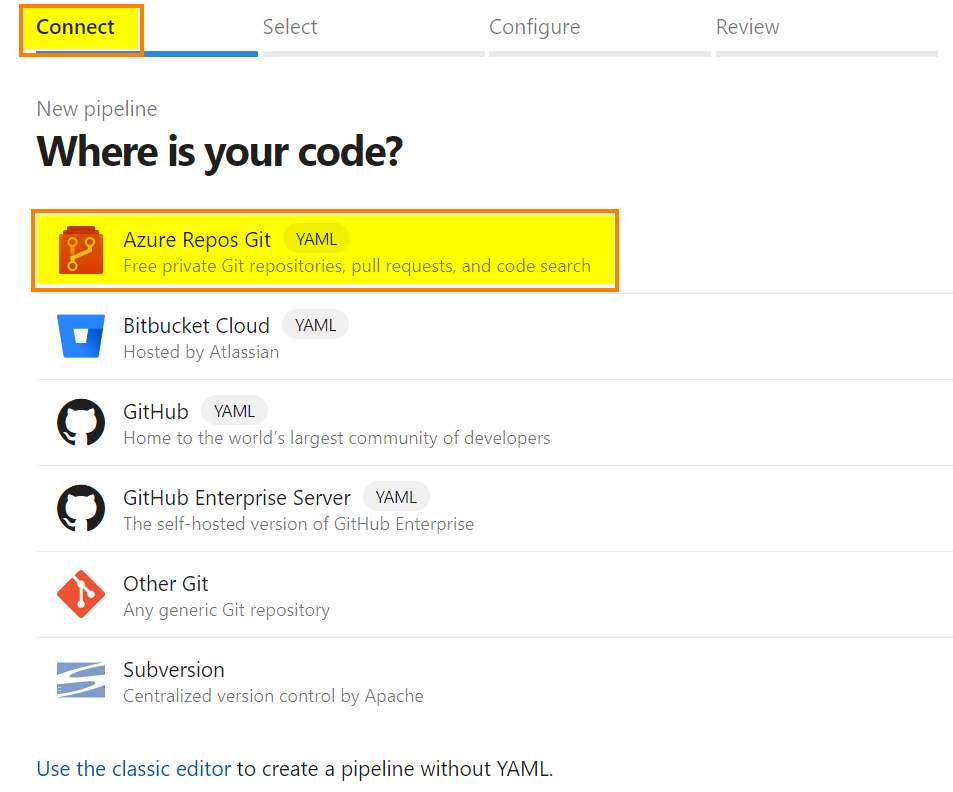
A new wizard appears, select the first option “Azure Repos Git” and select your Azure Repository
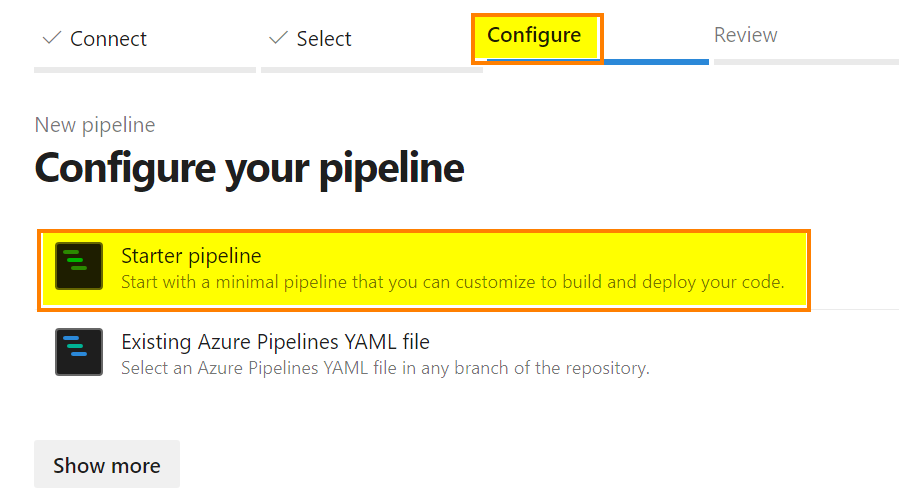
Then, select “Starter pipeline”
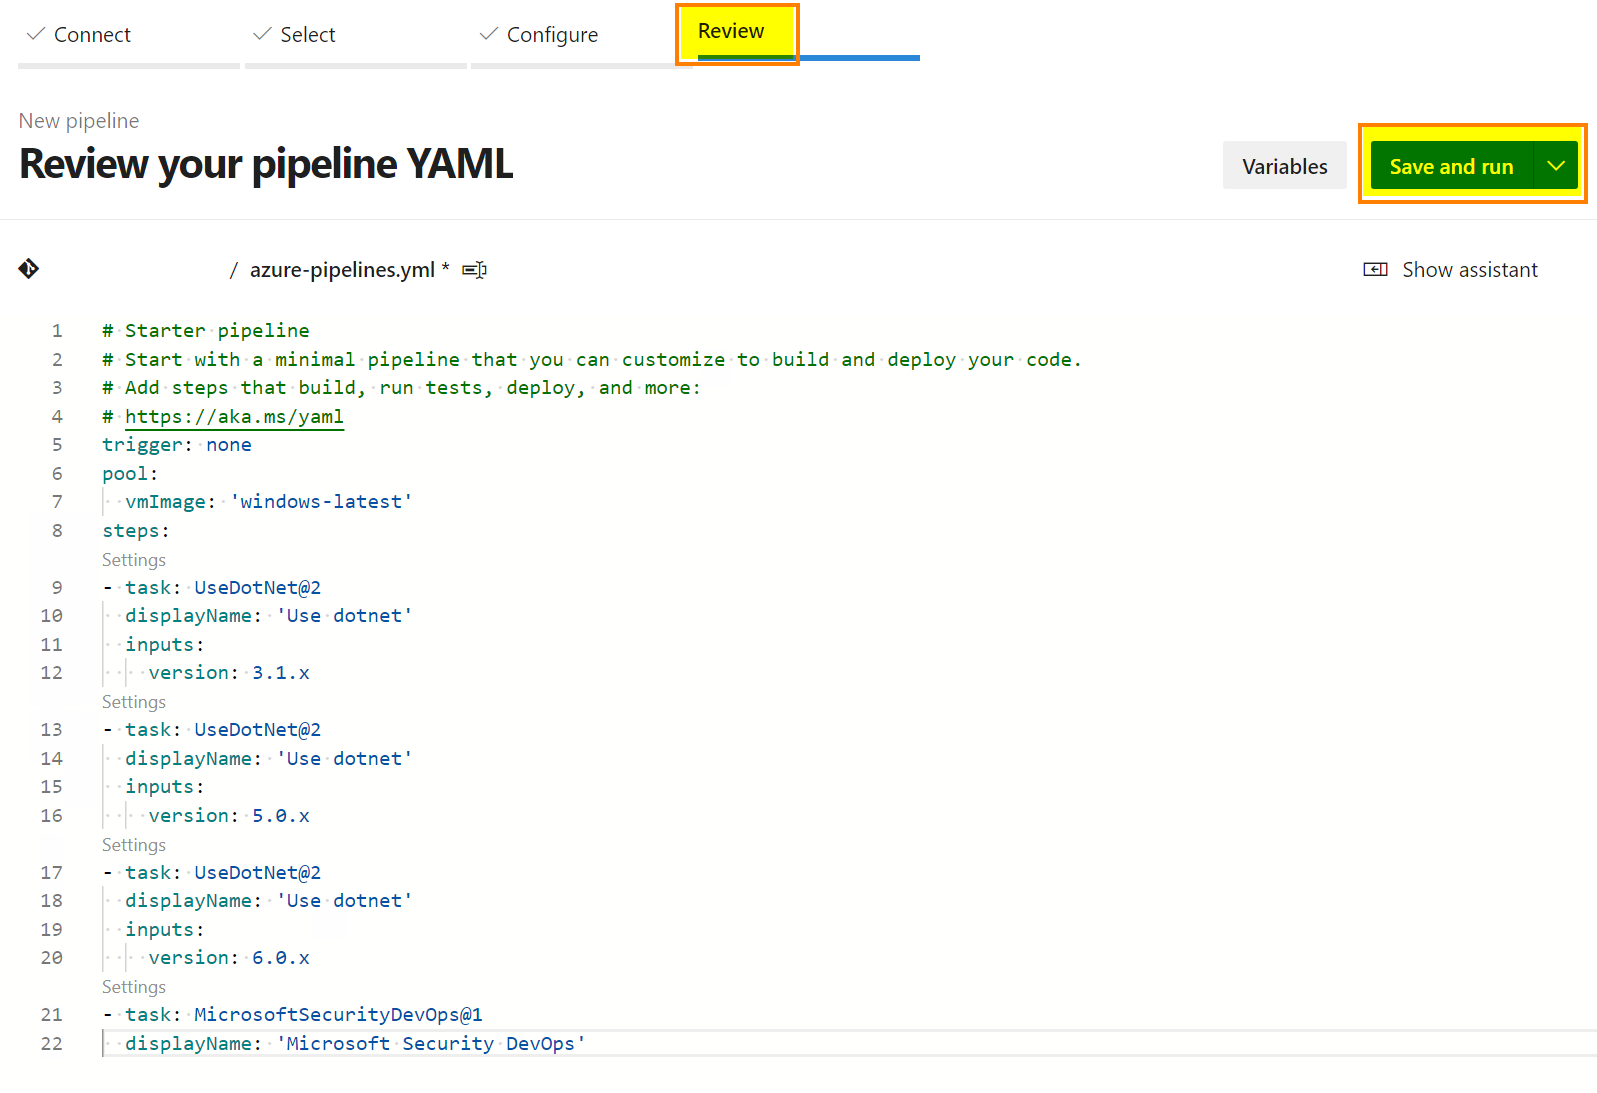
Copy/paste the following code and click “Save and run”:
# Starter pipeline

# Start with a minimal pipeline that you can customize to build and deploy your code.

# Add steps that build, run tests, deploy, and more:

# https://aka.ms/yaml

trigger: none

pool:

vmImage: 'windows-latest'

steps:

- task: UseDotNet@2

displayName: 'Use dotnet'

inputs:

version: 3.1.x

- task: UseDotNet@2

displayName: 'Use dotnet'

inputs:

version: 5.0.x

- task: UseDotNet@2

displayName: 'Use dotnet'

inputs:

version: 6.0.x

- task: MicrosoftSecurityDevOps@1

displayName: 'Microsoft Security DevOps'
To run the Security DevOps Extension, we need to support the .Net versions, which can be done by adding the tasks below.
The last task called “MicrosoftSecurityDevOps@1” executes the scanner and publishes the result.
Once the pipeline has been completed, go to the Scans tab to see the results. Results are uploaded to the Defender console.
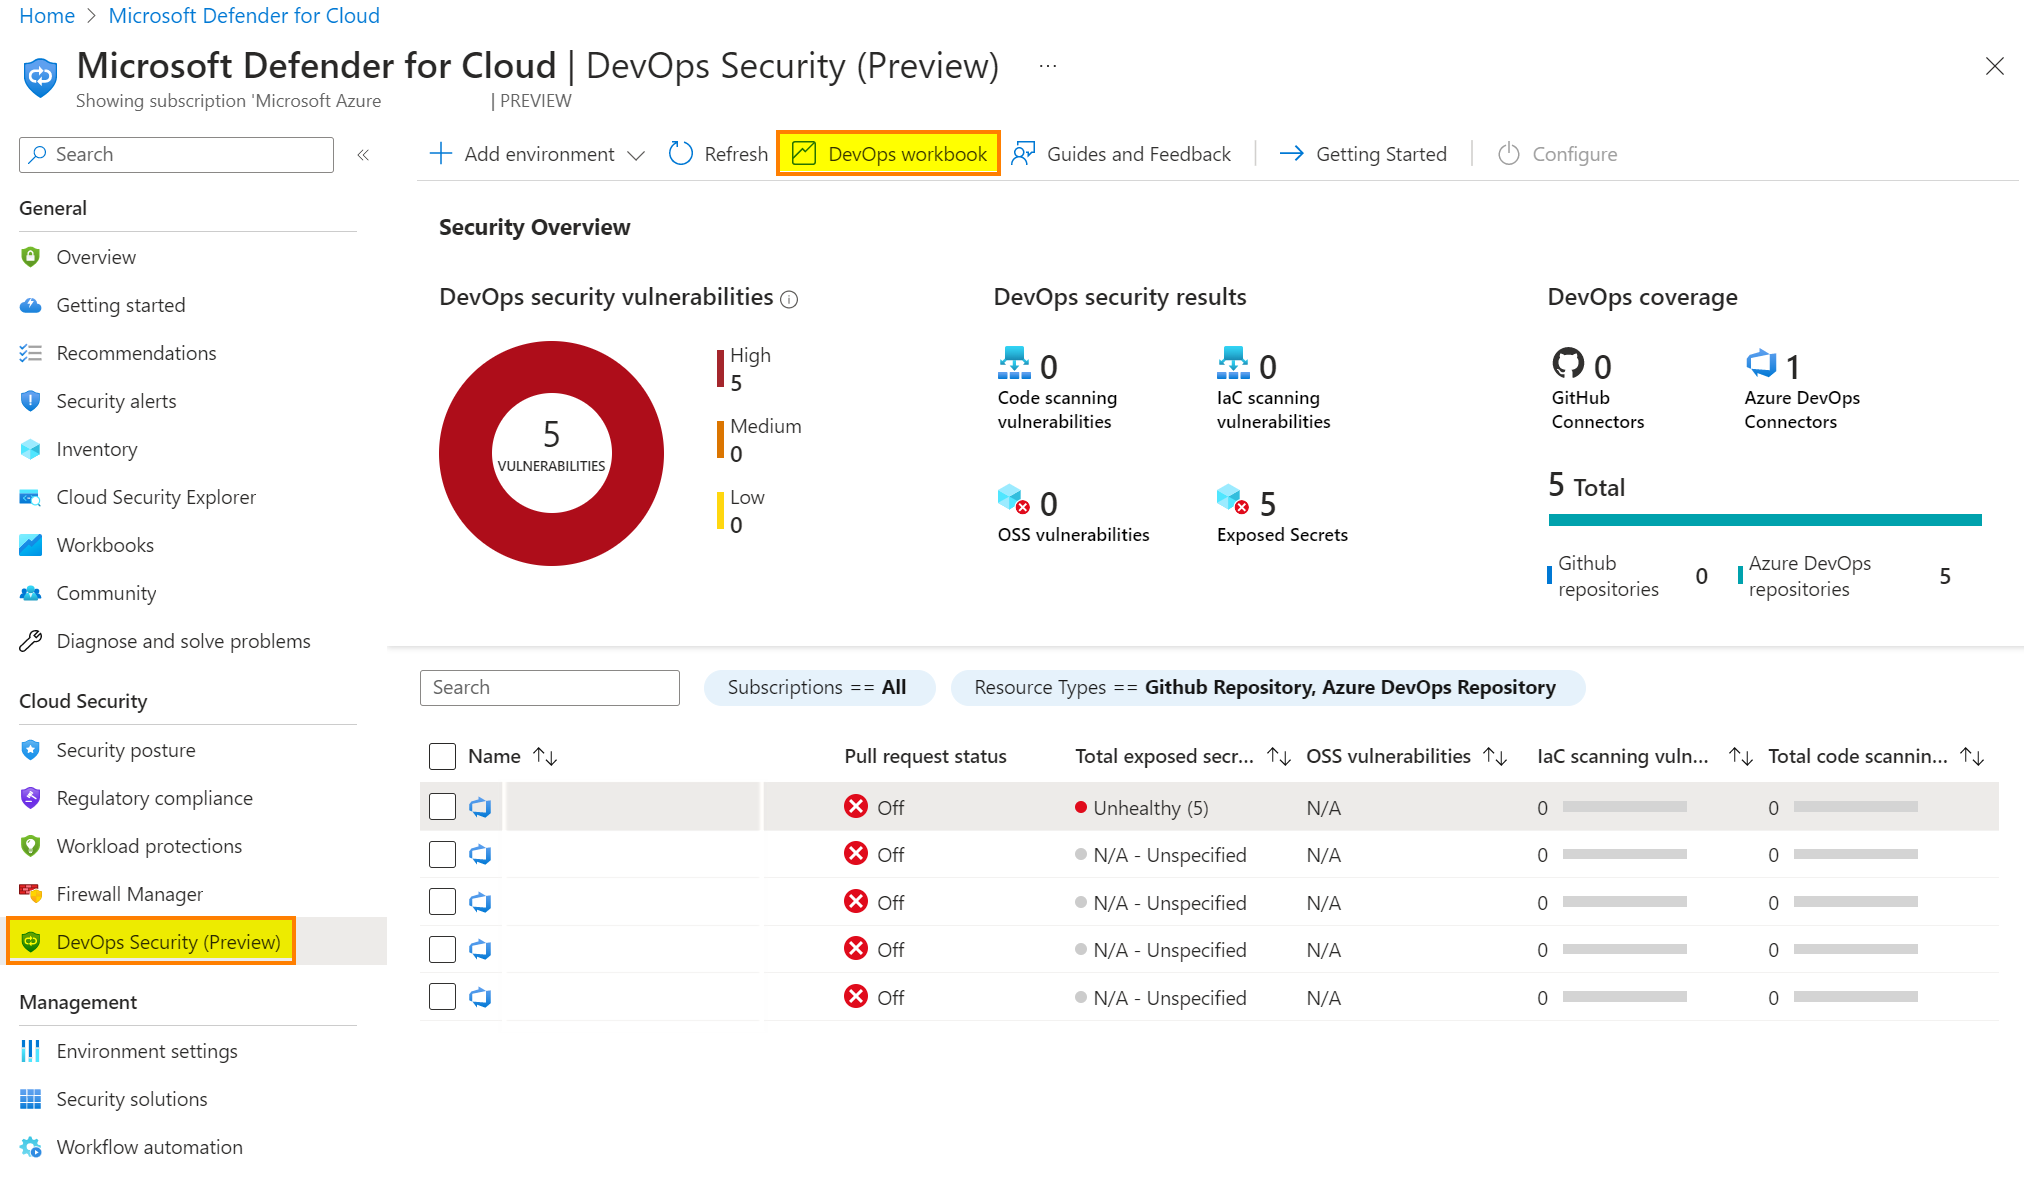
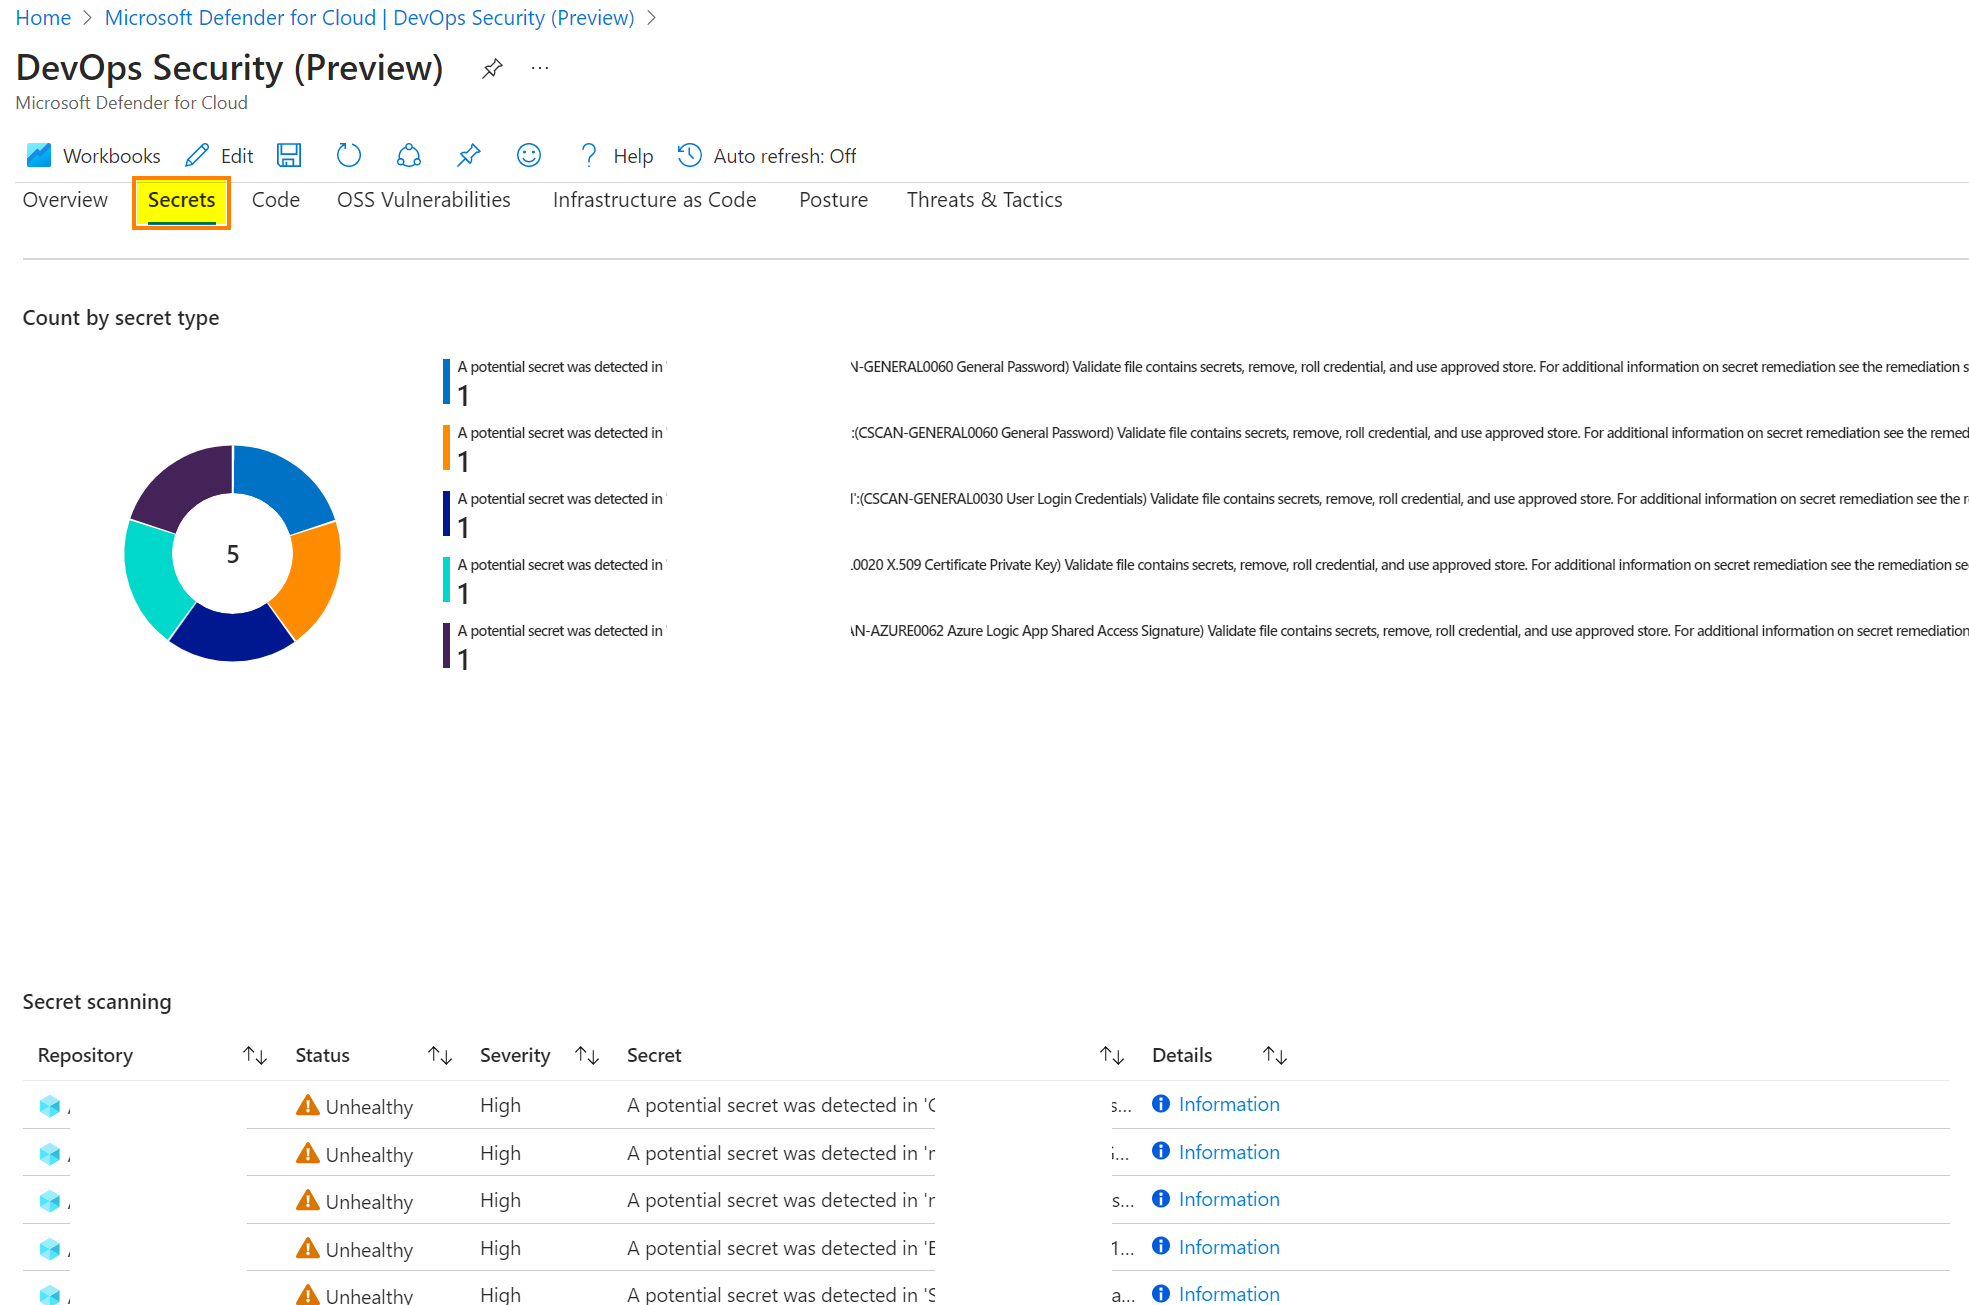
Switch back to the Azure Portal, go to Defender for Cloud. Refresh the dashboard and you should see some data. To get more information, Microsoft built a great Azure Workbook:
Depending on your environment, you will see data in the different tabs
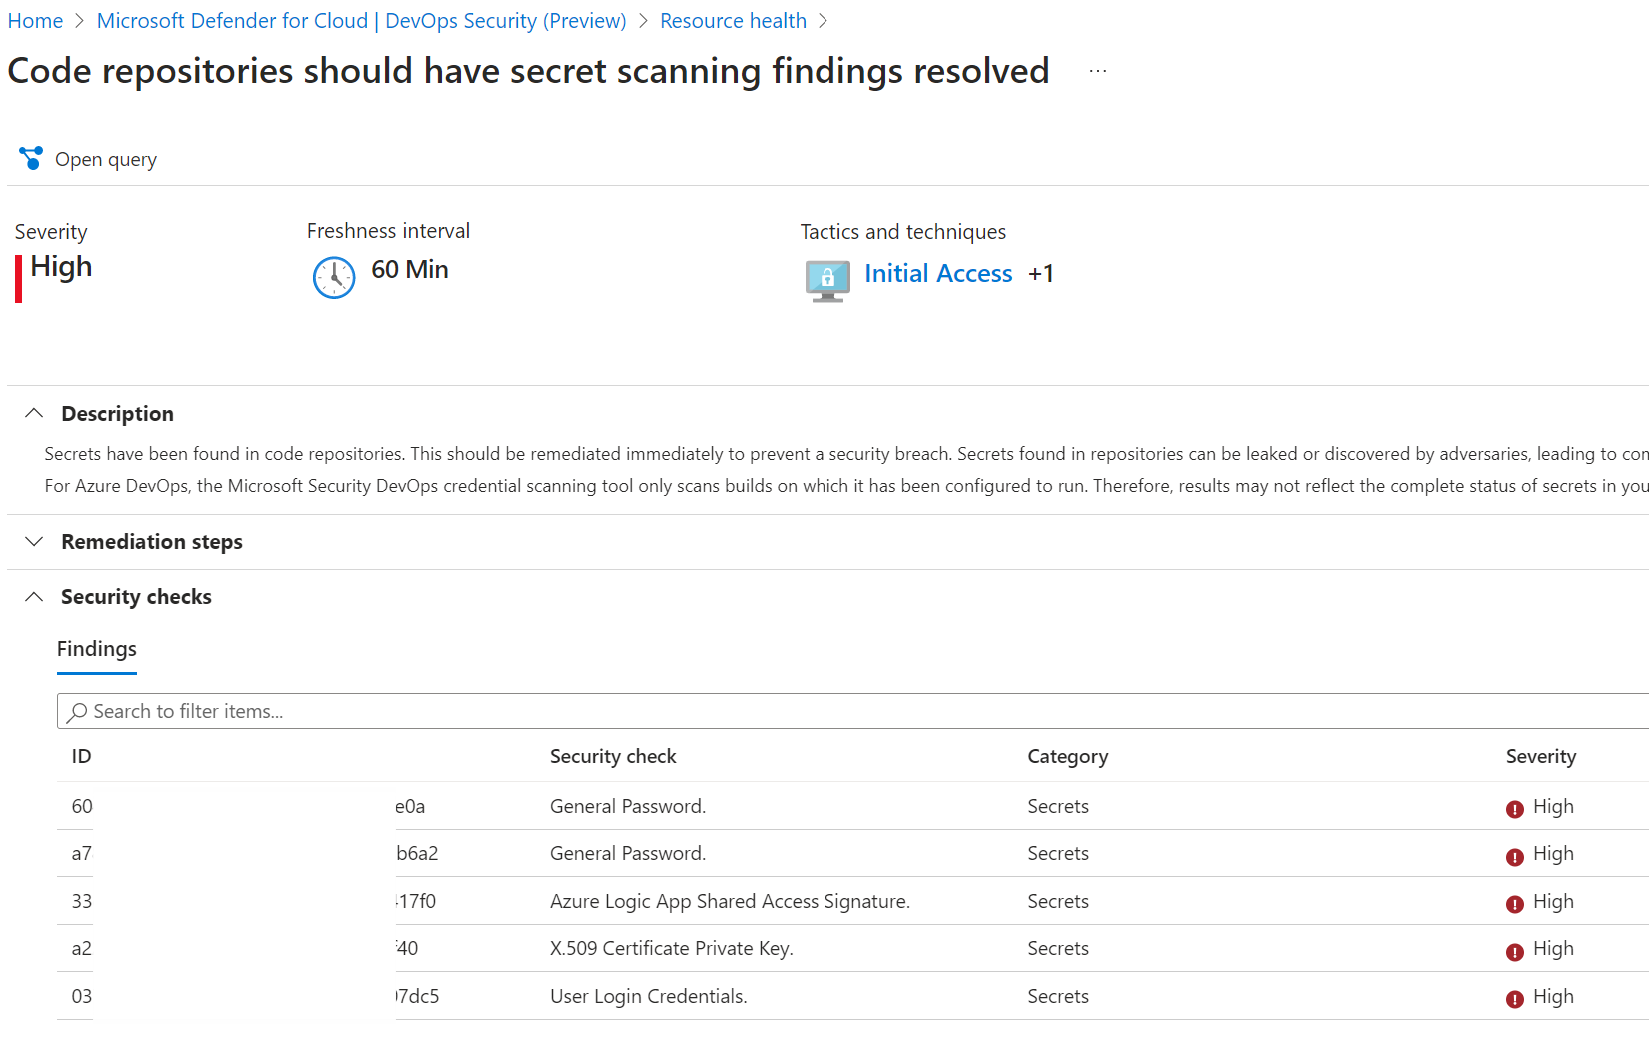
More details are available with the recommended remediation steps
Last point, we can download the *.sarif file thanks to the extension we installed earlier.
The *.sarif file is attached to the pipeline run as an artifact.


