Bicep is a ‘Domain Specific Language (DSL) for deploying Azure resources declaratively’. Ok so why do we need yet another way to deploy stuff in Azure? That’s a good question!
There is a huge variety of options to deploy resources in Azure. You can use:
- The Azure portal
- ARM template
- Azure CLI and Azure PowerShell
- ARM SDK
- Terraform
- …
The first great advantage of Bicep is the syntax. Comparing with JSON, Bicep files are more concise and easier to read for humans. The second advantage is that Bicep immediately supports all preview and GA versions for Azure services.
I will not explain in detail what is Azure Bicep (Brandon Lee wrote a great article https://www.starwindsoftware.com/blog/bicep-vs-terraform comparing Bicep vs Terraform), Bicep was well explained in this article.
Just remember that if you want to deploy resources in Multi-Cloud, Bicep is not the right tool for you, other cloud providers don’t support Bicep templates.
In this article, I will demonstrate how easy it is to use Azure Bicep to deploy a basic resource in your Azure subscription. You will never use JSON again your entire life!
Getting started
First, I advise you to install VS Code to write your Azure Bicep code. You can install the following extension to validate your code.
https://marketplace.visualstudio.com/items?itemName=ms-azuretools.vscode-bicep
Bicep extension provides intellisense for the core language, so you just need to press the space bar (or CTRL + SPACE), then VS Code will list the available options or resource types.
Ok you just installed VS Code + Bicep extension. Don’t forget to install the Az PowerShell module.
Confirm that bicep extension is loaded
Ok we will connect to our Azure subscription using the ‘Connect-AzAccount’ cmdlet
Now, we can create our first Bicep file (your file must be named using the *.bicep extension)
Below is the code that we will use to deploy a storage account.
param loc string = resourceGroup().locationresource myStorAccount 'Microsoft.Storage/storageAccounts@2021-09-01' = {
name: 'mystorrageaccount'
location: loc
sku: {
name: 'Standard_LRS'
}
kind: 'StorageV2'
properties: {
accessTier: 'Hot'
}
}First, you must tell to Bicep that you want to define a new resource
Resource myStorAccount ‘Microsoft.Storage/’
myStorAccount is just a friendly name inside your code. It will never appear in the Azure console.
Microsoft.Storage/storageAccounts@2021-09-01 is the resource type and API version of the storageAccounts that Bicep will use when it creates the resource.
Be careful, Bicep is strict about where you put line breaks. Just press CTRL + SPACE to create the squelette (e.g required-properties)
Repeat the same steps by pressing CTRL + SPACE for each property. As you can see, VS Code helps you to structure your Bicep code.
You can also use parameters. Resource Manager resolves parameter values before starting the deployment operations. Wherever the parameter is used, Resource Manager replaces it with the resolved value. In my case, I use a parameter to replace the location value and to be sure that all the resources will use the same location value.
param loc string = resourceGroup().location
When you deploy your Azure Bicep file, most of time it is deployed in a resource group, so we use the RG location value.
Now we will deploy our Bicep code using the following command:
New-AzResourceGrouDeployment -ResourceGroupName <your_RG> -TemplateFile <Bicep_File>
In the Azure portal, we can confirm the deployment
Just to really understand the power of Bicep instead of JSON complexity, below is the JSON code to create our storage account. Comparing the Bicep code, it saves time and efforts!
The storage account is created in the resource group.
Now if you want to remove the storage account, create an empty Bicep file
And run the following command:
New-AzResourceGrouDeployment -ResourceGroupName <your_RG> -TemplateFile <Bicep_File> -Mode Complete -Force -Verbose
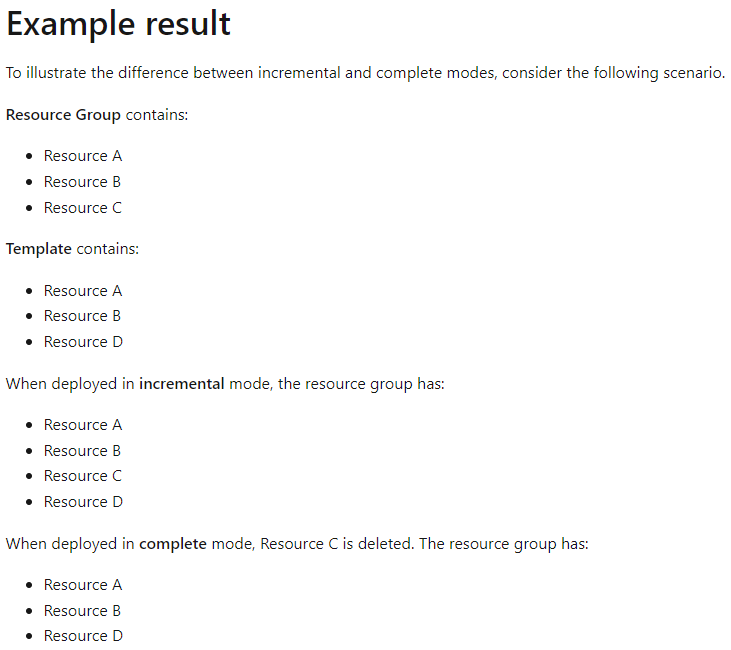
Be very careful! In the « complete » mode, Resource Manager deletes resources that exist in the resource group but aren’t specified in the template. The file ‘clean.bicep’ is empty, so ARM will delete all resources in the RG.
Another value is ‘Incremental’. In incremental mode, Resource Manager leaves unchanged resources that exist in the resource group but aren’t specified in the template. Resources in the template are added to the resource group.
Below is a simple but very good example from the Microsoft documentation:


