Introduction
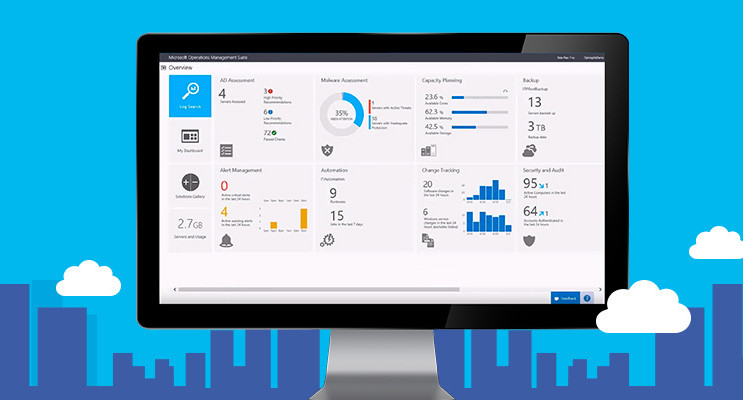
In this series of blog posts, we will show you how to get started with Microsoft Operations Management Suite (OMS) so that you can protect your heterogeneous environments, respond proactively to changing business needs and simplify IT management – all from a single portal with no infrastructure to maintain. This post will also show you how Microsoft Operations Management Suite delivers immediate, actionable insights into your log data by providing a cost-effective, all-in-one cloud management solution so you can better protect guest workloads in Microsoft Azure, AWS, Windows Server, Linux, VMWare, and Open Stack.
One single portal… multiple workloads!
In this post Part I; we will establish a Microsoft Operations Management Suite environment.
In the next post Part II; we will discuss how to get started with Microsoft Operations Management Suite.
In the third post Part III; we will configure automation for OMS.
In the last post Part IV; we will discuss how to perform Log Analytics with OMS.
Objectives
During this series of posts, you will learn how to use Microsoft Operations Management Suite (OMS) to:
- Protect heterogeneous environments.
- Respond proactively to changing business needs.
- Simplify IT management.
- Gain immediate, actionable insights.
- Provide all-in-one cloud management.
- Protect guests and workloads.
We will associate the OMS account with the Microsoft Azure account, and sign in to the Microsoft Operations Management Suite web site, then we will perform initial configuration tasks to connect the servers to OMS.
We will perform tasks necessary to integrate OMS with System Center Operations Manager 2012 R2.
Finally, you will be introduced to OMS Solutions, which will assist you in gaining deeper insight into your environment.
Infrastructure Overview
We have the following servers installed in our demo environment:
- Domain controller, DNS, WSUS.
- System Center Operations Manager 2012 R2 with update Rollup 9.
- SQL Server holding SCOM databases.
- Linux Server (Ubuntu).
Prerequisites
You need the following accounts ready if you want to follow along:
- An Outlook.com email account. It is recommended that you create a new Microsoft ID account specifically for this demo.
- An Azure Pass account. It is recommended that you create a new Azure account specifically for trial purpose.
- A Microsoft Operations Management Suite (OMS) account. It is recommended that you create a new OMS account specifically for trial purpose.
Establish a Microsoft Operations Management Suite Environment
In this step, we will create a Microsoft Security Account and a Microsoft Azure account and then link it to a newly created Microsoft Operations Management Suite Workspace. You will be introduced to Operational Insights, an online service that analyzes installations of Microsoft Server software and see how it integrates with System Center Operations Manager and OMS.
Assuming you already created above accounts, we will move to step 1.
Step 1 – Create a Microsoft Azure Automation Account
Microsoft Azure Automation accounts are used to automate the deployment, monitoring, and maintenance of resources in Azure. An Automation Account is a container for your Azure Automation resources. It provides a way to separate your environments or further organize your Automation workflows and resources.
In this step, we will create an Automation account that can be used by OMS when implementing an Automation Solution.
- Launch Azure Portal at http://portal.azure.com
- Sign in using your Microsoft Azure credentials.
- Click New+, click Management, and click Automation Account.
- In the Add Automation Account blade, in Name, type AzureOMSAutomation.
- Click Resource group.
- Click Create a new resource group.
- In Name, type AzureOMSResourceGroup and click OK.
- Click Region and select the closest region to you. At the time of writing this post, the following regions are available:
- Japan East
- East US 2
- West Europe
- Southeast Asia
- South Central US
I will choose West Europe
- Click Create as shown in the following screenshot.
(Note the details of the account for use in future steps).
Step 2 – Create Microsoft Azure Recovery Services Vaults (Backup and Recovery Site)
To back up files and data from your Windows Server or System Center Data Protection Manager (SCDPM) to Azure or when backing up IaaS VMs to Azure, you must create a backup vault in the geographic region where you want to store your data.
A Microsoft Azure Site Recovery Vault is used to replicate your virtual machines to a cloud service for disaster recovery purposes.
In this step, we will create both a Microsoft Azure Backup vault and a Microsoft Azure Site Recovery Vault.
- Switch to the classic Azure portal now at https://manage.windowsazure.com
- Scroll down and click RECOVERY SERVICES.
- Click CREATE A NEW VAULT.
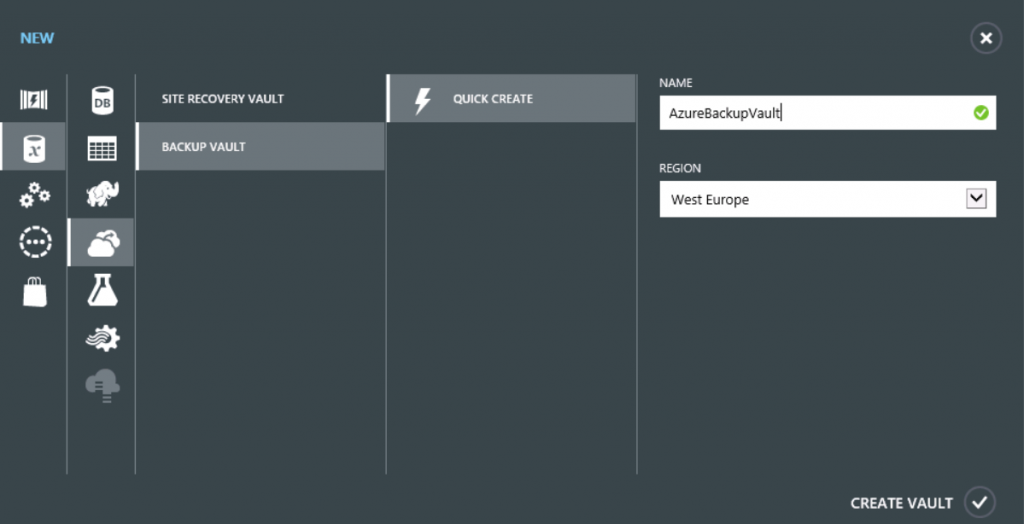
- Click BACKUP VAULT.
- Click QUICK CREATE.
- In the NAME field, type AzureBackupVault
- From the Region drop-menu, select the closest region to you.
- Click CREATE VAULT as shown in the following screenshot.

- Click +NEW.
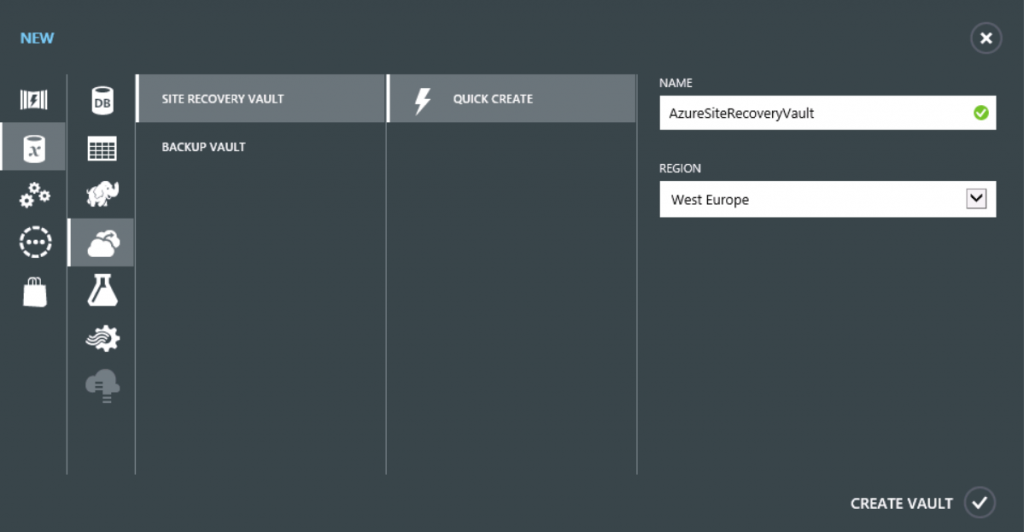
- Click SITE RECOVERY VAULT.
- Click QUICK CREATE.
- In the NAME field, type AzureSiteRecoveryVault
- From the Region drop-menu, select the same region you used before.
- Click CREATE VAULT as shown in the following screenshot.

- In the upper right corner of the window, click your user account name and click Switch to New Azure Portal.
Step 3 – Create a Microsoft Operations Management Suite Workspace
In this step, you will create a new Microsoft Operations Management Suite account, associate it with an existing Microsoft Azure account, and sign in to the Microsoft Operations Management Suite web site.
- Launch Operations Management Suite Portal at http://www.microsoft.com/en-us/server-cloud/operations-management-suite/overview.aspx
- If prompted, click No thanks.
- Click Create a free account.
- On the Operations Management Suite Trial page, click Get started.
- On the Create a New Workspace page, in Workspace Name type a unique name.
- In Workspace Region, click the drop-down arrow and select East US or West Europe.
- In the Name, type your full name.
- In Email, type the email address associated with your Microsoft Azure account.
- Click Subscription Agreement, read the terms and close the window.
- Select the check box next to I have read the Subscription agreement and agree to its terms and click CREATE as shown in the following screenshot.

- In Select Azure subscription, click the drop-down arrow and select Azure Pass.
- Click LINK as shown in the following screenshot.
Step 4 – Locate Operations Management Suite Workspace Configuration Information
Operational Insights is an Azure online service that analyzes installations of Microsoft Server software to help administrators identify potential issues.
In this step, we will browse the Microsoft Azure portal to locate information regarding our Operational Insights Workspace.
- Switch to the old Microsoft Azure Portal window at https://manage.windowsazure.com.
- In the Browse blade, scroll down and click Operational Insights.
- Record the Name, Resource Group, and Location of your Operational Insights workspace.
This information will be used in later steps as shown in the following screenshot. Write it down.
- Close the Azure portal.
Step 5 – Register the Operations Management Suite with SCOM
System Center Operations Manager now includes Operations Insights as an attached service, which will allow you to add Operations Management Suite monitoring to Windows management servers in your SCOM environment. The services feeds data to your OMS environment.
In this step, you will use the use the SCOM Operations Management Suite Onboarding Wizard to connect the Operational Insights service to SCOM.
Assuming you already have SCOM deployed in your environment.
- Open the Operations Manager
- On the navigation pane, click Administration.
- Expand Operations Management Suite and click Connection.
- Under Get Started, click Register to Operations Management Suite.
- Enter your email and the credentials associated with your OMS Workspace, and click Sign in.
- From the drop-down menu, ensure that your Operations Management Suite workspace is selected as shown in the following screenshot, and click
- Click Create.
- Click Close.
- In the Results pane, under Actions, click Add a Computer/Group.
- Click
- Under Available Items, select both your SCOM server and SQL server machine, click
- In the same window page, Click the drop-down menu for Options, select All Instance Groups, and click Search.
- Select Universal Linux Instances Group and click
- Click OK.
- In the Navigation pane, click Managed Computers to check all managed computers are listed.
- In the Navigation pane, click Monitoring and expand the Operations Management Suite node.
(Configuration Alerts and Health State nodes exist for monitoring the Operations Management Suite environment).
Congratulations! In Part 1 we have successfully established a Microsoft Operations Management Suite (OMS) Environment by completing the following steps:
- Create a Microsoft Azure Automation Account.
- Create Microsoft Azure Recovery Services Vaults (Backup and Recovery Site).
- Create a Microsoft Operations Management Suite Workspace.
- Locate Operations Management Suite Workspace Configuration Information.
- Register the Operations Management Suite with SCOM.
Until then… see you in Part 2.
Thanks for reading.


