PowerShell has become the preferred tool for managing Microsoft server products. Sysadmins can take full advantage of PowerShell to manage roles and perform routine management tasks. By using the command line, sysadmins are able to:
- Create a mailbox
- Configure a receive connector
- Generate a custom report
- Manage Distribution Group members, permissions, and group types
- Manage Exchange Services
- Etc.
In this article, we will not cover all the Exchange Management cmdlets, but I will describe several examples to guide you in the right direction. In all Exchange Server edition, a lot of settings are configured automatically by the Exchange installation. So, it is a good idea to explore all the settings individually to become familiar with your Exchange Server.
Exchange Management Shell
Thanks to the previous article, you have everything installed. Now it’s time to configure your Exchange server using the Exchange Management Shell console. What is it? EMS (Exchange Management Shell) is based on Microsoft Windows PowerShell, which provides a powerful command-line interface for executing and automating administrative tasks. With the Exchange Management Shell, you can manage every aspect of Exchange Server 2016.
How to run the Exchange Management Shell?
Let’s take a look at a couple of ways that you can use the EMS in a scripting environment. When you install an Exchange Server, you get the Exchange tools installed along with it which gives you the EMS.
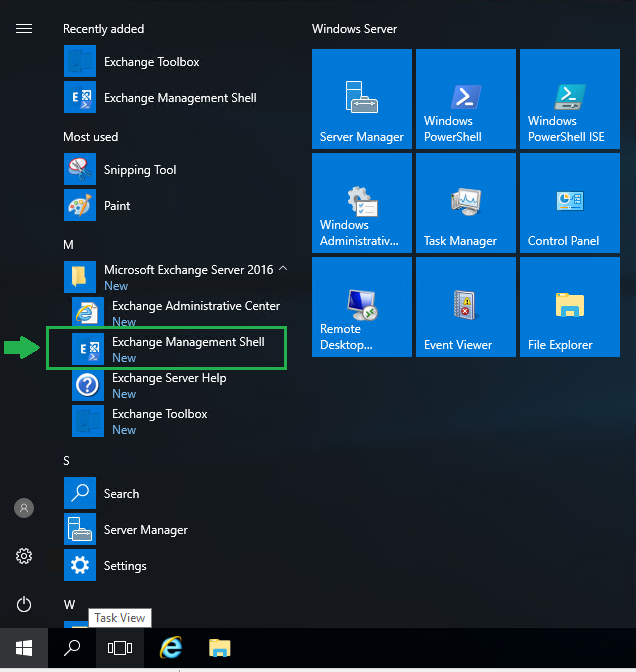
Click Start > Microsoft Exchange Server 2016 > Exchange Management Shell.
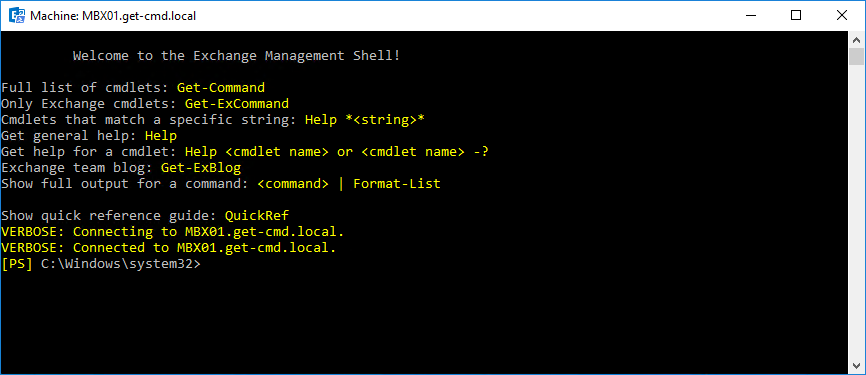
As you can see, it is just a customized version of “powershell.exe” that will load the Exchange PowerShell module. You may want to connect manually to your Exchange server from the PowerShell console. So, let’s start by creating a PowerShell Session:
PS > $session = New-PSSession -ConfigurationName microsoft.exchange -ConnectionUri

https://mbx01.get-cmd.local/powershell
You need to manually specify the server you want to connect to. Next, you should be able to use the Import-PSSession cmdlet to load the Exchange module:
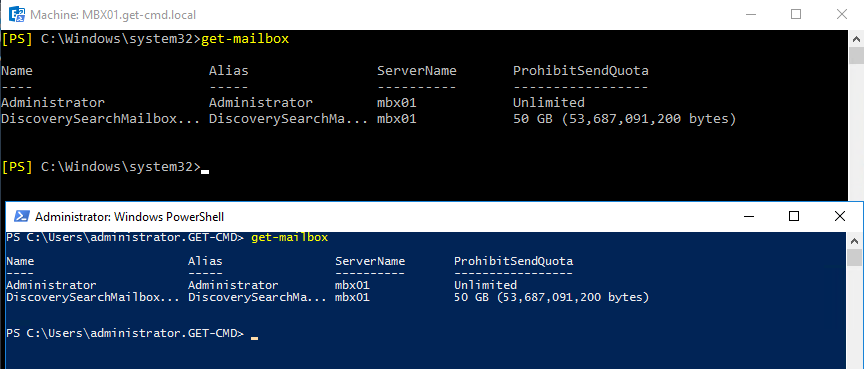
PS > Import-PSSession $sessionNow, you can compare both consoles by running the Get-Mailbox cmdlet to list all the mailboxes on your Exchange Server and confirm that the result is the same:
Which one do you have to use? Well, it’s up to you!
Checking the Microsoft Exchange Server Status
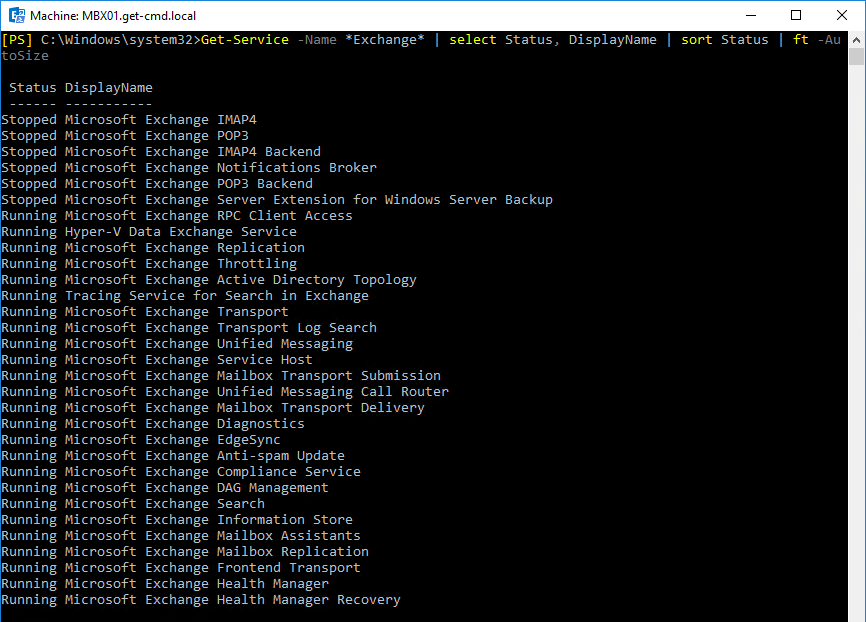
Before configuring Exchange, we will just check that Exchange Services are started:
PS > Get-Service -Name *Exchange* | select Status, DisplayName | sort Status | ft -Au

toSize
I don’t want to use IMAP and POP, so these Windows Services are stopped. Now, we can check some useful information about our Exchange Server:
PS > Get-ExchangeServer | select Fqdn, ServerRole, AdminDisplayVersion, IsEdgeServer

| ft -AutoSize
How to know which cmdlets are available to configure Exchange?
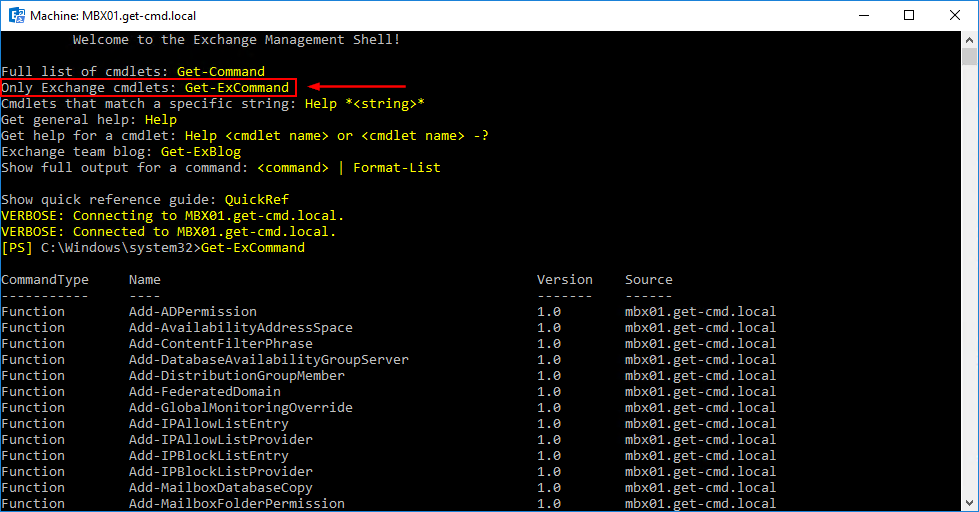
When you open the console, EMS shows you some useful tips. So you can run this command to display only Exchange cmdlets:
PS > Get-ExCommandYou can get the full list on the TechNet website:
https://technet.microsoft.com/en-us/library/bb124413(v=exchg.160).aspx
Configuring Exchange Server 2016
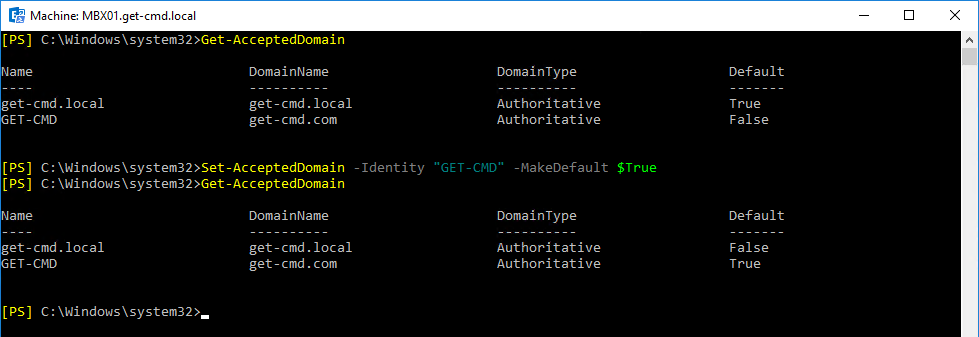
Now, we can start by configuring accepted domains and email address policies. Accepted domains are the SMTP namespaces that you configure to receive email messages. To create an accepted domain, use the following command:
PS > New-AcceptedDomain -Name <Name> -DomainName <Domain> -DomainType <Authoritative | InternalRelay | ExternalRelay>
We can verify that we have successfully created an accepted domain and make it the default domain.
Use the New-EmailAddressPolicy cmdlet to create e-mail address policies:
PS > New-EmailAddressPolicy -Name 'All External Users' -RecipientContainer 'get-cmd.local/External' -IncludedRecipients 'AllRecipients' -Priority 'Lowest' -EnabledEmailAddressTemplates 'SMTP:%g.%s-ext@get-cmd.com'

PS > New-EmailAddressPolicy -Name 'All Internal Users' -RecipientContainer 'get-cmd.local/Internal' -IncludedRecipients 'AllRecipients' -Priority '1' -EnabledEmailAddressTemplates 'SMTP:%g.%s@get-cmd.com'
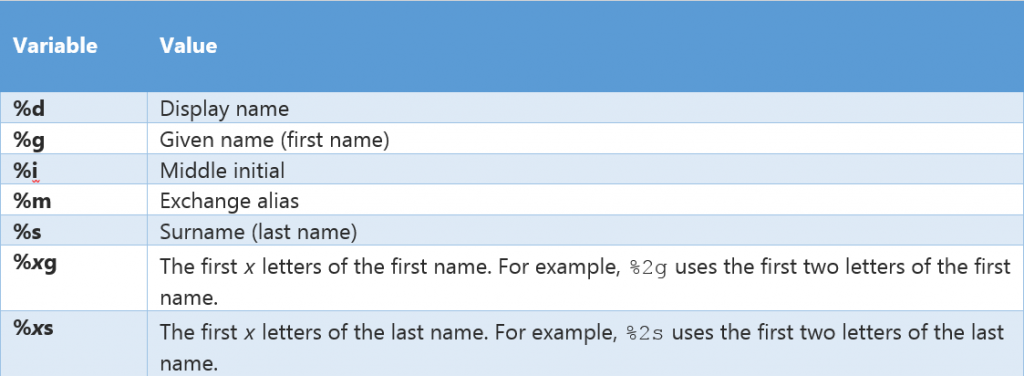
Exchange requires you to use variables to define the local part of the email address. These variables are described in the following table (from the TechNet website):
Connectors
You must create a send connector to route outbound mail to the Internet. I advise you to route outbound mail through a smart host (Antispam Gateway).
PS > New-SendConnector -Internet -Name SendToInternet -AddressSpaces * -FrontendProxyEnabled:$true –SmartHosts AntiSpamGW01.get-cmd.comThis connector will send email messages over the Internet. The -FrontendProxyEnabled parameter is set to True. This means that Exchange will actually proxy outbound emails through the CAS server to the Internet.
Please note the following information:
- Exchange does not automatically create a default send connector
- A basic connector will send out to the Internet via DNS resolution
Note that if you want to test SMTP connectors on Exchange, you can run the following command:
PS > Send-MailMessage –From sender@SenderDomain.com –To recipient@RecipientDomain.com –Subject “Test SMTP Connector” –Body “Test mail” -SmtpServer smtp.domain.comExchange Server 2016 uses receive connectors to control inbound SMTP connections from messaging servers that are external to your Exchange Organization. Exchange creates a default receive connector:
But if you need to create a new one, use the following:
PS > New-ReceiveConnector -Name FromSmartHost -Usage Custom -Bindings 192.168.0.143:25 -RemoteIPRanges 192.168.0.200Monitoring Exchange Server
How to check the content of an email queue?
It is good to know how to check an email queue. This is useful to determine if the mail flow is fluent or not. There are three types of queues available on Exchange Servers:
- Submission: Messages waiting to be processed by transport agents
- Unreachable: Messages that could not be delivered to their destination
- Poison message: Messages classified as dangerous for the server.
To check the contents of the submission queue run the following command:
PS > Get-Queue -Identity SubmissionExchange Server has some useful logs that you can check. Use the Get-MessageTrackingLog cmdlet to search for message delivery information stored in the message tracking log.
PS > Get-MessageTrackingLog -start '[date it started]' -resultsize unlimited | where-object {$_.Sender -like '*domain.com'}You can also count the total email messages processing by Exchange Server:
Some months ago, I wrote two PowerShell scripts. The first one lets you perform a query in the message tracking log from a GUI. This script is available on the Microsoft TechNet Gallery: https://gallery.technet.microsoft.com/Exchange-2013-Message-875b3eeb
And the second one is a health check for your Exchange environment: https://gallery.technet.microsoft.com/Exchange-2013-Audit-and-7e16fba5
 |
StarWind HyperConverged Appliance is a turnkey, entirely software-defined hyperconverged platform purpose-built for intensive virtualization workloads. Bringing the desired performance and reducing downtime, the solution can be deployed by organizations with limited budgets and IT team resources. Also, it requires only one onsite node to deliver HA for your applications that make the solution even more cost-efficient. |
Find out more about  StarWind HyperConverged Appliance StarWind HyperConverged Appliance |
Mailbox and Distribution Group Management
There are different types of the recipient in Exchange Server 2016. After installing Exchange 2016, you can create user mailboxes which is one of the most commonly used mailbox types. But you can also create resource mailboxes and distribution groups. Let’s see some examples:
Create user mailbox
PS > password = Read-Host "Enter password" -AsSecureString

Enter password: *********

PS > New-Mailbox -UserPrincipalName contact@get-cmd.com -Alias Contact -Name Contact -OrganizationalUnit Users -Password $password -FirstName Nicolas -LastName PRIGENT -DisplayName "Nicolas PRIGENT" -ResetPasswordOnNextLogon $true
Create resource mailbox
PS > New-Mailbox -Name "<Identity>" –RoomCreate equipment mailbox
PS > New-Mailbox -Name "<Name>" -EquipmentCreate distribution group
PS > New-DistributionGroup -Name "ITDepartment" -Members contact@get-cmd.comRemember that for a New-* cmdlet, there are often (but not always) Get-* and Set-* cmdlets available.
Managing Outlook/OWA Configuration
Finally, most of Outlook’s Exchange specific functionalities such as Automatic Replies (also known as “Out of Office Assistant” or “OOF”) can also be configured using EMS. For example, Exchange Administrators can enable automatic replies for another user without logging on to the mailbox by using the Set-MailboxAutoReplyConfiguration cmdlet:
PS > Set-MailboxAutoReplyConfiguration -Identity <username> -AutoReplyState Enabled -InternalMessage "Your internal message." -ExternalMessage "Your external message."Conclusion
With more than 1000 cmdlets at your disposal, there is plenty that you can do with PowerShell and Exchange. I can’t cover all these cmdlets, but the idea of this article was to describe several examples and explain how PowerShell can help you in your day-to-day sysadmin tasks. Thanks to PowerShell, you can now easily create a script to deploy and configure automatically Exchange Server 2016 in a new environment.
Thanks for reading!


