If your Microsoft Certification Authority (CA) is running on an obsolete Windows Server version, you need to migrate Root CA to a new server to keep the support from Microsoft.
You can directly migrate Root CA to version 2019 if the CA is running on any version of Windows Server from 2008R2 and later. The procedure involves several steps that need to be followed to avoid possible errors.
Migrate Root CA
The migrate Root CA procedure to a new server requires the following steps:
Old server
- Backup the current Root CA
- Backup the CA registry key
- Remove the CA role
New server
- Install the CA role on the new server
- Configure the new CA
- Import the private key
- Restore the database
Backup the current Root CA
Access the current CA Server and open the Certification Authority manager.
Right click the name of the CA (lab.local in the example) and select All Tasks > Back up CA.
The Certification Authority Backup Wizard opens. Click Next.
Select both Private key and CA certificate and Certificate database and certificate database log options. Click Browse and select a backup location then click Next.
Enter a Password to gain access to the private key and click Next.
Click Finish to perform the backup.
Backup the CA registry key
Now run the regedit command to export the registry key.
Navigate to HKEY_LOCAL_MACHINE\SYSTEM\CurrentControlSet\Services\CertSvc\Configuration, right click the Root CA name and select Export.
Select the path to store the file, specify the File name and click Save.
In the chosen location you should see three files:
- the CA database (DataBase folder)
- the exported CA certificate
- the exported registry file
These files must be copied to the new server.
Remove the CA role
The CA role must be removed from the server to dismiss.
From the Server Manager select Manage > Remove Roles and Features option.
Click Next.
Choose Select a server from the server pool and click Next.
Untick the Certification Authority role.
Click Remove Features.
The Certification Authority role has been removed from the current server. Click Next.
Click Next.
Select Restart the destination server automatically if required and click Remove.
When the removal process starts, you can click Close.
After few seconds, the removal procedure completes successfully.
Install the CA role on the new server
To migrate root CA, a Windows Server 2019 will be used in this procedure as destination server.
In the new server, open the Server Manager and click Add roles and features.
Click Next.
Select Role-based or feature-based installation option and click Next.
Choose Select a server from the server pool, select the server and click Next.
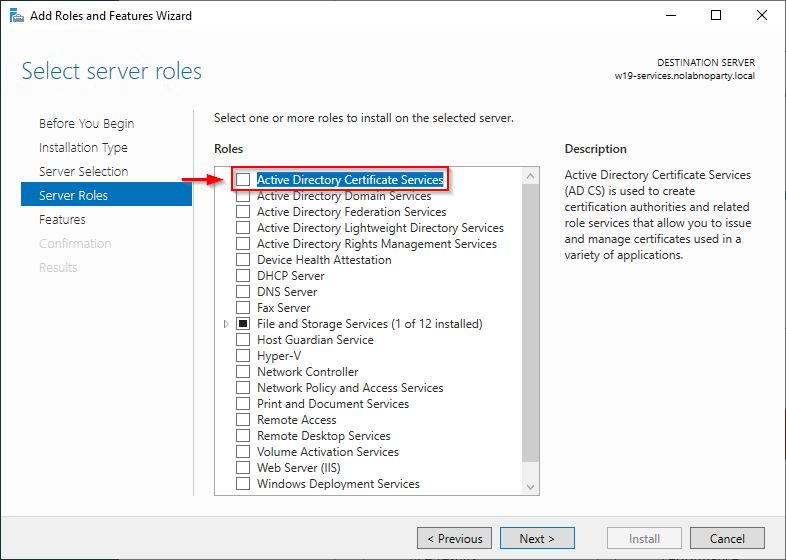
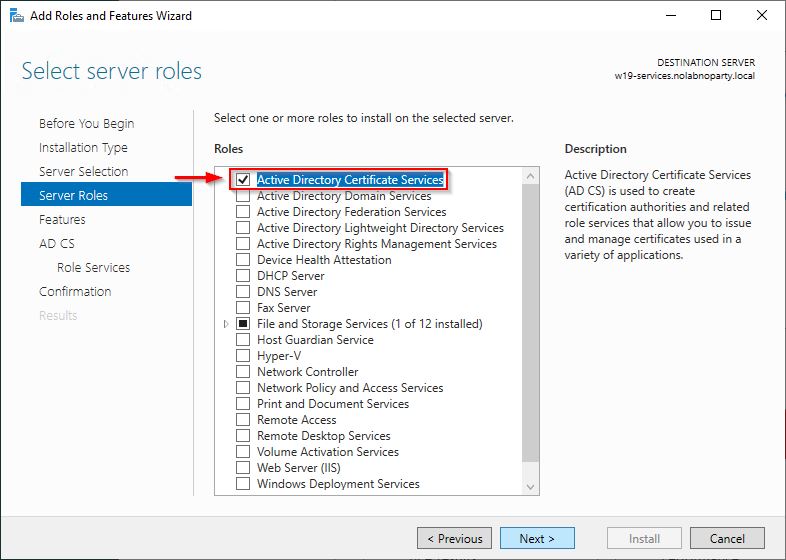
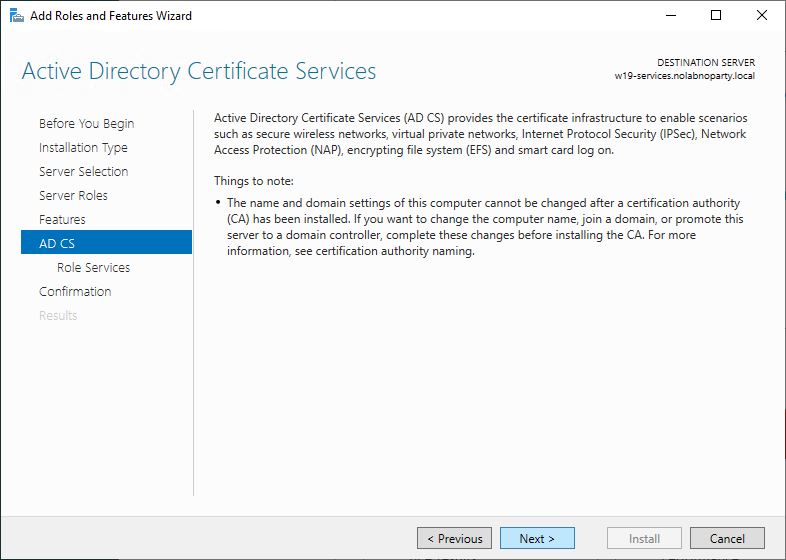
Select the Active Directory Certificate Services role.
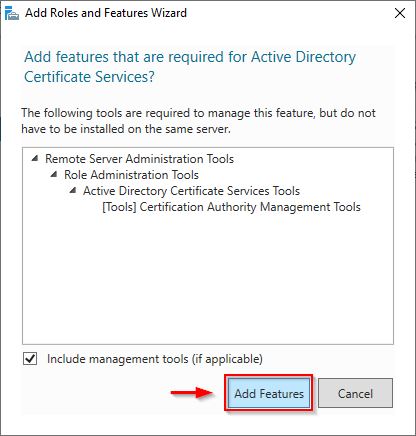
Click Add Features when prompted.
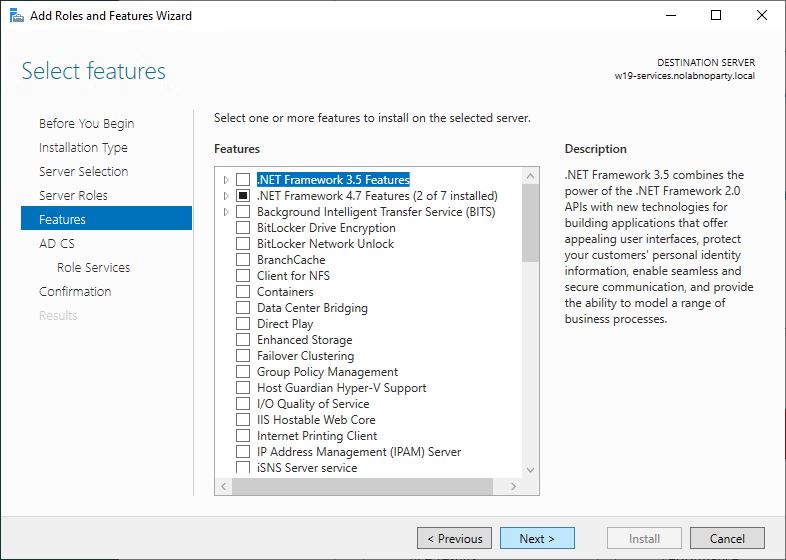
Click Next to install the role.
Click Next.
Click Next.
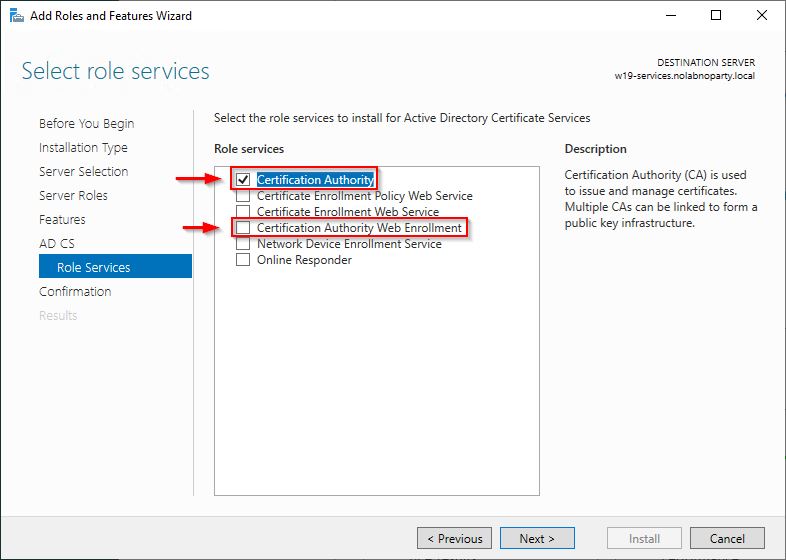
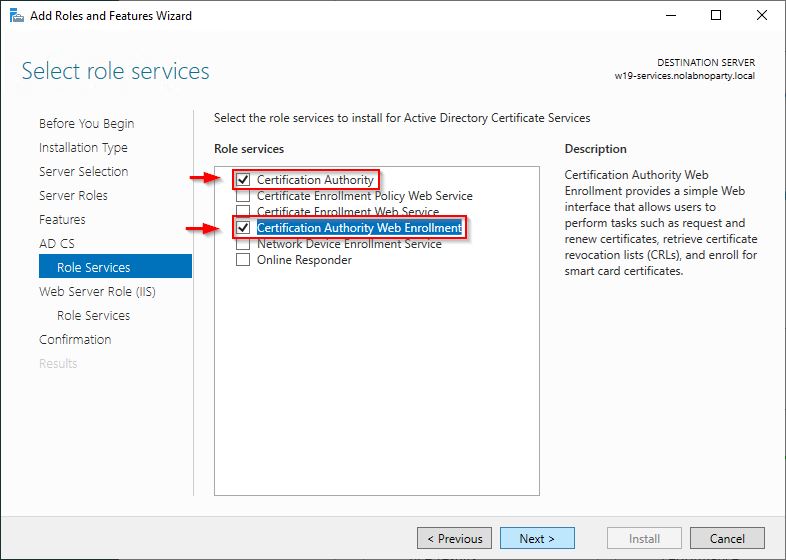
Select the desired role services and click Next. In this example two services will be installed:
- Certification Authority
- Certificate Authority Web Enrollment
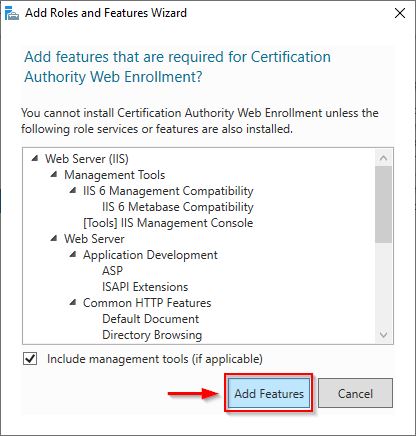
Click Add Features when prompted.
Click Next to install selected services.
Click Next.
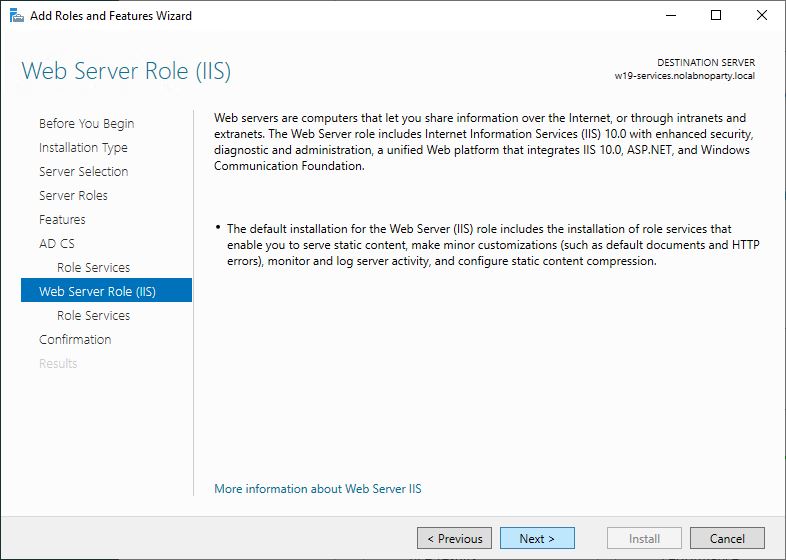
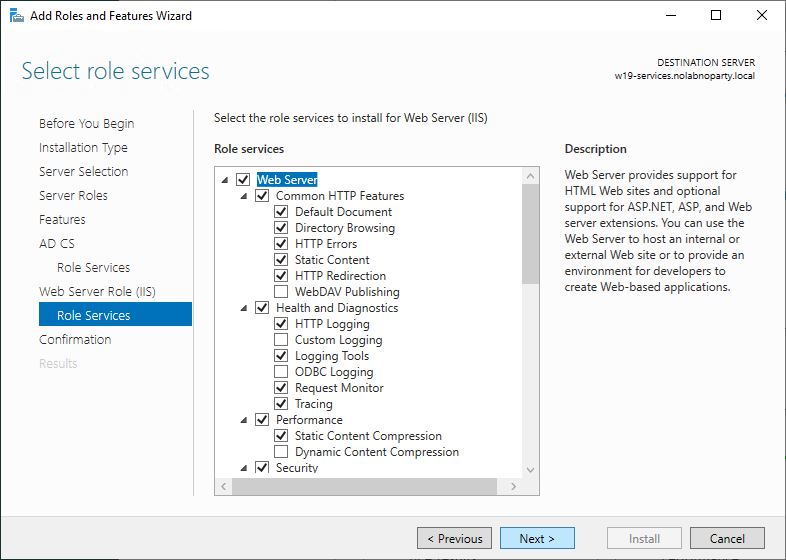
Accept default role services and click Next.
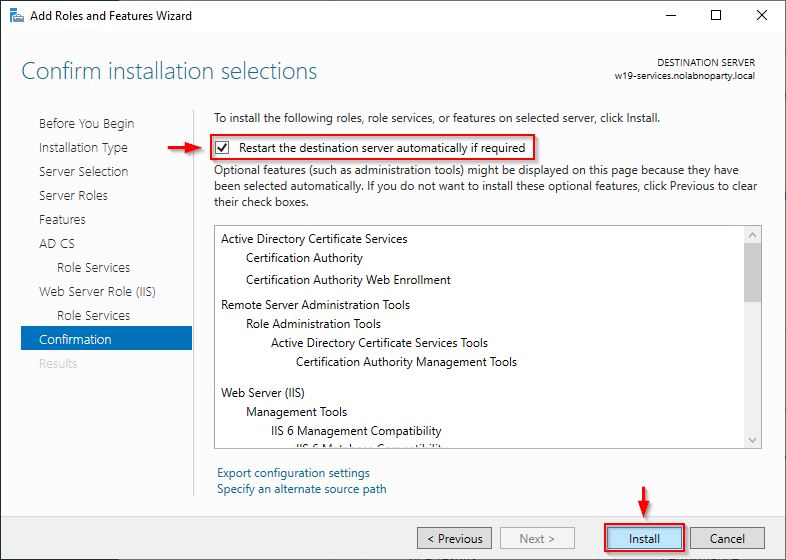
Select Restart the destination server automatically if required and click Install.
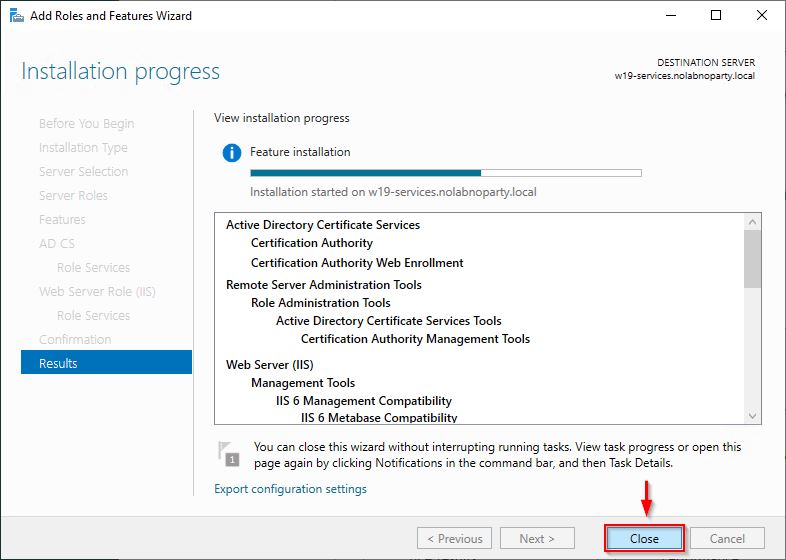
When the installation process starts, you can click Close.
Configure the new CA
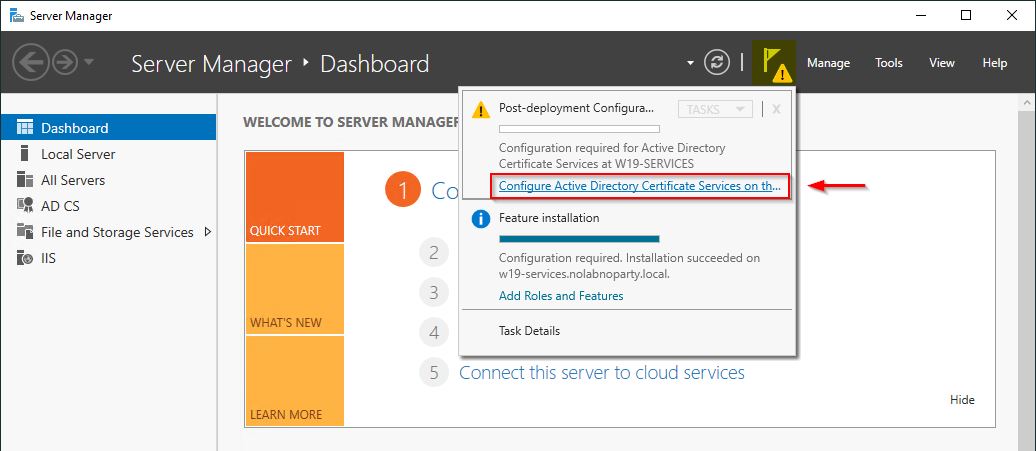
When the installation procedure completes, from the Server Manager click the yellow exclamation mark and click on the link Configure Active Directory Certificate Services on the destination server.
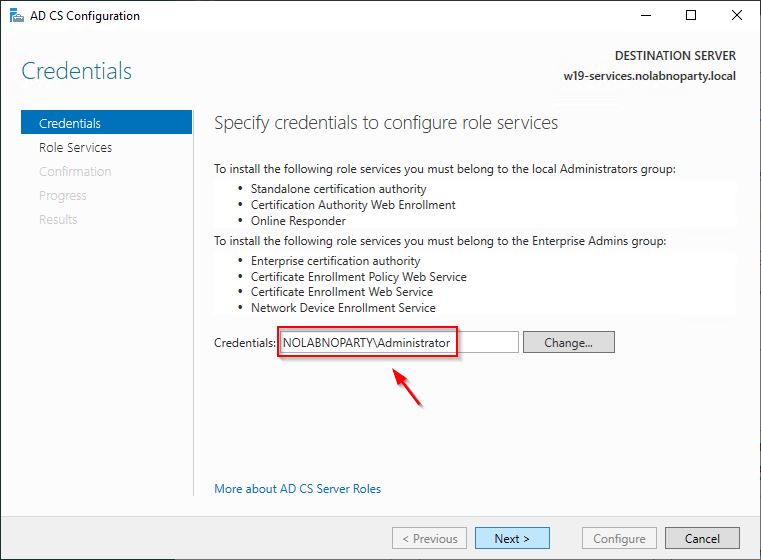
Make sure to use an account with Enterprise Administrator permissions. Click Next.
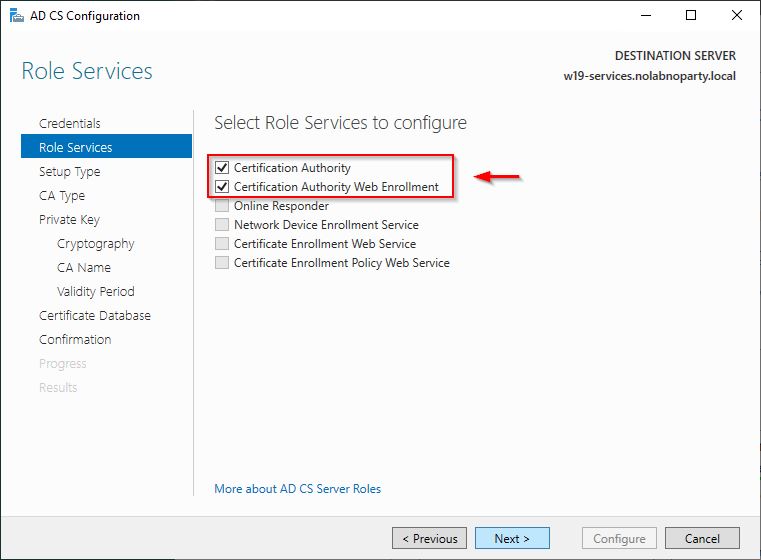
Select the two role services and click Next.
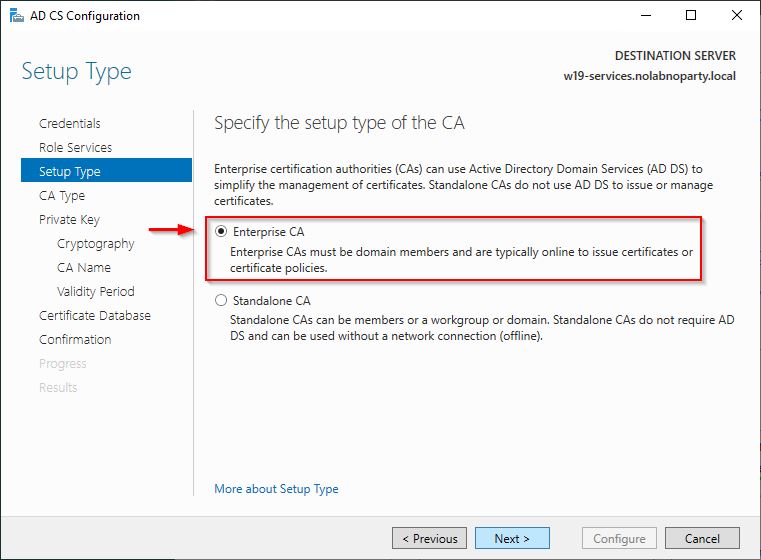
Select Enterprise CA as CA type and click Next.
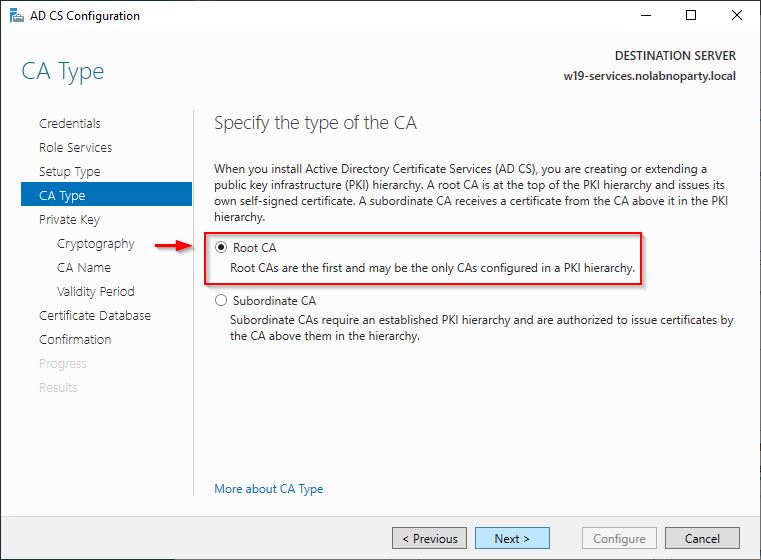
Since we are migrating a Root CA, select Root CA option and click Next.
Import the private key
Since we are migrating an existing CA with it’s private key, we need to import the existing private key.
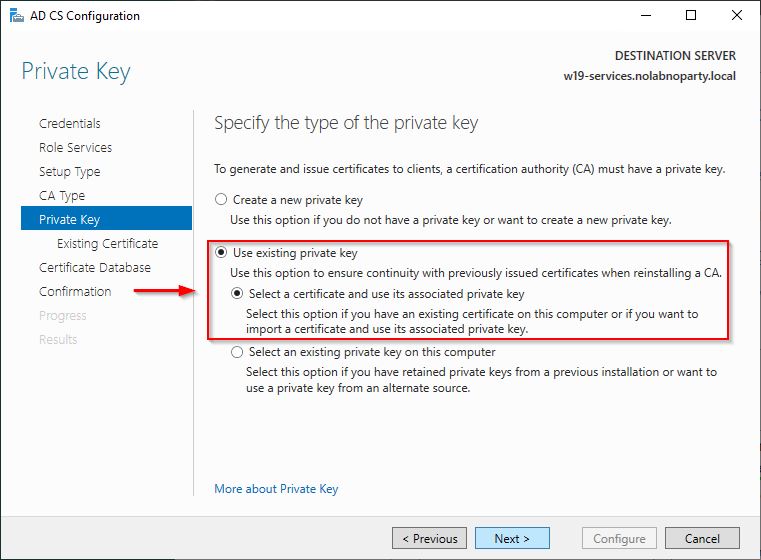
Select Use existing private key and choose Select a certificate and use its associated private key. Click Next.
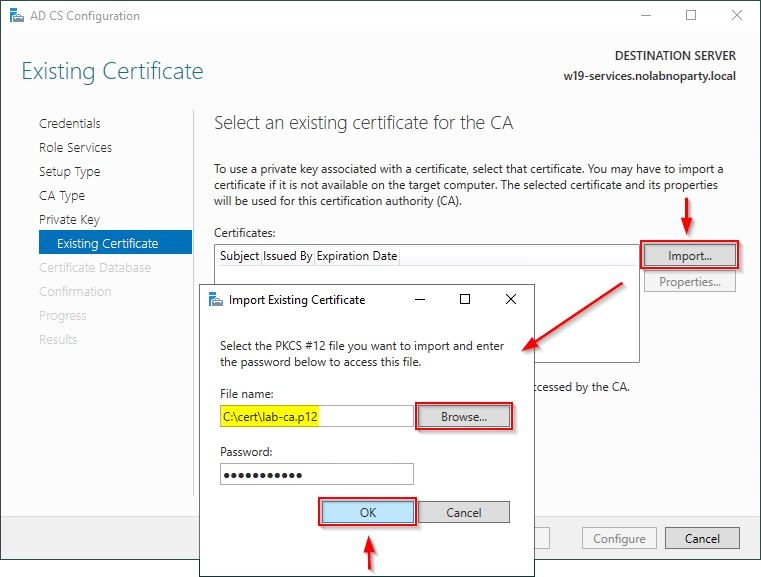
Click Import. Click Browse and select the certificate exported from the old CA and enter the Password. Click OK.
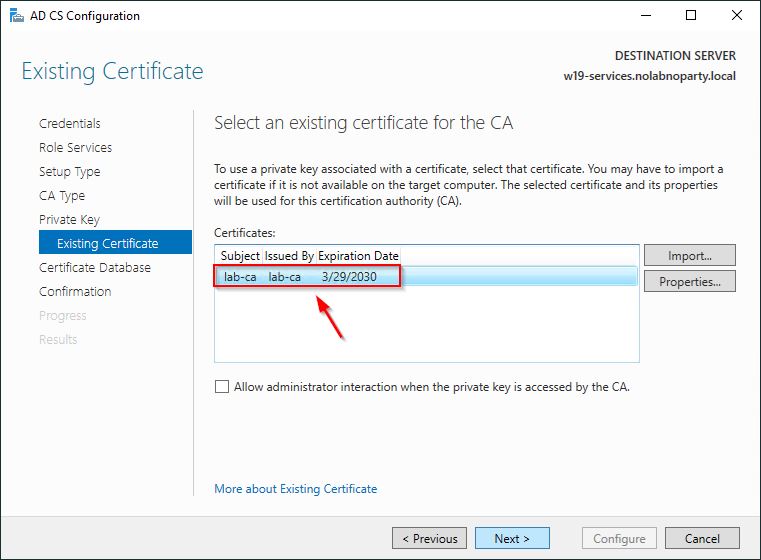
Select the imported certificate and click Next.
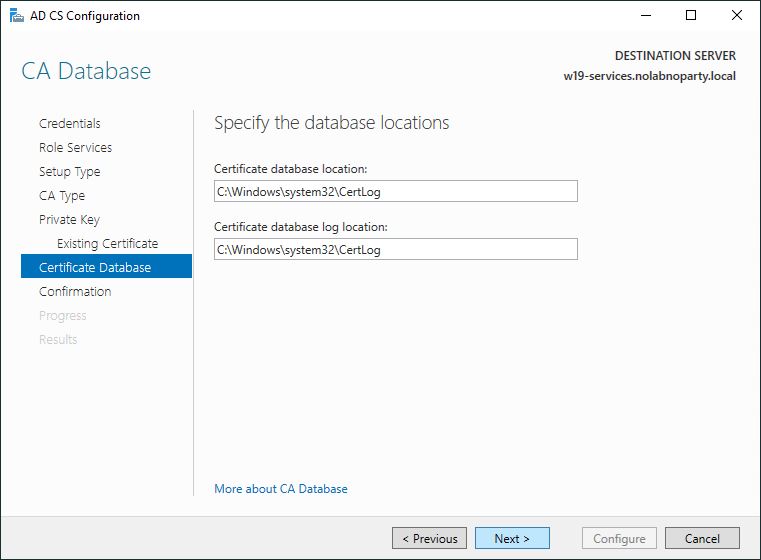
Leave default locations and click Next.
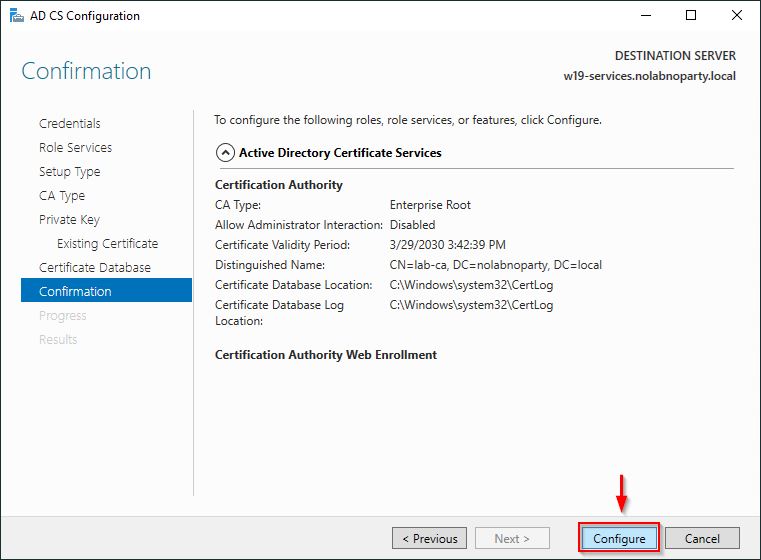
Click Configure to proceed with the configuration.
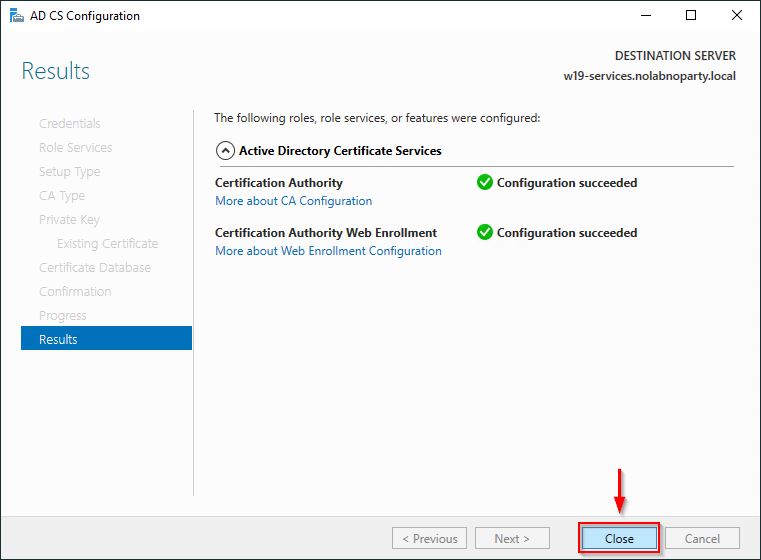
Click Close when the configuration completes successfully.
Import the registry key
Last step is the import of the registry key previously exported from the old CA.
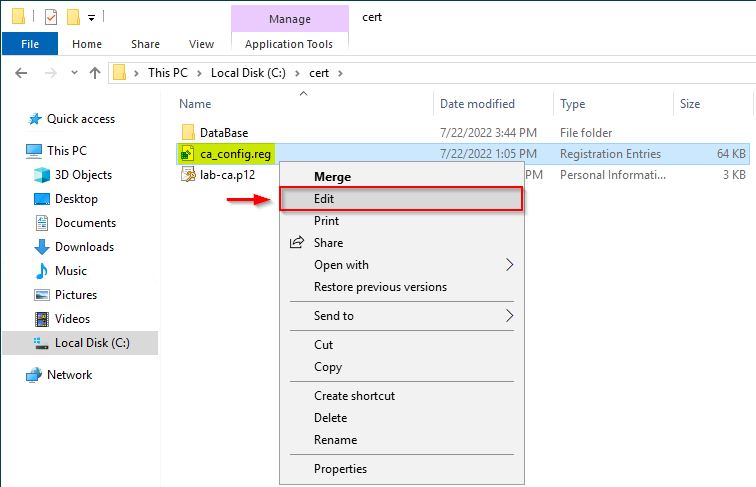
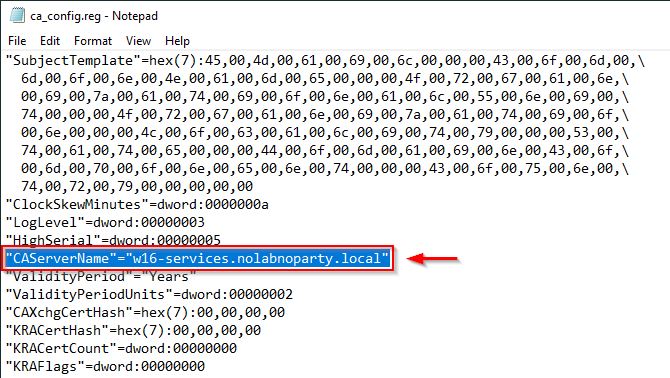
Before importing the registry key we need to change the name server with the new one. Right click the registry key file (ca_config.reg in the example) and select Edit.
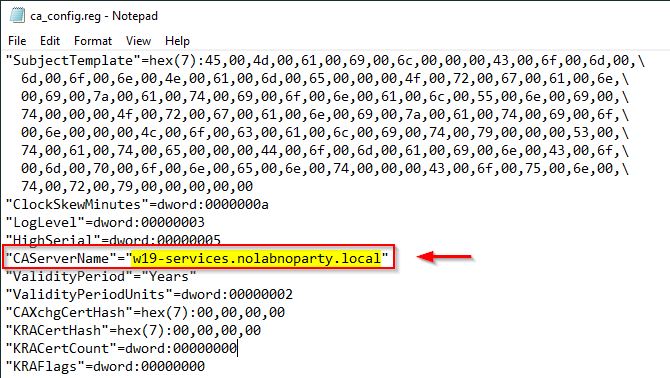
Locate the CAServerName entry.
Change the name with the current server name and save the file.
Now open the Command Prompt and stop the ca service with the command:
C:\..> net stop certsvc
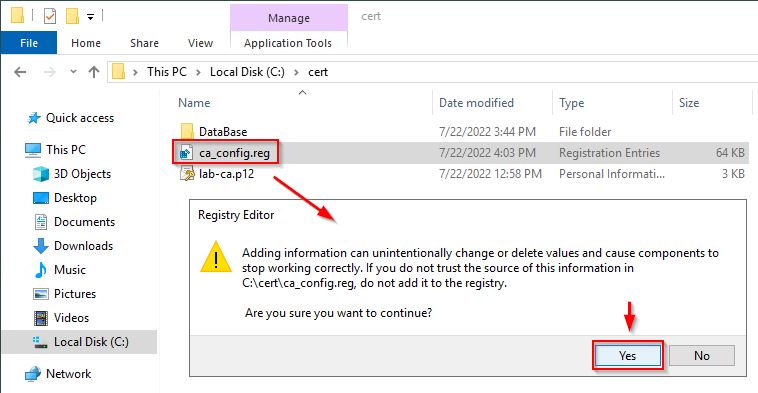
Double click on the registry file to import the settings. Click Yes to confirm the import.
Click OK when values have been added successfully.
Restore the database
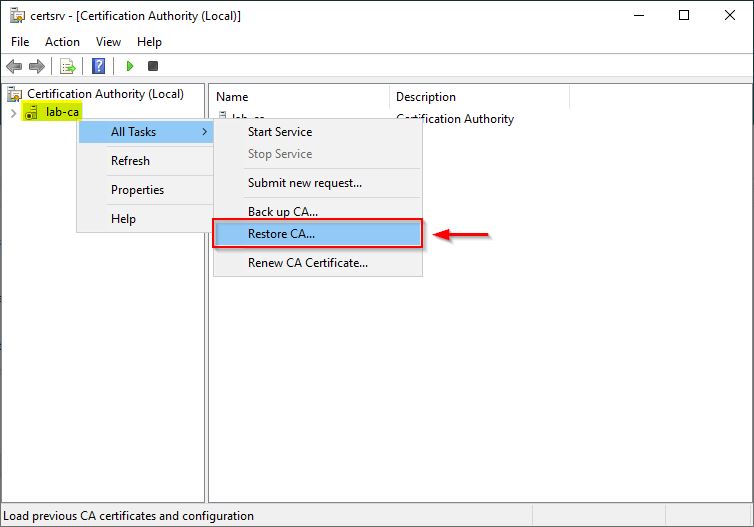
Open the Certification Authority manager and right click the CA name and select All Taks > Restore CA.
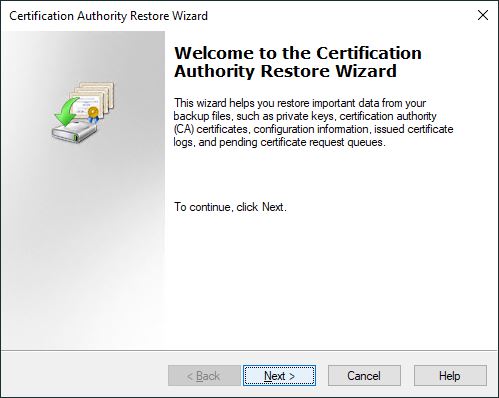
The Certification Authority Restore Wizard opens. Click Next.
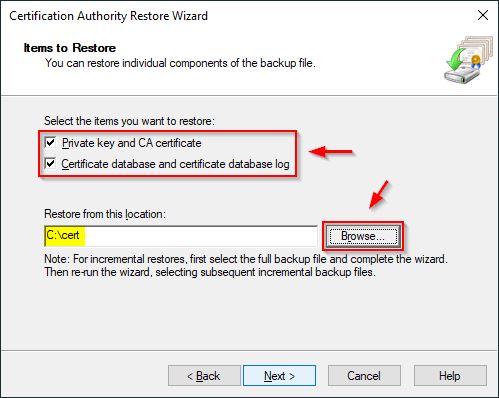
Select both Private key and CA certificate and Certificate database and certificate database log options. Click Browse and select the location where the database is located then click Next.
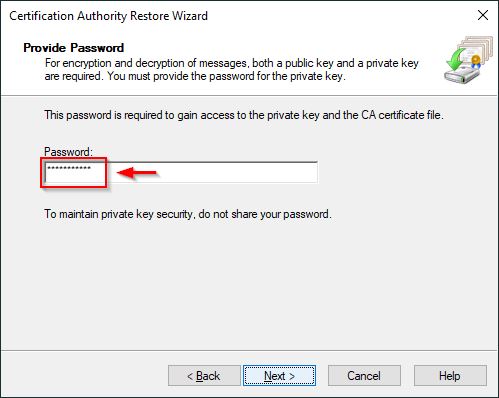
Enter the Password to gain access to the private key and click Next.
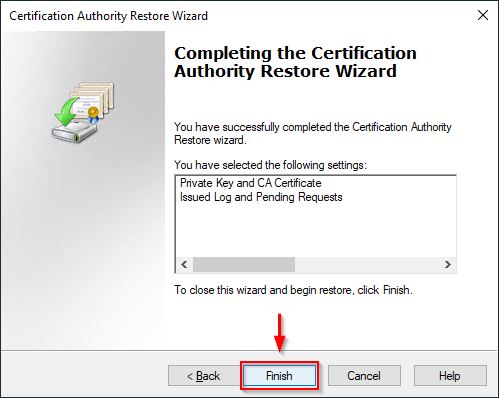
Click Finish to restore the database.
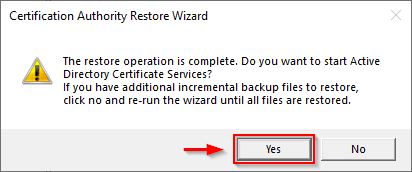
Click Yes to start Active Directory Certificate Services.
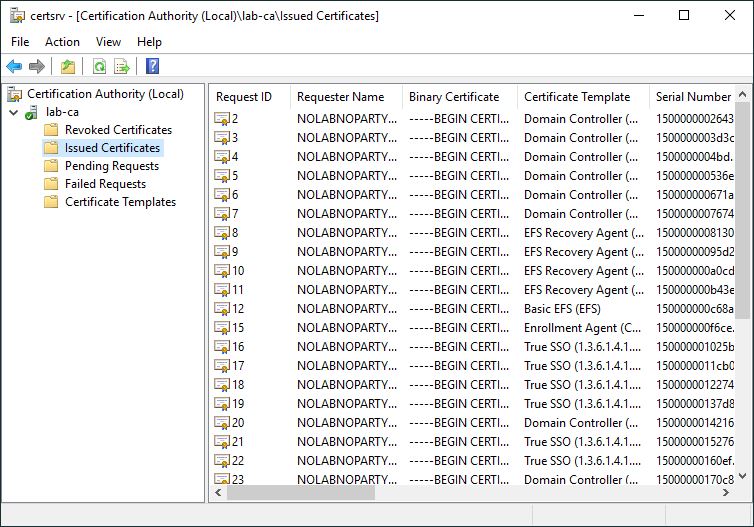
The migrated Root CA is now fully working with all data migrated from the old CA.
Once the migration of the Certification Authority has been completed, the old CA server can be safely dismissed.


