Introduction
In part 1 of this blog series, we became familiar with IBM i, its naming history, and configured StarWind VTL iSCSI Target. In this part, we will see how to make an actual backup from our IBM i server to StarWind VTL. Remember, we have a separate IBM i 7.5 server and a separate Windows Server 2019 machine with StarWind VTL installed. You can also see my simple setup on the diagram below.
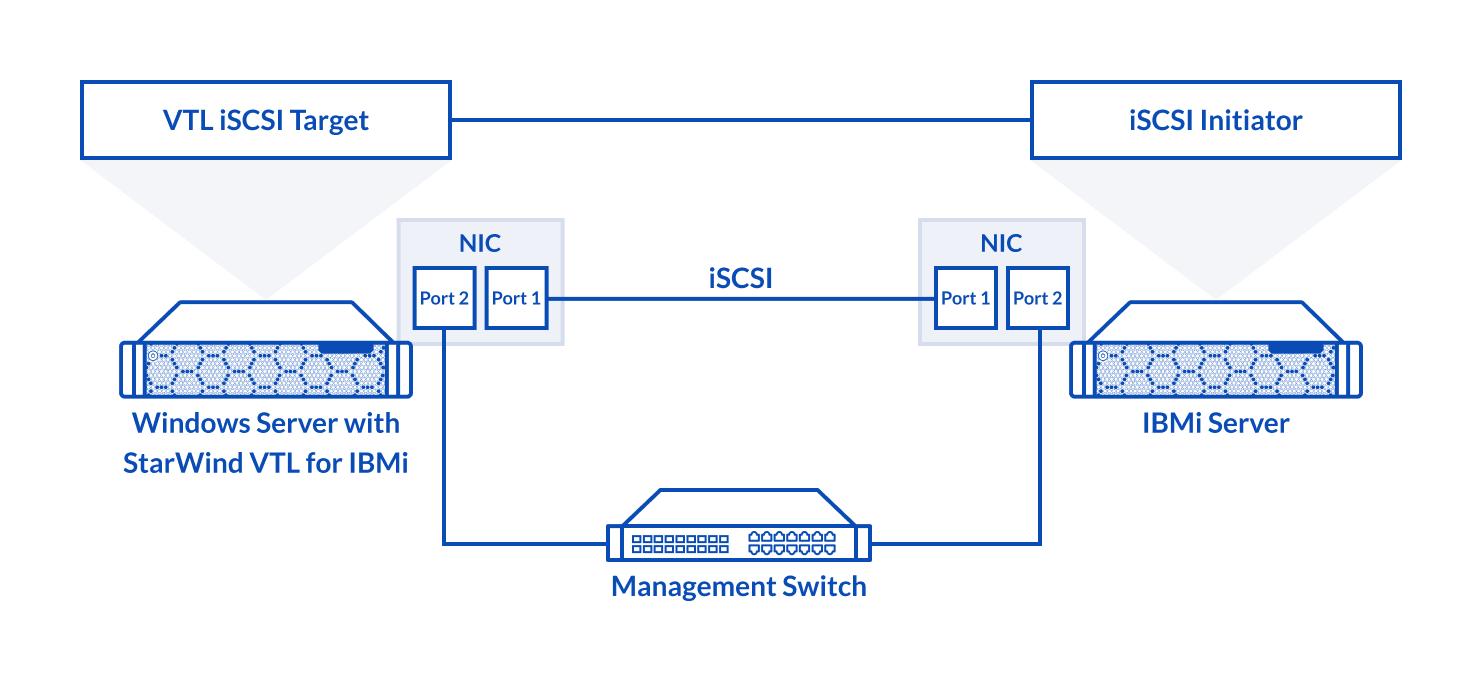 IBM i is great in that it doesn’t need any additional backup software to perform a backup. It has its own native backup capabilities already embedded and we will look how to use them.
Connecting StarWind VTL iSCSI target to IBM i iSCSI Initiator
So fitst thing we need to do is connect StarWind VTL target over iSCSI to IBM i. The iSCSI target can be connected using the IBM Navigator for i which has a modern WEB UI, but it’s not avaiable on older IBM i systems. So, I’m gonna use SQL commands for this.
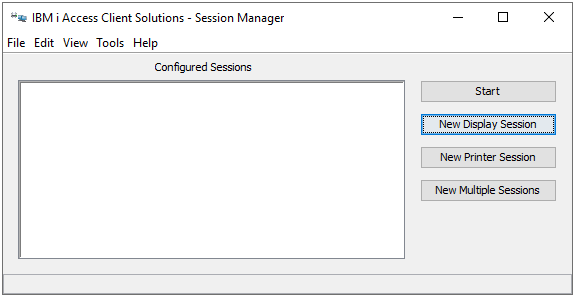
I will need an IBM i Access Client for this. Once it’s installed and running, open the New Display Session.
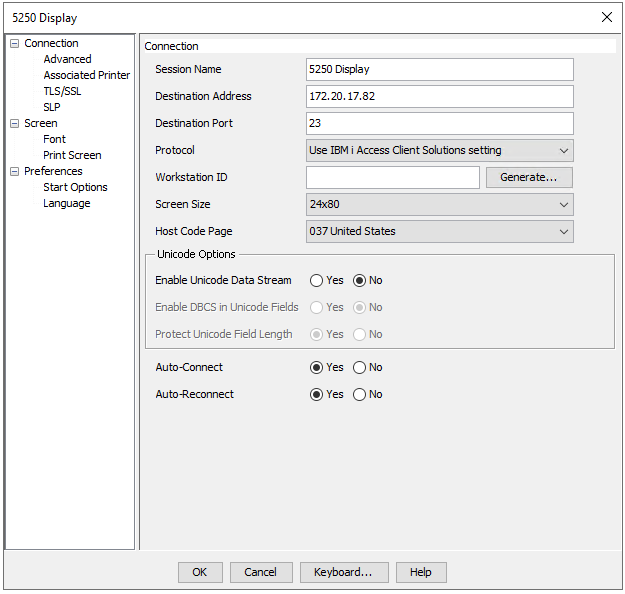
I’m just specifying the IP adress of my IBM i server and leaving the defaults for the rest here, but these can, be changed as per your environment requirements.
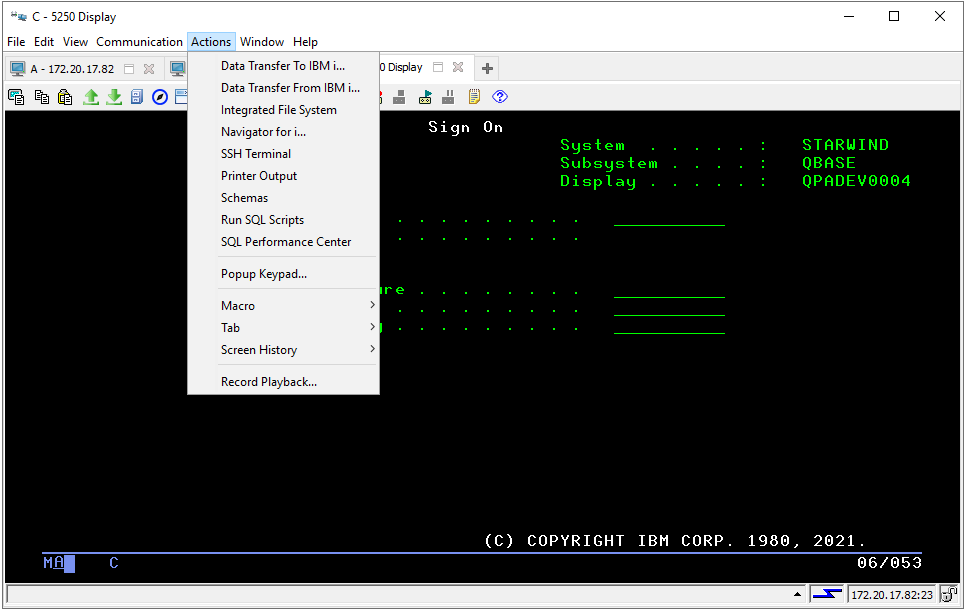
Now, once the display session is running, we’ll need to navigate to the “Actions” tab and select “Run SQL Scripts”.
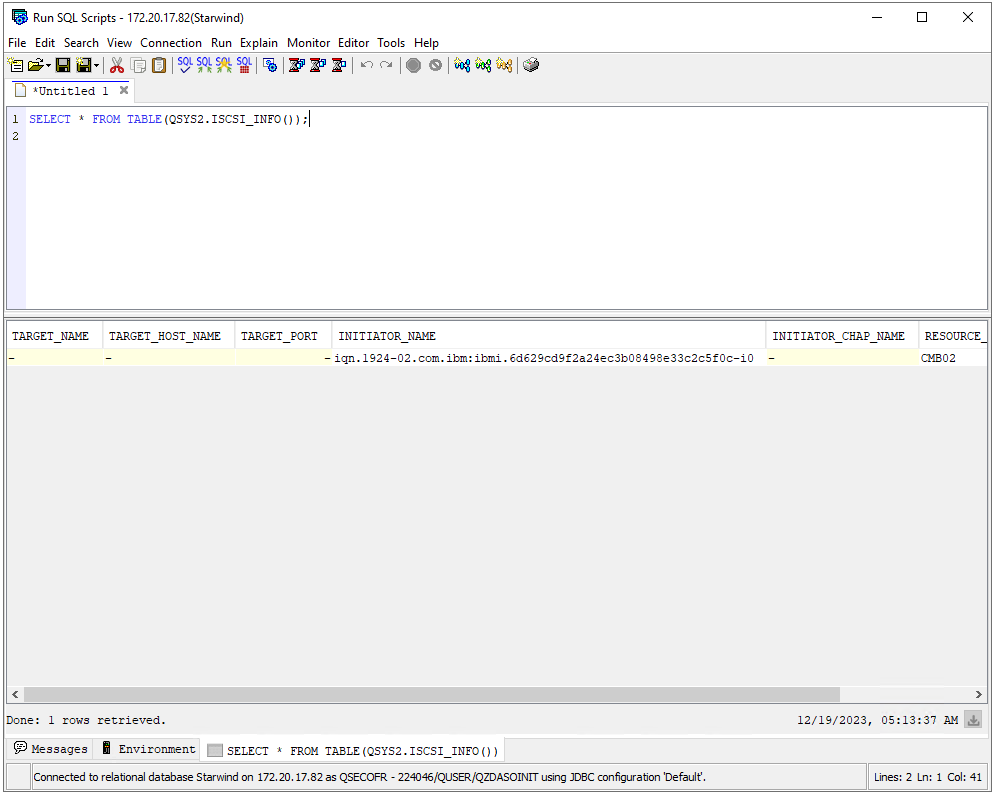
The first thing we need to know is the IQN name of the initiator on our IBM i server. To get this info, I’m using the following command:
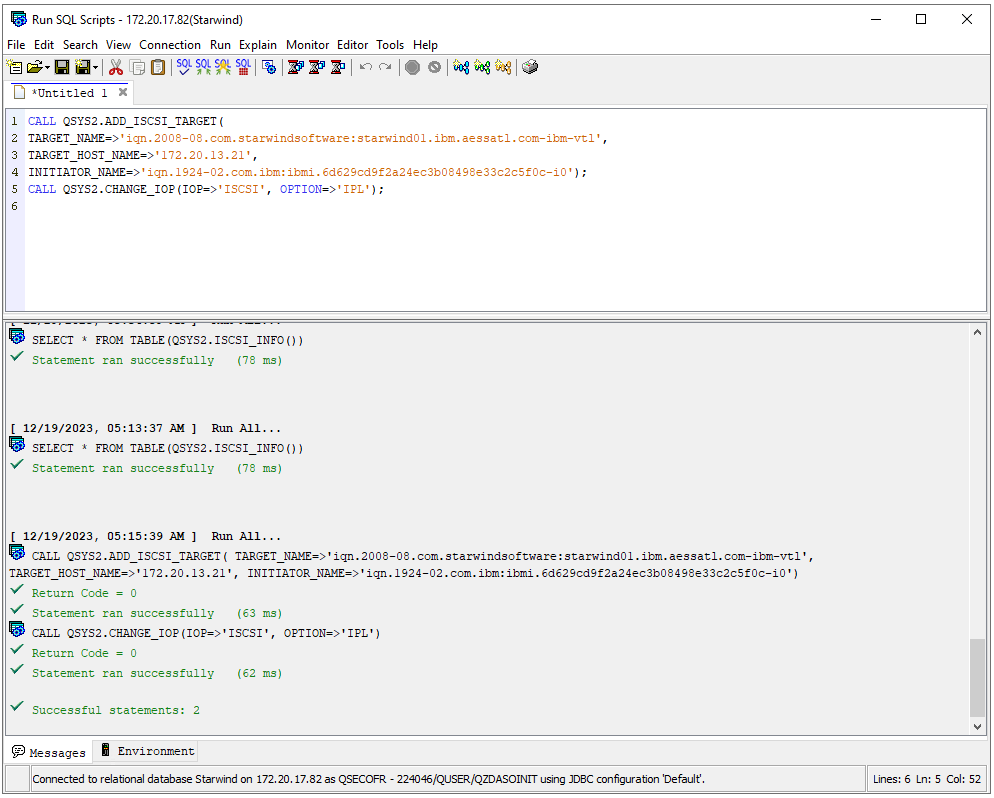
SELECT * FROM TABLE(QSYS2.ISCSI_INFO());Once we know the initiator name, we can actually connect StarWind VTL iSCSI target. For this, I’m using the following commands and running them all:
CALL QSYS2.ADD_ISCSI_TARGET(

TARGET_NAME=>' StarWind VTL target name',

TARGET_HOST_NAME=>'StarWind VTL target host IP address',

INITIATOR_NAME=>'IBM I initiator name');

CALL QSYS2.CHANGE_IOP(IOP=>'ISCSI', OPTION=>'IPL');
As you can see, I specify the target IQN, target host IP address and initiator IQN and then change IOP to iSCSI and perform Initial Program Load (IPL).
Adding and initializing StarWind VTL on IBM i server
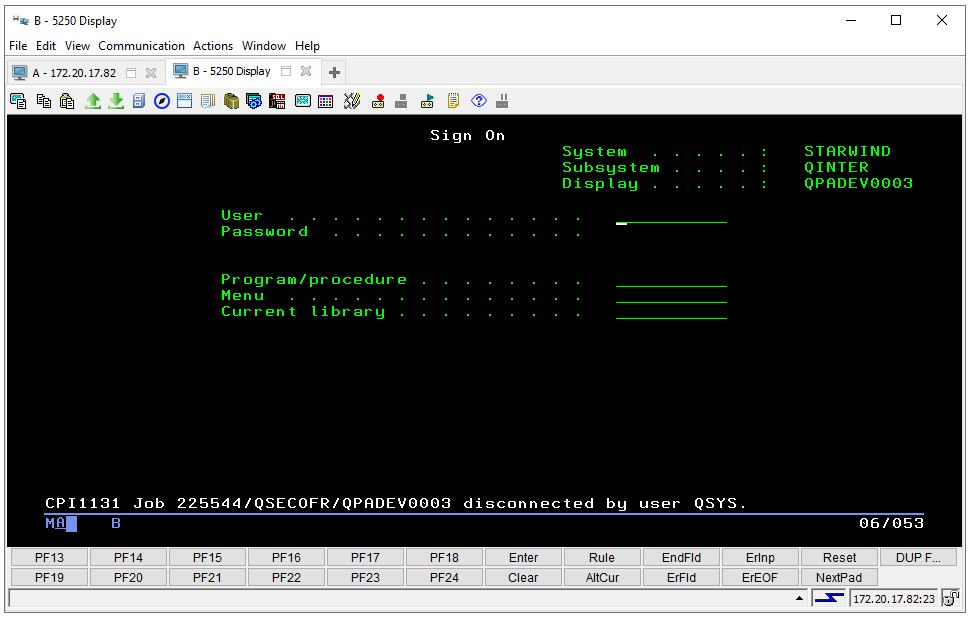
Now, let’s log into the IBM i server using the same IBM i Access Client.
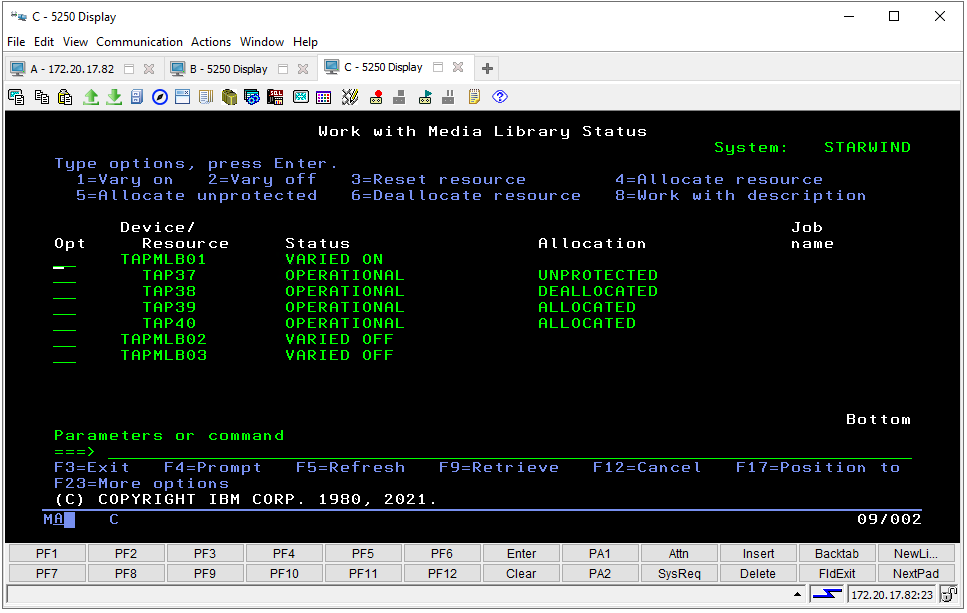
Once we’re in the main menu, we need to make sure that StarWind Virtual Tape Library and tapes are seen by the IBM i server. For this, we can use the following command:
WRKMLBSTSWe can see that StarWind VTL is presented as “TAPMLB01” with four default slots. It has a status of VARIED ON, and the first tape slot “TAP37” is the one with StarWind tape with barcode “SWIBM1”.
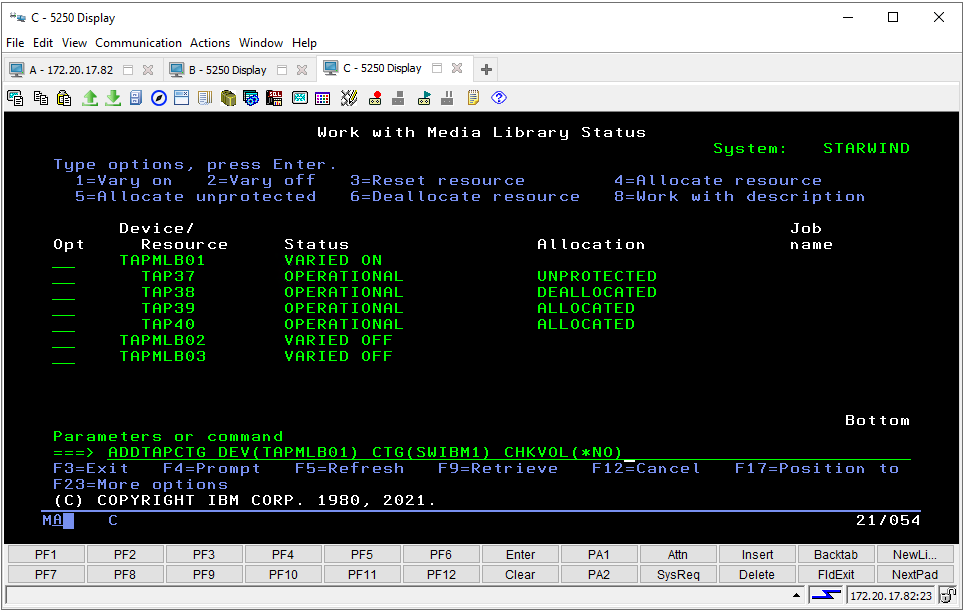
Next, I need to add a tape cartridge to a usable category. For this, I use the ADDTAPCTG command. ADDTAPCTG basically adds the specified cartridge identifiers to a usable category. For example:
ADDTAPCTG DEV(Library device) CTG(Cartridge ID) CHKVOL(*NO)Here, DEV represents the tape library (TAPMLB01) and CTG represents the StarWind tape barcode (SWIBM1). I also do not use the volume identifier check.
You should get the output “1 cartridges added”. Alternatively, you can simply type and execute ADDTAPCTG command and fill in all the required fields.
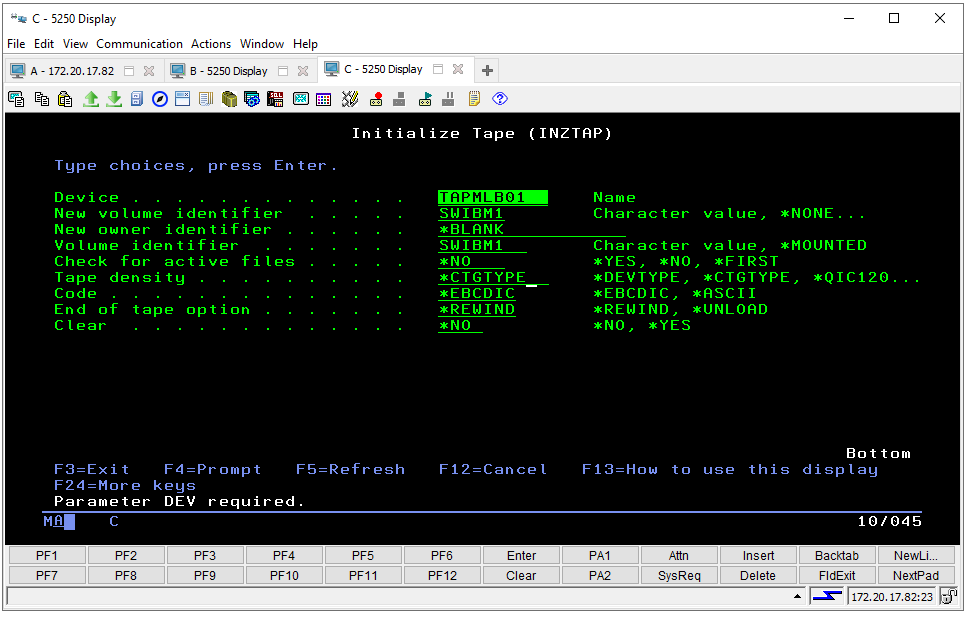
Now I need to initialize StarWind VTL tape for use on the system. For this, I use the INZTAP command. This command is used to initialize a tape with a standard volume label for standard label magnetic tape processing, or to initialize a tape with no labels.
As an example, the command looks like the following:
INZTAP DEV(Library device) NEWVOL(Cartridge ID) VOL(Volume identifier) CHECK(*NO) DENSITY(Tape density)Here, under DEV, I specify the tape library (TAPMLB01), under NEWVOL, the StarWind tape barcode (SWIBM1) and under VOL – preferred volume name or “MOUNTED”.
Since the number of characters in the text string is limited, I will just run the INZTAP command and fill in all the required fields.
Once executed, we will see that the output of volume “SWIBM1” has been prepared for operation.
Backup IBM i to StarWind VTL
Now, it’s time to run a test backup. There are several options for running the backup. Depending on what is required to backup (libraries, files, or objects), proper commands like “SAVLIB” can be used to backup the selected libraries, or just use the “GO SAVE” command and then select from the list of options.
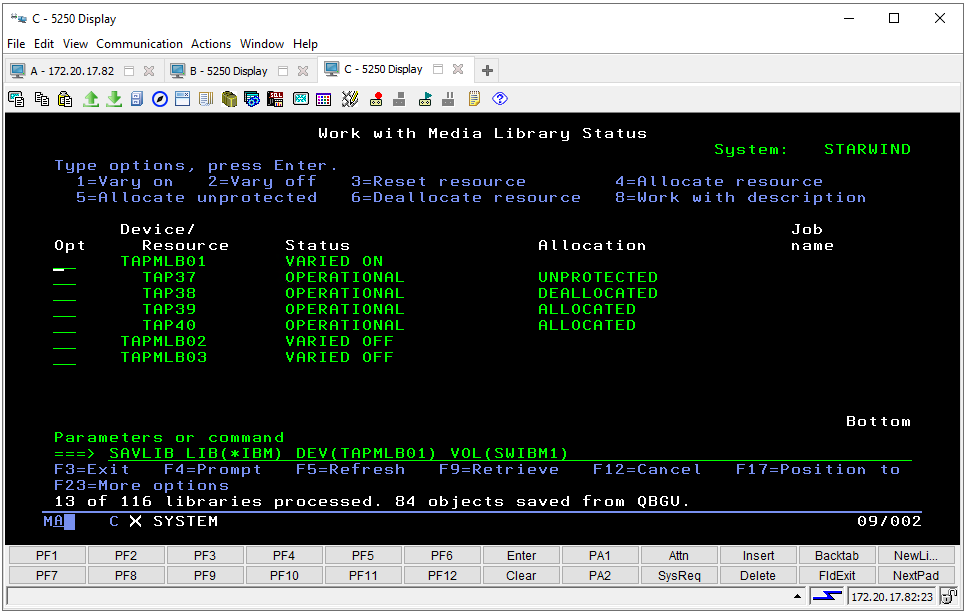
I will just use the SAVLIB command to backup IBM library which basically contains all IBM-supplied libraries that do not contain user data. The command will look as follows:
SAVLIB LIB(*IBM) DEV(TAPMLB01) VOL(SWIBM1)Once I execute the command, we can see that the backup is running as well as monitor the number of libraries processed, and the number of objects saved.
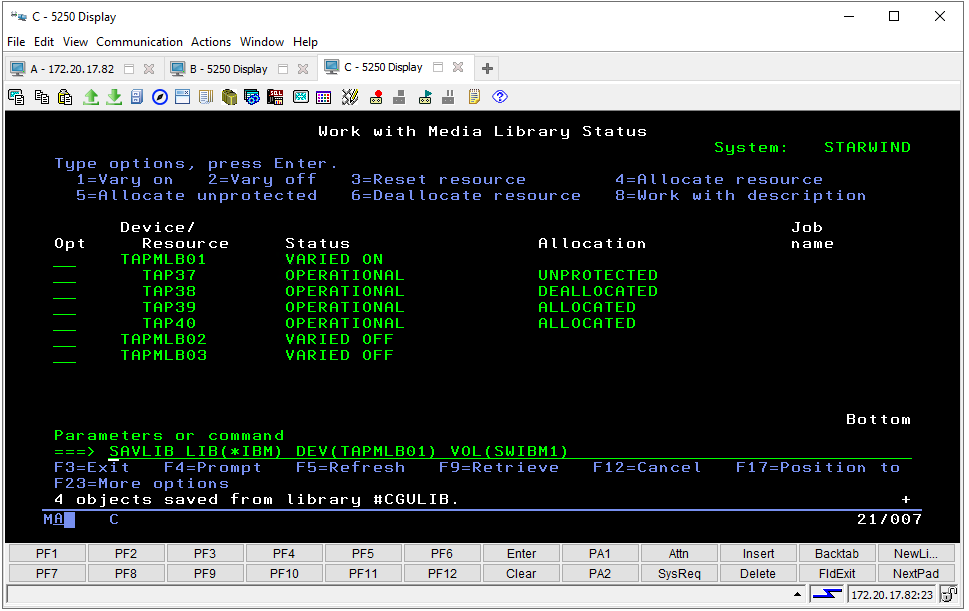
And finally, we can see that the backup has finished.
We can also see that around 7.7GB were written to StarWind tape under “Size Used”.
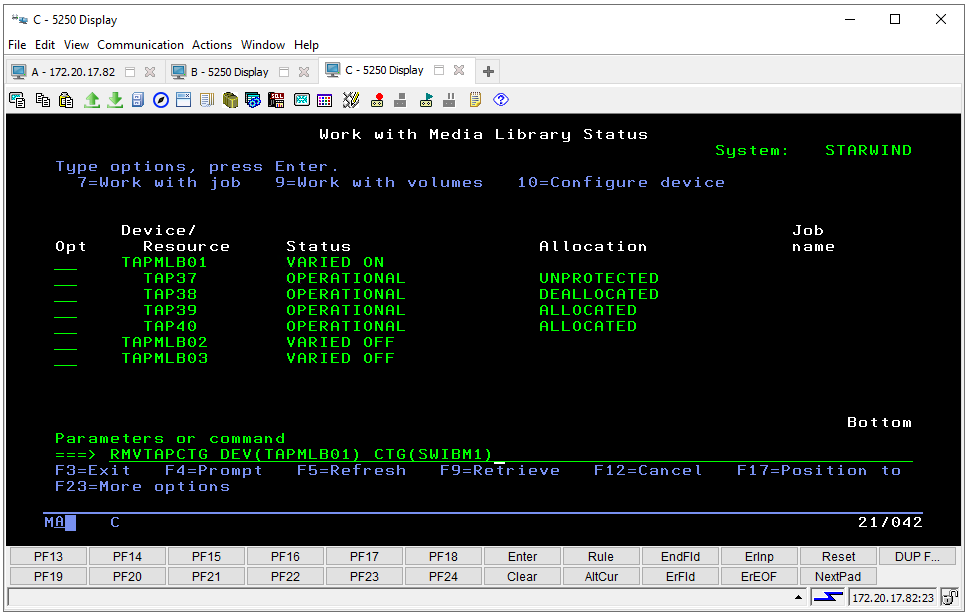
Further, I export the tape. For this, I use the “RMVTAPCTG” command. For example, RMVTAPCTG DEV(Library device) CTG(Cartridge ID). Here, DEV represents the tape library (TAPMLB01), and CTG represents the StarWind tape barcode (SWIBM1).
Once executed, we get the confirmation from IBM i server that one cartridge has been removed.
Export serves as a trigger for StarWind VTL to move the tape to the virtual offline shelf. We can check this in StarWind Management Console.
StarWind Management Console shows that the tape is on the offline shelf, local storage, and replication to the cloud has not been scheduled. Replication can be scheduled for the existing Virtual Tape Library or for a new one, and we’ll take a look at how to do this in the final part.
Conclusion
In this part of our blog post series, we have learned how to connect StarWind VTL iSCSI target to IBM i servers, how to add tapes and initialize, and how to perform an actual backup using native IBM i capabilities. In the next part, we will see how to configure cloud replication for StarWind VTL to automatically offload tapes to public cloud storage.
This material has been prepared in collaboration with Asah Syxtus Mbuo, Technical Writer at StarWind.


