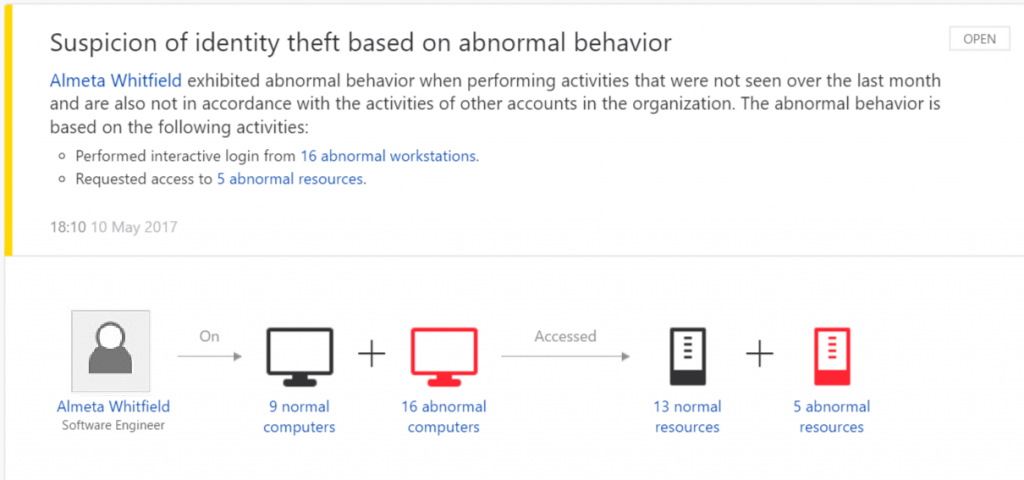
We have been talking on this blog before about the importance Microsoft and the rest of cloud providers are giving to security features and products in the last couple of years. The well-known security incidents present in the industry just in 2017 generated to companies billions in a loss, hence a large number of releases from Microsoft to face these incidents and, above all, provide calm to their customers around the cloud.
Microsoft Advanced Threat Analytics (ATA) combines several of the latest security enhancements. In this article, we will review how to connect the ATA platform to Azure, guaranteeing a reliable monitoring.
What is Advanced Threat Analytics?
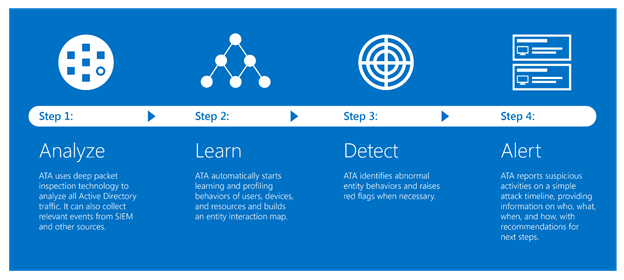
ATA is an on-premises platform that can be implemented in organizations to detect abnormal behavior around activities related to user authentication and authorization. ATA collects data from the network (port mirroring from Domain Controllers or using a gateway in the DCs), parses the logs and events, analyses the data and generates reports about potential malicious activities in the network.
Microsoft says that 60% of all successful attacks rely on using compromised credentials. Therefore, ATA mainly focuses on collecting data from the authentication source in domains: Active Directory Domain Controllers. The main difference about ATA is that analyses several types of data, connects the dots between activities, logs and/or events, and using their engine, with machine learning capabilities, detects abnormal behavior or suspicious activities.
Connecting ATA with Azure
Most of the organizations have been or at least are currently exploring the alternatives around the hybrid cloud model, having some of the infrastructure components in the cloud is always the initial step. Securing this hybrid scenario will also be key; therefore, ATA will come handy for this requirement.
This is the step-by-step process to integrate Advanced Threat Analytics with Azure:
- Log on to the Advanced Threat Analytics (ATA) portal.
- Access the Syslog Server panel in the portal.

- In the Syslog server endpoint field, type 127.0.0.7, and type any unique port available in your network, usually, a good example is 5114 (similar than the default option used from MS). Click on Save.
- Click on Notifications and make sure all are enabled. Click on Save.

- Access to Azure Security Center dashboard.
- On the left pane, click Security Solutions.
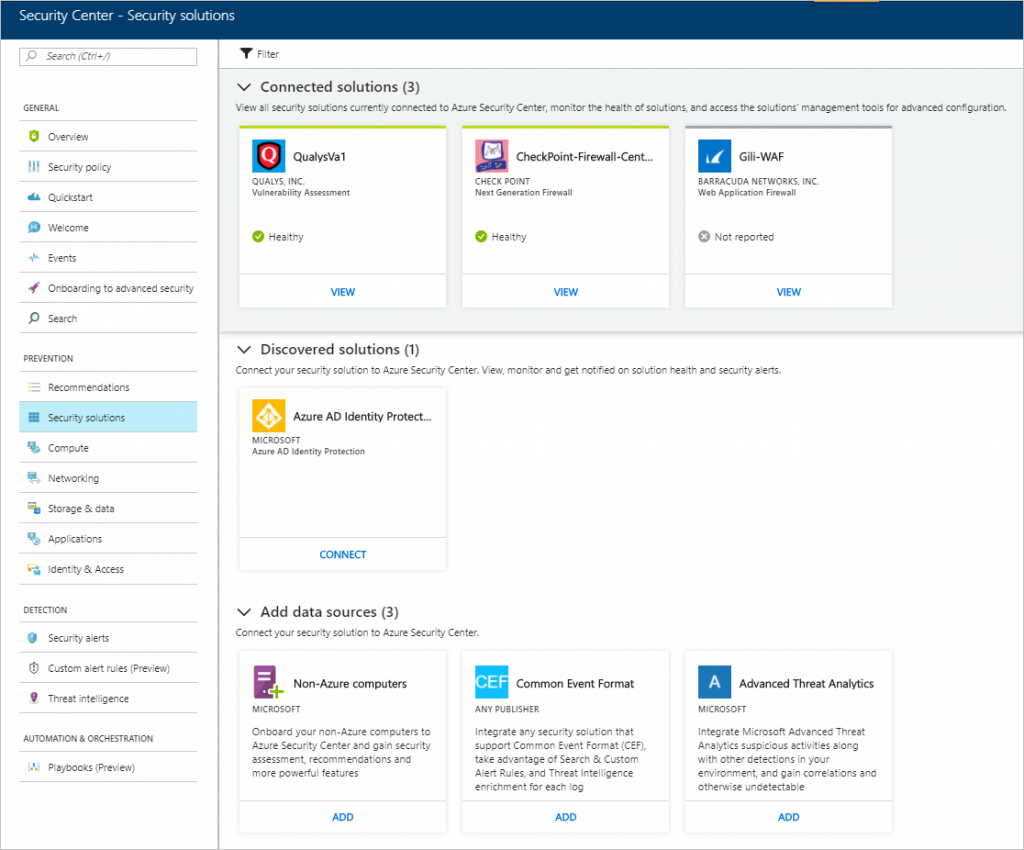
- Under Advanced Threat Analytics, click Add.
- Follow the steps and click Download agent.

- In the Add new non-Azure computer page, select the workspace.
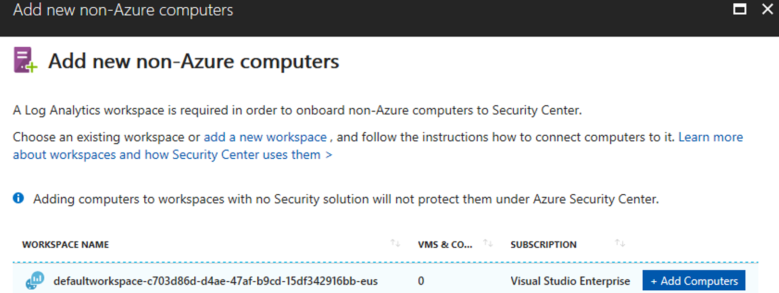
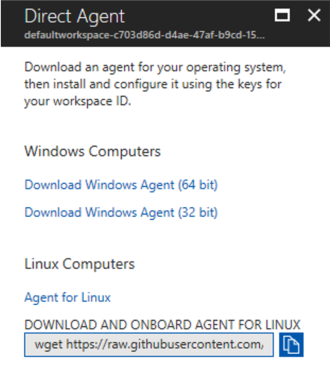
- In the Direct Agent page, download the appropriate Windows agent, and take notes of the Workspace ID and Primary Key that the panel will provide.
- Install the agent in the Advanced Threat Analytics Center. You need to select the option “Connect the agent to Azure Log Analytics (OMS)”, and provide the workspace ID and primary key from the previous step.
With that, the integration should be complete and you should be able to see Advanced Threat Analytics as a “Connected solution”.


