INTRODUCTION
Setting up a failover cluster is a thing that admins must do. To build such cluster, you need to configure shared storage. And, there are a lot of ways to do that. Today, I’d like to discuss how to build a Windows Failover Cluster using a virtual SAN solution (StarWind Virtual SAN) as a shared storage provider.
I believe virtual SAN’s to be a decent alternative for physical ones: they are far more flexible, easier to maintain, and cheaper (it is a very strong point for using such solution in a home lab). Furthermore, while deploying and configuring a virtual SAN so that everything will be running smoothly, you’ll gain hands-on experience which helps you a lot while working with real-life environments. Well, you can still use a NAS as a shared storage entity and Windows Server as a file server, but virtual SAN solutions are a thing of the future, IMHO.
Why do I use StarWind Virtual SAN today? First, it’s pretty intuitive and has good manuals on configuration and deployment. Just like any virtual SAN, StarWind’s solution allows building a highly available shared storage that is presented over iSCSI to the entire cluster. And, what is more important, I know how slow Microsoft iSCSI Target may be (that’s why I was looking for something better).
THE TOOLKIT USED
Here’s the host configuration:
- Dell PowerEdge R720, CPU 2 x Intel Xeon E5-2609 @ 2.40GHz, RAM 48GB DDR3
- Storage: 1 x HDD 300GВ, 2 x HDD 1TB
VIRTUAL HOST CONFIGURATION
Let’s take a look at virtual hosts’ configuration. Both Win19DS01 and Win19DS02 had identical settings:
- 4 Virtual CPU
- RAM 8GB DDR3
- 1 x HDD C: 30GВ
- 1 x HDD D: 200GB
THE SCOPE OF THIS ARTICLE
In this post, I don’t focus on boring stuff that you can read elsewhere (e.g., OS installation, setting up a domain, configuring the setup, etc.). I’ll keep things very short to discuss only the key moment for each step. If you need any help, look through the guides that I refer. Here’s what I am actually going to do today:
- Install VSAN and create virtual devices.
- Set up shared storage.
- Configure a failover cluster.
INSTALLING STARWIND VIRTUAL SAN
There is a bunch of ways how you can get StarWind Virtual SAN. You can download StarWind Virtual SAN here: https://www.starwindsoftware.com/download-starwind-products?product=hyperv#download. You can also request an NFR license for 1 year (find more at https://www.starwindsoftware.com/starwind-nfr-license-users). Or, you can request a trial version.
StarWind provides detailed guidelines for deploying and configuring VSAN for different scenarios. Here’s the manual used for this post: https://www.starwindsoftware.com/resource-library/starwind-virtual-san-hyperconverged-2-node-scenario-with-hyper-v-cluster-on-windows-server-2016.
I find it useless to rewrite their manual, so I mainly focus on key moments of StarWind virtual device (HA Device) creation.
StarWind virtual device creation
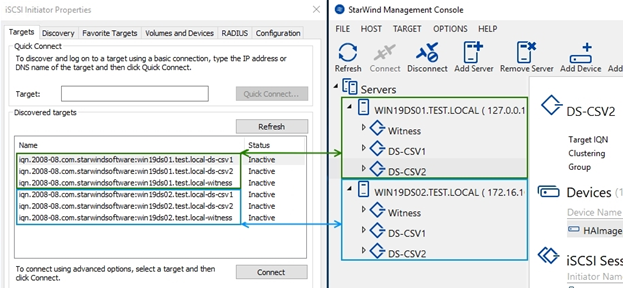
Please, set the clear names for virtual devices: this helps you while connecting them over iSCSI.
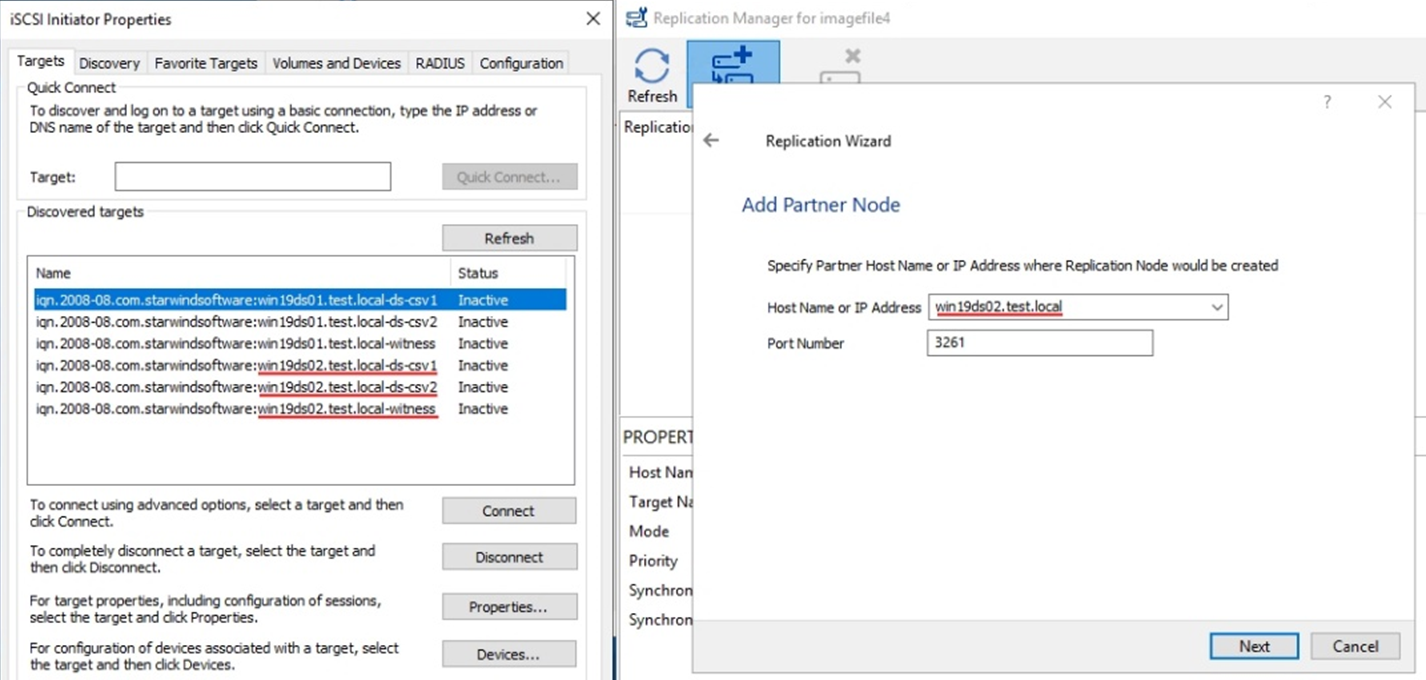
While creating the device replica, please, always enter the whole name of partner host! It will be easier for you to find out to which host you connected the disk.
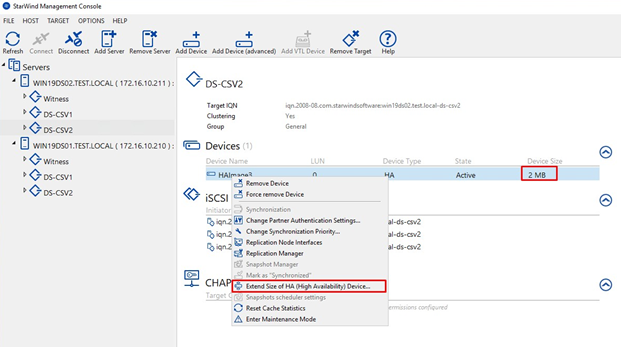
Now, I’d like to share a trick for creating a synchronously replicated device quickly. Create the smallest possible HA Device, set up replication, and extend it afterward! This life hack saves you some time that is typically needed to sync large disks.
CONNECTING THE VIRTUAL DEVICE OVER ISCSI
Now, I’d like to discuss some key moments of connecting a virtual device over iSCSI.
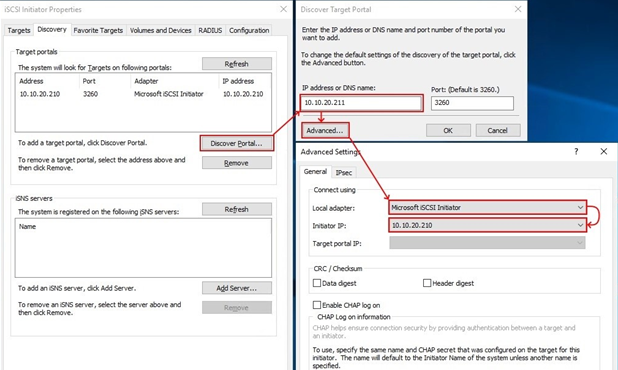
First, do not leave iSCSI Initiator properties as they are set by default. The thing is that iSCSI Initiator will scan through all available NIC’s whenever an iSCSI session starts instead of just checking the hard-set NIC. That’s why it is good to reserve a special adapter for iSCSI traffic.
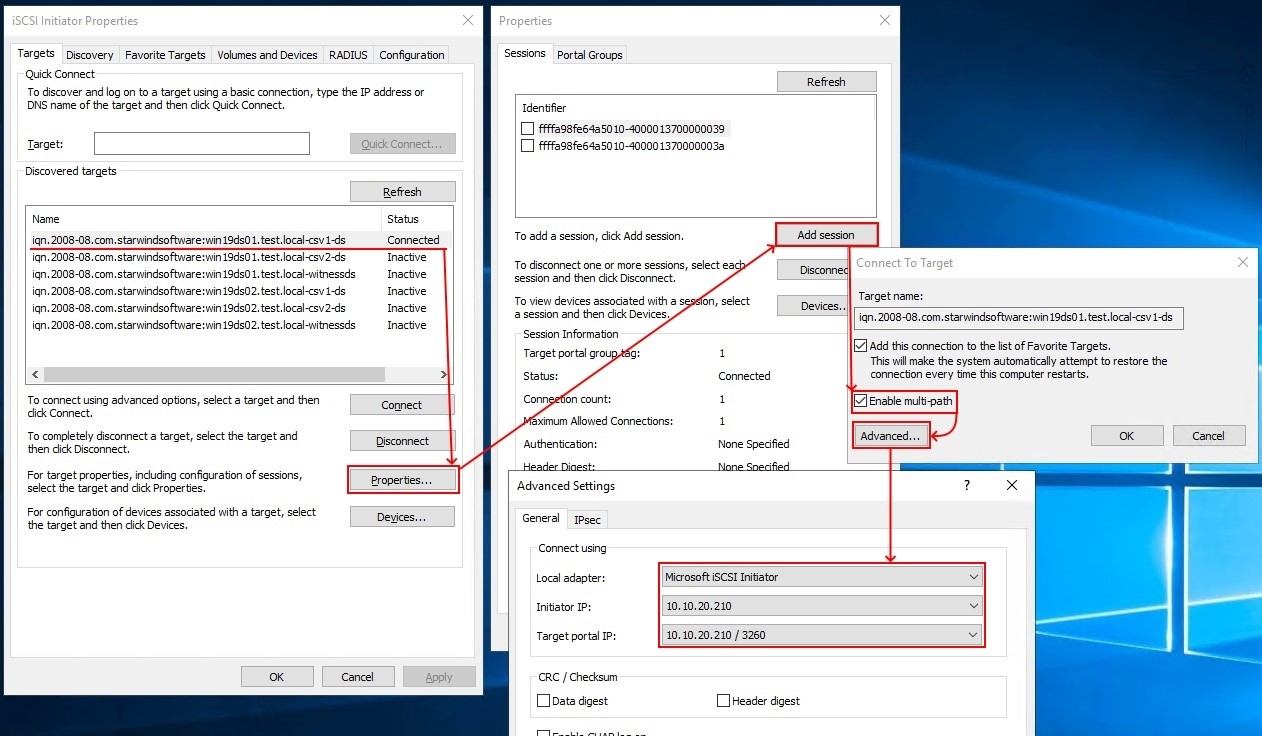
If you want to boost iSCSI performance, add the connection to the Favorite Targets and enable multi-path.
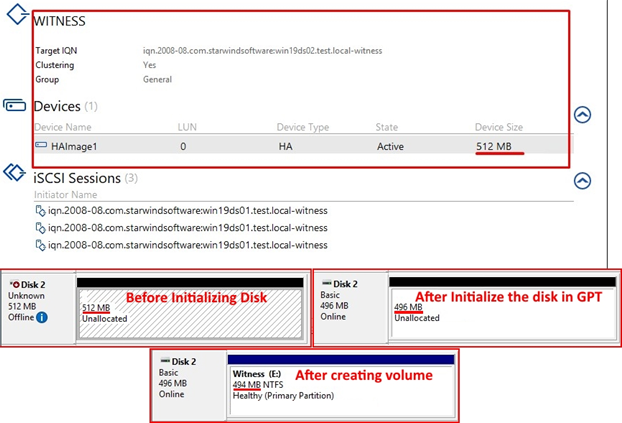
While creating a witness disk, set its size to +512MB (https://docs.microsoft.com/en-us/windows-server/failover-clustering/manage-cluster-quorum). Don’t create a 512MB disk. The thing is that disk free space may be less than 512MB after formatting.
SETTING UP THE CLUSTER
You need to set up time synchronization between hosts and domain controller. Before, I discussed how it can be done in detail: https://www.starwindsoftware.com/blog/hyper-v/configuring-time-synchronization-for-all-computers-in-a-windows-domain/. You can do that manually or using cmdlets:
w32tm /resyncCheck the NTP settings:
w32tm /query /status
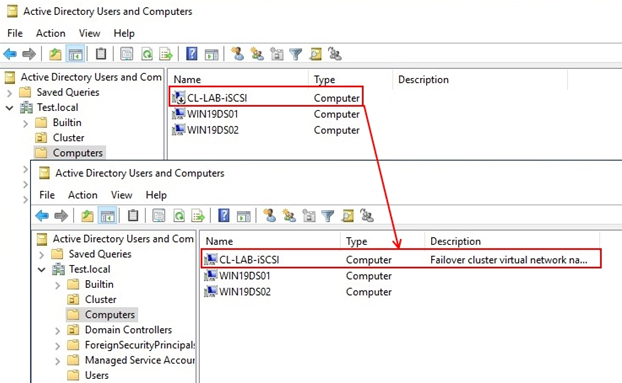
Before you create the cluster, it’s good to reserve the name for it. Create an Active Directory Users and Computers entry and disable it. While creating the cluster, the wizard will activate that entry and add the description.
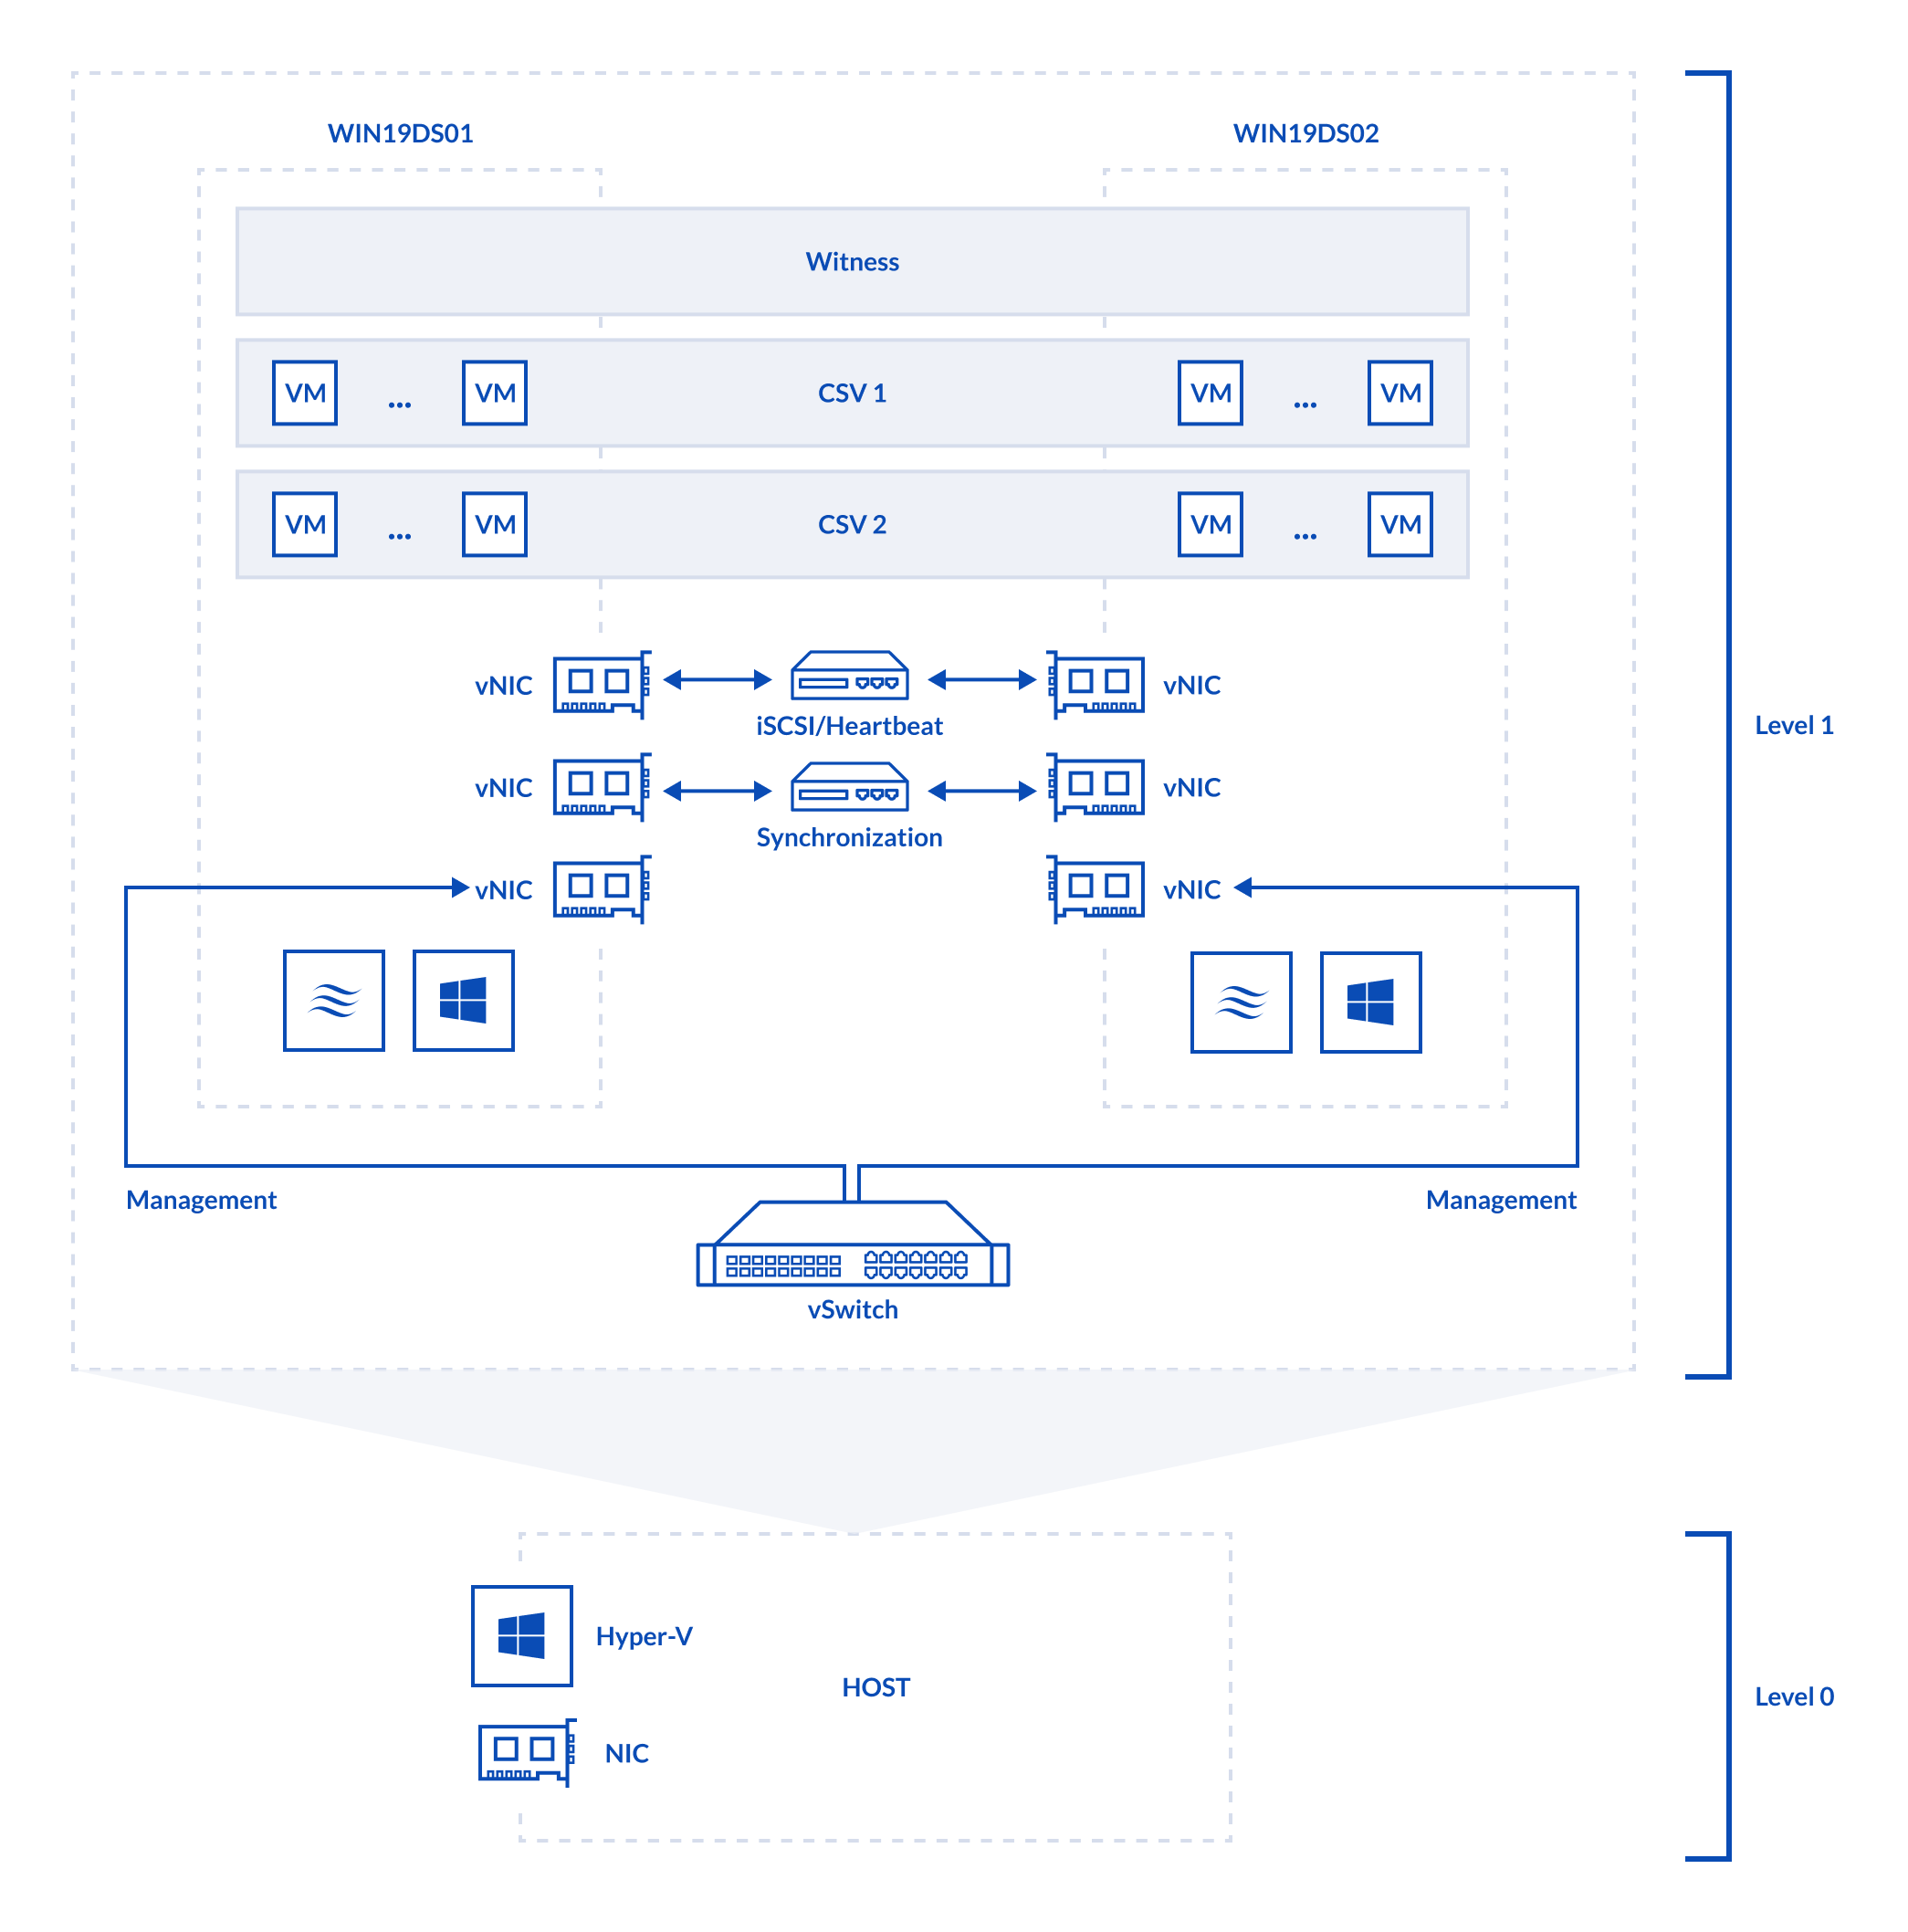
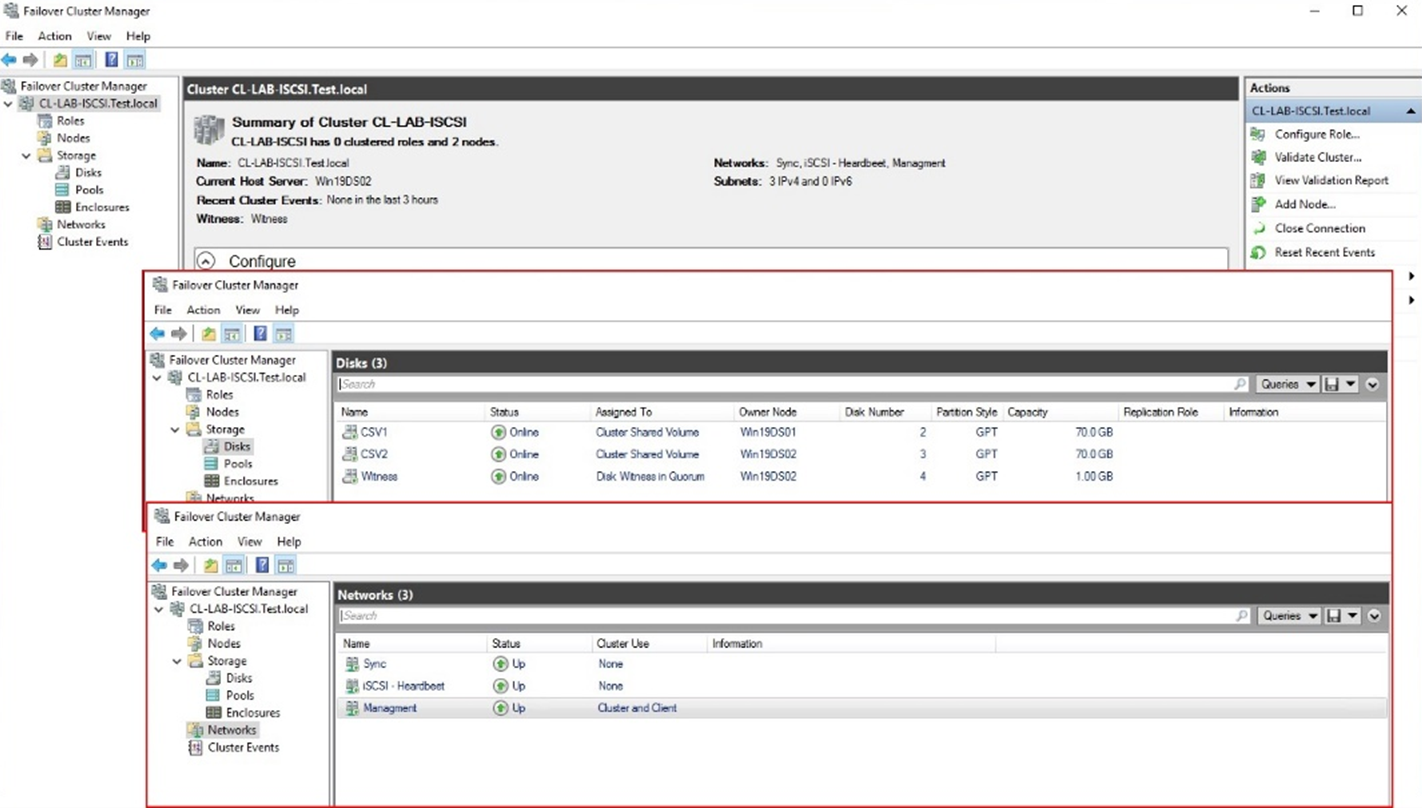
Here’s how my test environment looked like after connecting everything and setting up the cluster.
CONCLUSION
Configuring a failover cluster may seem a bit complicated for ones who do it for the first time. Well, if you follow the guides, everything will be quickly and easy. Thanks to awesome manuals from Microsoft and StarWind, this process took me around 2 hours in total.
Sorry for keeping things that short. I just find it useless to rewrite things that one can easily learn from guides; I believe that mentioning some key moments should still be OK (anyway, if you have any questions, ask me in comments).


