What is Azure Data Share?
Azure Data Share helps you to simply and safely share your data from multiple sources with other organizations. Easily control what you share, who receives your data, and the terms of use. There is no infrastructure to set up or manage, and Data Share uses managed identities for Azure resources and integrates with Azure Active Directory (AAD) to manage credentials and permissions.
How Does Azure Data Share Work?
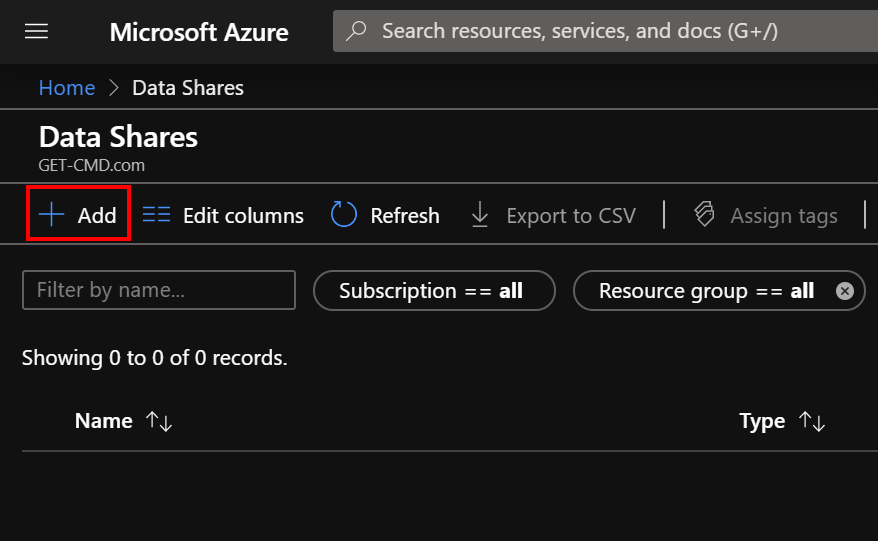
Let’s start by opening Azure Portal and then going to the “Data Shares” service.
Click “Add” to create your first Data Share
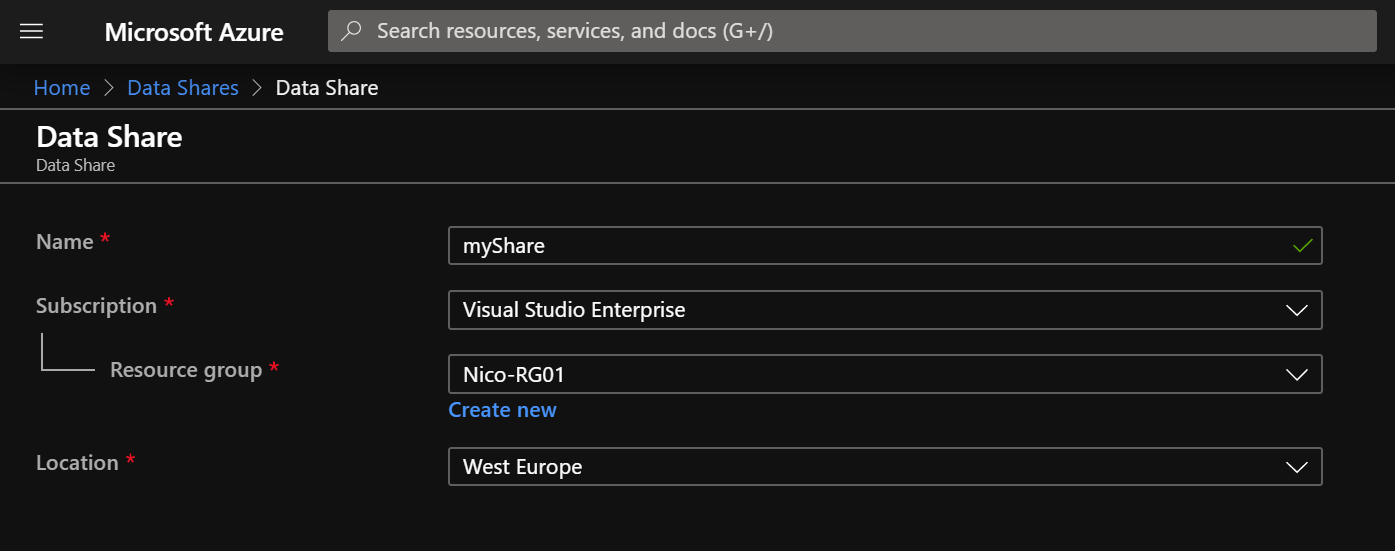
In order to create the share, enter the required information such as:
- A friendly name
- Azure subscription
- The Resource Group where the share will be located
- The location
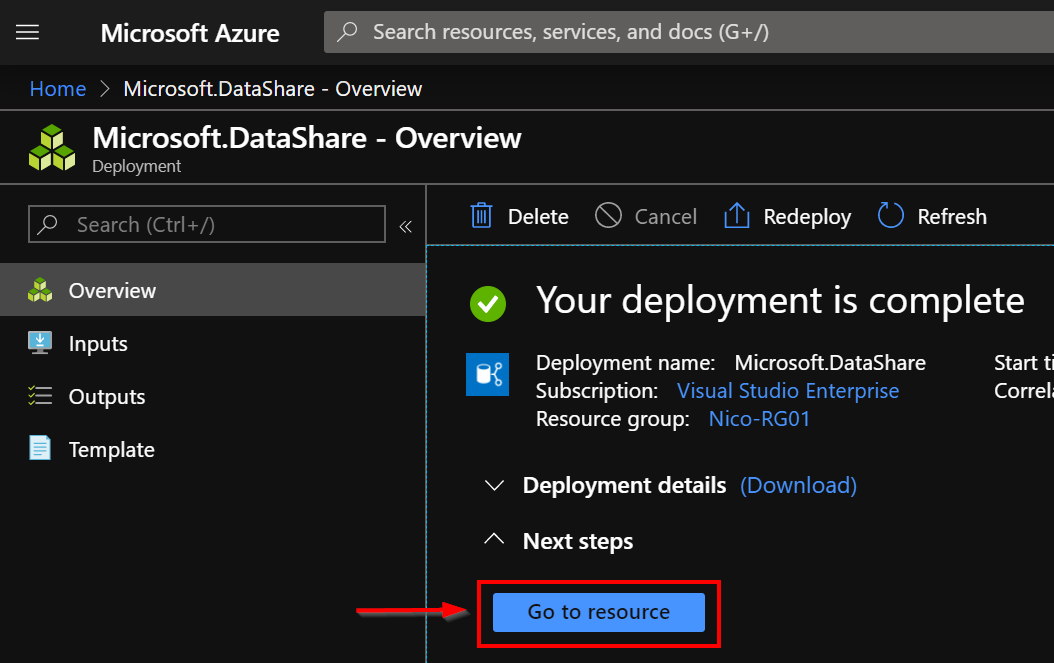
Wait until the deployment is done and click “Go to resource”
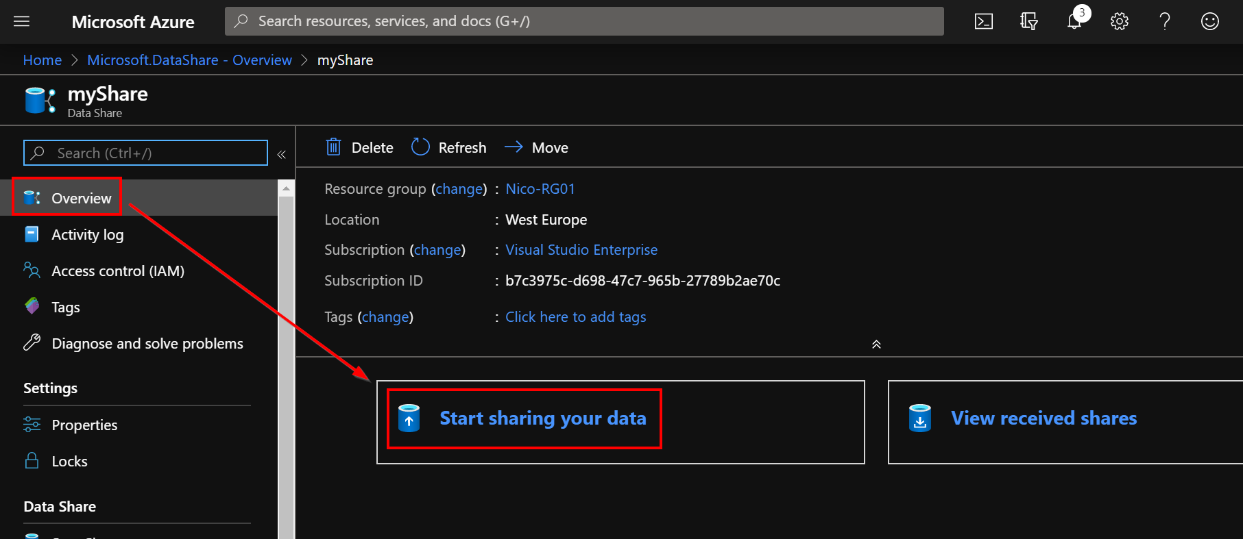
First, we will create the “Data Share”, so click “Start Sharing your data”
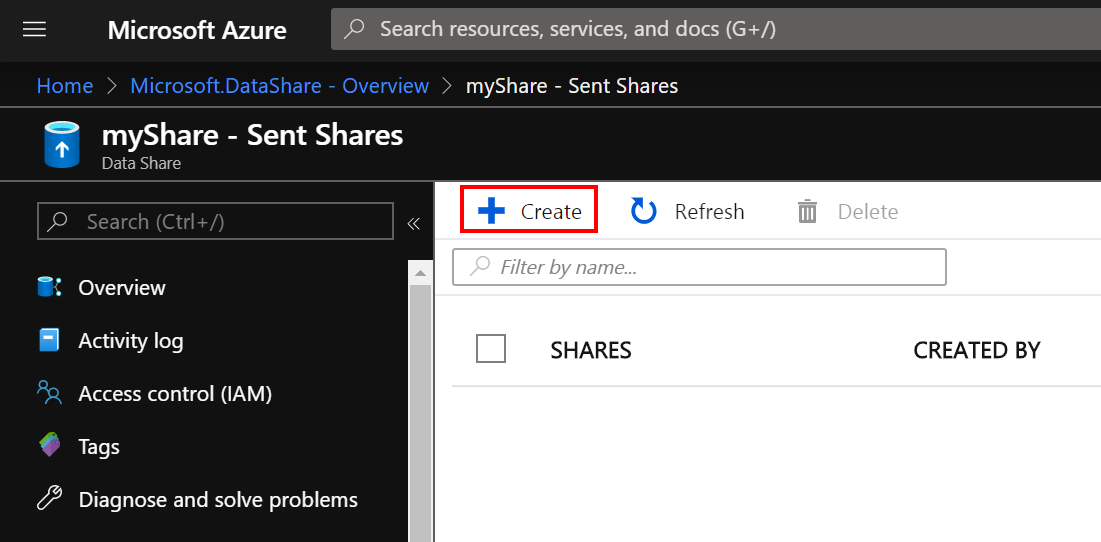
Click “Create” to open the following wizard
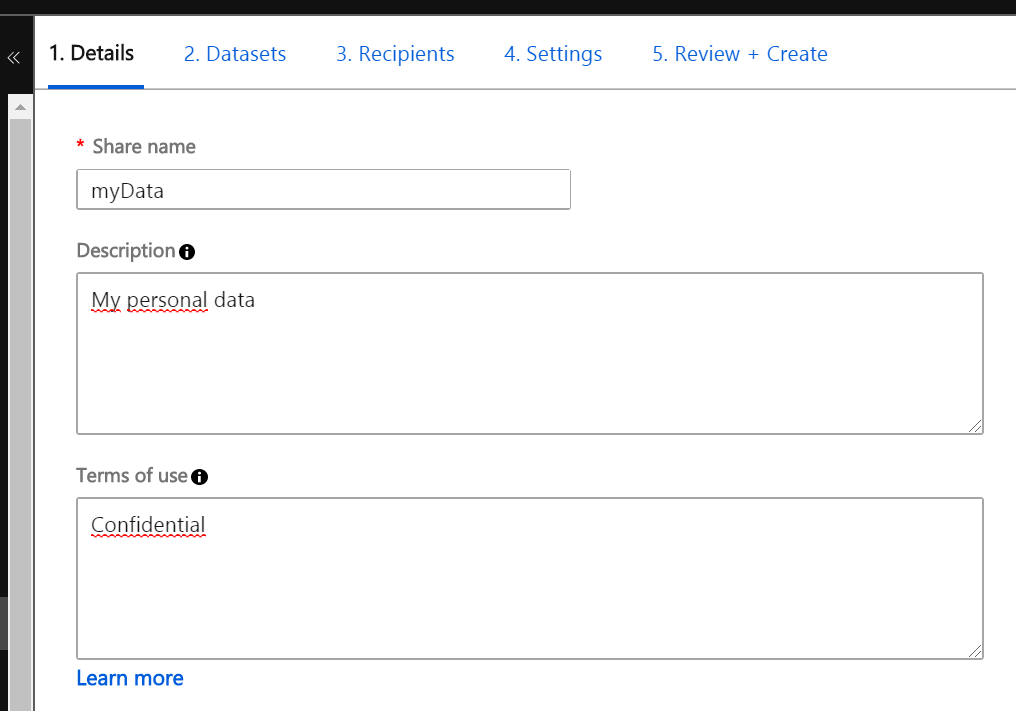
In the first window, we will enter the general information such as:
- Name
- Description
- Terms of use
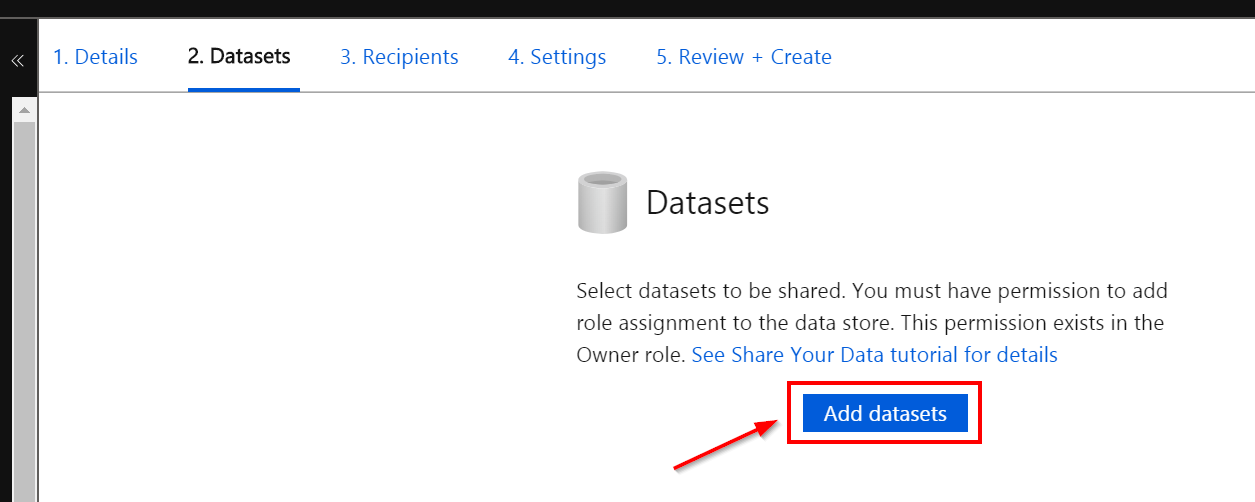
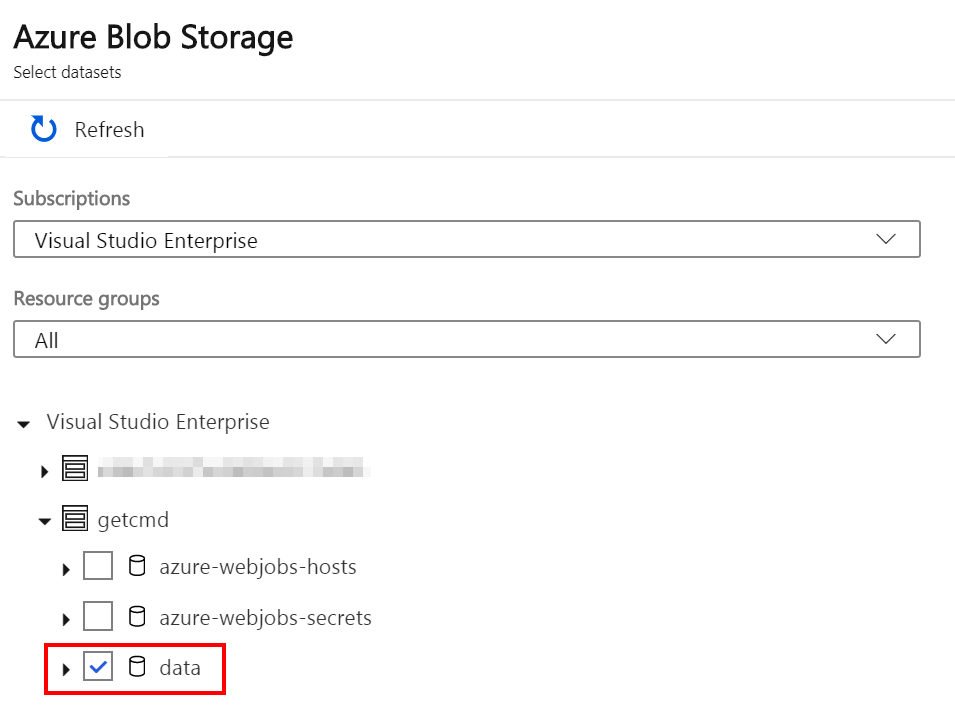
In the second window, we must add a dataset
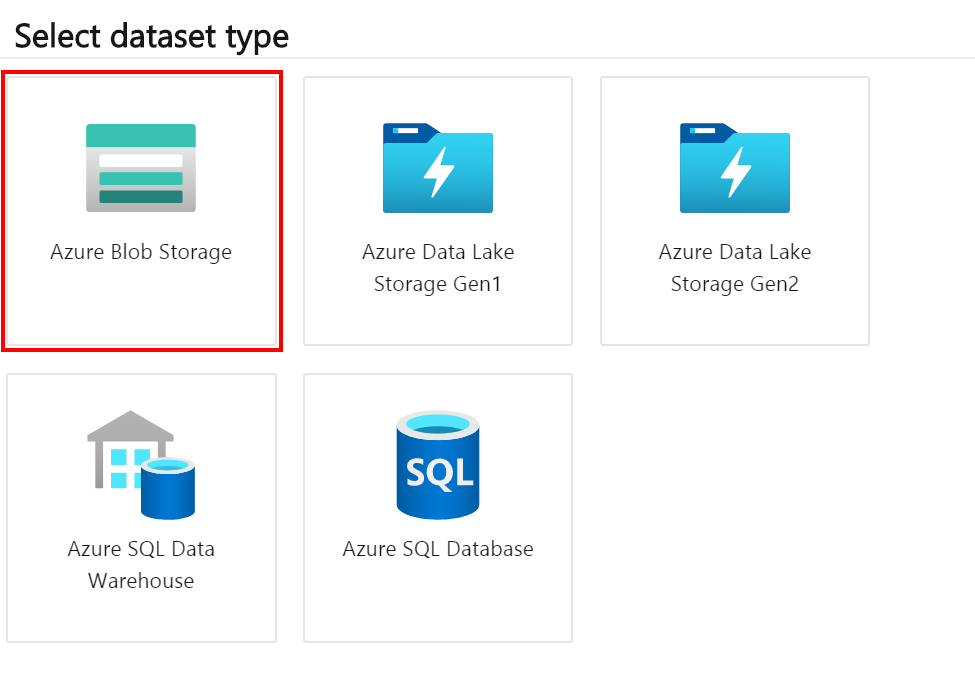
A new window appears to select which dataset you want. Data Share supports data sharing to and from:
- Azure Synapse Analytics,
- Azure SQL Database,
- Azure Data Lake Storage,
- Azure Blob Storage,
- and Azure Data Explorer.
Data Share will support more Azure data stores in the future.
In this guide, I chose Blob Storage, so I must select which blob storage will be used
I need to provide a name for this dataset. Note that your recipients will see this name.
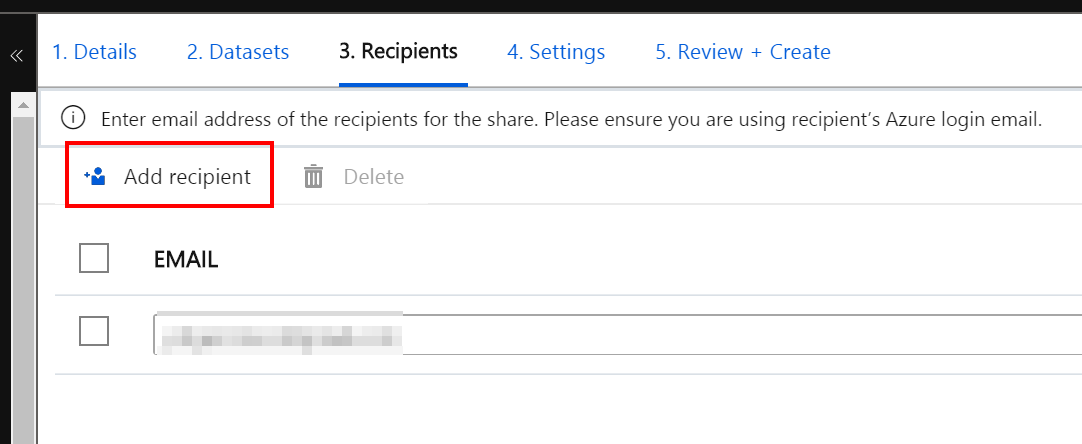
In the third window, enter the email address of the recipients. Be careful, your recipients must have an Azure account. Use their Azure login email in this section:
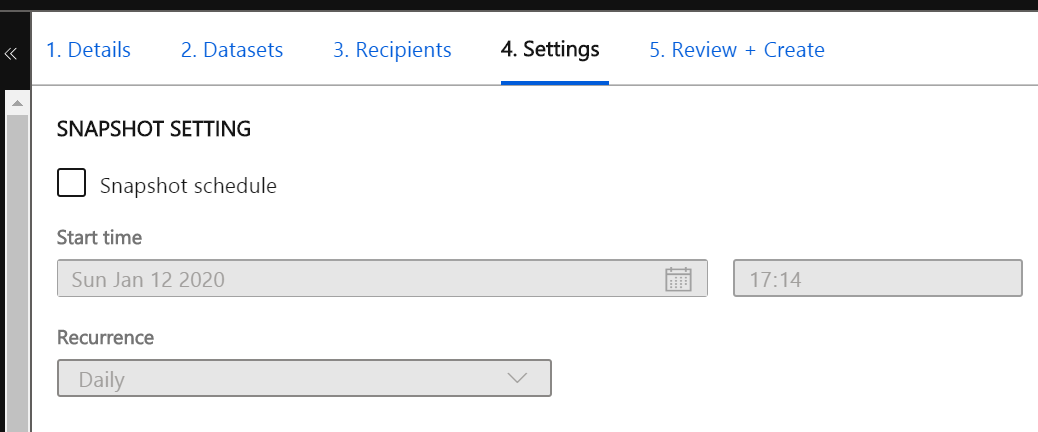
In the next window, you can enable snapshot on your data. If you enable snapshot, then your recipients will get incremental updates of your data.
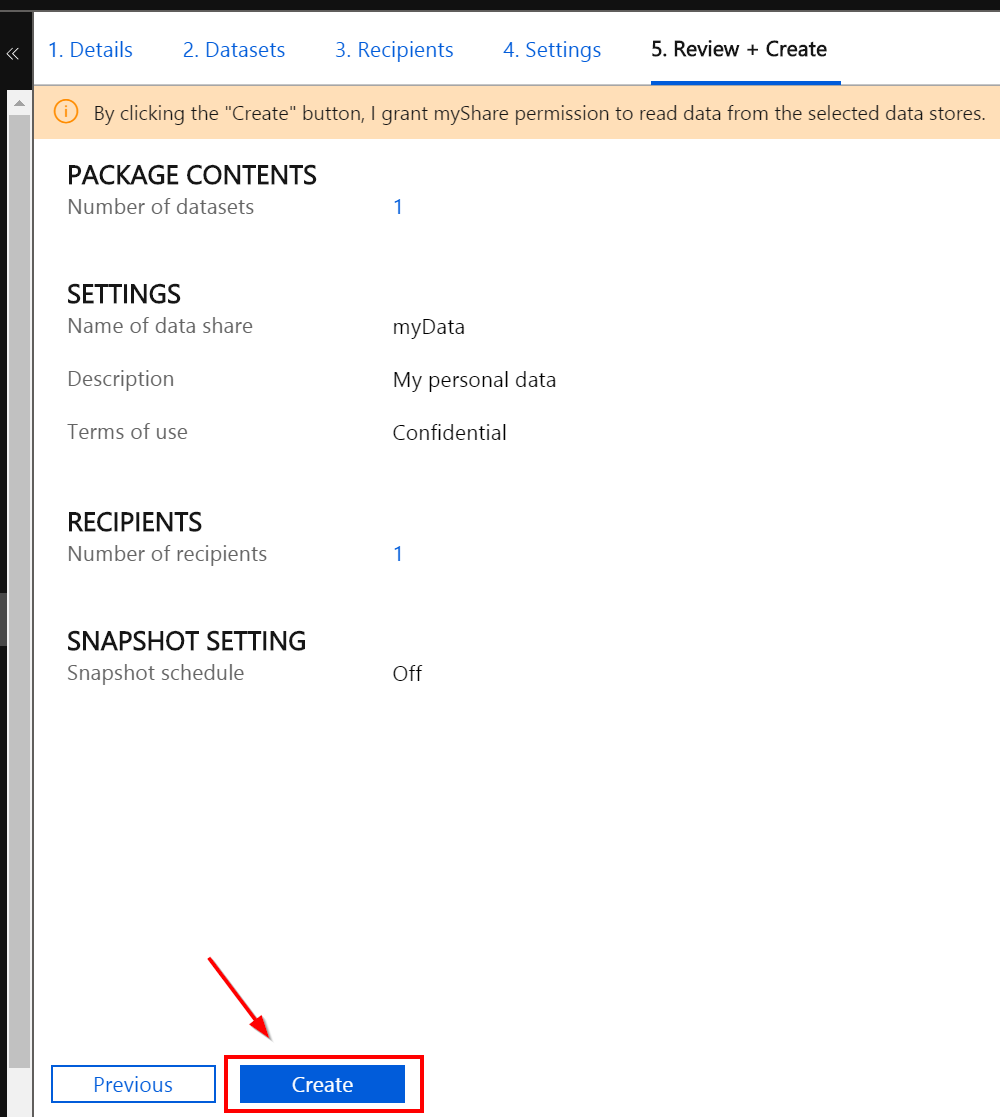
Review the configuration and click “Create”
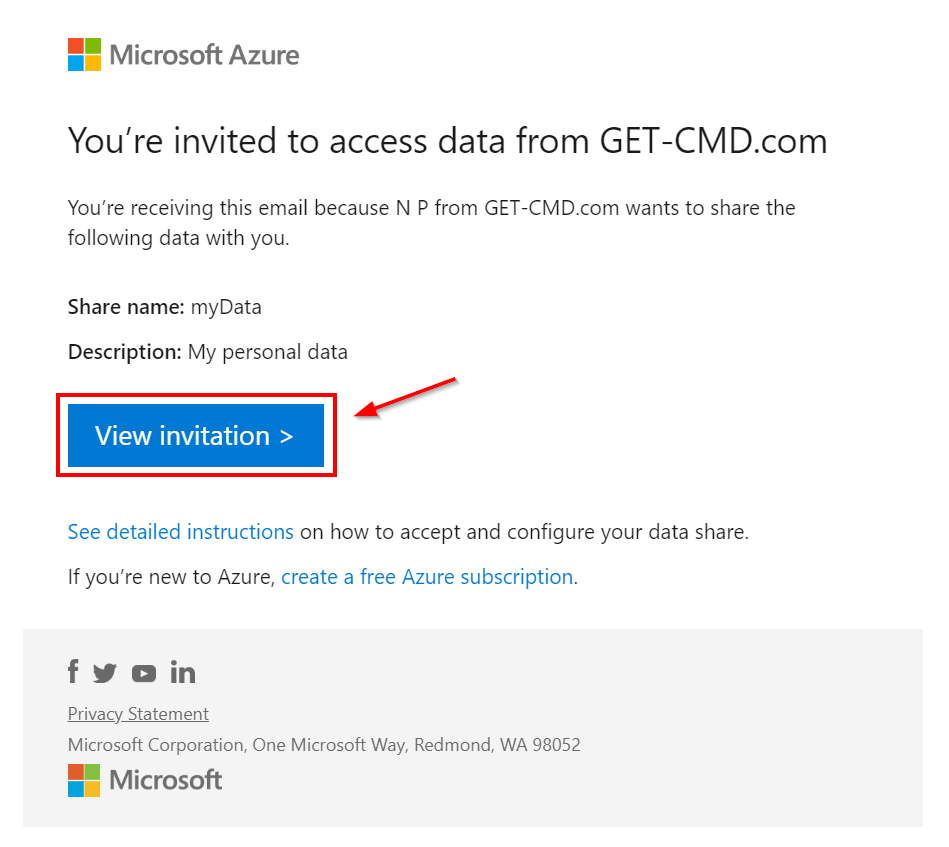
Your recipient needs to check their mailbox for an invitation from Microsoft Azure. Open the invitation and click “View invitation”
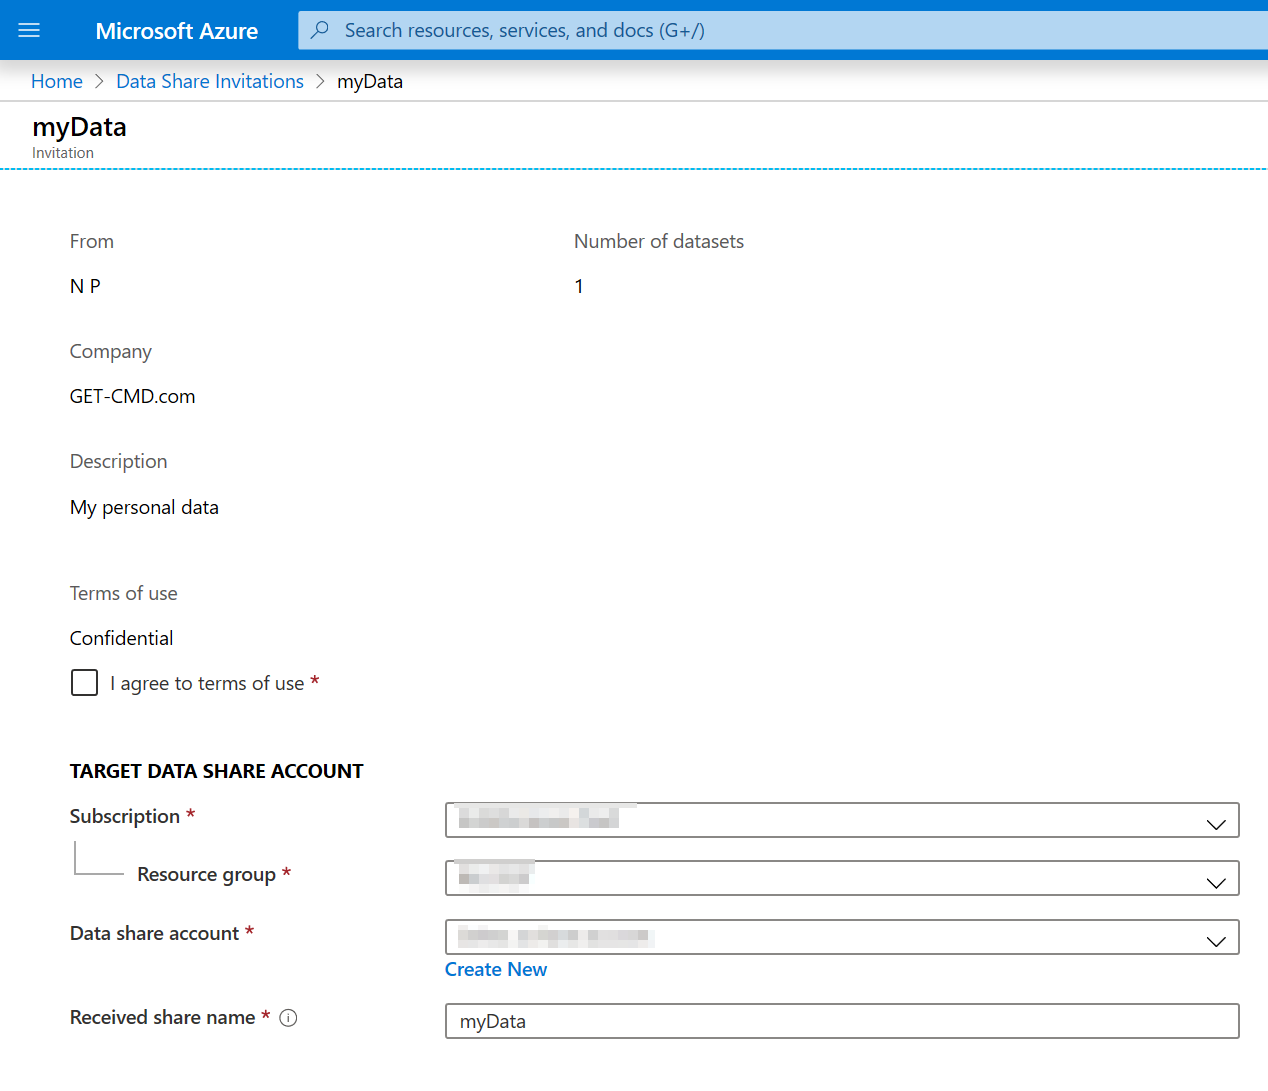
In Azure Portal, click on the share you want to use
Select “I agree to terms of use” and fill out the details below
Then, you can open the storage account selected previously, and view the received data.
Conclusion
Thanks to Azure Share Data, we can easily share data between organizations or subscriptions in order to facilitate collaboration.
Do not forget that your recipients must use their Azure login email to received data.
Announcement: https://azure.microsoft.com/en-us/blog/announcing-preview-of-azure-data-share/


