Introduction
VMDK file to LUN storage architecture has been the most usable scenario for years until VMware released Virtual Volumes in vSphere 6.0. In the case of an array with block access, own VMware file system – VMFS – was used -, and NFS was used for file storage. The array capacity was divided into LUNs or NFS-shares and presented ESXi hosts in the datastore form. Frequently, datastore is a large capacity storage housing numerous VMs. In fact, allocating a separate datastore for each VM is quite inconvenient and time-consuming in terms of administration.
With this approach, the VM storage maintenance operations are at the datastore level, and not at the Virtual Machine level. The operations like snapshots, replication, deduplication, encryption, etc. are performed at the storage level, thus being implemented faster with no use of compute and networking resources. The traditional VM storage technology described in vSphere is still supported. At once, Virtual Volumes (VVols) is an object containing VM files virtual disks and their derivatives.
This handy and at the same time advanced technology was integrated with StarWind Products, that I am about to implement.
Vsphere 6.0 or Higher
Just before configuring StarWind VVols, I have deployed a vSphere 6.5 Cluster of 2 ESXi hosts, each running a StarWind VM.
Being a part of StarWind Appliances, as well as VSAN from StarWind software, StarWind VVols provides the VVols functionality to VMware vSphere Cluster interacting as Storage Provider. VVols Datastores connected to vSphere Cluster are presented by StarWind Cluster Service that handles all the storage operations.
Deploying and configuring StarWind VVols
- To begin with, I install StarWind Cluster Service, which is a part of StarWind Product family.

- Step to configuring HA VVols datastore. Create a VVols-type target on both StarWind nodes. It’s mandatory to have them with the same Target Alias and Name specified.
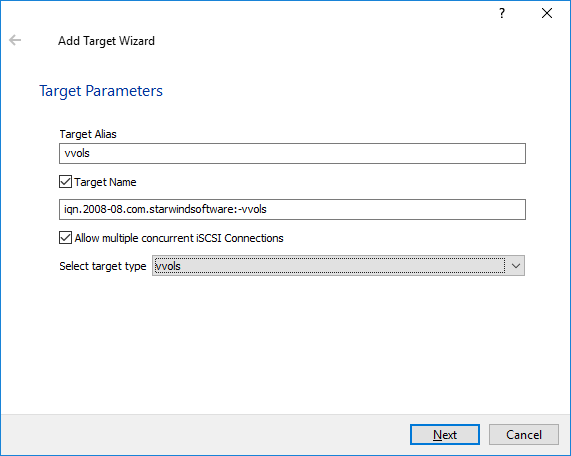
- Follow the technical paper to get done with the datastore, nodes, and containers in the right way. I don’t include the command line part of the configurations.

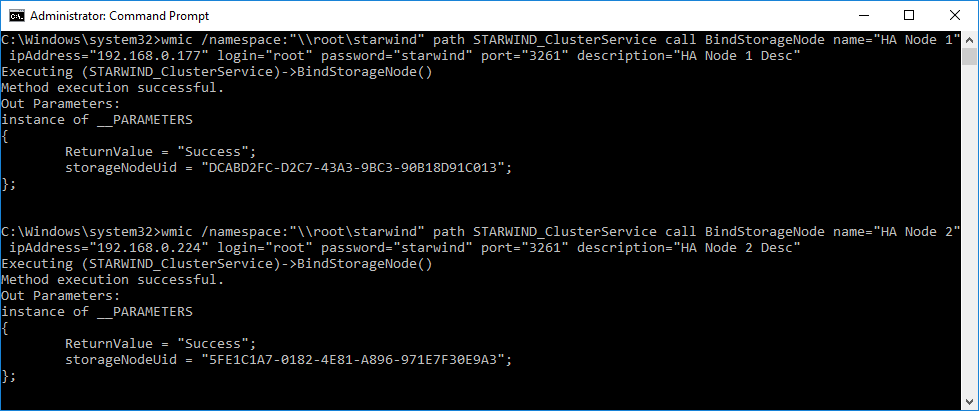
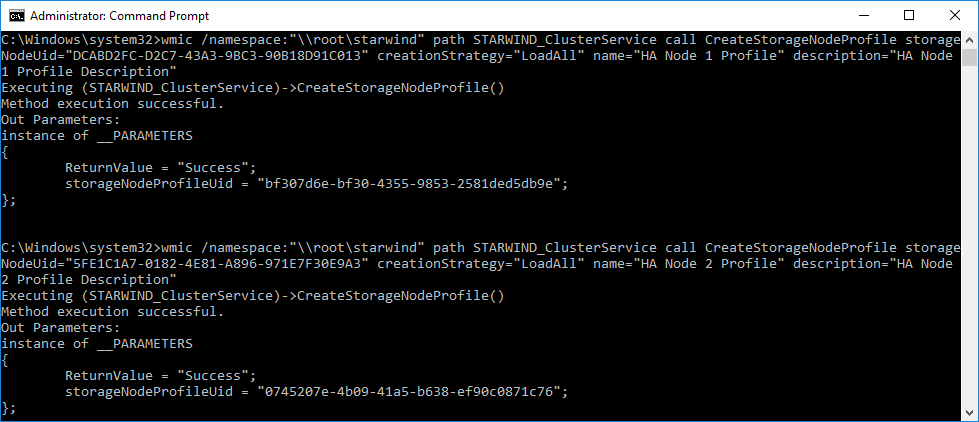
- By following the guidance, configure a StarWind storage Cluster specifying each of vSphere nodes. A single storage profile was created on each node specifying storage resources.
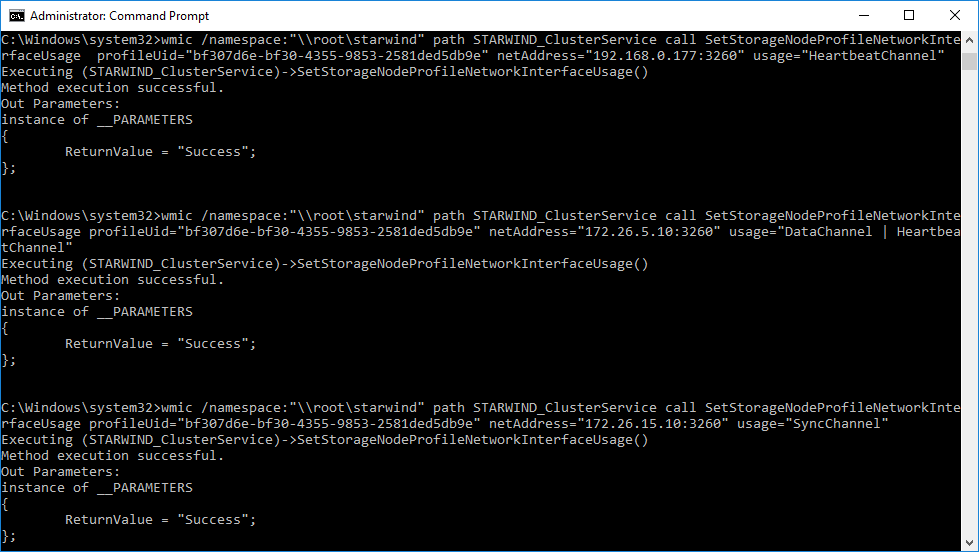
- The networks were configured in the usual for VSAN from StarWind way. Sync Channel and Heartbeat Channel were installed for Heartbeat and Data Channel handles the replication traffic. It’s mandatory to have at least 2 network connections to implement StarWind.
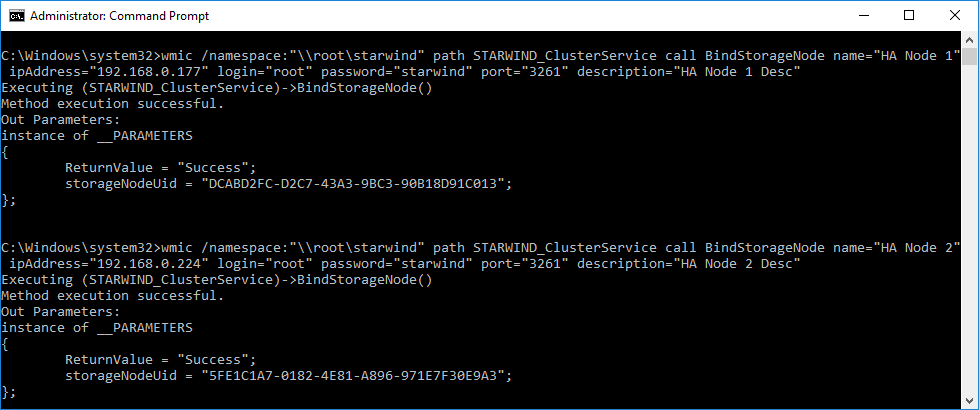
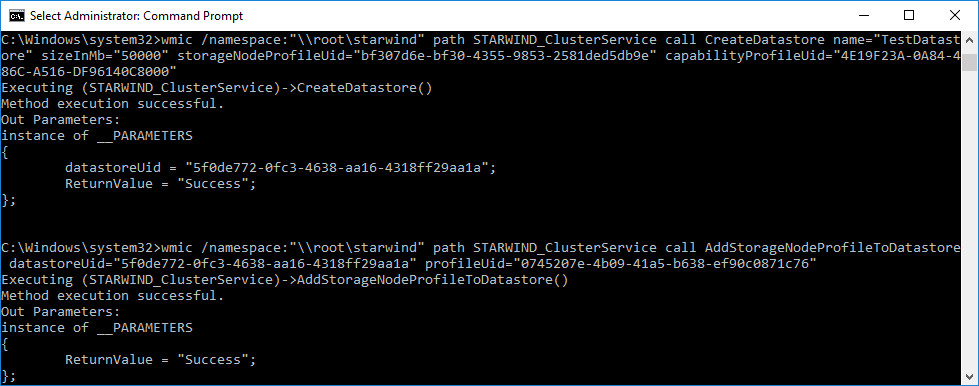
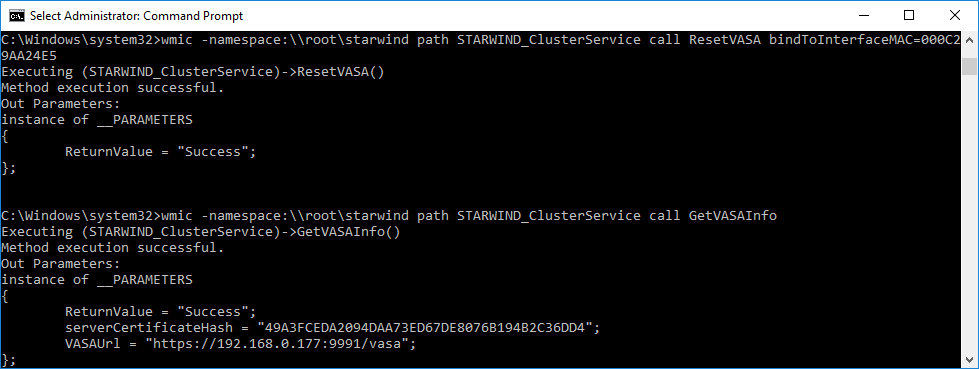
- Once the StarWind Cluster Service is configured, it is time to proceed with configuring VVols datastore in VMware vSphere. StarWind interacts as VASA provider having two connection options either via hostname or via MAC address. After having bound VASA provider to MAC address, the following output has been returned.
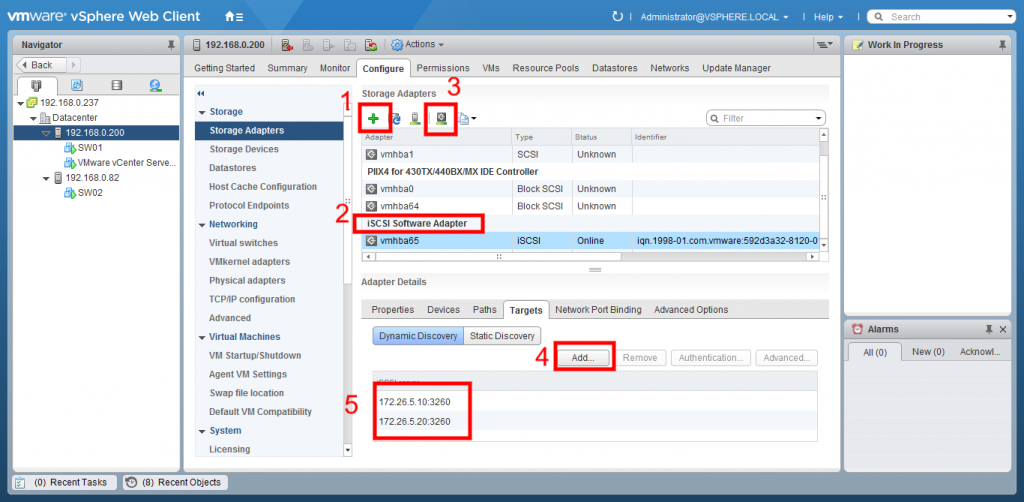
- The next point is iSCSI connections setup in vCenter. Connect with StarWind VVols as with traditional StarWind HA device. Go to Cluster -> Node -> Manage tab -> Storage and add the IP address to dynamic discovery. Ensure you have completed network discovery on each vSphere host.
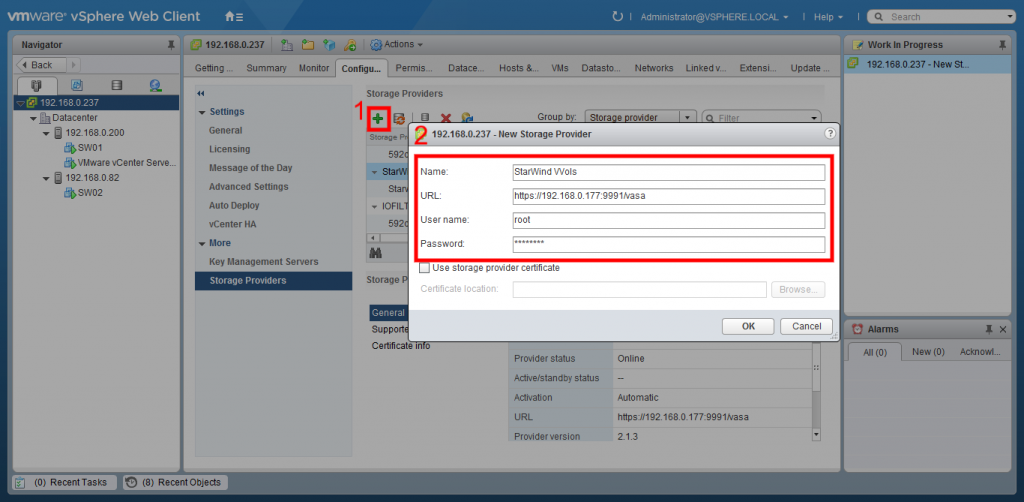
- To register StarWind Storage Provider, go to vCenter -> Storage Providers and fill the new provider information with the StarWind VASA information. Now we have successfully connected the StarWind Storage.
- It is time to create a VVols Datastore. That has been done, as always, at Storage -> New Datastore tab. The storage configuration is finished.
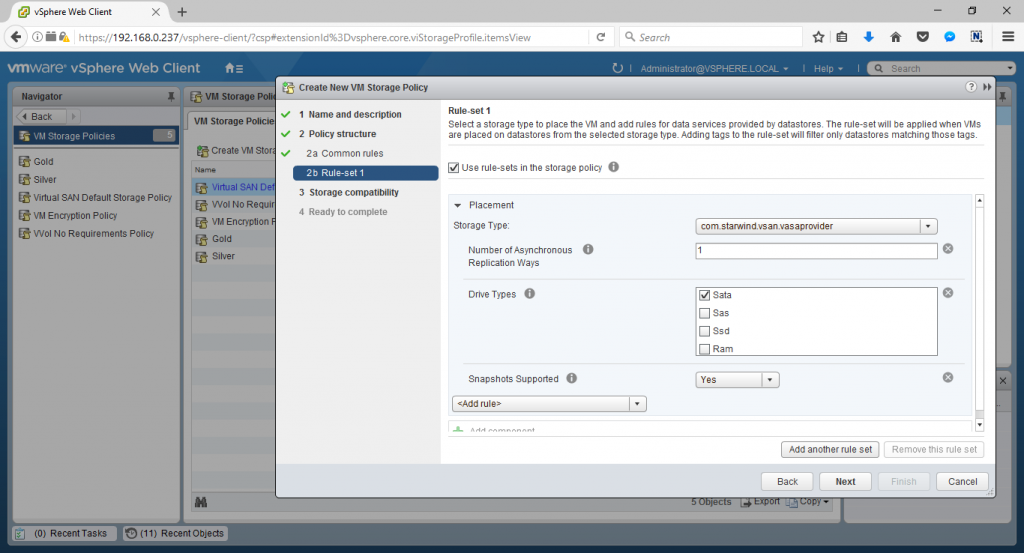
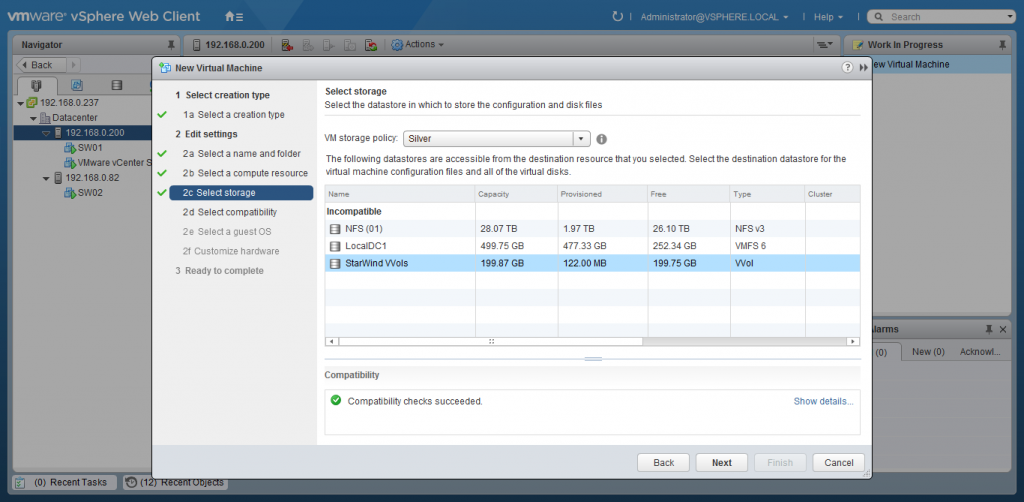
StarWind VVols supports the creation of storage profiles. Basically, I have created three of them: Gold, Silver, and Bronze. Gold has fast SSD, L1 cache and Synchronous replication. For Silver, I have set HDDs, L1 and L2 caches, and Sync. For the Bronze tier, I required only Asynchronous replication with Snapshots and deduplication.
Conclusion
With the configuration described above, I found it easy and handy to implement VVols technology. Storage with VVols support allows simplifying procedure at the expense of its own hardware resources. There is no need to allocate space for VVols in advance, they are created automatically when performing storage operations with the VM like creation, cloning, or snapshotting. Using vSphere built-in policies, there is a possibility to respire and enjoy the storage management absolutely.


