Hi there! There have been pretty much debates over which network protocol is better: NFS or iSCSI when building a virtualization infrastructure. Some experts argue that iSCSI gives better performance and reliability due to block-based storage approach while others go in favour of NFS citing management simplicity, large data stores and the availability of cost-saving features like data deduplication on some NFS arrays. Anyway, we’re not here for polemics but to see which protocol is better for your production environment, meaning, which one really provides higher performance for your mission-critical applications. That’s what we all want, right? Just to make it clear, the whole project will be divided into three parts: configuring NFS, configuring iSCSI, and the testing itself. So, first things first. In this first chapter, I’ll guide you through the process of configuring and preparing the NFS protocol for further testing. So, as Michael Buffer uses to say: “Let’s get ready to rumble!”. Here is how our environment configuration looks like: Server 1 (Windows)
- Intel Xeon E5-2660
- 128Gb RAM Kingston
- 1x HDD Seagate 1tb
- 4xIntel DC S3610 Series 480gb
- Mellanox ConnectX-3 network adapter 10G
Server 2 (ESXi)
- Intel Xeon E5-2660
- 128Gb RAM Kingston
- 1x HDD Seagate 1tb
- Mellanox ConnectX-3 network adapter 10G
As you can see, we’ll have storage on Host 1 connected to the VMware ESXi hypervisor on Host 2 over NFS. First, a few words about the protocol itself. NFS (Network File System) is a distributed file system protocol allowing to access files over the network just as the local ones. This allows mounting remote file systems via the network. NFS provides small client systems with an access to servers’ huge disk capacities. That seems natural for the modern network file systems, but some time ago, clients and servers could not distribute disk storage among each other. NFS delivers a transparent access to server files and file system that, actually, is protocol’s main advantage. The protocol accesses only the parts of the file referred by the process. This implies that any clients’ application can access an NFS file just as it does with the local files without any modifications of the initial application. In order to optimize the NFS Server performance, check the official VMware guide: https://www.vmware.com/content/dam/digitalmarketing/vmware/en/pdf/techpaper/vmw-white-paper-vsphr-nas-uslet-101-web.pdf
Let’s go on and configure the NFS Server. First, add roles in the Windows Server environment. 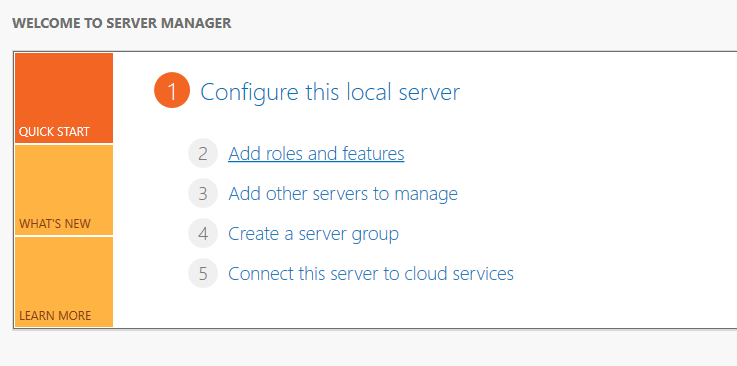
Add the NFS Server role.
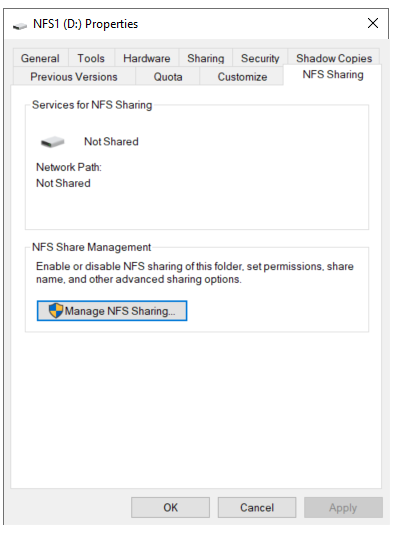
Afterwards, access properties of the disk that you intend to connect with NFS. Here, D drive is used for that purpose.
Enter the NFS Sharing tab in the Drive Properties menu. In the NFS Sharing directory, access the Manage NFS Sharing tab.
Check the necessary settings there and go to the Permissions tab.
Choose Read-Write in the Type of access field. Afterwards, check the Allow root access box. 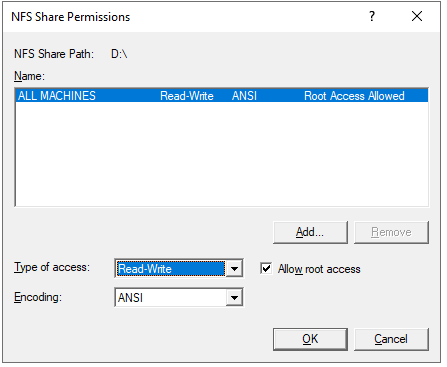
Once the settings are applied, you will be provided access to the disk storage with the NFS protocol. 
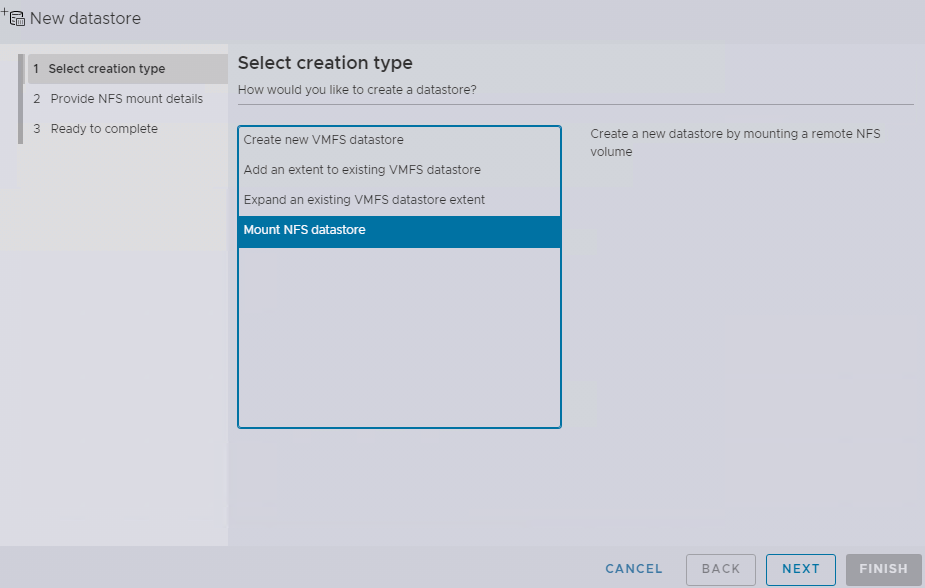
Now, we can proceed to setting NFS in the VMware environment Go to the Datastores tab on the host where an NFS is connected. Create a new Datastore there.
Select Mount NFS datastore in the Type tab.
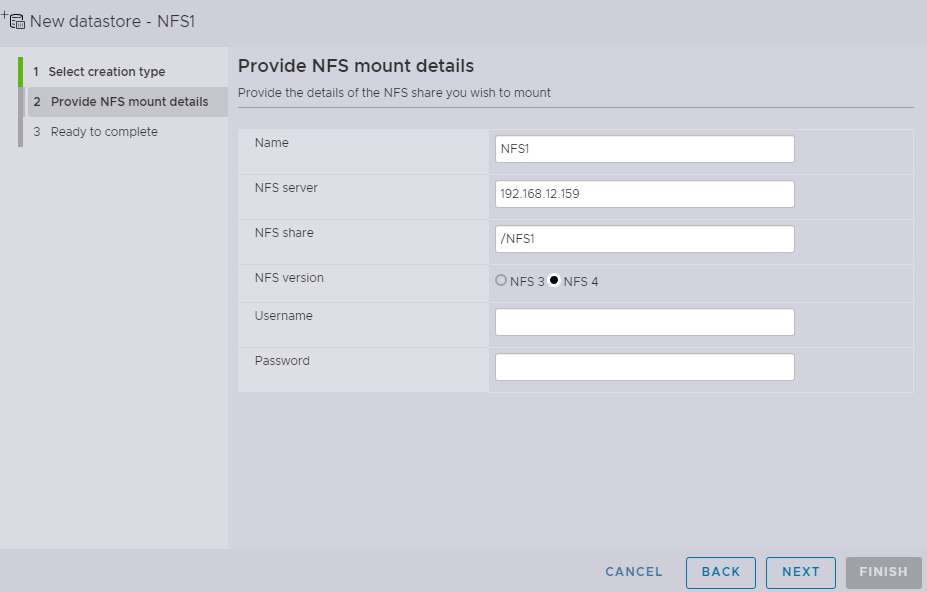
Next, in the Name specify the Datastore name. In the NFS Servers field, enter the server’s IP address or name where NFS Disk is located; enter the path to the NFS in the NFS Share area. Afterwards, in the NFS Version field, select NFS 4 version. Username and Password are optional.
Right after the NFS Datastore creation is confirmed, it is displayed in the Datastores tab.
Connect the NFS disk via virtual machine’s settings as Thick provisioned eagerly zeroed disk.
In virtual machine Disk Management menu, an unallocated disk is displayed.
Conclusion
In this first part, we’ve configured an NFS disk and connected it to the VMware host. It should be noted that the VMware solution whit underlying NFS storage is a simple and reliable way to store and manage virtual machines. In the next chapter, https://www.starwindsoftware.com/blog/testing-nfs-vs-iscsi-performance-part-2-configuring-iscsi, we configure iSCSI.
This material has been prepared in collaboration with Vitalii Feshchenko, Solutions Engineer at StarWind.


