Move from a CSP to KSP provider
Once you have moved to a least Windows Server 2008 R2 you can take this step. Any version below doesn’t allow for this and should be considered the end of life. Many haven’t made the move from a CSP to KSP provider yet, even when they are already running Windows Server 2012 or 2012 R2 for a few reasons. There were some issues with older clients like Windows Server 2003 and Windows XP. These were fixed with a hotfix but in all seriousness, if you’re still on those OS versions you need to move a.s.a.p. and if not there’s nothing we can do to help you. A modern and secure PKI will be the last of your worries I’m afraid. For a Microsoft reference, see Migrating a Certification Authority Key from a Cryptographic Service Provider (CSP) to a Key Storage Provider (KSP).
Another reason is that often people don’t even know about the type of cryptographic provider. If you’ve never looked into moving from SHA1 to SHA2 this might have passed you by completely. The other thing is that in the early days the advice was that you needed to set up a new CA to do so, which left many people to leave that for later.
On top of this, you need at least Windows Server 2012 (or higher over even Windows 8/81.10 will do) to convert from SCP to KSP. If you’re running a Windows 2008 R2 CA you’ll have to export it to a higher-level OS, convert from CSP to KSP, export the key and then import it again into the Windows Server 2008 R2 CA. Do yourself a favor and upgrade already! While you invest all this time and effort do so on a modern OS that has the better longevity, for me today that’s Windows Server 2016. As you can see I’m already there over time and I go there by a series of migrations & in place upgrades (W2K3=>W2K8R2=>W2K12R2=>W2K16).
Backup, Backup, Backup & Exports
We actually don’t want to fall back but it pays off to have all bases covered when it’s needed. In the spirit of “one is none and two is one” we create multiple options for getting out of a failed upgrade.
- Make a backup of your CA server. Make sure you can restore it. Use proven backup software like Veeam and test the restore!
- If the CA server is a VM, export it for good measure. Just another recovery option right there for you.
- While you’re at it, shut down the CA VM (unless you’re leveraging production checkpoints, then you can leave it running) and create a checkpoint. Yet another and very fast recovery option
- Start the VM up again
PRO TIP: The entire PKI upgrade can be tested on an export of the VM which can be isolated from the production network. It doesn’t require network connectivity for Active Directory access for validating the procedure. So you can test and experiment on an isolated import of the exported virtual machine as much as you want because combined with a checkpoint you can always return to the original state to test again. When you’re good and ready you can then run the procedure on your production VM of which you also have a backup and a checkpoint as described above for good measure.
Before we do anything we’re going to back up the individual parts of what constitutes a CA. Yes, we already have multiple ways of going back but it’s good to have different options!
We define a target for the backups and a password to use:
|
1 2 3 |
$FilePath = “C:\CAUpgradeToSHA256\Backups” $PassWord = "MyPassword" |
Back up the certificate database and the (root) certificate:
|
1 |
certutil -p $Password -backup $FilePath |
Export the registry settings for the CA configuration, this includes the keys that are going to get deleted/changed during the upgrade:
|
1 |
Reg export hklm\system\currentcontrolset\services\certsvc\configuration $FilePath\CAConfiguration.reg /y |
Backup the certificate revocation lists (CRLs). It’s not good to lose those! To do so we copy anything with a .crl extension in C:\Windows\System32\certsrv\certenroll into our backup folder:
|
1 |
Copy-Item -Path "C:\Windows\System32\certsrv\certenroll\*.crl" -Destination $FilePath |
In case the Enterprise CA has certificate templates in use, we’ll back those up too:
|
1 |
certutil -catemplates | Out-File -FilePath "$FilePath\Templates.txt" |
We have all the backups and exports we need to get out of a pickle. We can now move along with our risky business.
Creative Destruction
It sounds a bit crazy but to move from a CSP with SHA1 to a KSP provider and move to SHA256 we need to delete the certificate and the crypto provider in order to recreate them.
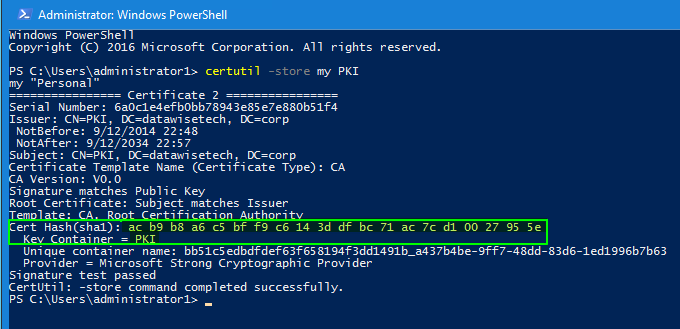
We’re going to do some creative destruction so to speak. We retrieve the hash of our certificate and the key container value that we’ll use to delete the provider.
Stop the certificate service:
|
1 |
Stop-Service -Name ‘certsvc’ |
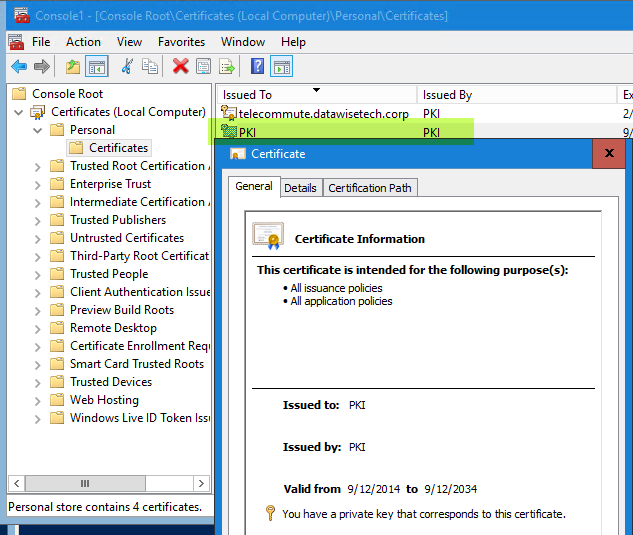
Check the computer personal certificate store on the CA you’ll see the PKI cert we’re going to remove.
Delete from the CA certificate:
|
1 |
certutil -delstore My "ac b9 b8 a6 c5 bf f9 c6 14 3d df bc 71 ac 7c d1 00 27 95 5e" |
When you now check the computer personal certificate store on the CA you’ll see the cert is gone
We now also delete the provider. It’s going to be pretty similar to how I just deleted the certificate.
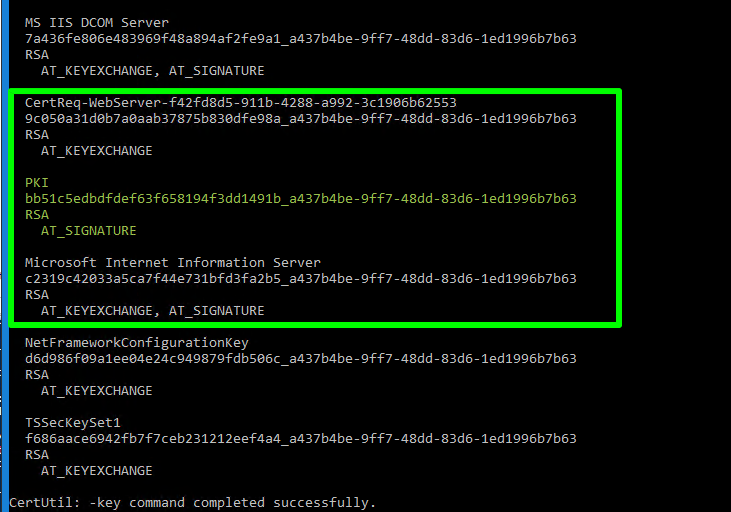
Fist take a look at the private keys in the Microsoft Strong Cryptographic Provider using
|
1 |
certutil -CSP "Microsoft Strong Cryptographic Provider" -key |
Delete the private key for our remove PKI cert using
|
1 |
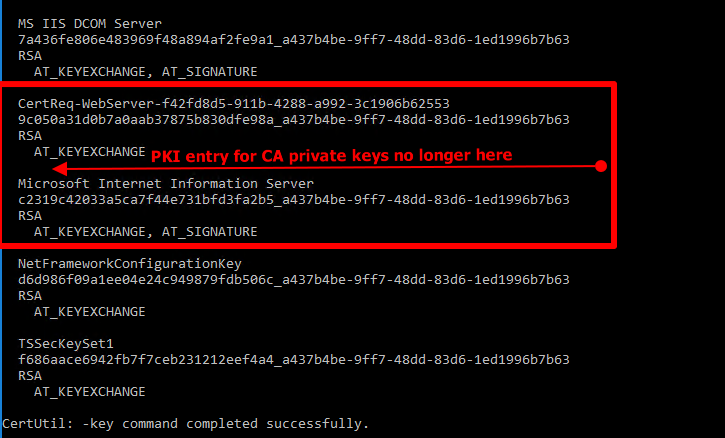
certutil -CSP "Microsoft Strong Cryptographic Provider" -delkey PKI |
When you now run again, you’ll see that the entry for CA (PKI) private keys is gone
That’s it. We’re done destroying the old to make room for the new. Do continue because right now you CA is toast.
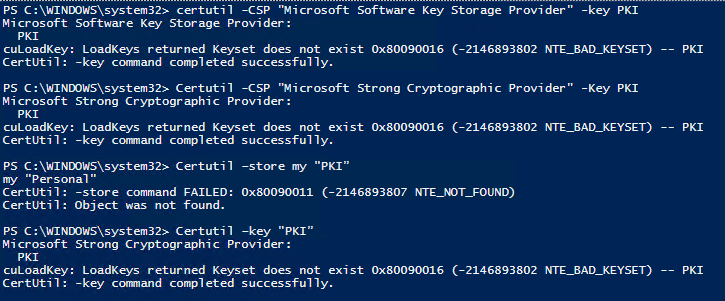
Just for a reference, note that there is no “PKI” named key in Microsoft Software Key Storage Provider on the CA yet. We also check CSP, CA store and the like. It’s all gone.
|
1 |
certutil -CSP "Microsoft Strong Cryptographic Provider" –key PKI |
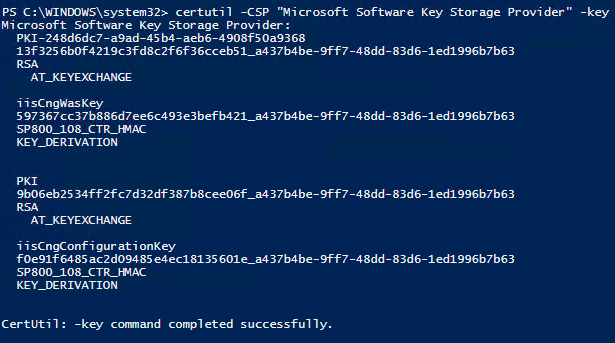
For good measure, we check what is actually in the Microsoft Software Key Storage Provider
|
1 |
certutil -CSP "Microsoft Software Key Storage Provider" -key |
Creating a KSP for the keys and import the key into the CA
We will now bring back all we destroyed but more secure and better. To do so we need to do 3 things.
Restore the certification authority (CA) certificate and keys into a KSP provider using the pfx we created earlier as a backup. This is done with the following command:
|
1 |
certutil -p “MyPwd” -csp ”Microsoft Software Key Storage Provider” -importpfx “C:\CAUpgradeToSHA256\PKI.p12″ |
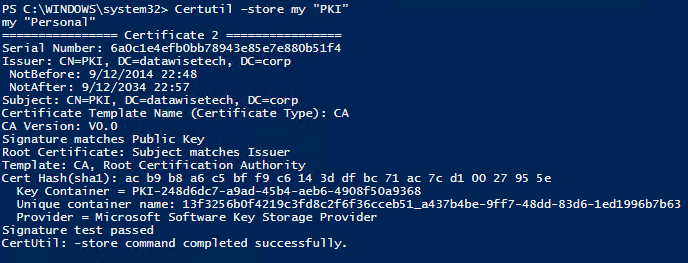
Now look at what’s in the store for the CA PKI and yes, the key in the KSP:
|
1 |
certutil -store my “PKI” |
It’s still not available to the CA that only knows about the CSP for now and there it’s gone:
|
1 |
certutil –key PKI |
Querying the CSP specifically (paranoia) confirms it’s gone from the SCP:
|
1 |
certutil -CSP "Microsoft Strong Cryptographic Provider" –key PKI |
And there’s nothing in the KSP yet:
|
1 |
certutil -CSP "Microsoft Software Key Storage Provider" -key |
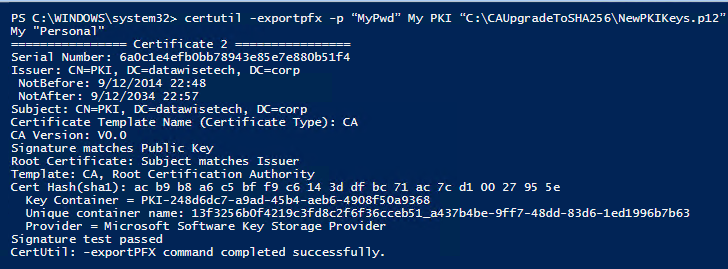
We now have the CA cert and the key restored into a KSP. We now export it from that KSP in order to import the keys itself into the CA.
|
1 |
certutil -exportpfx -p “MyPwd” My PKI “C:\CAUpgradeToSHA256\NewPKIKeys.p12” |
Using certutil I restore the key into the CA.
|
1 |
certutil -p “MyPwd” -restorekey “C:\CAUpgradeToSHA256\NewPKIKeys.p12” |
So yes, now we see the PKI key in the Microsoft Software Key Storage Provider
|
1 |
certutil -CSP "Microsoft Software Key Storage Provider" -key PKI |
When we look at all keys in the Microsoft Software Key Storage Provider we see it’s been what’s added:
|
1 |
certutil -CSP "Microsoft Software Key Storage Provider" -key |
Also, note by using
|
1 |
certutil -key PKI |
without specifying the provider it defaults to the SCP provider. Nothing else and that PKI is not in there. That makes sense, we deleted it.
Congratulations, we’re now using the KSP instead of the SCP. Do note that we’re not done yet. In part II we moved from the older CSP provider to a KSP provider but now we want to start issuing certs with an SHA256 hash. That’ what we’ll do her in part III.
- Upgrade your CA to SKP & SHA256. Part I: Setting the Stage
- What is Key Storage Drive in Windows Server 2016 Hyper-V?


