The procedure to restore a failed vCSA connected to Distributed vSwitch (dvSwitch) could be tricky if the infrastructure uses dvSwitches with no ephemeral port group available.
In an environment running Distribute vSwitches, the vCSA binding to the dvSwitch virtual port can behave weirdly with the result of losing the connection with the virtual machine.
Restoring the vCSA connected to dvSwitch
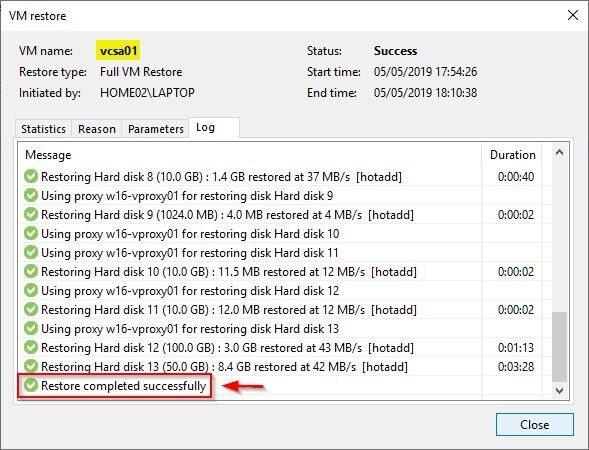
In case of a vCSA failure, the first action normally performed by administrators is the restore of the VM from the backup.
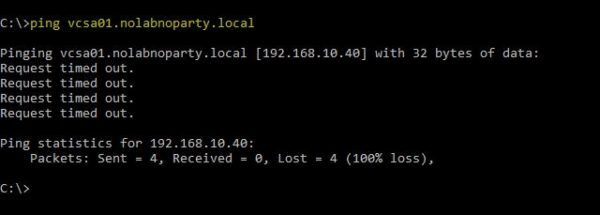
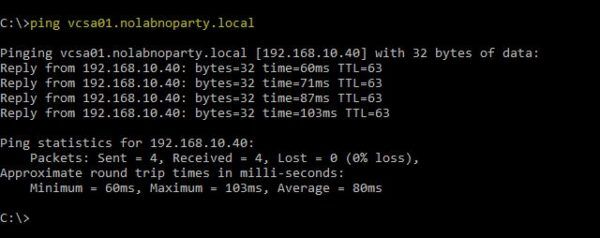
Anyhow, even if the restoration is completed successfully, the ping to the vCSA is not responding and the VM is inaccessible from the network.
To restore the vCenter attached to a dvSwitch properly, you should configure the port group as Ephemeral.
Quote from VMware KB:
Ephemeral binding
In a port group configured with ephemeral binding, a port is created and assigned to a virtual machine by the host when the virtual machine is powered on and its NIC is in a connected state. When the virtual machine powers off or the NIC of the virtual machine is disconnected, the port is deleted.
You can assign a virtual machine to a distributed port group with ephemeral port binding on ESX/ESXi and vCenter, giving you the flexibility to manage virtual machine connections through the host when vCenter is down. Although only ephemeral binding allows you to modify virtual machine network connections when vCenter is down, network traffic is unaffected by vCenter failure regardless of port binding type.
If you don’t have an Ephemeral port group available, you can’t create a new one since you can’t have a dvSwitch without a vCenter Server. Also changing a mapped port group is not allowed without a vCenter and you will get an error if you try to do this action. How can you properly restore a vCSA in case of need then?
If the vCSA is attached to a dvSwitch to access the network and all vmnics are assigned to the dvSwitch, the only possible solution to recover the vCSA functionality is the creation of a temporary virtual switch (vSwitch) using a vmnic detached from the dvSwitch.
Free up a vmnic from dvSwitch
Using a tool like PuTTY, connection with vCSA on ESXi host can be restored with SSH. If no virtual switches are configured in the ESXi host, create a new virtual switch with the following command:
# esxcfg-vswitch -a vSwitch0Create a port group used to attach the vCSA to recover:
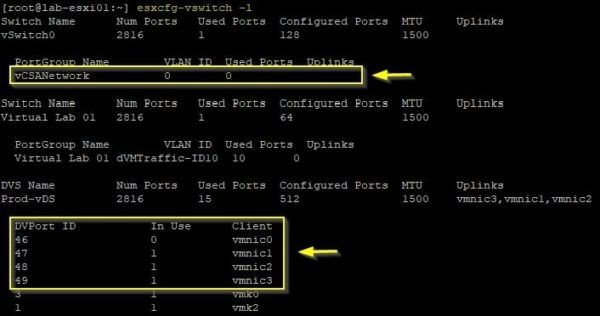
# esxcfg-vswitch -A vCSANetwork vSwitch0Once the virtual switch has been created, we need to free up one vmnic from the dvSwitch to attach to the virtual switch. Run the following command to identify the ID of the vmnic we are going to remove from dvSwitch:
# esxcfg-vswitch -lNote the previously created port group vCSANetwork.
Check the infrastructure configuration to determine which vmnic can be safely removed from the dvSwitch without disrupting other functionalities, then remove the vmnic from the dvSwitch with the following command:
esxcfg-vswitch -Q <vmnic_name> -V <vmnic_id> <vDS_name>

# esxcfg-vswitch -Q vmnic0 -V 46 Prod-vDS
When the vmnic has been removed successfully from the dvSwitch, you need to add the recently removed vmnic to the virtual switch vSwitch0:
# esxcli network vswitch standard uplink add --uplink-name=vmnic0 --vswitch-name=vSwitch0To check both uplink and port group assigned to vSwitch0, run the command:
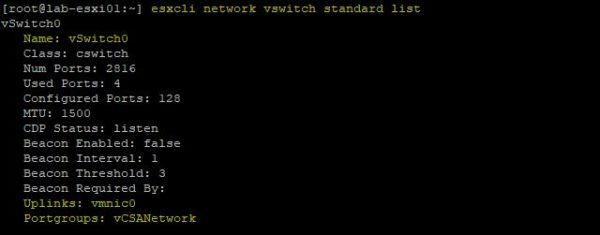
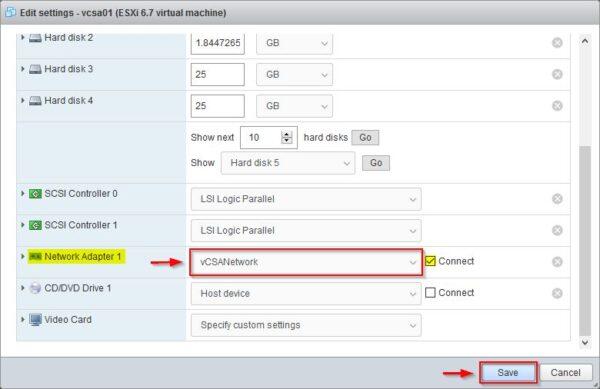
# esxcli network vswitch standard listNow configure the vCSA to connect the vmnic to the recently created port group vCSANetwork. Right-click the vCSA and select Edit Settings. From the Network Adapter 1 drop down menu select vCSANetwork port group. Click Save to save the configuration.
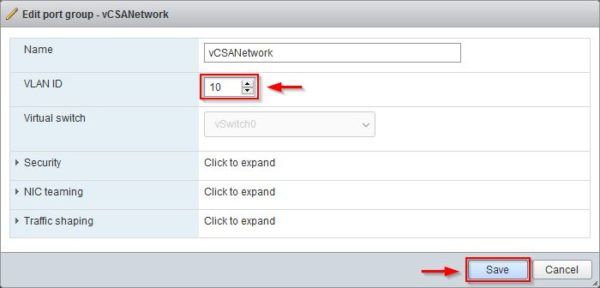
Edit the created port group vCSANetwork to specify the VLAN ID if the vCSA is attached to a VLAN. Click Save.
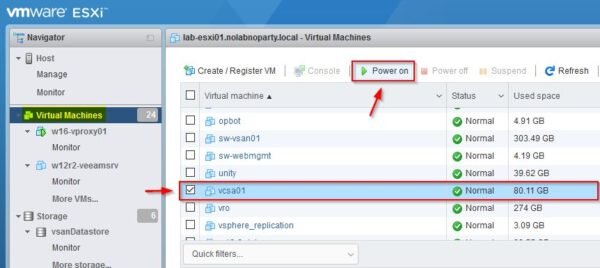
Select the vCSA and click on Power on button.
When the boot process has completed, you are now able to ping and access the vCSA once again.
Remove the temporary network configuration
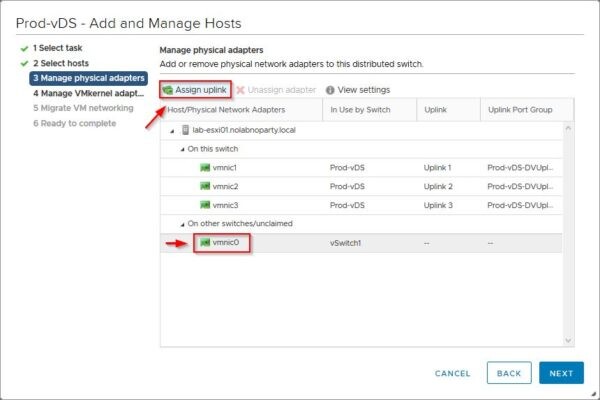
Once the access to the vCSA has been fixed, you need to restore the correct network configuration by adding back the vmnic to the dvSwitch and re-connecting the vCSA to the correct port group. Edit the dvSwitch and go to the Manage physical adapters section to add the vmnic to the dvSwitch. Click Assign uplink to proceed.
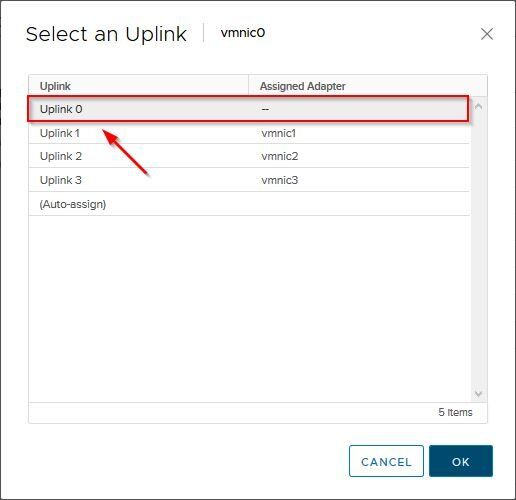
Select the correct Uplink to assign the vmnic then click OK.
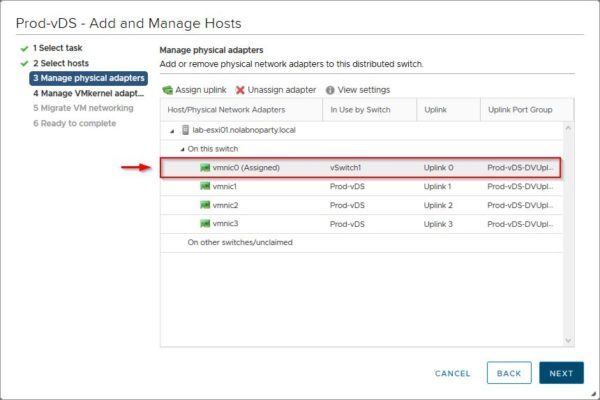
The vmnic has been assigned to the specified uplink. Click Next and complete the procedure.
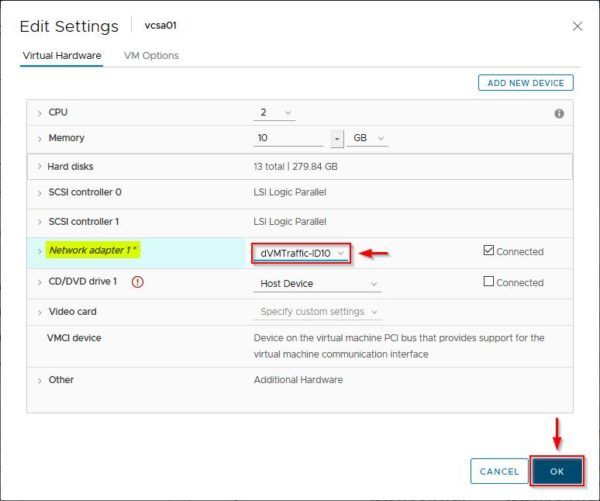
Now right click the vCSA and select Edit Settings. Select the port group the vCSA should use and click OK to save the configuration.
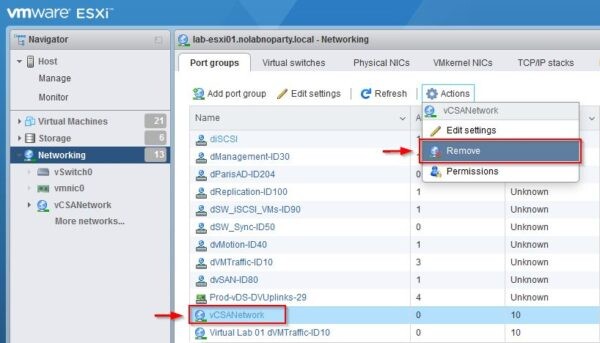
Port group and vSwitch created to recover the vCSA are no longer required and can be safely removed. From the Networking area, go to Port groups section and select the port group to remove. Select Actions > Remove.
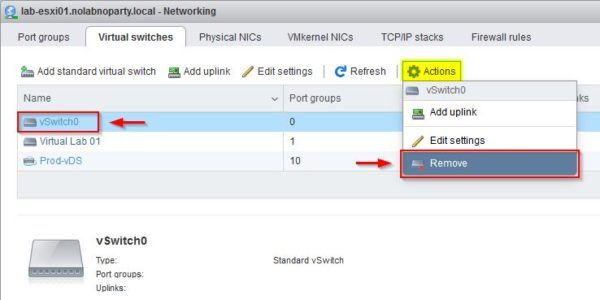
From the ESXi host, select the vSwitch to remove and select Actions > Remove.
Now the network configuration has been restored to the original settings.
Create a new ephemeral port group for the vCSA recovery
To avoid the same issue if the vCSA needs to be restored once again, you can create a dedicated dvSwitch port group configured as ephemeral in order to allow easy and quick recovery of the appliance.
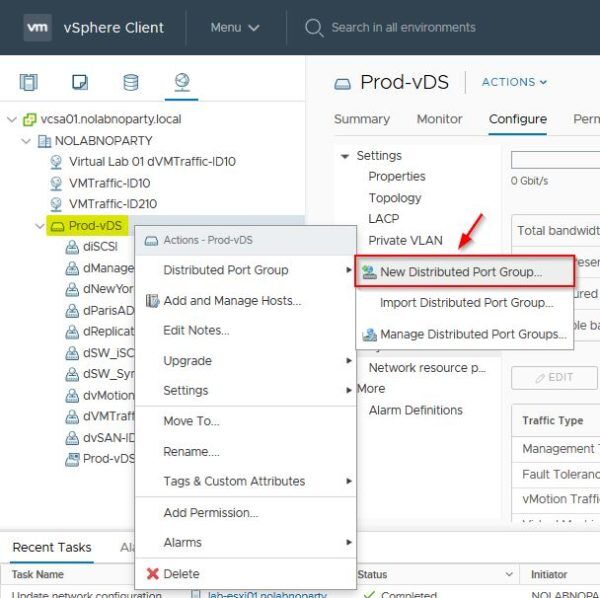
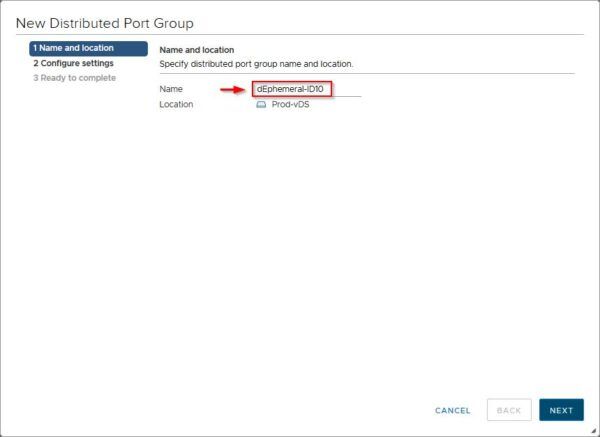
To create a new port group, from the vSphere Client go to Network area. Right-click the distribute switch in use (Prod-vDS in the example) and select Distributed Port Group > New Distributed Port Group.
Specify a Name of the port group to create, then click Next.
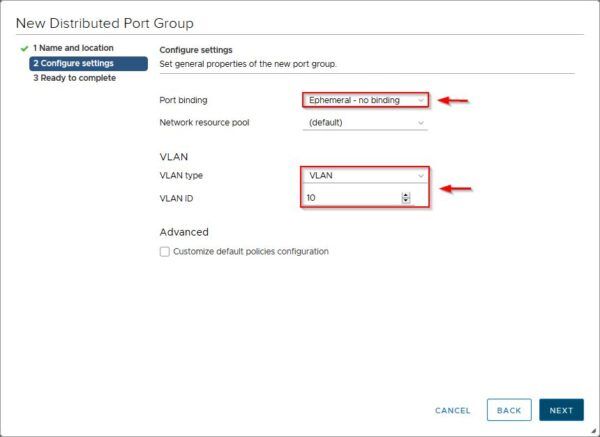
From the Port binding drop-down menu select Ephemeral – no binding option. Specify also a VLAN type and VLAN ID if used then click Next.
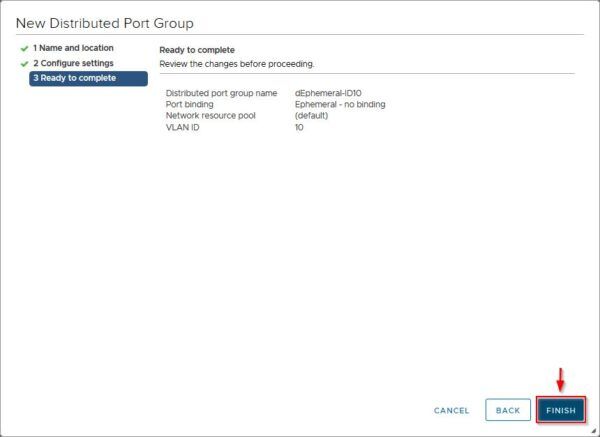
Click Finish to create a new Ephemeral port group.
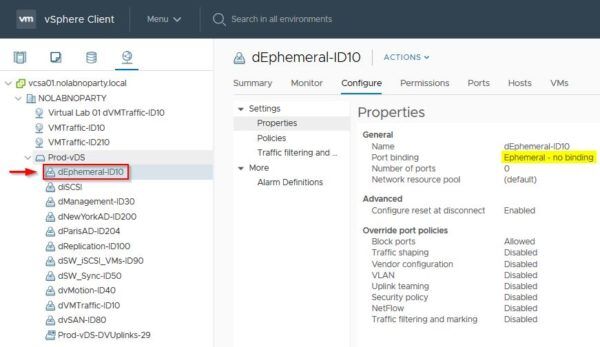
The new port group has been successfully created and can be used during the restoration procedure of the vCSA.
Although the use of a dvSwitch port group configured as Ephemeral solved the issue, this configuration type should be used for recovery purposes only and not used for production.


