One of the new features introduced in Veeam Backup & Replication v11 is the option to store the backup to Google Cloud Storage to comply the 3-2-1 backup rule.
With the support of Google Cloud object storage, backup administrators have now the chance to make their backup infrastructure more flexible with a quite large set of supported object storage solutions.
Before proceeding with the configuration, make sure you have a configured Bucket in Google Cloud Storage with the correct credentials to access the resource.
Configure the backup to Google Cloud Storage in Veeam
To configure the backup to Google platform is required the creation of a Scale-out repository the Backup Job will use to transfer the backed up data since direct backup to object storage is not supported in v11. Veeam v12 will provide this capability.
Create the Google Object Storage as Capacity tier
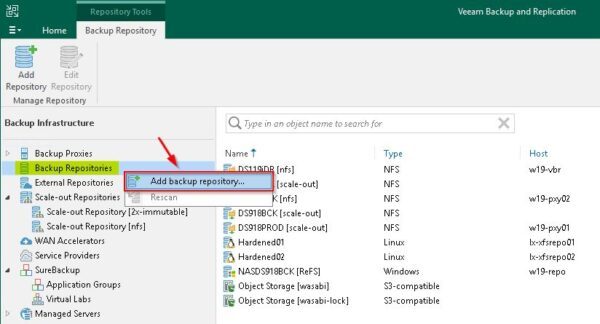
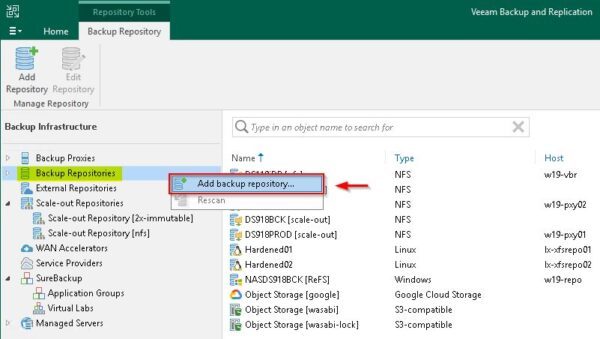
From Veeam’s Backup Infrastructure area, right click Backup Repositories and select Add backup repository.
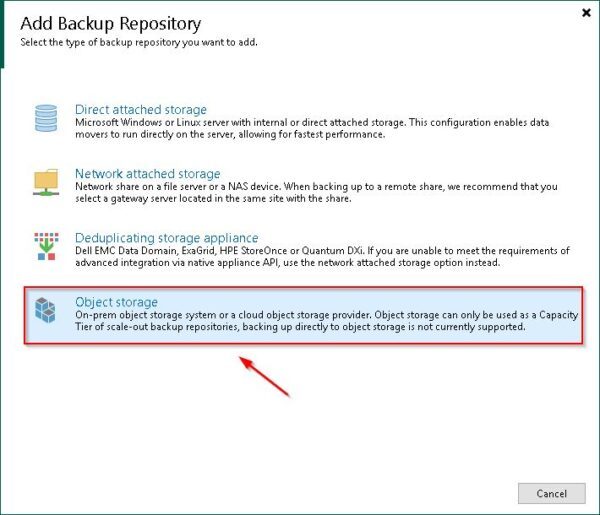
Select Object storage option to create the Capacity Tier for the Scale-out repository to configure.
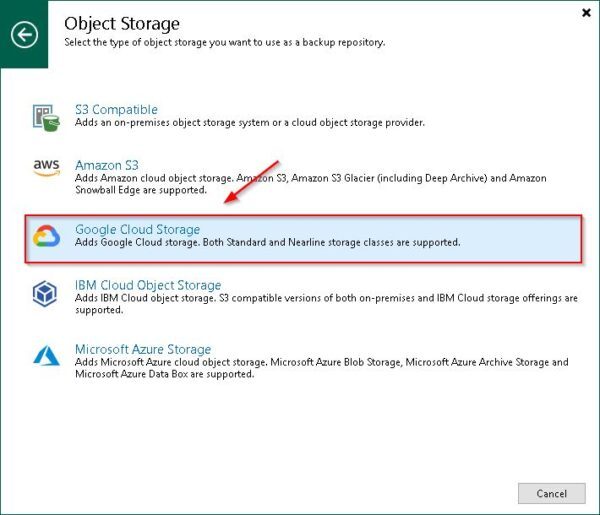
Select Google Cloud Storage option.
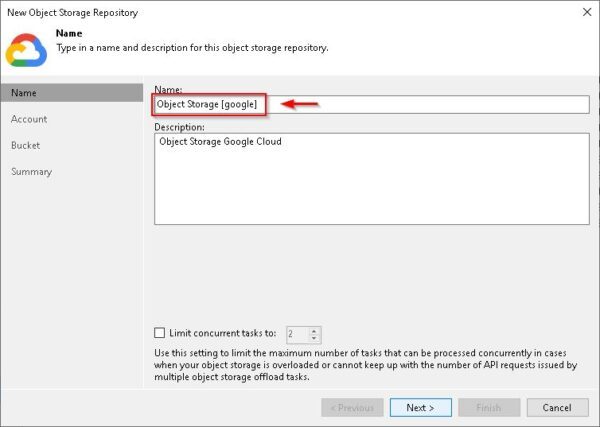
Enter a Name for the new repository and optionally a Description then click Next.
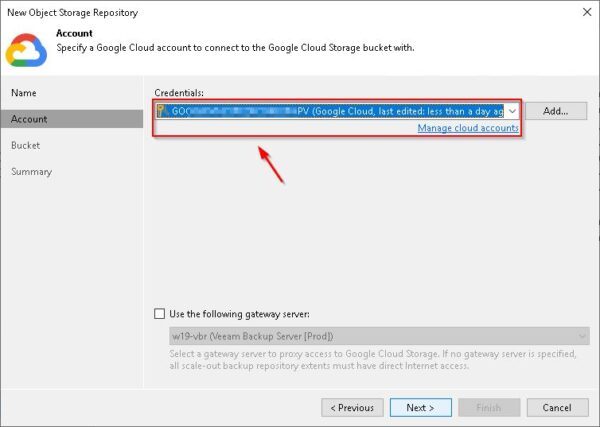
Select the Credentials to connect the desired Google Bucket.
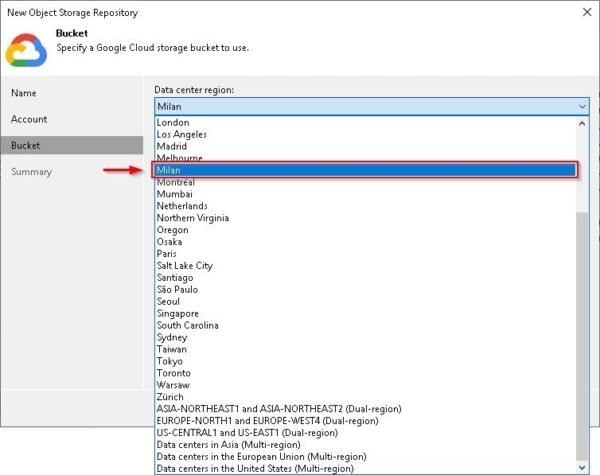
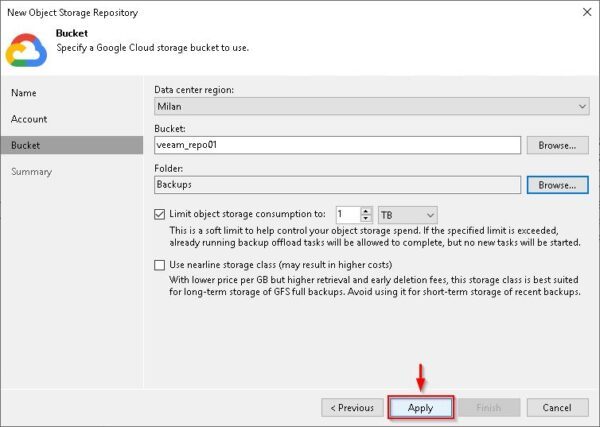
Select the Data center region where the Bucket has been created.
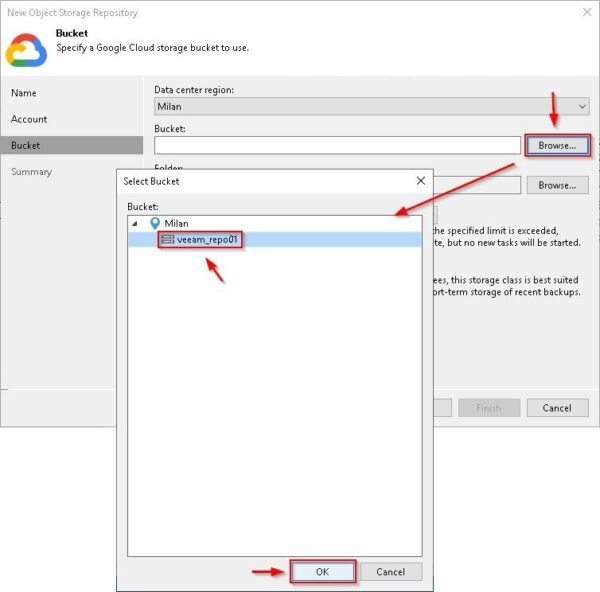
Click Browse and select the Bucket to use then click OK.
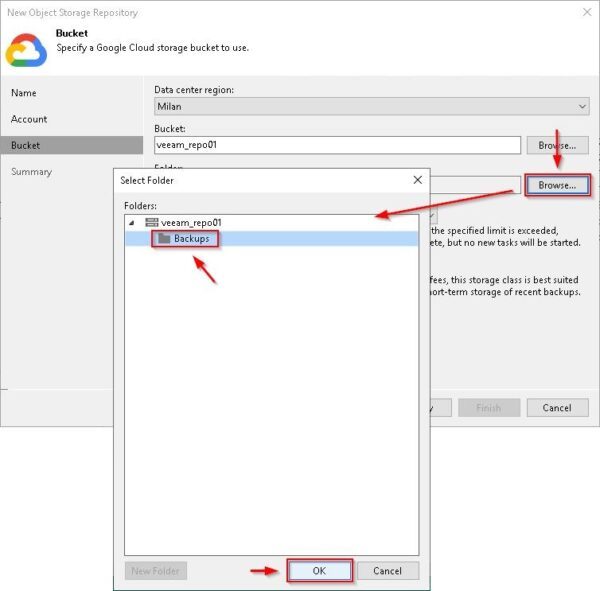
Click Browse and select the Folder to use then click OK.
Enable the Limit object storage consumption to xx TB to keep consumed space under control. Click Apply.
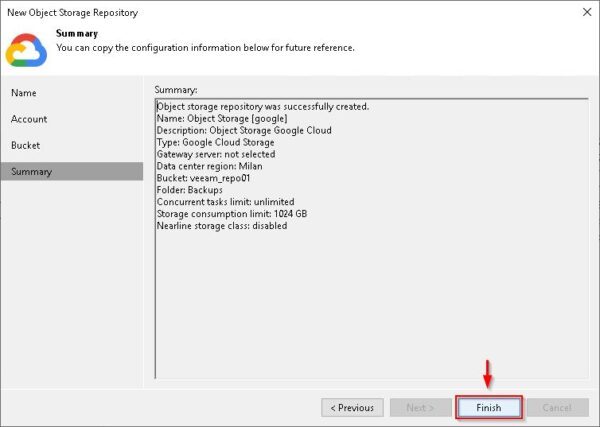
Click Finish to create the new repository.
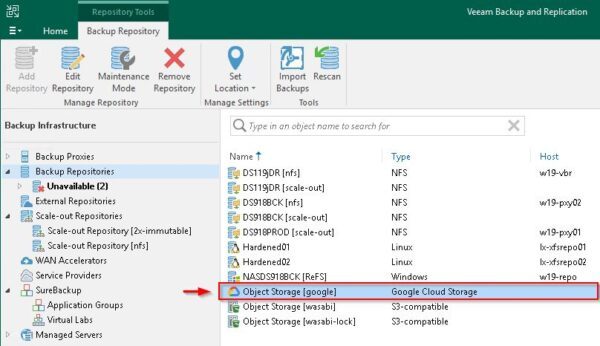
The new object storage has been created successfully.
Create the local Performance tier repository
Right click Backup repositories and select Add backup repository to create a new local repository used as Performance tier for the Scale-out repository.
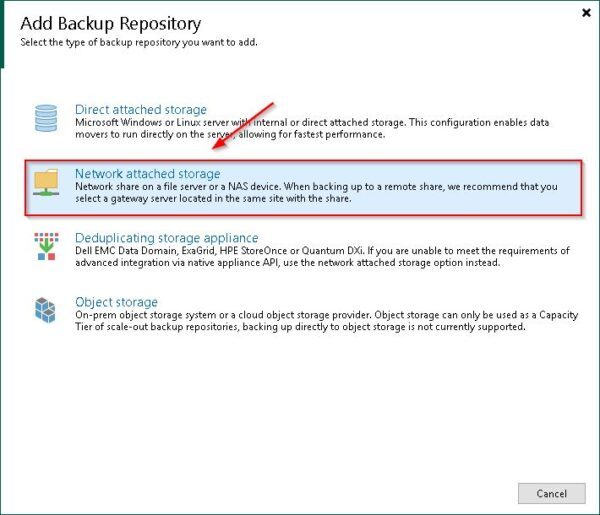
In this example an NFS share will be used as Performance tier. Select Network attached storage option.
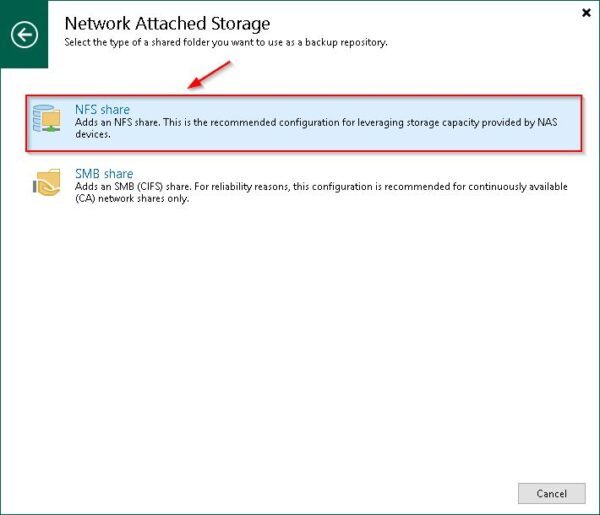
Select NFS share.
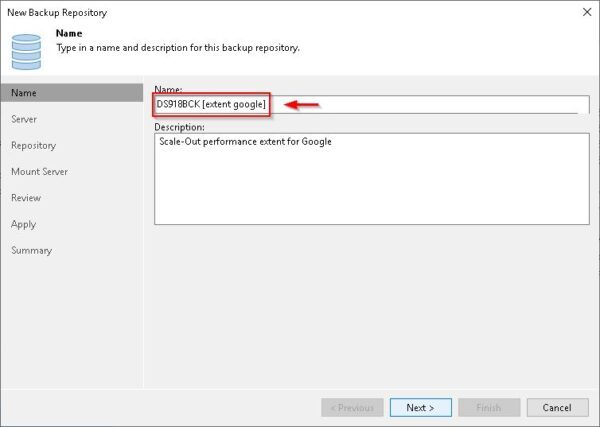
Enter a Name for the new repository and optionally a Description. Click Next.
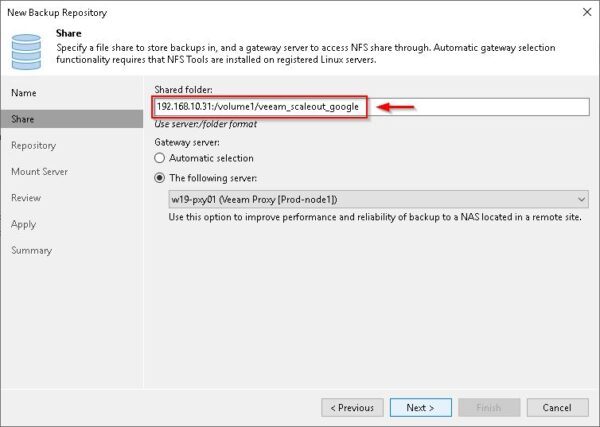
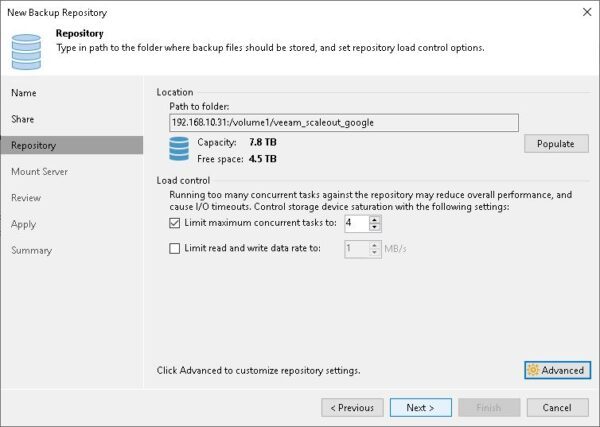
Enter the correct path for the Shared folder and the Gateway server. Click Next.
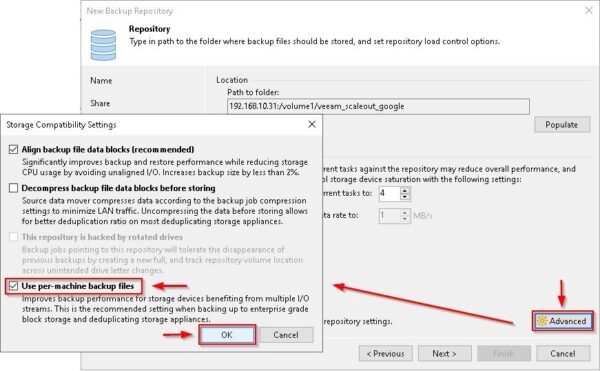
If you have the appropriate license, click Advanced and enable the Use per-machine backup files, click OK.
Click Next.
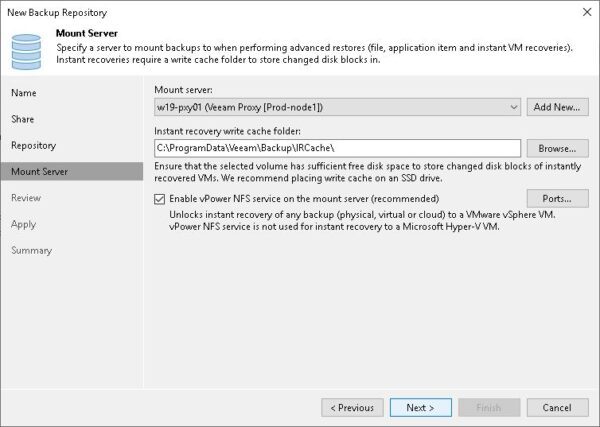
Specify the Mount server to use and click Next.
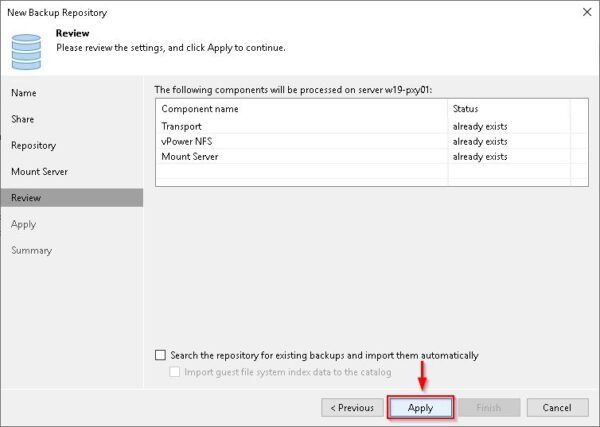
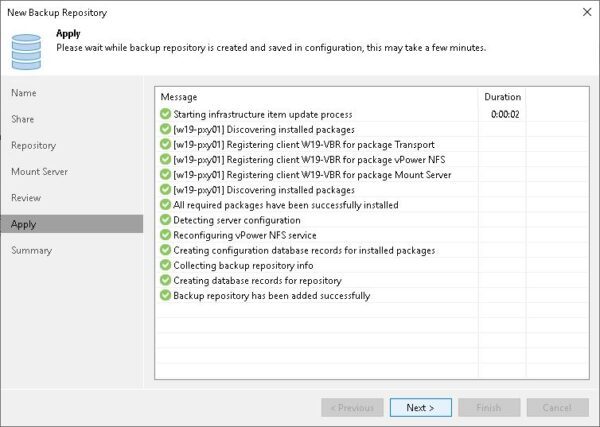
Missing Veeam components will be installed to the Proxy Server selected as Mount Server. Click Apply.
Required packages have been installed. Click Next to continue.
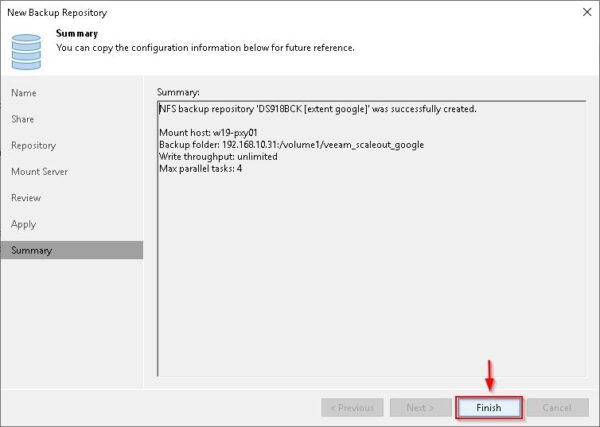
Click Finish to close the wizard.
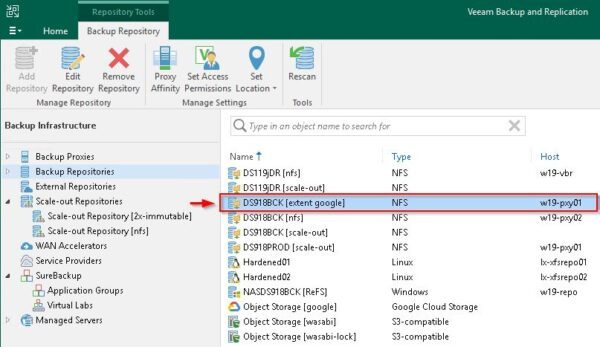
The just created repository.
Create the Scale-out repository
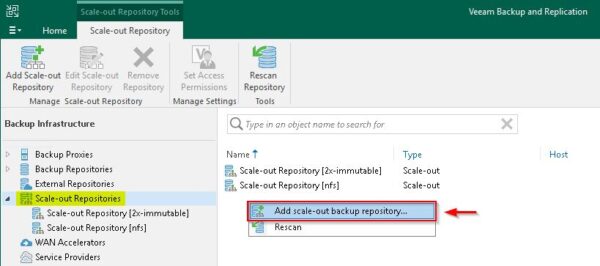
Since direct backup to object storage is not supported in Veeam v11, to backup to Google Cloud Storage you need to create a Scale-out repository. Once Capacity (Google object storage) and Performance (local repository) tiers have been created, right click Scale-out Repositories and select Add scale-out backup repository.
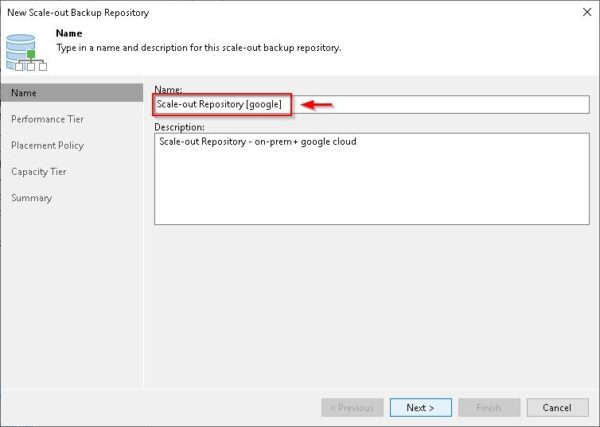
Enter a Name for the repository and optionally a Description. Click Next.
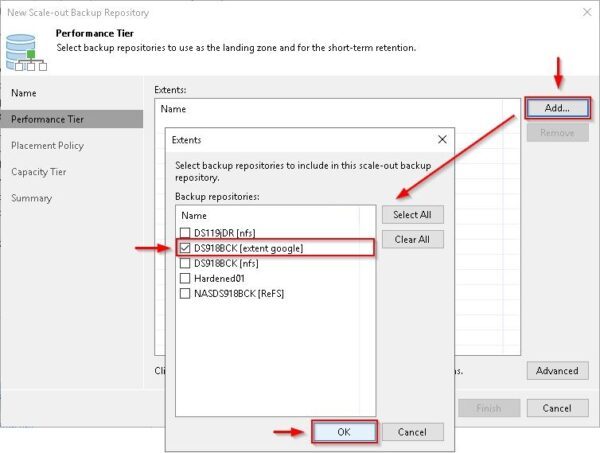
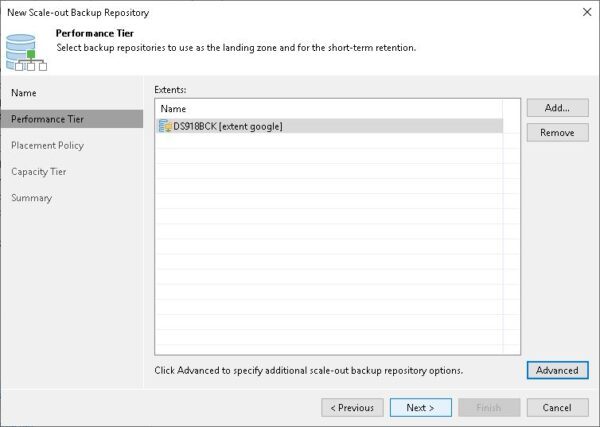
Click Add and select the local repository (extent) previously created as Performance Tier then click OK.
Click Next.
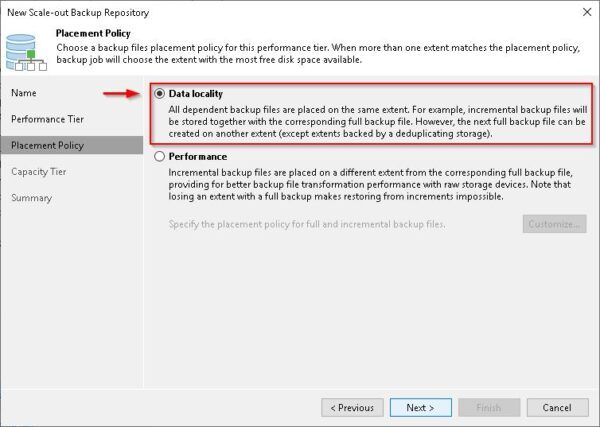
Select Data locality option and click Next.
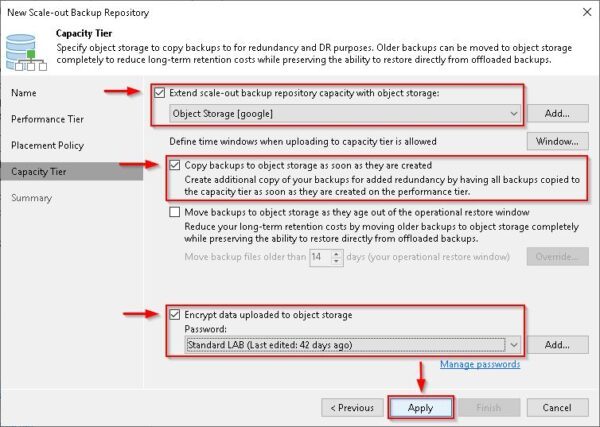
Enable the Extend scale-out backup repository capacity with object storage option and from the drop-down menu select the Google Object Storage repository previously created as Capacity tier. Enable the Copy backup to object storage as soon as they are created to run the backup data copy transfer as soon as they are available. It is also recommended to enable encryption for backups sent to object storage for security reasons. Click Apply.
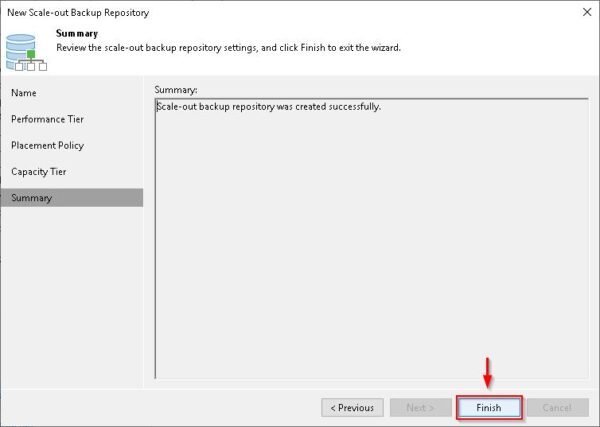
Click Finish to create the configured Scale-out repository.
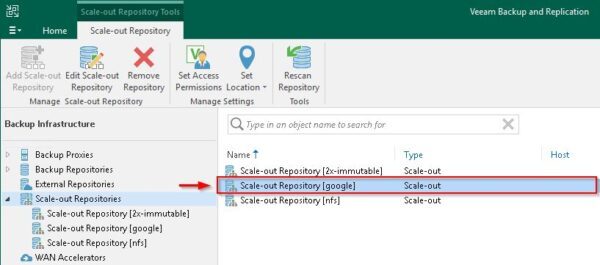
The created Scale-out repository.
Create the Backup Job
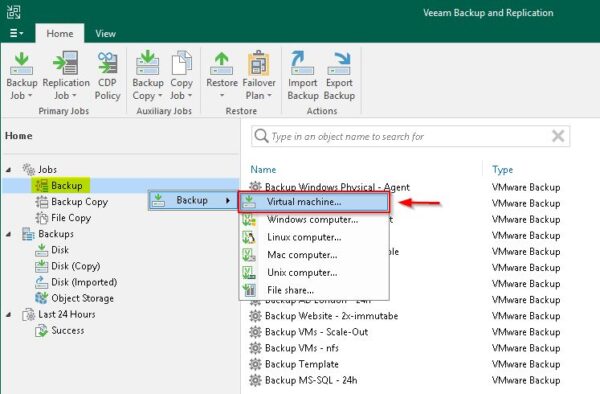
To perform the backup to Google Cloud Storage you need to create the appropriated Backup Job. Right click Backup and select Backup > Virtual machine.
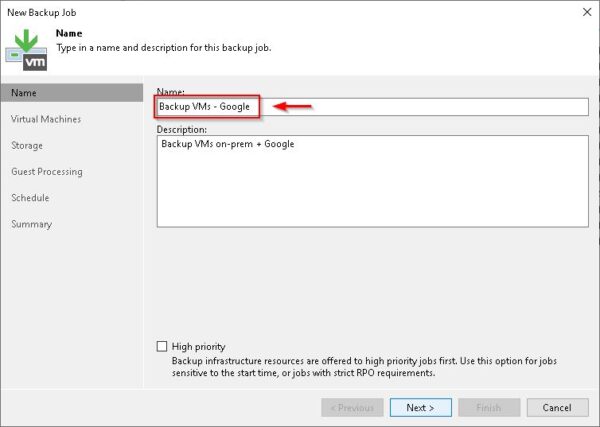
Enter a Name for the new Backup Job and optionally a Description then click Next.
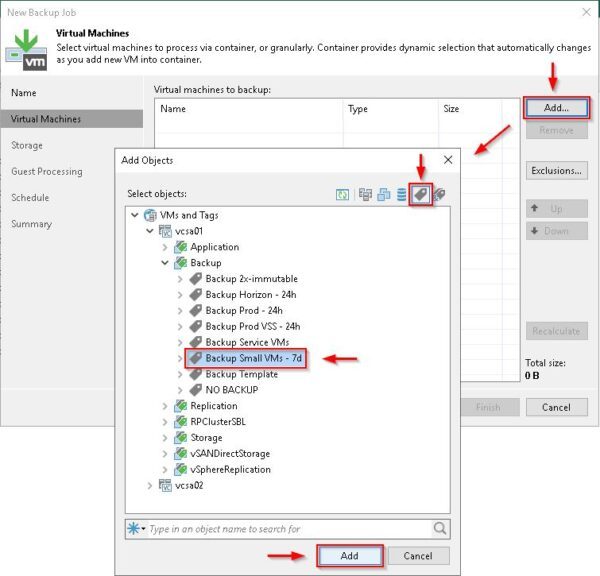
Click Add to select the VMs to backup. In this example vSphere TAGs are used. Select the desired TAG and click Add.
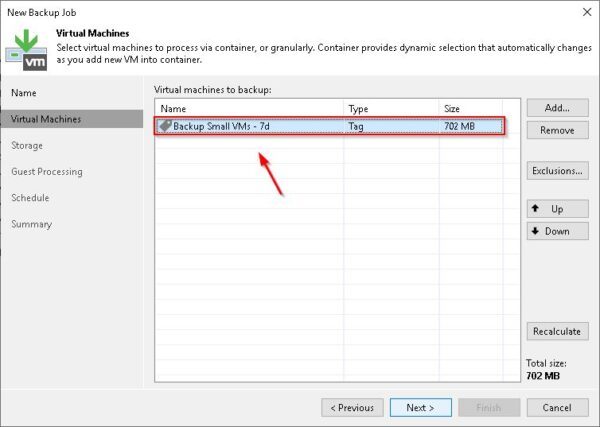
When the VMs to backup have been selected, click Next.
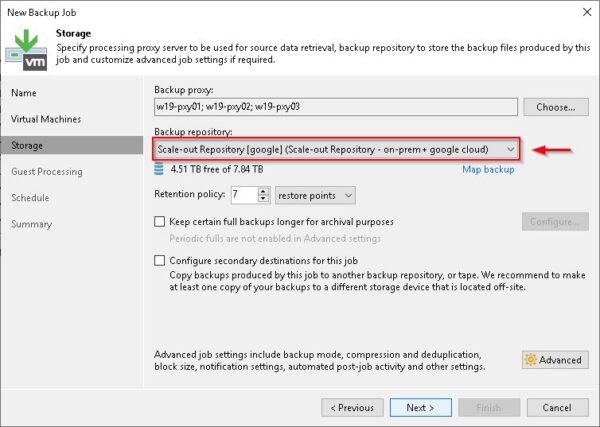
Select the previously created Scale-out repository as Backup repository and click Next.
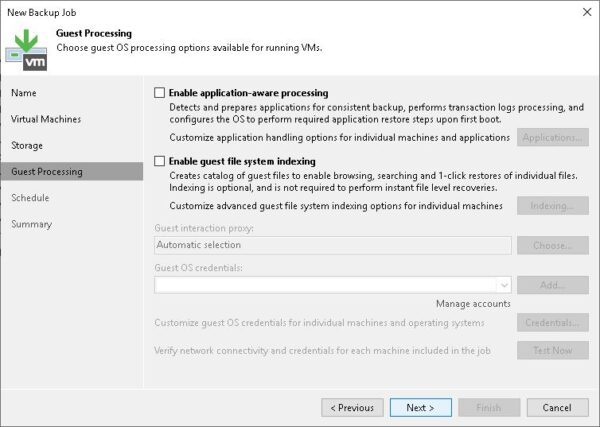
If you don’t have any DB or supported VSS applications to protect, click Next.
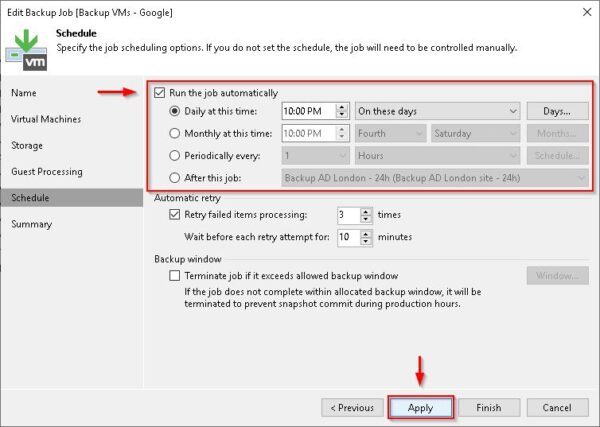
Configure the desired Schedule and click Apply.
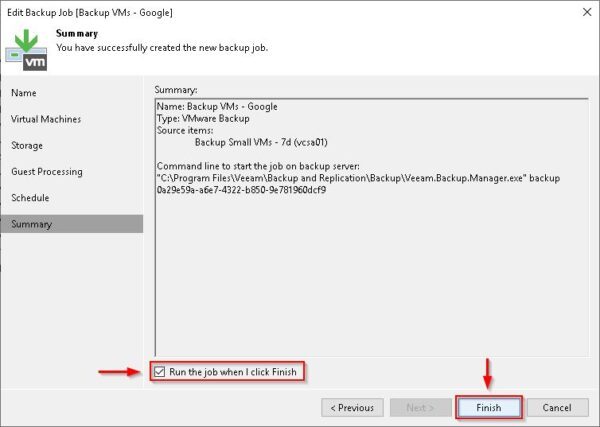
Enable the Run the job when I click Finish option to run the backup immediately then click Finish.
Test the backup
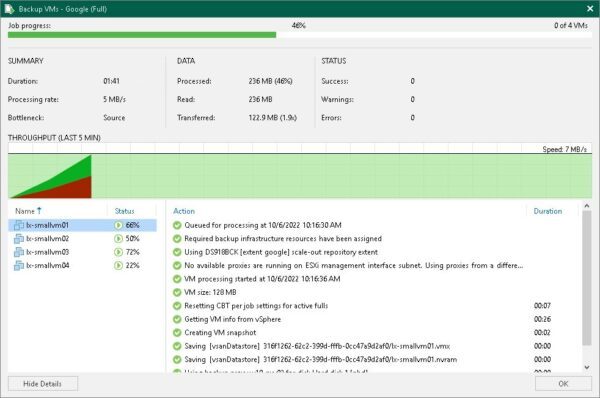
When you run the Backup Job, the first backup will perform a Full backup to Google Cloud Storage and the available bandwidth will determine the backup speed.
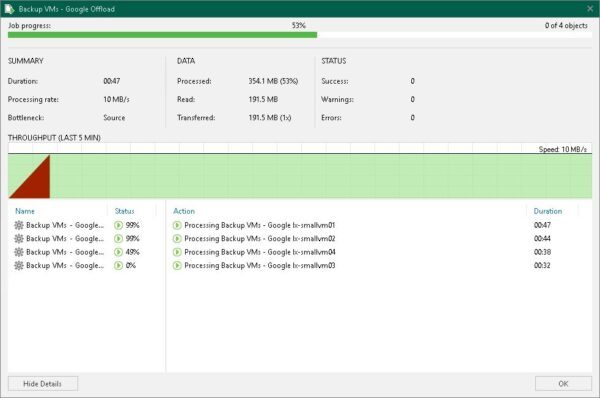
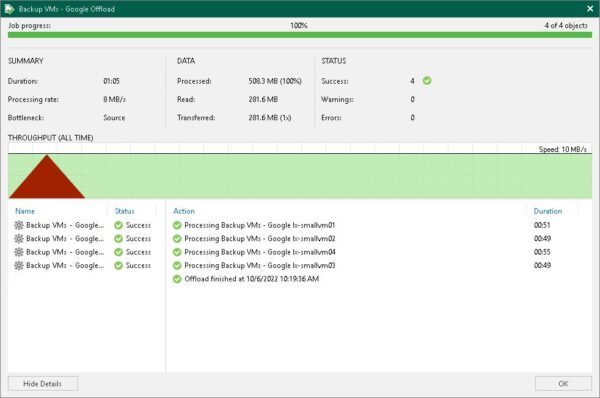
As soon as the local backup is complete, the offload process fires up by sending the copy of the processed data to the selected Bucket in Google Cloud.
Depending on the amount of data to transfer, after a few minutes the backup to Google Cloud Storage is complete.
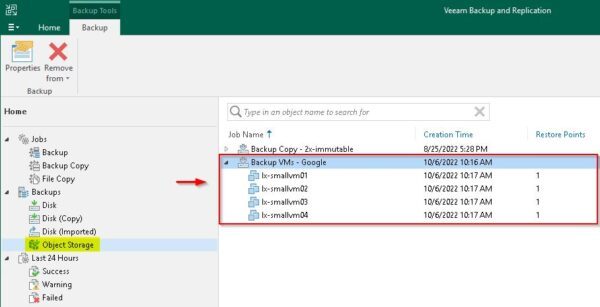
From the Veeam Console, you can verify the availability of the processed backup in the Object Storage section under Backups.
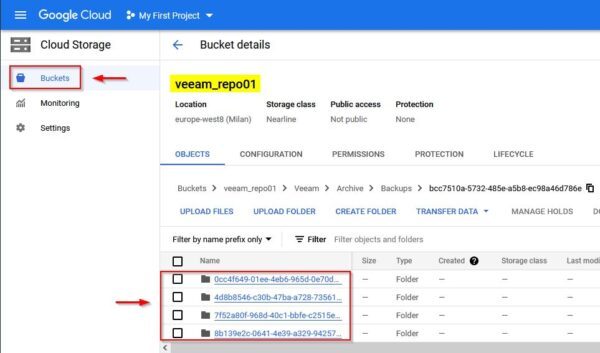
Checking the Google Bucket content you can find the just processed backup.
Complying the 3-2-1 backup rule provides the maximum protection to your business data and taking benefit of backup to Google Cloud Storage feature you can easily offload your data to the cloud.
Veeam Backup & Replication v11 is available to download as 30-day trial.


