Cluster-Aware-Updating
Some admins prefer the Cluster updates to be done automatically. To do so, Microsoft designed a feature to facilitate patching of Windows Servers from 2012 to 2016 that are configured in a failover cluster. Cluster Aware Updating (CAU) does this automatically, thereby avoiding service disruption for clustered roles.
In this article, we are going to take a look into how we can achieve this assuming that Cluster is built with hyperconverged scenario and VSAN from StarWind used as a shared storage. Before going in the steps to set the CAU, we will investigate this scenario.
Let’s say you have activated automatic updates. One day they were downloaded and installed. Then, you restart one host, but StarWind VSAN does not complete the synchronization process to the restarted host when you initiated restart of another one. What happens next? All devices will become not synchronized and production will be interrupted. Due to such scenarios we have come up with a pre-update script you can configure within CAU.
In general, this script scans the devices on both nodes by checking the synchronization status. If devices are synchronized in both hosts, the restart of the host will proceed. In case of any devices are still synchronizing, it will postpone the restart till the synchronization is completed.
Getting to the interesting part for configuration, we have two scripts that we use. The first one is Runner_cau.ps1 that runs the main script with –STA parameter and it should be configured in Cluster self-updating options. The second script CAU.ps1 is the main script that does the process of checking the devices synchronization status. These scripts are both located in one of your Cluster Shared Volumes.
Here are the examples of the scripts which have been already mentioned:
Runner_CAU.ps1 script:
powershell.exe -sta -file "C:\ClusterStorage\Volume2\CAU.ps1"CAU.ps1
Import-Module StarWindX

# Setting IP addresses of the StarWind storage nodes

$ip1 = "172.16.11.1" # IP address of node 1

$ip2 = "172.16.11.2" # IP address of node 2

# =====================================================================================

# Uncomment the below line in case you use 3 StarWind storage nodes in your cluster

# -------------------------------------------------------------------------------------

# $ip3 = "172.16.10.3" # IP address of node 3

# =====================================================================================

# =====================================================================================

# Uncomment the below line to clear the log file. Adjust its location as needed

# -------------------------------------------------------------------------------------

# Clear-Content 'C:\ClusterStorage\Volume1\CAU_LOG.txt'

# =====================================================================================

$server1 = New-SWServer -host $ip1 -user root -password starwind -port 3261

$server2 = New-SWServer -host $ip2 -user root -password starwind -port 3261

# =====================================================================================

# Uncomment the below line in case you use 3 StarWind storage nodes in your cluster

# -------------------------------------------------------------------------------------

# $server3 = New-SWServer -host $ip3 -user root -password starwind -port 3261

# =====================================================================================

$server1.Connect()

$server2.Connect()

# =====================================================================================

# Uncomment the below line in case you use 3 StarWind storage nodes in your cluster

# -------------------------------------------------------------------------------------

# $server3.Connect()

# =====================================================================================

if ($server1.Connected -and $server2.Connected){

# =====================================================================================

# Comment the above line and uncomment the below line in case you use 3 StarWind storage nodes in your cluster

# -------------------------------------------------------------------------------------

# if ($server1.Connected -and $server2.Connected -and $server3.Connected){

# =====================================================================================

# =====================================================================================

# Uncomment the below lines to log a message. Adjust the log file location as needed

# -------------------------------------------------------------------------------------

# $time = (Get-Date -Format o).Substring(0, (Get-Date -Format o).length - 6)

# Add-Content 'C:\ClusterStorage\Volume1\CAU_LOG.txt' "$time StarWind servers connected"

# =====================================================================================

do {

$result = @()

foreach($device1 in ($server1.Devices | where {$_.deviceType -eq 'HA Image'})){

$device1.Refresh()

$syncState1 = $device1.GetPropertyValue("ha_synch_status")

if ($syncState1 -ne "1"){

# ==================================================================================

# Uncomment the below lines to log a message. Adjust the log file location as needed

# ----------------------------------------------------------------------------------

# $time1 = (Get-Date -Format o).Substring(0, (Get-Date -Format o).length - 6)

# Add-Content 'C:\ClusterStorage\Volume1\CAU_LOG.txt' "$time1 $($device1.TargetName) is not synchronized yet. Pausing for 60 seconds"

# ==================================================================================

$result += $syncState1

}

}


foreach($device2 in ($server2.Devices | where {$_.deviceType -eq 'HA Image'})){

$device2.Refresh()

$syncState2 = $device2.GetPropertyValue("ha_synch_status")

if ($syncState2 -ne "1") {

# ==================================================================================

# Uncomment the below lines to log a message. Adjust the log file location as needed

# ----------------------------------------------------------------------------------

# $time2 = (Get-Date -Format o).Substring(0, (Get-Date -Format o).length - 6)

# Add-Content 'C:\ClusterStorage\Volume1\CAU_LOG.txt' "$time2 $($device2.TargetName) is not synchronized yet. Pausing for 60 seconds"

# ==================================================================================

$result += $syncState2

}

}

# =====================================================================================

# Uncomment the below section in case you use 3 StarWind storage nodes in your cluster

# -------------------------------------------------------------------------------------

# foreach($device3 in ($server3.Devices | where {$_.deviceType -eq 'HA Image'})){

# $device3.Refresh()

# $syncState3 = $device3.GetPropertyValue("ha_synch_status")

# if ($syncState3 -ne "1") {

# # ==================================================================================

# # Uncomment the below lines to log a message. Adjust the log file location as needed

# # ----------------------------------------------------------------------------------

# # $time3 = (Get-Date -Format o).Substring(0, (Get-Date -Format o).length - 6)

# # Add-Content 'C:\ClusterStorage\Volume1\CAU_LOG.txt' "$time3 $($device3.TargetName) is not synchronized yet. Pausing for 60 seconds"

# # ==================================================================================

# $result += $syncState3

# write-host $result

# }

# }

# =====================================================================================

#Wait for 60 second and rescan again

$result = $result.length

Start-Sleep -s 60

} while ($result -gt "0")

} else {

# ==================================================================================

# Uncomment the below lines to log a message. Adjust the log file location as needed

# ----------------------------------------------------------------------------------

# $time4 = (Get-Date -Format o).Substring(0, (Get-Date -Format o).length - 6)

# Add-Content 'C:\ClusterStorage\Volume1\CAU_LOG.txt' "$time4 StarWind servers not connected. Exiting..."


# Cancel CAU Process

Stop-CauRun -Force -Wait

}

$server1.Disconnect()

$server2.Disconnect()

# =====================================================================================

# Uncomment the below line in case you use 3 StarWind storage nodes in your cluster

# -------------------------------------------------------------------------------------

# $server3.Disconnect()
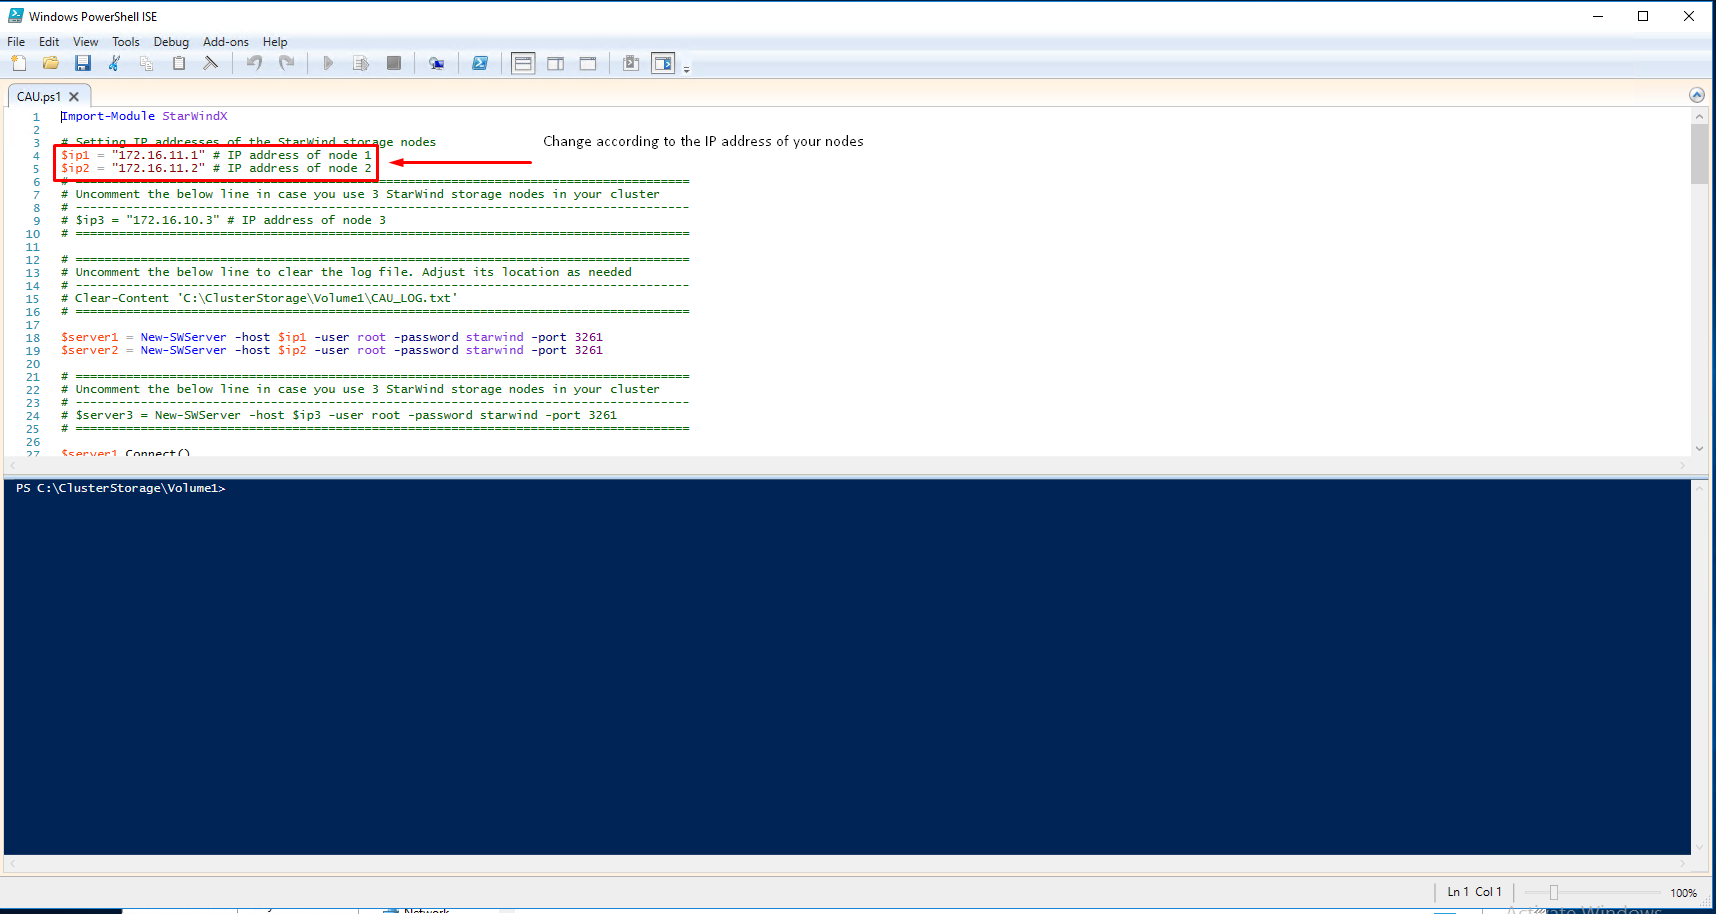
Before jumping into the next steps, let’s take a look at CAU.ps1 script and small changes that need to be done. As you can see below, the IPs need to be changed according to your environment. Also, in the same script, you can find several commented lines which you can use for troubleshooting or, alternatively, for log generation.
Below are the steps that we need to take to configure CAU successfully:
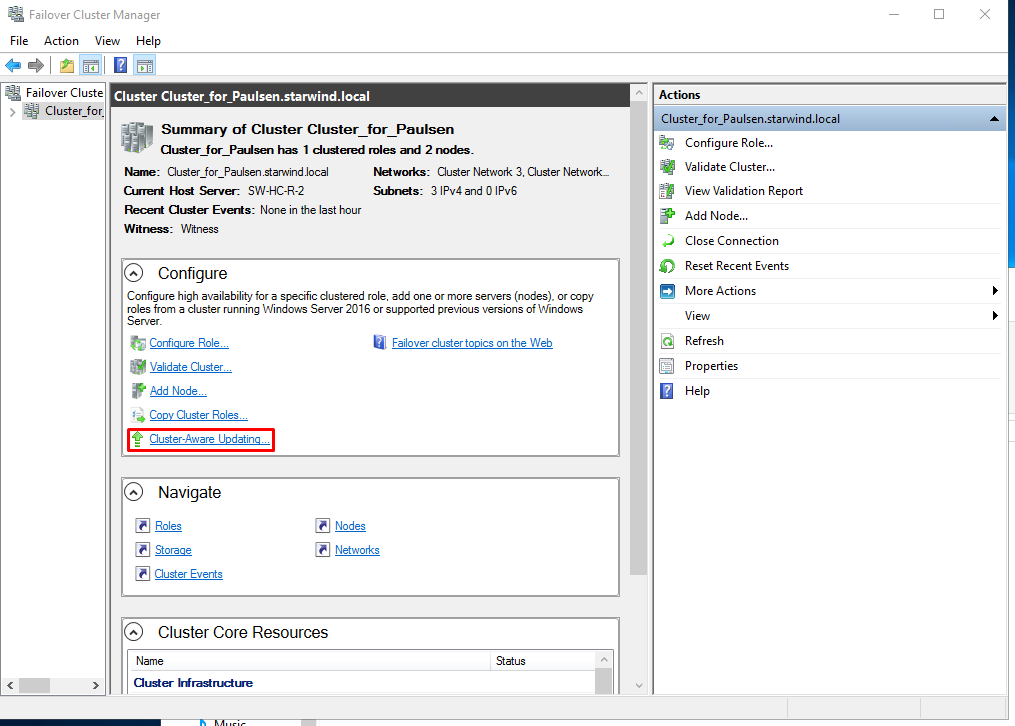
1. Open Failover Cluster Manager, select your cluster as shown in the screenshot and click on Cluster-Aware-Updating.
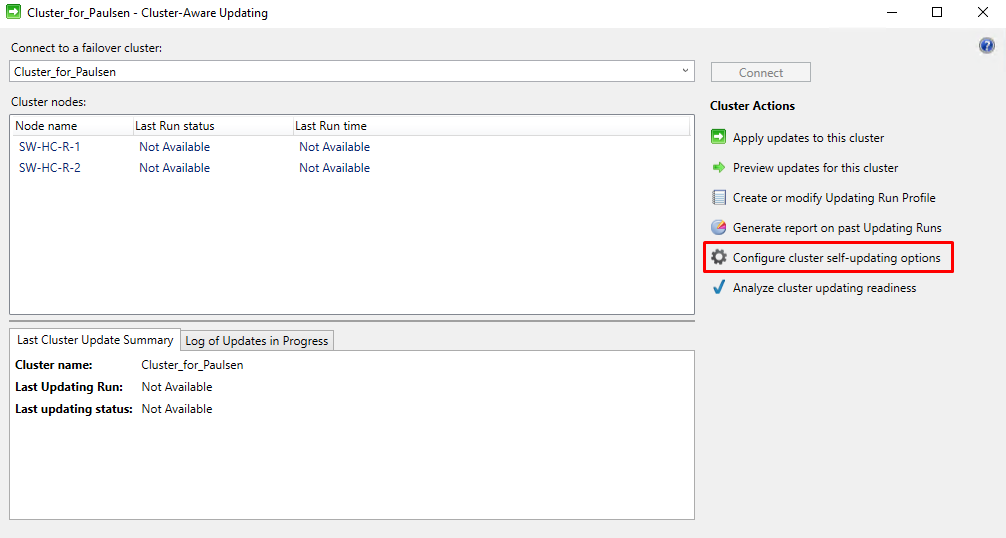
2. On the next window, click Configure cluster-self-updating options.
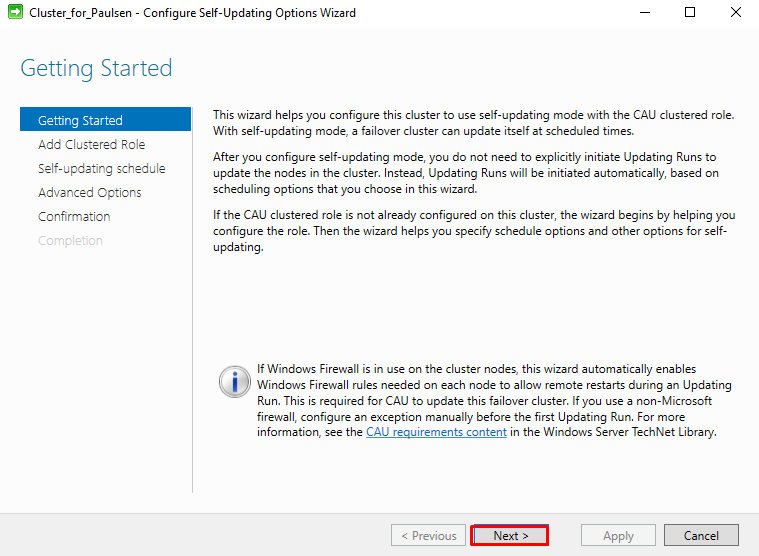
3. Click next on the Getting Started window.
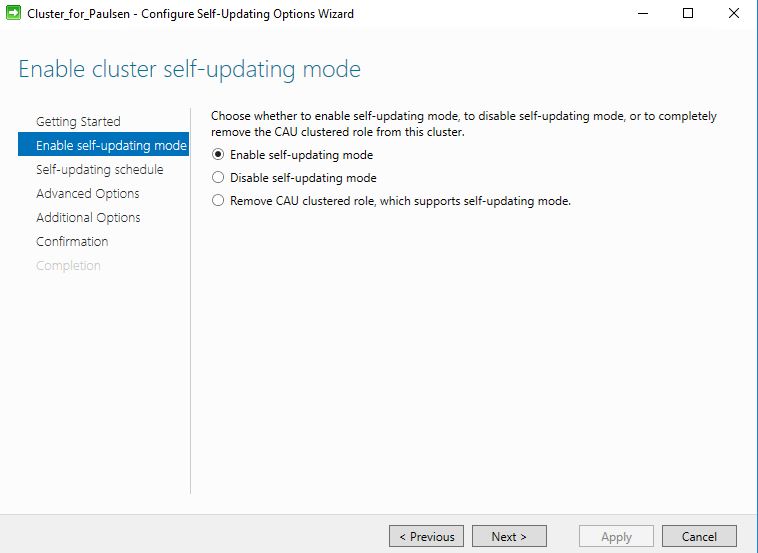
4. On Enable self-updating mode, select Enable self-updating mode and click next.
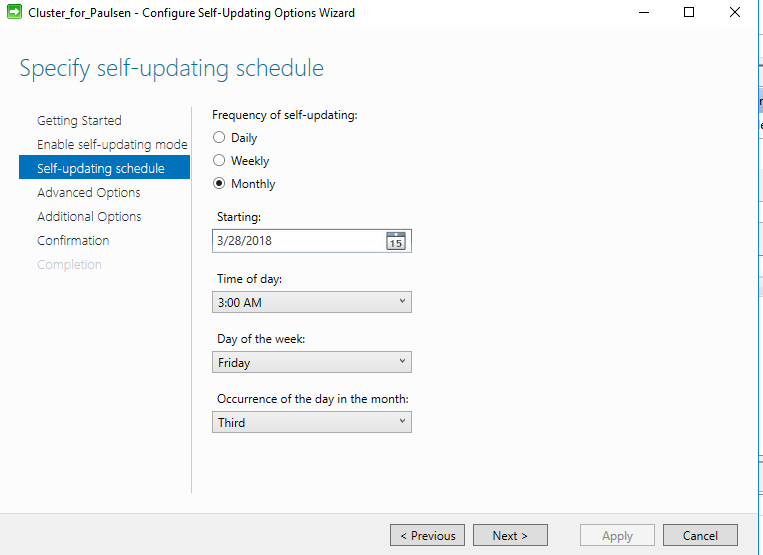
5. The next window has to do with the scheduling. Select the frequency for the updates and click Next.
6. In the Advance Option window, we need to include the path where the runner script is located, in this case, it was on volume1. This can differ in your environment, so please make sure you have the correct path.
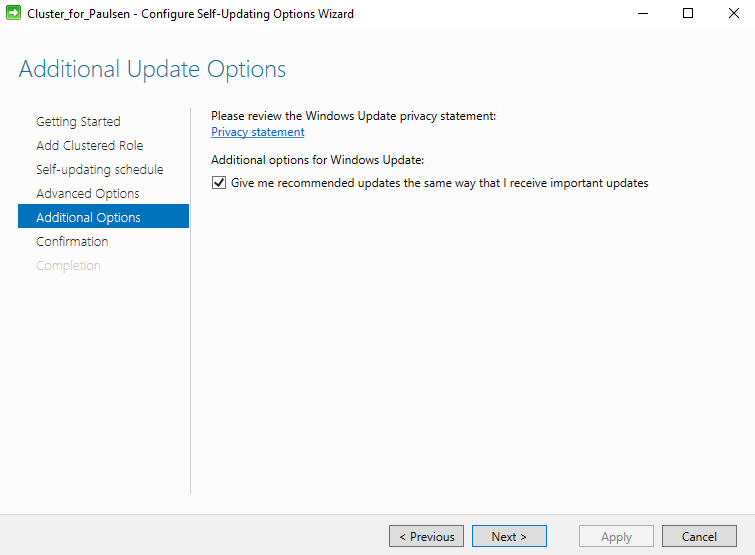
7. If you would like to receive the updates, choose the corresponding option in the Additional Update Options window.
8. Confirm the details and click Apply.
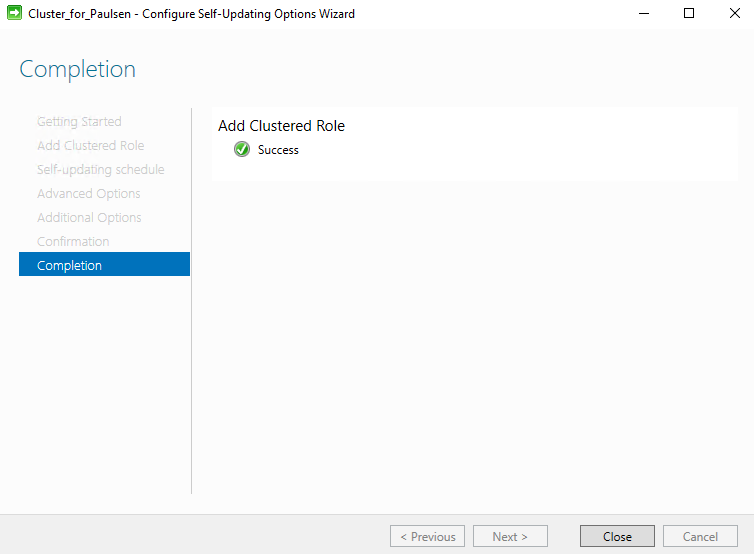 9. We have successfully added the role.
Conclusion
As you can see, you are set for automated updates in a quite simple way. Well, you can go ahead and set this up in your environment and let me know in the comments about your experience!


