StarWind Virtual SAN: Virtual Tape Library (VTL) + Symantec Backup Exec
- November 04, 2014
- 5 min read
This document refers to the previous StarWind Virtual SAN version. To view the document for the current version, please follow this link
INTRODUCTION
Tape will never go away. It wins the competition for capacity price, being cheaper than high-capacity SATA spindles. At the same time, tape is the best vaulting medium, capable of storing data for decades. Some companies have to adhere to regulatory requirements for tape vaulting, so it’s only logical to say that tape is here forever.
StarWind® VTL takes the existing tape backup infrastructure and virtualizes it so that the backup process requires a smaller backup window. In addition to the acceleration of the backup process, it also creates an additional copy of the snapshot, thus making the backup even safer. As a result, tape backup becomes affordable, fast and convenient.
This guide is intended for experienced StarWind users and Windows system administrators and IT professionals who would like to configure StarWind Virtual SAN® solution. It provides detailed instructions on how to create the Virtual Tape Library device that will run on top of the Windows Server 2012 R2 to be used with BackupExec.
A full set of up-to-date technical documentation can always be found here, or by pressing the Help button in the StarWind Management Console.
For any technical inquiries please visit our online community, Frequently Asked Questions page, or use the support form to contact our technical support department.
Pre-Configuring the Servers
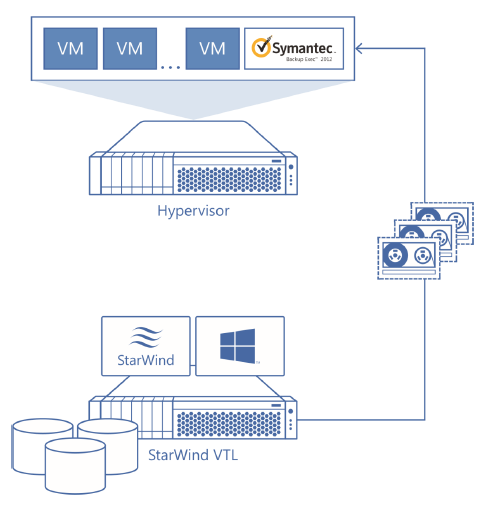
The figure shows the reference network diagram of the configuration described in this guide.
StarWind server running VTL device and Hypervisor running VMs and Symantec Backup Exec software are connected directly, but it is possible to wire them through switches as optional.
Creating Virtual Tape Library
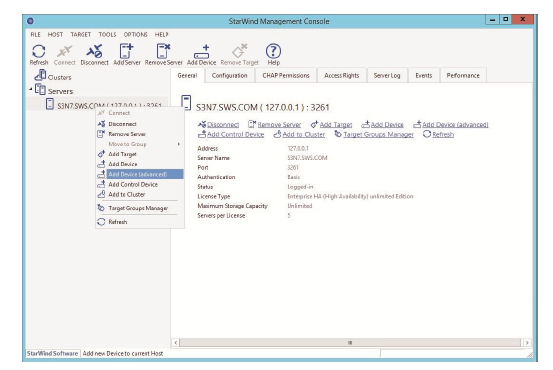
1. Launch StarWind Management Console and connect to the server. Right click on the server and select Add Device (advanced) from the pop-up menu.
2. The Add Device Wizard appears. Choose Tape Device item.

3. Choose Virtual Tape item.

4. Click Next to continue.

5. Enter the path to virtual Device Header File.

6. Specify target alias. Target name will be generated automatically.

7. Once at Creation page, click Create and view the creation progress.

8. After creation, you will see Device Creation completed page.

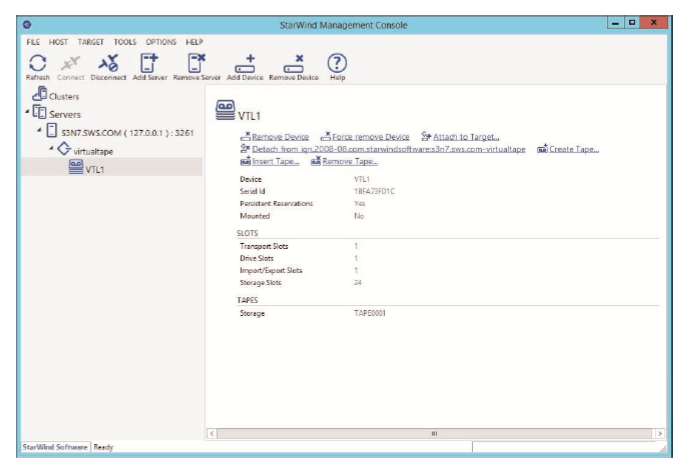
9. VTL device created successfully. Right click on the device and select Create Tape… from the pop-up menu.

10. See tape type/size and barcode click OK.

11. Tape was created and placed into the first slot of VTL. You can create another tapes. VTL type HP MSL2024 have 24 slots for tapes.
Client-Side Configuration
1. There is no tape device connected.

2. Launch MS iSCSI initiator. Switch to Discovery tab. Click Discover Portal and enter the IP address of StarWind server with VTL created.

3. Switch to Targets tab and connect the target.

4. Tape drive and autoloader appears.

5. Install the tape divers.

6. The drivers are installed.

7. Now perform backup and/or restore.
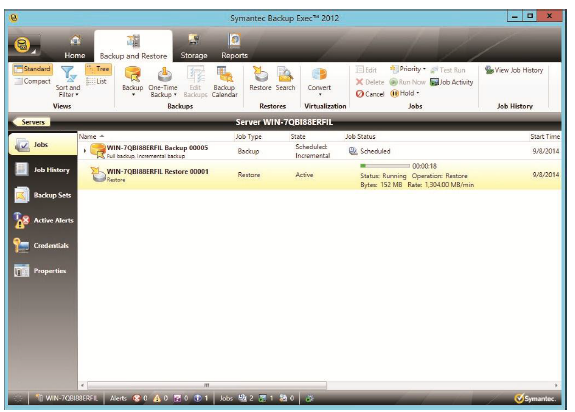
Symantec Backup Exec
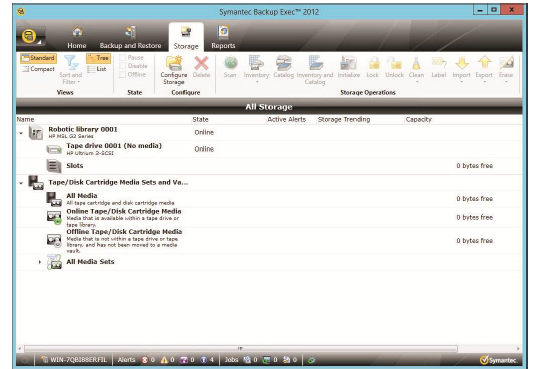
1. Open Symantec Backup Exec. Storage tab.
NOTE: If there’s no tape device on tab Storage after target connection in MS Initiator, initiate restart.
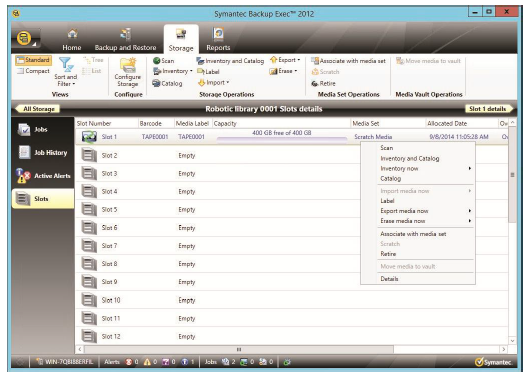
2. To Scan, Erase, Inventory and catalog tapes double-click on Slots.
3. On Backup and Restore tab click Backup button to configure long time backup settings or click One-Time backup to do one-time backup. Select Back Up to Tape.

4. Configure the Backup settings and click OK.

5. When backing up is started you will see it in status field. To see details double-click on server.


6. To restore data click Restore button on Backup and Restore tab

7. Select the type of data you want to restore


8. Select location to restoring

9. Configure restoring settings


10. To see restoring details double-click on server