
- Select Remote VMware ESXi Server as the location of the image to convert.

- Enter the credentials and IP address for the target server and press Next.

- Select the virtual disk to convert and press Next.

- Select Azure as the location of the destination image.

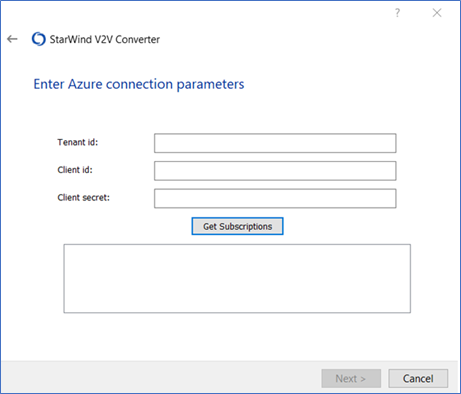
- Specify the Tenant ID, Client ID (i.e., Application ID), and Client secret. Click Get Subscriptions, select the subscription from the field under the button, and press Next.
- Select the virtual machine to attach the image or create a new Azure instance by clicking the Create new virtual machine button.

- In order to create a new Microsoft Azure instance, specify its name, path, and OS type.

- Press … to set the destination file location.

NOTE: Steps 6-8 are skipped if the new virtual machine is created. - Select the destination file location. It is also possible to modify the image name if needed.

- Press Converting to initiate the process of image conversion.

- Wait until the conversion process is over and press Finish to complete the wizard or Convert another image if there are more images or virtual machines to convert.

- Why Us
- Software
- Software
- StarWind Virtual SAN (VSAN)
- StarWind vHCI Appliance
- StarWind SAN & NAS
- StarWind Virtual Tape Library (VTL)
- StarWind NVMe-oF Initiator
- Hardware
- Solutions
- Resources
- Support & Services
- Partners
- About Us